微服务已经成当前各大大厂追求的主流技术架构,学习微服务前景非常可观,而SpringCloud已成为主流微服务技术栈。本系列文章将以SpringCloud技术栈进行精讲,全方位剖析讲解SpringCloud技术栈在微服务场景下的实战应用,可以点赞关注,后续持续为大家更新。
注册中心
知识索引
- 什么是注册中心
- cap定理
- 注册中心对比
- 服务注册
- 服务调用
1 什么是注册中心
微服务互相调用时需要知道被调用服务的具体地址以及它是否健康(服务器是否有响应),这就要求注册中心必须拥有这两项能力:1.允许服务注册的能力,2.监控服务的能力。如果只有一个注册中心,当它由于各种原因无法提供服务时我们的系统也无法正常运行,所以要求注册中心有集群的能力,并且集群之间数据必须保证一致性,否则当注册中心由于主节点故障转移主机时由于主从节点的数据不一致可能会导致在服务调用时获取到错误的服务列表。所以它还必须具备高可用,一致性的集群能力。
2 Spring Cloud支持的注册中心及对比
2.1 cap定理
CAP原则又称CAP定理,指的是在一个分布式系统中,一致性(Consistency)、可用性(Availability)、分区容错性(Partition tolerance)。CAP 原则指的是,这三个要素最多只能同时实现两点,不可能三者兼顾。
Consistency 一致性:所有数据备份,在同一时刻是否同样的值。(等同于所有节点访问同一份最新的数据副本)
Availability 可用性:在集群中一部分节点故障后,集群整体是否还能响应客户端的读写请求。(对数据更新具备高可用性)
Partition Tolerance 容错性:以实际效果而言,分区相当于对通信的时限要求。系统如果不能在时限内达成数据一致性,就意味着发生了分区的情况,必须就当前操作在C和A之间做出选择。
CAP原则的精髓就是要么AP,要么CP,要么AC,但是不存在CAP。如果在某个分布式系统中数据无副本, 那么系统必然满足强一致性条件, 因为只有独一数据,不会出现数据不一致的情况,此时C和P两要素具备,但是如果系统发生了网络分区状况或者宕机,必然导致某些数据不可以访问,此时可用性条件就不能被满足,即在此情况下获得了CP系统,但是CAP不可同时满足。
2.2 注册中心对比
| Nacos | Eureka | Consul | Zookeeper | |
|---|---|---|---|---|
| 一致性协议 | CP+AP | AP | CP | CP |
| 健康检查 | TCP/HTTP/MYSQL/Client Beat | Client Beat | TCP/HTTP/gRPC/Cmd | Keep Alive |
| 负载均衡策略 | 权重/metadata/Selector | Ribbon | Fabio | — |
| 雪崩保护 | 有 | 有 | 无 | 无 |
| 自动注销实例 | 支持 | 支持 | 不支持 | 支持 |
| 访问协议 | HTTP/DNS | HTTP | HTTP/DNS | TCP |
| 监听支持 | 支持 | 支持 | 支持 | 支持 |
| 多数据中心 | 支持 | 支持 | 支持 | 不支持 |
| 跨注册中心同步 | 支持 | 不支持 | 支持 | 不支持 |
| SpringCloud集成 | 支持 | 支持 | 支持 | 支持 |
| Dubbo集成 | 支持 | 不支持 | 不支持 | 支持 |
| K8S集成 | 支持 | 不支持 | 支持 | 不支持 |
其中Eureka2.x版本已经宣布闭源,Nacos在后续Spring CloudAlibaba章节中会介绍,本篇我们主要通过Consul来演示注册中心的配置及使用。
3 Consul
3.1 Consul介绍
Consul 是HashiCorp 公司推出的开源工具,用于实现分布式系统的服务发现与配置。与其他分布式服务注册与发现的方案,Consul 的方案更“一站式”,内置了服务注册与发现框架、分布一致性协议实现、健康检查、Key/Value 存储、多数据中心方案,不再需要依赖其他工具(比如 ZooKeeper 等)。使用起来也较 为简单。Consul使用 Go 语言编写,因此具有天然可移植性(支持Linux、windows和Mac OS X);安装包仅包含一个可执行文件,方便部署,与 Docker等轻量级容器可无缝配合。
3.2 Consul安装(虚拟机模拟linux操作)
查看所有docker镜像
docker images

拉取Consul镜像
docker pull consul # 默认拉取latest
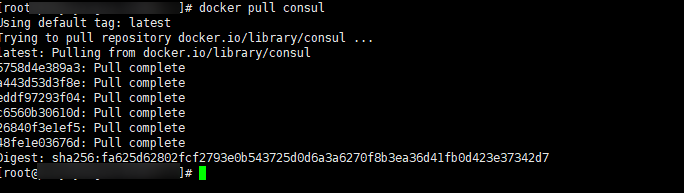
可以再次查看镜像已经存在Consul了

启动一个Consul容器
docker run -d -p 8500:8500 --restart=always --name=consul consul:latest agent -server -bootstrap -ui -node=1 -client='0.0.0.0'

查看启动的容器

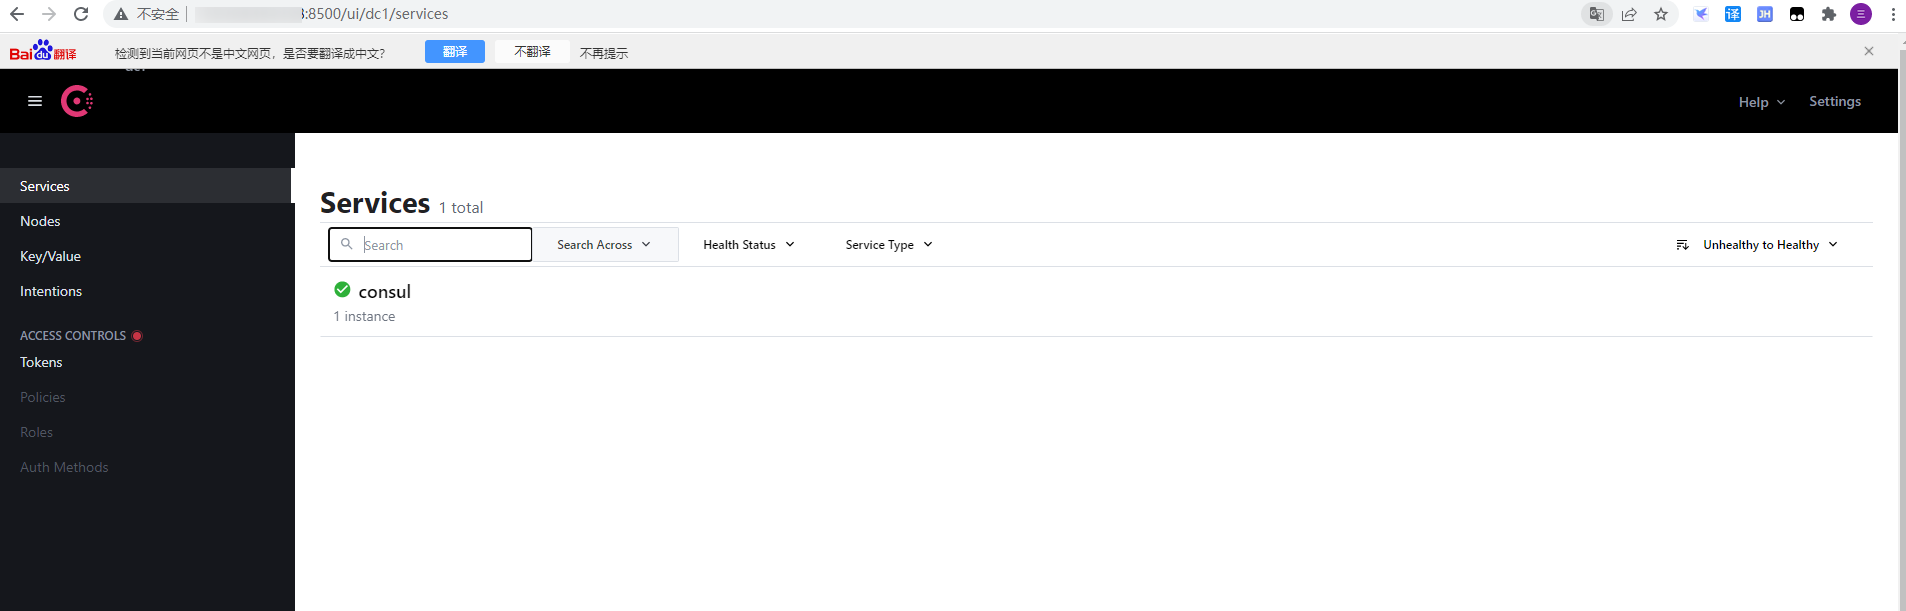
浏览器访问安装机器的8500端口
http://ip:8500
跳转到如下页面说明安装成功
4 服务注册
接下来我们开发一个简单的服务注册到注册中心。
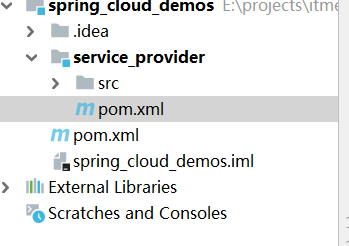
4.1 创建maven项目
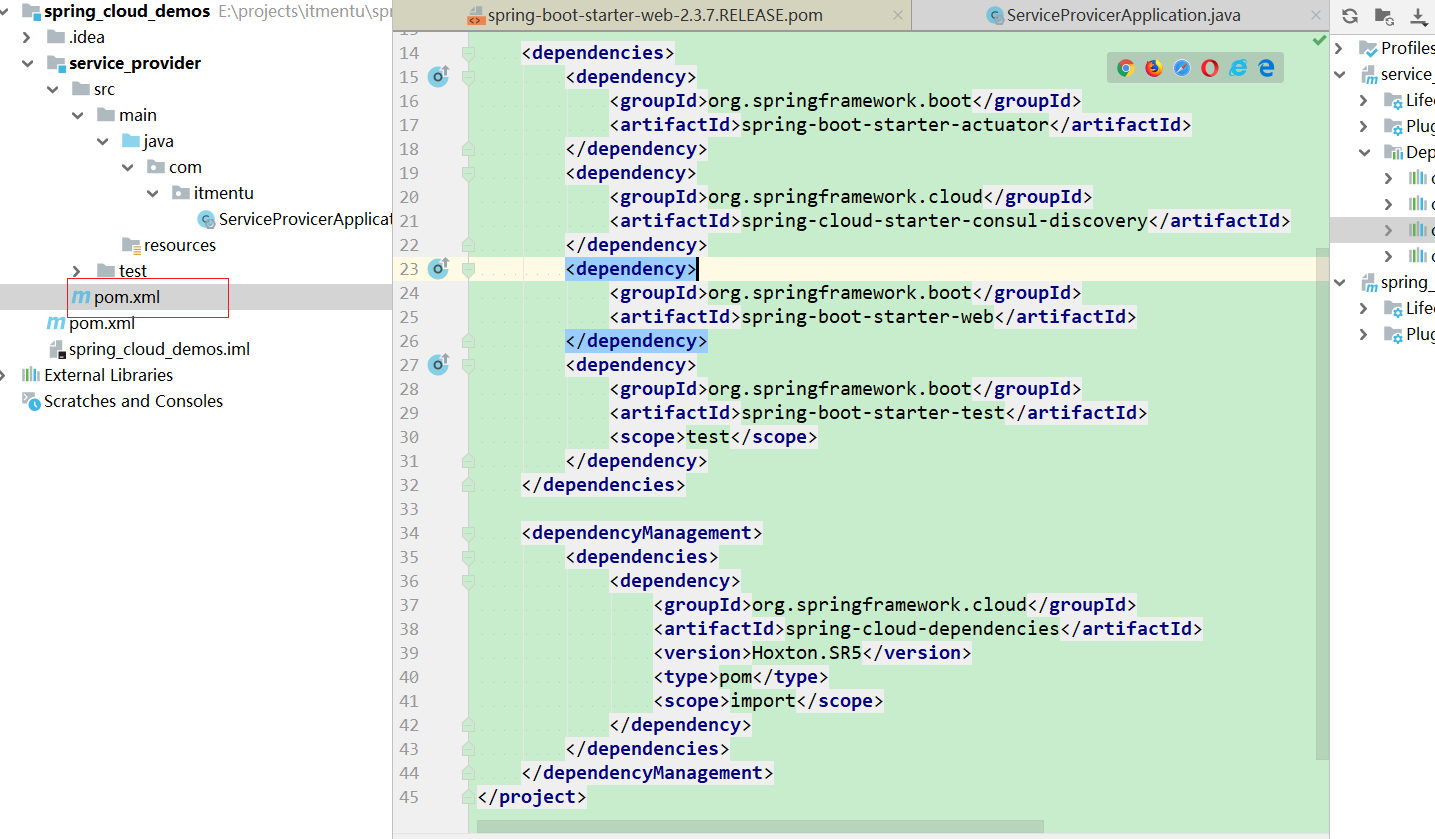
新建一个spring_cloud_demos项目并创建service_provider模块,目录结构如下
4.2 引入依赖
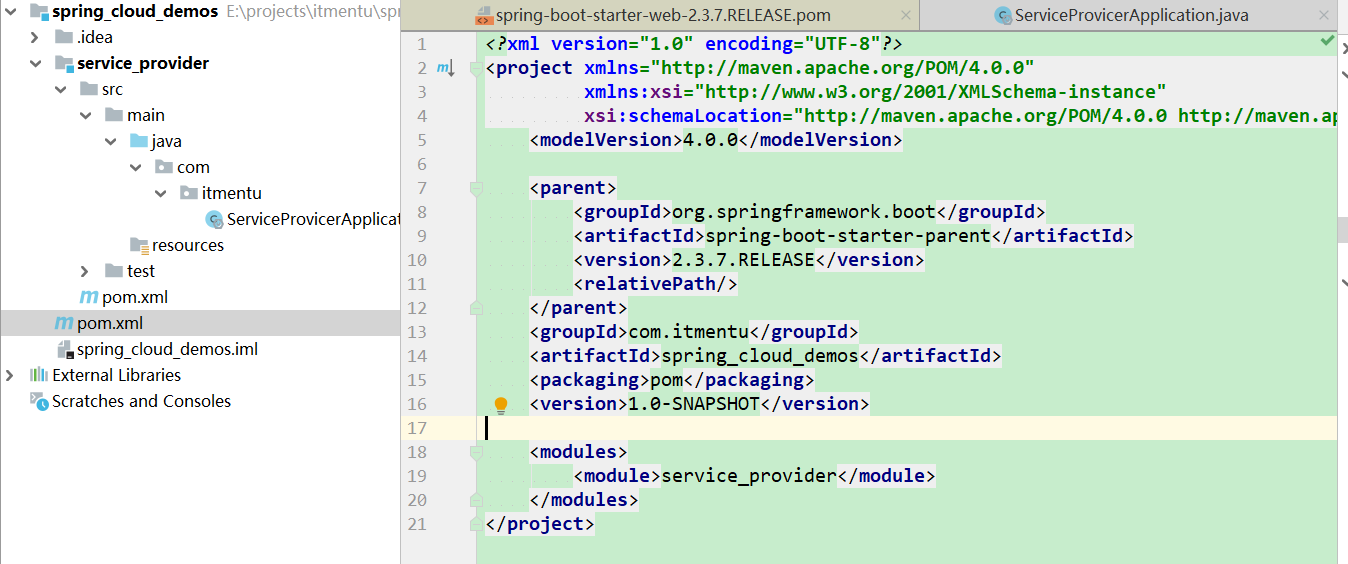
在父项目中引入spring-boot-starter-parent
<parent>
    <groupId>org.springframework.boot</groupId>
    <artifactId>spring-boot-starter-parent</artifactId>
    <version>2.3.7.RELEASE</version>
</parent>
最终如下:
在service_provider中引入Consul依赖
<dependencies>
    <dependency>
        <groupId>org.springframework.boot</groupId>
        <artifactId>spring-boot-starter-actuator</artifactId>
    </dependency>
    <dependency>
        <groupId>org.springframework.cloud</groupId>
        <artifactId>spring-cloud-starter-consul-discovery</artifactId>
    </dependency>
    <dependency>
        <groupId>org.springframework.boot</groupId>
        <artifactId>spring-boot-starter-web</artifactId>
    </dependency>
    <dependency>
        <groupId>org.springframework.boot</groupId>
        <artifactId>spring-boot-starter-test</artifactId>
        <scope>test</scope>
    </dependency>
</dependencies>

<dependencyManagement>
    <dependencies>
        <dependency>
            <groupId>org.springframework.cloud</groupId>
            <artifactId>spring-cloud-dependencies</artifactId>
            <version>Hoxton.SR5</version>
            <type>pom</type>
            <scope>import</scope>
        </dependency>
    </dependencies>
</dependencyManagement>
最终如下:
4.3 配置文件
server:
  port: 8001 #服务端口
spring:
  application:
    name: service-provider #服务名
  cloud:
    consul:
      host: 192.168.184.128 #注册中心地址
      port: 8500 #注册中心端口
      discovery:
        service-name: ${

    spring.application.name} #注册中心中该服务的服务名
4.4 编写代码
4.4.1 启动类
/**
 * Copyright (c) 2022 itmentu.com, All rights reserved.
 *
 * @Author: yang
 */
@SpringBootApplication
@EnableDiscoveryClient
public class ServiceProvicerApplication {


    public static void main(String[] args) {


        SpringApplication.run(ServiceProvicerApplication.class, args);
    }
}
代码说明:
1:@EnableDiscoveryClient表示发现注册中心,向注册中心注册服务
2:@SpringBootApplication见springboot章节
4.4.2 接口编写
/**
 * Copyright (c) 2022 itmentu.com, All rights reserved.
 *
 * @Author: yang
 */
@RestController
public class HelloController {


    @GetMapping("/hello")
    public String hello(){


        return "hello!";
    }
}
4.4.3 运行启动类
运行后控制台看到如下内容说明启动成功:
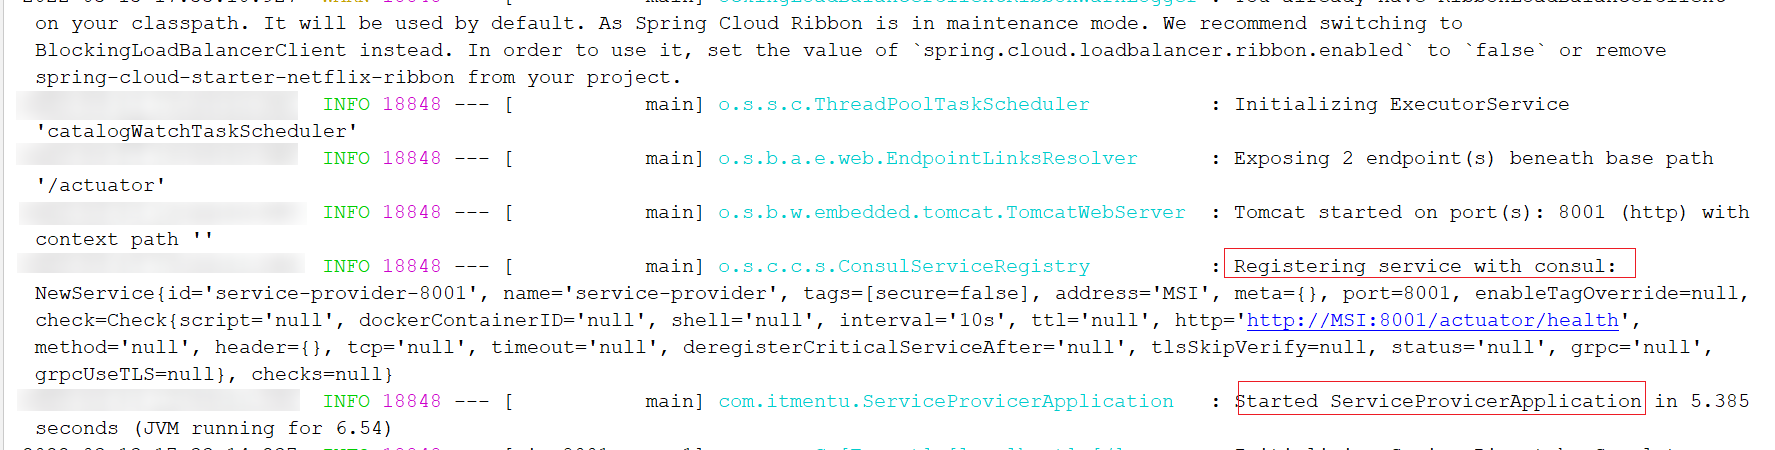
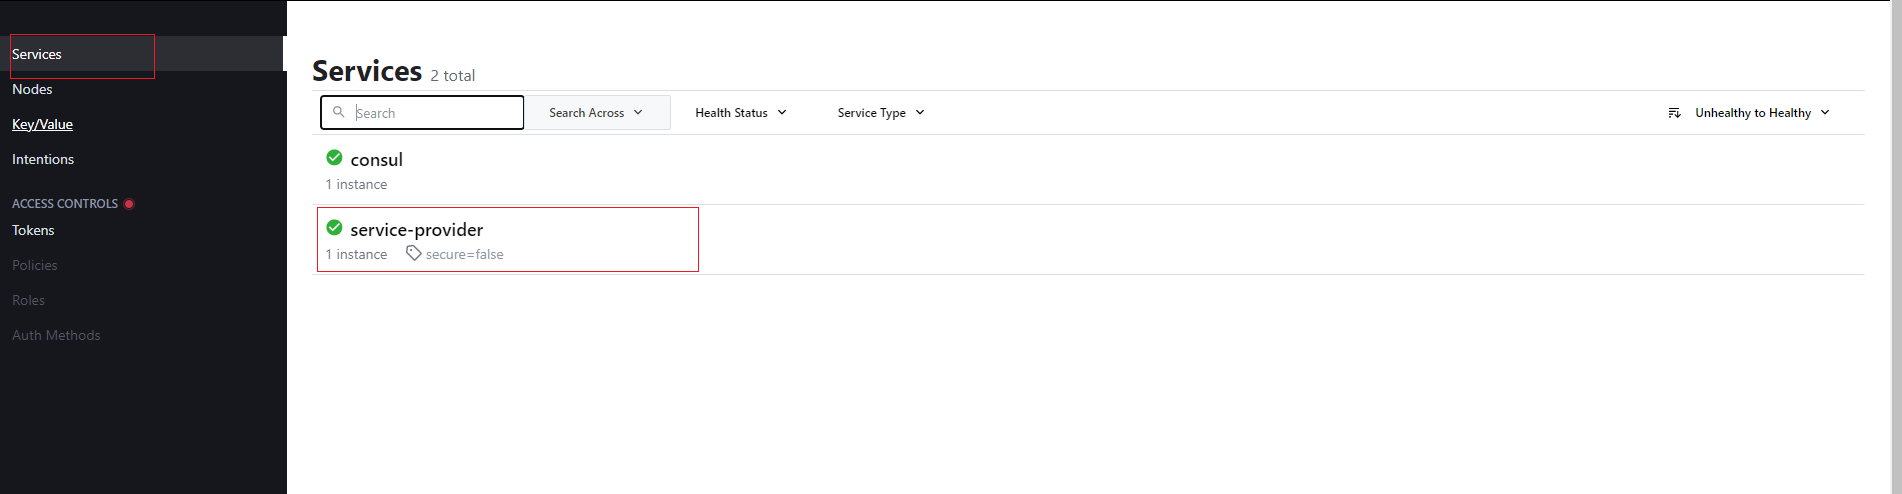
同时查看注册中心页面中该服务已经注册成功
5 服务调用
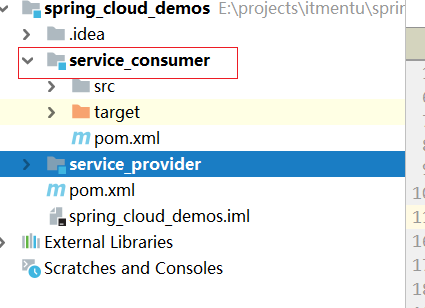
5.1 创建子模块service_consumer
5.2 引入依赖
<dependencies>
    <dependency>
        <groupId>org.springframework.boot</groupId>
        <artifactId>spring-boot-starter-actuator</artifactId>
    </dependency>
    <dependency>
        <groupId>org.springframework.cloud</groupId>
        <artifactId>spring-cloud-starter-consul-discovery</artifactId>
    </dependency>
    <dependency>
        <groupId>org.springframework.boot</groupId>
        <artifactId>spring-boot-starter-web</artifactId>
    </dependency>
    <dependency>
        <groupId>org.springframework.boot</groupId>
        <artifactId>spring-boot-starter-test</artifactId>
        <scope>test</scope>
    </dependency>
</dependencies>

<dependencyManagement>
    <dependencies>
        <dependency>
            <groupId>org.springframework.cloud</groupId>
            <artifactId>spring-cloud-dependencies</artifactId>
            <version>Hoxton.SR5</version>
            <type>pom</type>
            <scope>import</scope>
        </dependency>
    </dependencies>
</dependencyManagement>
5.3 配置文件
server:
  port: 8001 #服务端口
spring:
  application:
    name: service-provider #服务名
  cloud:
    consul:
      host: 192.168.184.128 #注册中心地址
      port: 8500 #注册中心端口
      discovery:
        service-name: ${

    spring.application.name} #注册中心中该服务的服务名
        register: false #不注册到注册中心
说明:
1:由于消费者不需要注册到注册中心,所以spring.cloud.consul.discovery.register为false
5.4 编写代码
5.4.1 启动类
/**
 * Copyright (c) 2022 itmentu.com, All rights reserved.
 *
 * @Author: yang
 */
@SpringBootApplication
public class ServiceConsumerApplication {


    public static void main(String[] args) {


        SpringApplication.run(ServiceConsumerApplication.class, args);
    }

    @Bean
    public RestTemplate restTemplate(){


        return new RestTemplate();
    }
}
代码说明:
1:注册一个RestTemplate到spring容器中以便使用
5.4.2 接口编写
@RestController
@RequestMapping("/consumer")
public class ConsumerController {


    @Autowired
    private RestTemplate restTemplate;
    @Autowired
    private DiscoveryClient discoveryClient;

    @GetMapping("/hello")
    public String hello(){


        //1、获取注册中心中注册的service-provider实例列表
        List<ServiceInstance> serviceInstanceList = discoveryClient.getInstances("service-provider");
        //2、获取实例
        ServiceInstance serviceInstance = serviceInstanceList.get(0);
        //3、根据实例的信息拼接的请求地址
        String url = serviceInstance.getUri()+ "/hello";
        //4、发送请求
        return restTemplate.getForObject(url,String.class);
    }
}
代码说明:
1:DiscoveryClient用于获取注册中心中对应服务的实例
2:serviceInstance.getUri()表示实例中的地址包括ip端口
3:RestTemplate用于进行rest方式的http请求
5.4.3 运行启动类并访问接口
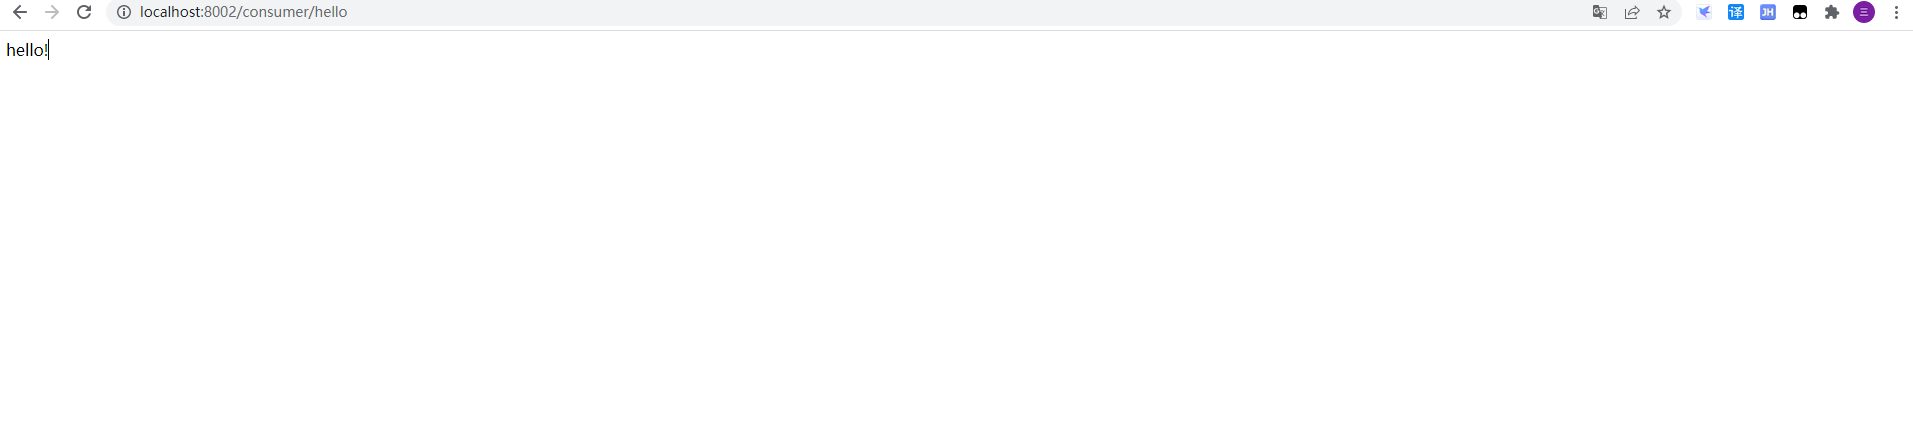
浏览器访问
http://localhost:8002/consumer/hello
可以看到
stance.getUri()+ “/hello”;
//4、发送请求
return restTemplate.getForObject(url,String.class);
}
}
代码说明:

```properties
1:DiscoveryClient用于获取注册中心中对应服务的实例
2:serviceInstance.getUri()表示实例中的地址包括ip端口
3:RestTemplate用于进行rest方式的http请求
5.4.3 运行启动类并访问接口
浏览器访问
http://localhost:8002/consumer/hello
可以看到
[外链图片转存中…(img-SEv3pOhQ-1647865478979)]
说明我们已经成功通过consumer访问到了service_provider的/hello接口并响应数据