1. 简介
Redux 是 JavaScript 应用的状态容器(对象),提供可预测的状态管理。可以让你开发出行为稳定可预测的应用,运行于不同的环境(客户端、服务器、原生应用),并且易于测试。Redux 除了和 React 一起用外,还支持其它界面库。
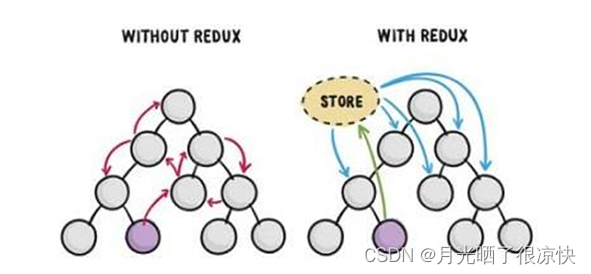
解决的问题:多层级组件间通信问题。
2. 核心概念
-
单一数据源
整个redux中的数据都是集中管理,存储于同一个数据源中,数据源中的数据为单向数据流,不可直接修改。
-
纯函数 (reducer) 统一对 state 数据修改
redux 定义了一个 reducer 函数来完成 state 数据的修改,reducer 会接收先前的 state 和 action,并返回新的 state。
-
函数执行结果是可预期的(多次调用结果相同)
-
函数执行不会触发副作用
-
函数中的变量,没有使用外部的
-
3. redux工作流
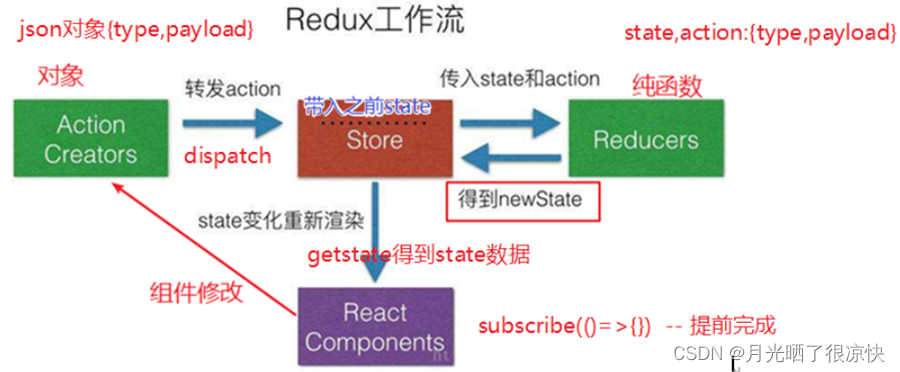
①、store通过 reducer 创建了初始状态
②、component 通过 store.getState() 获取到了 store 中保存的 state 挂载在了自己的状态上
③、用户产生了操作,调用了 actions 的方法
④、actions 的方法被调用,创建了带有标示性信息的 action(描述对象)
⑤、actions 将 action 通过调用 store.dispatch 方法发送到了 reducer 中
⑥、reducer 接收到 action 并根据标识信息判断之后返回了新的 state
⑦、store 的 state 被 reducer 更改为新 state 的时候,store.subscribe 方法里的回调函数会执行,此时就可以通知 component 去重新获取 state
4. 模拟redux工作流程
redux.js:
// 自定义的redux状态管理

// 用 createStore 方法接收 reducer 纯函数
export const createStore = reducer => {


    // 接收新的带有单一数据源的对象
    let state = undefined

    // 订阅队列
    let tasks = []

    // 3.store.dispatch({type,payload})
    const dispath = action => {


        // 将 action 交给 reducer ,返回一个新的数据源
        state = reducer(state, action)
        // 数据源发生变化时,让订阅队列中的每一个回调函数执行
        tasks.forEach(cb => cb())
    }

    const subscribe = cb => {


        // 把回调函数放入订阅队列中
        tasks.push(cb)
        // 取消订阅时,删除订阅队列中的回调函数
        return () => tasks.splice(tasks.indexOf(cb), 1)
    }

    // 返回数据源
    const getState = () => state

    // 2.初始化,防止组件第一次调用 getState 得到的是 undefined
    dispath({

     type: '@@init@@' })

    // 返回 redux 工作流中需要的三个函数
    return {


        dispath,
        subscribe,
        getState
    }

}
index.js:
// 导入仓库
import {

     createStore } from './redux'

// 5.设置一个初始值
const initState = {


    num: 100
}

// 4.创建 reducer 纯函数
const reducer = (state = initState, action) => {


    // 完成组件中加的操作
    if (action.type === 'add') return {

     ...state, num: state.num + action.payload }
    return state;
}

const store = createStore(reducer)

export default store
App.jsx:
import React, {

     Component } from 'react'
// 组件中导入仓库
import store from './store'

class App extends Component {


  componentDidMount() {


    // 订阅 redux 的频道,只要频道发生更改,就会触发视图更新
    // 并且让 unsubscribe 接收到 redux 中取消订阅的函数
    this.unsubscribe = store.subscribe(() => this.forceUpdate())
  }

  componentWillUnmount() {


    // 取消订阅,组件卸载时执行
    this.unsubscribe()
  }

  render() {


    return (
      <div>
        {

    /* 1.组件通过 getState 得到数据 */}
        <h3>{

    store.getState().num}</h3>
        <hr />
        <button
          onClick={

    () => {


            // 动作:添加;数据:每次加2
            store.dispath({

     type: 'add', payload: 2 })
          }}
        >
          ++++
        </button>
      </div>
    )
  }
}

export default App
5. 使用redux
安装 redux:
redux 没有内嵌在 react 框架中,使用时需要手动去安装:yarn add redux
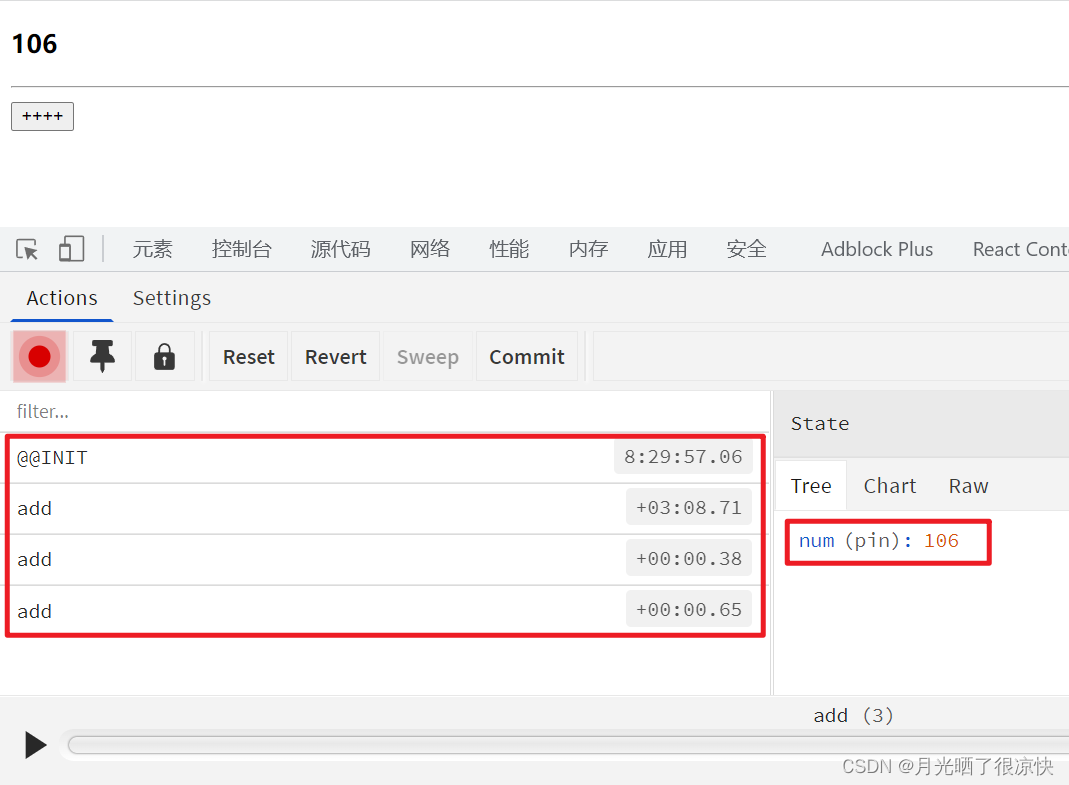
安装 redux-devtools:
安装第3方模块,让调试工具显示 state:
# yarn add -D @redux-devtools/extension

import {

     composeWithDevTools } from '@redux-devtools/extension'
const store = createStore(
  reducer,
  composeWithDevTools()
);
把上述案例,用真实的 redux 实现一下:
index.js:
// 1.导入redux中的createStore创建仓库数据的方法
import {

     createStore } from 'redux'
// 配合浏览器安装的插件来进行redux调试所用
// 开发时有用,生产要关闭
import {

     composeWithDevTools } from '@redux-devtools/extension'

// 2.初始state数据
const initState = {


  num: 100
}

// 3.定义一个纯函数reducer,专门用来操作state中的数据,要返回一个新的state
const reducer = (state = initState, action) => {


  if (action.type === 'add') return {

     ...state, num: state.num + action.payload }
  return state;
}

// 得到数据对象
let store
// 开发与生产环境的判断,提高安全性
process.env.NODE_ENV === 'development'
  ?
  store = createStore(
    reducer,
    composeWithDevTools()
  )
  :
  store = createStore(
    reducer
  )

// 导出
export default store
6. react-redux
概述:
React-Redux 是 Redux 的官方针对 React 开发的扩展库,默认没有在 React 项目中安装,需要手动来安装。react-redux 是依赖于 redux,所以你必须安装 redux。
你可以理解为 react-redux 就是 redux 给我们提供一些高阶组件,能解决的问题是:使用它以后我们不需要在每个组件中再去手动订阅数据的更新了,方便了 react 组件中调用 redux 中的数据。
安装:
yarn add react-redux
使用步骤:
-
在程序主文件 index.js 文件中,定义 Provider。此处类似于之前跨组件通信处的 Provider 一样,旨在让全局的组件共享 store 中的数据。
import React from 'react' import ReactDOM from 'react-dom' import App from './App' // 导入Provider生产数据者组件 import { Provider } from 'react-redux' // 导入数据源 import store from './store' ReactDOM.render( // 包裹所有的路由 <Provider store={ store}> <App /> </Provider>, document.getElementById('root') ) -
在组件中使用 react-redux
import React, {

       Component } from 'react'
// 提供一个高阶组件 connect 用来把 redux 中的 state 和 action 映射到当前组件的 props 中
import {

       connect } from 'react-redux'

// 此函数必须要返回一个json对象
// 函数的 state 参数就是 redux 中的 state 数据
const mapStateToProps = state => {


  return {

       num: state.num }
}

// mapStateToProps 函数的两种简写写法
// const mapStateToProps = state => state
// @connect(state => state, mapDispatchToProps)

// 此函数必须要返回一个json对象
// dispatch 就是之前通过 store.dispatch 的方法
const mapDispatchToProps = dispatch => {


  return {


    add(n = 1) {


      // 动作:增加,数据:n
      dispatch({

       type: 'add', payload: n })
    }
  }
}

// 函数的方式可以同步也可以异步,dispatch 是你手动在需要的地方来调用
// const mapDispatchToProps = dispatch => {


//   return {


//     add(n = 1) {


//       setTimeout(() => {


//         dispatch({ type: 'add', payload: n })
//       }, 1000)
//     }
//   }
// }

// 该函数的对象写法:
// 如果为对象方式则只能使用同步,不能用异步,因为在 connect 实现时如果是对象,则它会主动调用 dispatch
// 调用了 dispatch 它就立刻执行。而如果是一个异步,则就会不符合 dispatch 要求,则报错
// const mapDispatchToProps = {


//   add: (n = 1) => ({ type: 'add', payload: n })
// }

// 参数1:函数,把 redux 中的 state 数据映射到当前的 props 属性中
// 参数2:函数|对象,把你操作的 dispatch 方法映射到当前的 props 属性中
@connect(mapStateToProps, mapDispatchToProps)
class App extends Component {


  render() {


    console.log('props', this.props)
    return (
      <div>
        <h3>{

      this.props.num}</h3>
        <hr />
        <button onClick={

      () => this.props.add()}>++++</button>
      </div>
    )
  }
}

export default App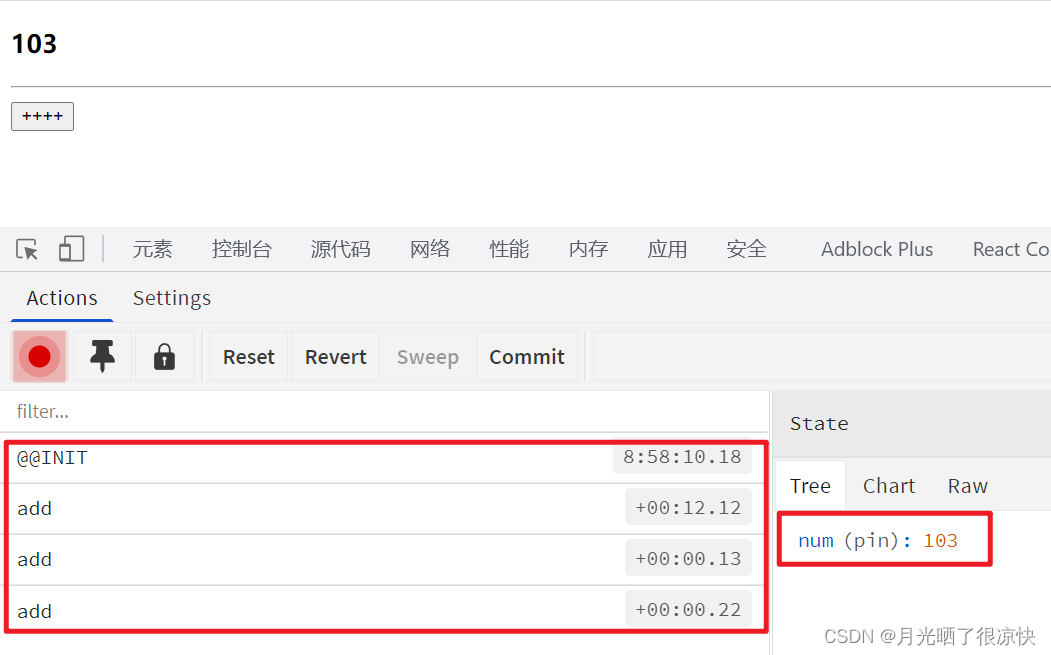
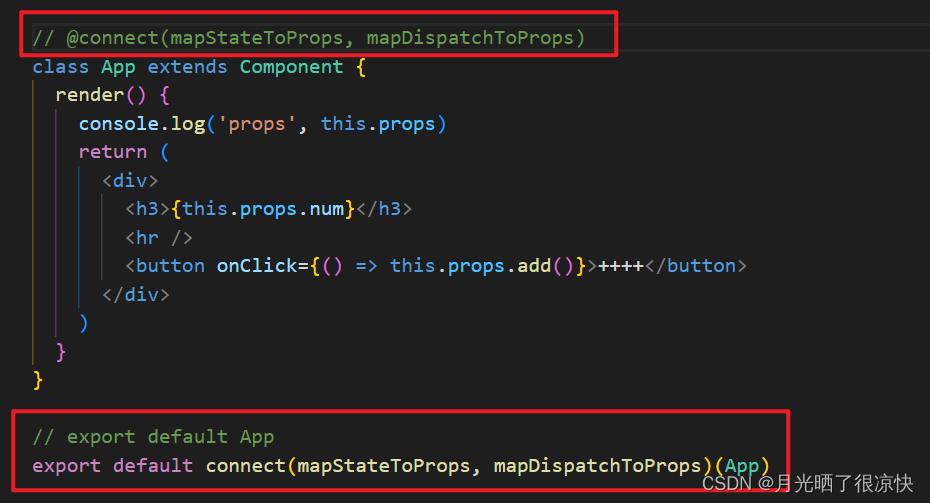
上面是使用装饰器的写法,还有不使用装饰器的写法:
我们需要将装饰器一行注释,并且修改导出方式。