实战场景
如何安装 Elasticsearch
知识点
•CentOS
•Java
•Elasticsearch 安装
•Kibana 安装
菜鸟实战
Elasticsearch 是一个基于 Lucene 的搜索服务器。它提供了一个分布式多用户能力的全文搜索引擎,基于 RESTful web 接口。Elasticsearch 是用 Java 语言开发的,并作为 Apache 许可条款下的开放源码发布,是一种流行的企业级搜索引擎。Elasticsearch 用于云计算中,能够达到实时搜索,稳定,可靠,快速,安装使用方便。官方客户端在 Java、.NET(C#)、PHP、Python、Apache Groovy、Ruby 和许多其他语言中都是可用的。
前置环境
确认 java 环境
Elasticsearch 运行于Java JDK 环境, 所以需要确认该环境

确认服务器架构
[root@xqdsvtvnyje9zxeo ~]# uname -a
Linux xqdsvtvnyje9zxeo 4.18.0-80.el8.x86_64 #1 SMP Tue Jun 4 09:19:46 UTC 2019 x86_64 x86_64 x86_64 GNU/Linux
新增 Elasticsearch 账户
ElasticSearch5及以上版本,基于安全考虑,强制规定不能以root身份运行,必须创建一个非root用户来运行ElasticSearch。
useradd esuser
pasword esuser
下载文件
下载地址 https://www.elastic.co/cn/downloads/elasticsearch
# 下载
wget https://artifacts.elastic.co/downloads/elasticsearch/elasticsearch-8.5.1-linux-x86_64.tar.gz
# 解压
tar -zxvf elasticsearch-8.5.1-linux-x86_64.tar.gz
运行环境配置
系统环境
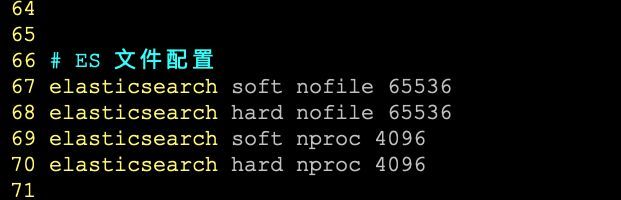
vim /etc/security/limits.conf
elasticsearch soft nofile 65536
elasticsearch hard nofile 65536
elasticsearch soft nproc 4096
elasticsearch hard nproc 4096
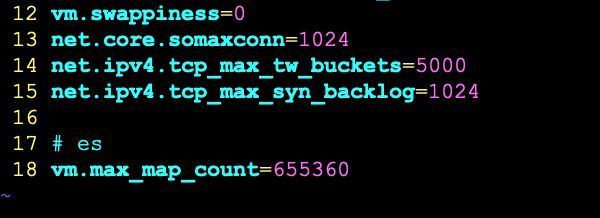
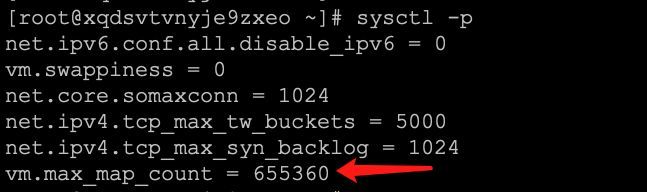
vim /etc/sysctl.conf
vm.max_map_count=655360
运行参数
# 修改目录权限至新增的elasticsearch用户
chown -R esuser elasticsearch-8.5.1
# 增加data和log存放区,并赋予 elasticsearch 用户权限
mkdir -p es/data
chown -R esuser es/data
mkdir -p es/log
chown -R esuser es/log
# 编辑elasticsearch.yml修改数据和日志目录
vim config/elasticsearch.yml
path.data: /home/es/data # 数据目录位置
path.logs: /home/es/logs # 日志目录位置
network.host: 0.0.0.0 #绑定的ip:默认只允许本机访问,修改为0.0.0.0后则可以远程访问
# 如果不是 https,则关闭ssl 选项
xpack.security.enabled: false
xpack.security.enrollment.enabled: false
# Enable encryption for HTTP API client connections, such as Kibana, Logstash, and Agents
xpack.security.http.ssl:
enabled: false
keystore.path: certs/http.p12
# Enable encryption and mutual authentication between cluster nodes
xpack.security.transport.ssl:
enabled: false
verification_mode: certificate
keystore.path: certs/transport.p12
truststore.path: certs/transport.p12
# 配置jvm参数,编辑jvm.options
vim config/jvm.options
# 注意填写一致
-Xms2g
-Xmx2g
elasticsearch.yml 其他可配置信息

启动服务
启动
# 切换到 ES 用户
su esuser
# 启动
./bin/elasticsearch
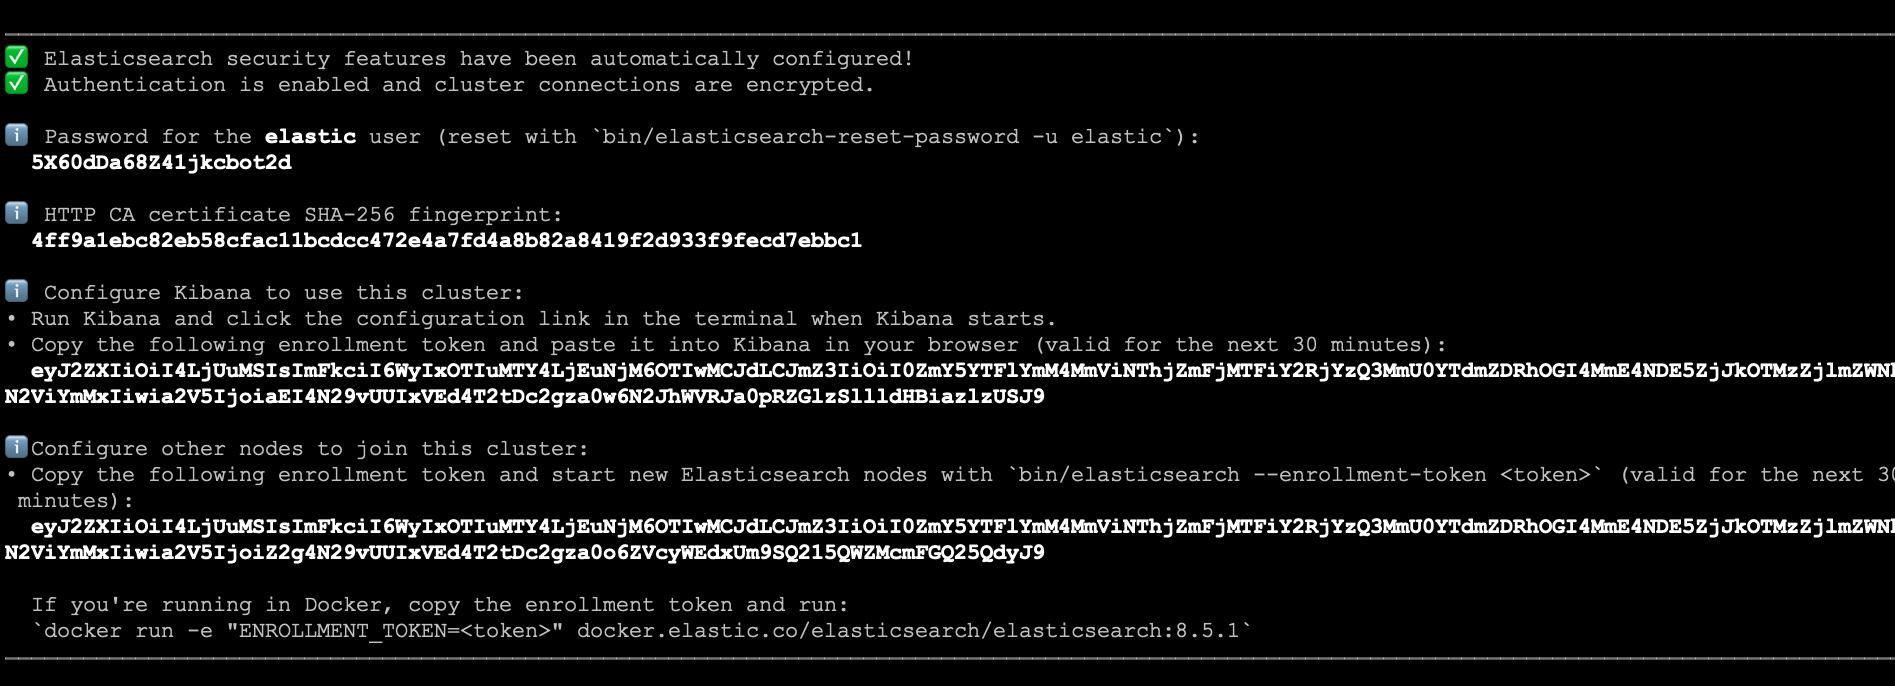
确认安装成功
netstat -ntlp | grep 9200
tcp6 0 0 :::9200 :::* LISTEN 8163/java
# 本机验证
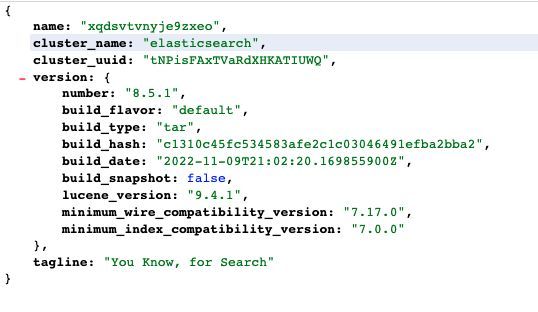
[root@xqdsvtvnyje9zxeo elasticsearch-8.5.1]# curl 127.0.0.1:9200
{
"name" : "xqdsvtvnyje9zxeo",
"cluster_name" : "elasticsearch",
"cluster_uuid" : "tNPisFAxTVaRdXHKATIUWQ",
"version" : {
"number" : "8.5.1",
"build_flavor" : "default",
"build_type" : "tar",
"build_hash" : "c1310c45fc534583afe2c1c03046491efba2bba2",
"build_date" : "2022-11-09T21:02:20.169855900Z",
"build_snapshot" : false,
"lucene_version" : "9.4.1",
"minimum_wire_compatibility_version" : "7.17.0",
"minimum_index_compatibility_version" : "7.0.0"
},
"tagline" : "You Know, for Search"
}
浏览器验证
http://127.0.0.1:9200
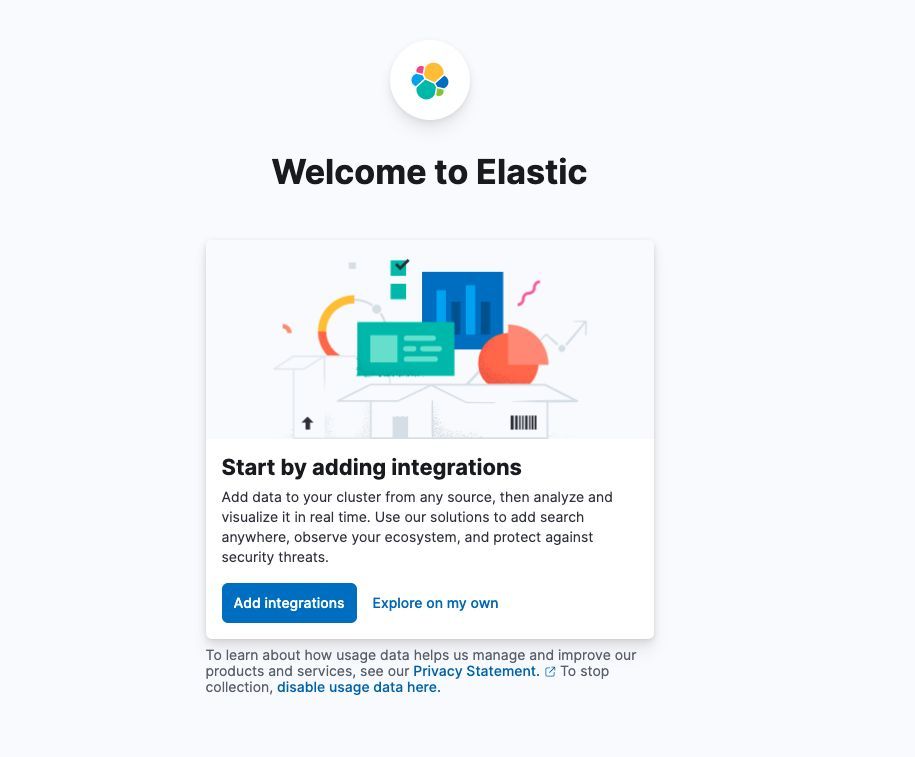
安装 Kibana
Kibana是界面化的查询数据的工具,下载时尽量下载与ElasicSearch一致的版本。
下载与解压
下载地址: https://www.elastic.co/cn/downloads/kibana
# 下载
wget https://artifacts.elastic.co/downloads/kibana/kibana-8.5.1-linux-x86_64.tar.gz
# 解压
tar -zxvf kibana-8.5.1-linux-x86_64.tar.gz
运行环境配置
系统环境
# 更新权限
chown -R esuser kibana-8.5.1
运行参数
# 配置更新 config/kibana.yml
server.port: 5601
server.host: "0.0.0.0"
启动服务
# 切换到 ES 用户
su esuser
# 启动
./bin/kibana
后台模式同时启动
启动 elasticsearch
./bin/elasticsearch -d
启动 kibana
nohup ./bin/kibana &
环境安装完成后,接下来就可以使用 Elasticsearch 的各项功能了。