概述

1.flask提供接口,axios调用接口得到数据,vue将数据渲染到页面上。
2.存在问题:跨域请求的报错;解析json数据的问题。
vue+axios
首先,创建好一个vue项目。(这个网上资源很多),然后在项目的目录下用命令行导入axios,
npm install axios
然后,在你vue项目下的main.js配置好axios.
import axios from 'axios'
Vue.prototype.$axios = axios
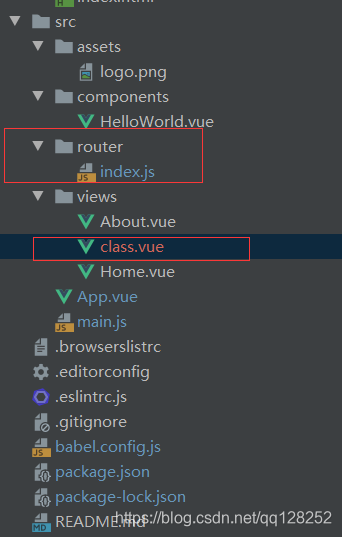
我的src目录是这样的,创建一个class.vue的组件,与flask的交互就是在这里面的。当然,要在router里面配置好路由,在app里面渲染出来。
这是路由,class的路径就是加入进去的class.vue的路由。
import Vue from 'vue'
import VueRouter from 'vue-router'
import Home from '../views/Home.vue'

Vue.use(VueRouter)

const routes = [
  {
    path: '/',
    name: 'Home',
    component: Home
  },
  {
    path: '/about',
    name: 'About',
    component: () => import(/* webpackChunkName: "about" */ '../views/About.vue')
  },
  {
    path: '/class',
    name: 'class',
    component: () => import(/* webpackChunkName: "about" */ '../views/class.vue')
  }
]

const router = new VueRouter({
  routes
})

export default router
app里随便配置一下。这样你的组件就能渲染出来。
  <div id="app">
    <router-view/>
  </div>
基本配置就算好了,下面就是组件里的实现了。
一个form表单,这是效果图,getdata里的数据是设置好的,等到文件上传后,后台返回的结果会更新这些数据。
<form  enctype=multipart/form-data>
            <p></p>
            <input type="file" @change="getFile($event)">
            <button @click="submitForm($event)">提交</button>
          </form></a-layout-content>
        <a-layout-sider>
          <p></p>
          <span>{

    {

    getdata.classify}}</span>
          <p></p>
          <span>{

    {

    getdata.state}}</span>
          <p></p>
          <span>{

    {

    getdata.type}}</span>

下面是calss.vue的script,data里就是预先随便设置的数据,methods里面用来存放方法。主要看这里,axios.post一个表单数据(里面是图片),到指定的url,这里就是flask提供的接口。我们通过var msg = response.data
that.getdata = msg。将flak返回的json数据绑定到data中,然后就会在页面中渲染出来。
// A code block
 this.$axios.post('http://localhost:8280/upload', formData, config).then(function (response)
export default {


  name: 'class',
  data: function () {


    return {


      getdata: {


        classify: '**',
        state: '**',
        type: '**'
      }
    }
  },
  methods: {


    getFile (event) {


      this.file = event.target.files[0]
      console.log(this.file)
      console.log(1111)
    },
    submitForm (event) {


      event.preventDefault()
      const formData = new FormData()
      formData.append('file', this.file)
      var that = this
      const config = {


        headers: {


          'Content-Type': 'multipart/form-data'
        }
      }

      this.$axios.post('http://localhost:8280/upload', formData, config).then(function (response) {


        if (response.status === 200) {


          var msg = response.data
          that.getdata = msg
          console.log(response.data.classify)
          console.log(response.data)
          console.log(222)
        }
      })
    }
  }
}
下面是完整代码
<template>
  <div>
    <a-layout>
      <a-layout-header>Header</a-layout-header>
      <a-layout>
        <a-layout-content><h1>下面是测试</h1>
          <form  enctype=multipart/form-data>
            <p></p>
            <input type="file" @change="getFile($event)">
            <button @click="submitForm($event)">提交</button>
          </form></a-layout-content>
        <a-layout-sider>
          <p></p>
          <span>{

   {getdata.classify}}</span>
          <p></p>
          <span>{

   {getdata.state}}</span>
          <p></p>
          <span>{

   {getdata.type}}</span>
        </a-layout-sider>
      </a-layout>
      <a-layout-footer>Footer</a-layout-footer>
    </a-layout>
    </div>
</template>

<script>
export default {
  name: 'class',
  data: function () {
    return {
      getdata: {
        classify: '**',
        state: '**',
        type: '**'
      }
    }
  },
  methods: {
    getFile (event) {
      this.file = event.target.files[0]
      console.log(this.file)
      console.log(1111)
    },
    submitForm (event) {
      event.preventDefault()
      const formData = new FormData()
      formData.append('file', this.file)
      var that = this
      const config = {
        headers: {
          'Content-Type': 'multipart/form-data'
        }
      }

      this.$axios.post('http://localhost:8280/upload', formData, config).then(function (response) {
        if (response.status === 200) {
          var msg = response.data
          that.getdata = msg
          console.log(response.data.classify)
          console.log(response.data)
          console.log(222)
        }
      })
    }
  }
}
</script>

<style scoped>

</style>
flask
下面是flask的代码,from flask_cors import CORS
CORS(app, resources=r’/*')这是解决跨域请求报错的设置。
from flask import Flask
from flask import request, jsonify,render_template
import base64
import cv2
import os
import time
from werkzeug.utils import secure_filename
import detection_mobilenetv2 as test

from flask_cors import CORS

app = Flask(__name__)
CORS(app, resources=r'/*')


@app.route('/')
def hello_world():
    app.logger.error("sss")
    return 'Hello World!'
//这里是主要接口测试路径
@app.route('/upload', methods=['POST', 'GET'])
def upload():
    if request.method == 'POST':
        f = request.files['file']

        basepath = os.path.dirname(__file__)
//把接受的文件报错起来
        upload_path = os.path.join(basepath, 'static\\img', secure_filename(f.filename))
        fname, fename = os.path.split(upload_path)
        f.save(upload_path)
//你的项目对这张图片干的事
        total,nomask=test.pic_show(upload_path)
  //json数据返回
        result_dict = dict()
        result_dict["classify"] = "mask_detect"
        result_dict["state"] = "-1"
        result_dict["type"] = "noFace"

        return jsonify(result_dict)


if __name__ == '__main__':
    app.run(host="0.0.0.0",port=8280,debug=False)
大概就是这样了。