通过前几篇的文章, Spring Security的认证系列基本介绍完毕,前几篇的系列文章更多的是关注 认证本身,对一些细枝末节没有额外的展开,因此接下来的两篇文章会补充讲解一些额外的知识。
本篇文章主要扩展讲解在前后端分离的架构下,Spring Security该如何处理 JSON 类型的数据交互。
随着技术的发展,分工越来越明细;“让专业的人干专业的事” 是发展的主旋律。回到我们的登录认证上,即无论登录成功还是失败,服务端都返回一段 JSON 给前端,该跳转还是该展示就由前端自己决定;前端的事就让前端工程师去折腾吧~
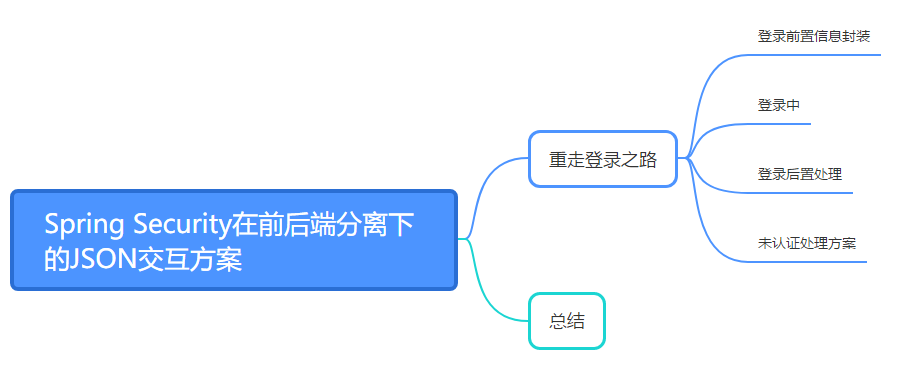
重走登录之路
基于这一思想,我们再回过头来看看登录的流程(认证(一):基于表单登录的认证模式),登录的流程大致上可以分为 3 个部分,分别是: 登录前置信息封装、登录中、登录后置处理。
-
登录前置信息封装(解析前端传递的 JSON 登录信息,封装成 UsernamePasswordAuthentionToken)。
-
登录中
-
登录后置处理(登录成功或登录失败的处理方案)
登录前置信息封装
之前我们学习过,UsernamePasswordAuthentionFilter过滤器用以获取前端传递的登录表单信息(username、password),封装成 UsernamePasswordAuthentionToken;具体代码如下:
public Authentication attemptAuthentication(HttpServletRequest request,
        HttpServletResponse response) throws AuthenticationException {


    if (postOnly && !request.getMethod().equals("POST")) {


        throw new AuthenticationServiceException(
                "Authentication method not supported: " + request.getMethod());
    }

    String username = obtainUsername(request);
    String password = obtainPassword(request);

    if (username == null) {


        username = "";
    }

    if (password == null) {


        password = "";
    }

    username = username.trim();

    UsernamePasswordAuthenticationToken authRequest = new UsernamePasswordAuthenticationToken(
            username, password);

    // Allow subclasses to set the "details" property
    setDetails(request, authRequest);

    return this.getAuthenticationManager().authenticate(authRequest);
}

@Nullable
protected String obtainPassword(HttpServletRequest request) {


    return request.getParameter(passwordParameter);
}

@Nullable
protected String obtainUsername(HttpServletRequest request) {


    return request.getParameter(usernameParameter);
}
主要关注 obtainUsername(HttpServletRequest request)和 obtainPassword(HttpServletRequest reqeust)这两个方法,我们可以看出 Spring Security 是通过 request.getParamter()的方式来获取登录的参数的, 这也就不难理解为什么是 key/value形式的登录参数了。
知道了原理之后就很简单了,我们需要做的就是:自定义一个 Filter替代 UsernamePasswordAuthentionFilter,获取登录参数的时候解析前端传递的 JSON 即可。

package com.kylin.demo.security.filter;

import com.google.gson.Gson;
import lombok.Data;
import lombok.extern.slf4j.Slf4j;
import org.springframework.security.authentication.AuthenticationServiceException;
import org.springframework.security.authentication.UsernamePasswordAuthenticationToken;
import org.springframework.security.core.Authentication;
import org.springframework.security.core.AuthenticationException;
import org.springframework.security.web.authentication.UsernamePasswordAuthenticationFilter;

import javax.servlet.http.HttpServletRequest;
import javax.servlet.http.HttpServletResponse;
import java.io.BufferedReader;
import java.io.IOException;
import java.io.InputStreamReader;

@Slf4j
public class MyLoginFilter extends UsernamePasswordAuthenticationFilter {


    private static final Gson GSON = new Gson();

    @Override
    public Authentication attemptAuthentication(HttpServletRequest request,
                                                HttpServletResponse response) throws AuthenticationException {


        if (!request.getMethod().equals("POST")) {


            throw new AuthenticationServiceException(
                    "Authentication method not supported: " + request.getMethod());
        }

        // 解析前端传递的登录信息
        LoginInfo loginInfo = null;
        try {


            loginInfo = translate(request);
        } catch (IOException e) {


            log.error("translate error:", e);
            throw new AuthenticationServiceException("解析前端传递登录信息失败: " + e);
        }
        String username = loginInfo.getUsername();
        String password = loginInfo.getPassword();

        if (username == null) {


            username = "";
        }

        if (password == null) {


            password = "";
        }

        username = username.trim();

        UsernamePasswordAuthenticationToken authRequest = new UsernamePasswordAuthenticationToken(
                username, password);

        // Allow subclasses to set the "details" property
        setDetails(request, authRequest);

        return this.getAuthenticationManager().authenticate(authRequest);
    }

    /**
     * 转换前端传递的 json
     *
     * @param request
     * @return LoginInfo
     */
    private LoginInfo translate(HttpServletRequest request) throws IOException {


        try(BufferedReader reader = new BufferedReader(new InputStreamReader(request.getInputStream()))) {


            String line = "";
            StringBuilder infoBuilder = new StringBuilder();
            while ((line = reader.readLine()) != null) {


                infoBuilder.append(line);
            }

            return GSON.fromJson(infoBuilder.toString(), LoginInfo.class);
        }
    }

    @Data
    private static class LoginInfo {


        private String username;

        private String password;
    }

}
源码的讲解在之前有过比较详细的介绍,这里就不过多的展开;主要的改变在于调整了获取前端传递登录参数的方式。
登录中
因为没有特殊的需求,登录中这个阶段其实不需要我们做什么额外的调整。
登录后置处理
登录后置处理主要有2种,分别是登录成功的处理和登录失败的处理;通过重写 Spring Security 提供的 AuthenticationSuccessHandler和 AuthenticationFailureHandler可以满足我们的需求。
成功处理器
Spring Security 提供了认证成功处理器接口 AuthenticationSuccessHandler, 我们可以通过自定义实现该接口,用以满足我们前后端 JSON 交互的需求。
/**
 * 自定义验证成功处理器
 * @author 小奇
 */
@Slf4j
@Component
public class WebAuthenticationSuccessHandler implements AuthenticationSuccessHandler {


    @Autowired
    private ObjectMapper objectMapper;

    @Override
    public void onAuthenticationSuccess(HttpServletRequest request, HttpServletResponse response, Authentication authentication)
            throws IOException, ServletException {


        log.info("登录成功~~");
        // 返回JSON 可添加自身业务逻辑  如:登录成功后添加用户积分等……
        response.setContentType("application/json;charset=UTF-8");
        response.getWriter().write(objectMapper.writeValueAsString(authentication));
    }
}
失败处理器
Spring Security 提供的认证失败处理器接口 AuthenticationFailureHandler,我们可以通过自定义实现该接口,满足前后端 JSON 交互的需求。
/**
 * 自定义验证失败处理器
 * @author 小奇
 */
@Slf4j
@Component
public class WebAuthenticationFailureHandler implements AuthenticationFailureHandler {


    @Autowired
    private ObjectMapper objectMapper;

    @Override
    public void onAuthenticationFailure(HttpServletRequest request, HttpServletResponse response, AuthenticationException exception)
            throws IOException, ServletException {


        log.error("登录失败");
        // 把exception返回给前台
        response.setStatus(HttpStatus.INTERNAL_SERVER_ERROR.value());
        response.setContentType("application/json;charset=UTF-8");
        response.getWriter().write(objectMapper.writeValueAsString(exception));

        // 可做其他业务逻辑,诸如限制每天登录失败的次数
    }
}
至此基本整个登录流程上都是以 JSON 来进行数据交互,但还有一个额外的场景需要考虑:未认证场景下的处理方案。
未认证处理方案
我们来思考这么一个场景:某个用户没有登录,但是却访问了一个需要认证的接口,这时需要怎么办呢?
在前后端没有分离的场景下,这个问题还是比较好解决的:用户没有认证就访问数据,那直接给他重定向到登录页面就好了;确实如此, Spring Security 默认也是这么做的。
不过在前后端分离的场景下,这个逻辑就需要相对应的调整一下:在用户没有认证的情况下,我们应该返回 JSON 用以说明该用户还未认证;不应该"自作主张"的进行重定向操作,该咋做由前端自行决定。
Spring Security 对此也提供了友好的支持,其提供了一个接口 AuthenticationEntryPoint和一个实现类 LoginUrlAuthenticationEntryPoint。
AuthenticationEntryPoint是一个概念模型接口,主要的功能是:在用户请求处理过程中遇到认证异常时,被 ExceptionTranslationFilter用于开启特定认证方案的认证流程。 LoginUrlAuthenticationEntryPoint用于根据配置计算出登录页面url,将用户重定向到该登录页面从而开始一个认证流程。
AuthenticationEntryPoint.class
public interface AuthenticationEntryPoint {


/**
     * 当遇到认证异常的用户请求时,会修改相应的认证方案并返回给用户,引导用户进入认证流程(相当于是一个 后备处理)
     * @param request  遇到了认证异常(AuthenticationException)的用户请求
     * @param response 响应
     * @param authException 异常对象
     */
    void commence(HttpServletRequest request, HttpServletResponse response,
                  AuthenticationException authException) throws IOException, ServletException;
}
LoginUrlAuthenticationEntryPoint.class
public class LoginUrlAuthenticationEntryPoint implements AuthenticationEntryPoint, InitializingBean {


    // ..省略其他方法
    private boolean useForward = false;

    /**
    * Performs the redirect (or forward) to the login form URL.
    */
    public void commence(HttpServletRequest request, HttpServletResponse response,
            AuthenticationException authException) throws IOException, ServletException {


        String redirectUrl = null;

        if (useForward) {


            if (forceHttps && "http".equals(request.getScheme())) {


                // First redirect the current request to HTTPS.
                // When that request is received, the forward to the login page will be
                // used.
                redirectUrl = buildHttpsRedirectUrlForRequest(request);
            }

            if (redirectUrl == null) {


                String loginForm = determineUrlToUseForThisRequest(request, response,
                        authException);

                if (logger.isDebugEnabled()) {


                    logger.debug("Server side forward to: " + loginForm);
                }
                RequestDispatcher dispatcher = request.getRequestDispatcher(loginForm);

                dispatcher.forward(request, response);

                return;
            }
        }
        else {


            // redirect to login page. Use https if forceHttps true

            redirectUrl = buildRedirectUrlToLoginPage(request, response, authException);

        }

        redirectStrategy.sendRedirect(request, response, redirectUrl);
    }

}
从源码本身的方法注释上我们就能看出,该方法主要是用于决定应该是走重定向策略还是走转发策略;通过打断点排查跟进,默认情况下 userForward 是 false,也就是说默认当没有认证的情况,是会走重定向的。
既然明白了它的原理,我们的做法就很简单了,直接重写该方法,返回 JSON 即可。
/**
 * 未认证处理(在未登录的状态下访问需要授权的接口)
 * @author 小奇
 */
public class WebNotAuthenticationHandler extends LoginUrlAuthenticationEntryPoint {


    public WebNotAuthenticationHandler(String loginFormUrl) {


        super(loginFormUrl);
    }


    @Override

    public void commence(HttpServletRequest request, HttpServletResponse response,
                         AuthenticationException authException) throws IOException, ServletException {


        response.setContentType("application/json;charset=utf-8");
        PrintWriter writer = response.getWriter();
        // 这里可以对Result做序列化
        writer.write("尚未登录,请先登录");
        response.setStatus(401);
        writer.flush();
        writer.close();
    }

}
接下来只需要将我们自定义的东西配置好,就大功告成啦!
/**
 * @author 小奇
 */
@Configuration
public class WebSecurityConfig extends WebSecurityConfigurerAdapter {


    @Autowired
    private WebAuthenticationSuccessHandler successHandler;

    @Autowired
    private WebAuthenticationFailureHandler failureHandler;


    @Bean
    public WebNotAuthenticationHandler notAuthenticationHandler() {


        return new WebNotAuthenticationHandler("/login");
    }

    @Bean
    public MyLoginFilter myLoginFilter() throws Exception {


        MyLoginFilter myLoginFilter = new MyLoginFilter();
        myLoginFilter.setAuthenticationManager(authenticationManager());
        return myLoginFilter;
    }


    /**
     * http请求安全配置
     *
     * @param http
     */
    @Override
    protected void configure(HttpSecurity http) throws Exception {


        http
           .authorizeRequests()
                .antMatchers("/resources/**", "/css/**", "/about", "/test/*", "/login").permitAll()
                .anyRequest().authenticated()
                .and()
           .formLogin()
                // 配置登录后置 成功&失败处理
                .successHandler(successHandler)
                .failureHandler(failureHandler)
                .permitAll()
                .and()
           .csrf().disable()
                // 配置未认证处理方案
                .exceptionHandling().authenticationEntryPoint(notAuthenticationHandler());

        // 自定义的替换UsernamePasswordAuthenticationFilter
        http.addFilterAt(myLoginFilter(), UsernamePasswordAuthenticationFilter.class);
    }


    @Override
    protected void configure(AuthenticationManagerBuilder auth) throws Exception {


        super.configure(auth);
        auth
            .inMemoryAuthentication()
                .withUser("admin")
                .password("admin")
                .roles("USER");
    }
}
总结
本文主要介绍了在前后端分离的架构下,Spring Security 是如何做的登录认证,以及介绍了未认证场景下的处理方案。
本文为个人学习笔记,如有错误或不妥指出,烦请指出!
文章到这就结束拉,欢迎大家扫码关注小奇公众号~
