目录
一、前言
本篇内容属于新大陆物联网Lora模块开发,使用给定的Lora基础例程,并在其基础上开发完成,并可为其他版本的Lora学习提供思路。
二、实践与代码
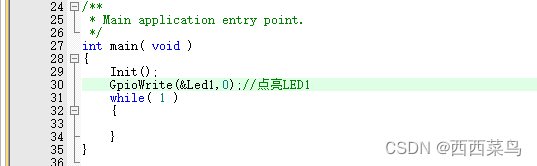
1.电亮LED1
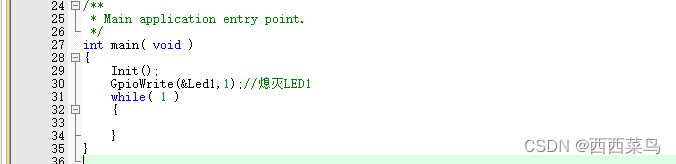
2.熄灭LED1
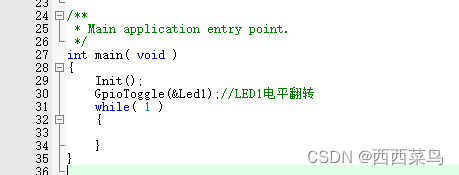
3.翻转LED电平
4.LED1与LED2交替闪烁
在其为我们提供的led_light.c文件中,定义了关于闪烁的方法:
#define HELF_SECOND 50
uint16_t helfSecondCnt = 0;
bool isLed1Lighted = true;
bool isHelfSecondLedBlinkEnable = false;
void blinkPerHelfSecond() {
    if (!isHelfSecondLedBlinkEnable)
        return;

    helfSecondCnt ++;
    if (helfSecondCnt > HELF_SECOND) {
        helfSecondCnt = 0;
        isLed1Lighted = !isLed1Lighted;
    }

    if (isLed1Lighted) {
        GpioWrite( &Led1, 0 );
        GpioWrite( &Led2, 1 );
    }
    else {
        GpioWrite( &Led1, 1 );
        GpioWrite( &Led2, 0 );
    }
}

void startLedBlink() {
    isHelfSecondLedBlinkEnable = true;
    GpioWrite( &Led1, 1 );
    GpioWrite( &Led2, 1 );
}

void stopLedBlink() {
    isHelfSecondLedBlinkEnable = false;
    GpioWrite( &Led1, 1 );
    GpioWrite( &Led2, 1 );
}
通过对上述的代码分析,我们可以得知,如果我们想开启闪烁,我们首先先需要调用startLedBlink()函数,随后我们需要在主函数中一直调用blinkPerHelfSecond(),即可实现闪烁效果。
由代码可知,当blinkPerHelfSecond()函数调用50次后,LED将会翻转电平,因此我们只需要控制调用的间隔时间,即可完成固定时间闪烁。

上述代码,通过每10ms调用一次blinkPerHelfSecond()函数,实现了每0.5s交替闪烁的效果。
5.LED1呼吸灯
同样是在led_light.c中,也定义了关于呼吸灯的方法:
#define LED_ILLUMINATION_LEVEL 8
#define LED_LEVEL_TIMER				LED_ILLUMINATION_LEVEL/2
#define DEVIDE_VALUE 16

uint8_t levelCount = LED_ILLUMINATION_LEVEL;
uint8_t led_levet_timer = LED_LEVEL_TIMER;
uint8_t devideCount = DEVIDE_VALUE;
uint8_t level = 1;
uint8_t timeTic = 0;
bool isUprise = true;
bool isLed1BreathEnable = false;
bool isLed2BreathEnable = false;

void setBreathLedArg(uint8_t levelCnt, uint8_t levelUpDevide){
	levelCount = levelCnt;
	led_levet_timer = levelCount/2;
	devideCount = levelUpDevide;
}

void resetLedPwm() {
    timeTic = 0;
    if (isLed1BreathEnable)
        GpioWrite( &Led1, 0 );
    if (isLed2BreathEnable)
        GpioWrite( &Led2, 0 );
}

void pwmLevelUp() {
    static unsigned long led_level_tick = 0;
    led_level_tick++;
    if (led_level_tick > led_levet_timer) {
        led_level_tick = 0;
        if (isUprise)
            level++;
        else
            level--;
        if (level > levelCount) {
            level = levelCount;
            isUprise = false;
        } else if (level == 0) {
            isUprise = true;
        }
    }
}

void pwm() {
    timeTic++;
    if (timeTic > level) {
        if (isLed1BreathEnable)
            GpioWrite( &Led1, 1 );
        if (isLed2BreathEnable)
            GpioWrite( &Led2, 1 );
    }
    if (timeTic > levelCount) {
        resetLedPwm();
    }
}

uint8_t timeDevice = 0;
void breathLed() {
    timeDevice++;
    if (timeDevice >= devideCount) {
        timeDevice = 0;
        pwmLevelUp();
    }
    pwm();
}

void switchLed1Breath() {
    isLed1BreathEnable = !isLed1BreathEnable;
}

void switchLed2Breath() {
    isLed2BreathEnable = !isLed2BreathEnable;
}

void startLedBreath() {
    isLed1BreathEnable = true;
    isLed2BreathEnable = true;
    GpioWrite( &Led1, 1 );
    GpioWrite( &Led2, 1 );
}

void stopLedBreath() {
    isLed1BreathEnable = false;
    isLed2BreathEnable = false;
    GpioWrite( &Led1, 1 );
    GpioWrite( &Led2, 1 );
}
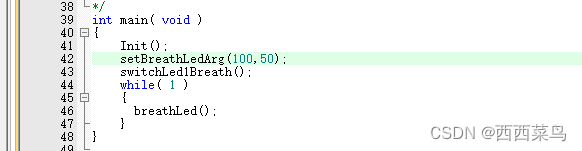
根据上面代码,我们可知使用setBreathLedArg()函数进行初始化,其第一个参数为亮度的分级,建议为100,第二个为亮度等级变化的调用次数,推荐为50,随后使用startLedBreath()开启呼吸灯,然后只需要在主程序内一直调用breathLed()函数。switchLed1Breath函数可以与startLedBreath()用法相似,可以单独开启某个呼吸灯的呼吸标志位。
三、程序代码
/**
 * Main application entry point.
 */
int main( void )//任务4
{
    Init();
		startLedBlink();
    while( 1 )
    {
			HAL_Delay(10);
			blinkPerHelfSecond();
    }
}

int main( void )//任务5
{
    Init();
		setBreathLedArg(100,50);
		switchLed1Breath();
    while( 1 )
    {
			breathLed();
    }
}