本例实现Hibernate的第一个程序,Hibernate的优点我想大家都很清楚,在这里不做过多赘述。总之,使用Hibernate对数据库操作,也就是来操作实体对象的!
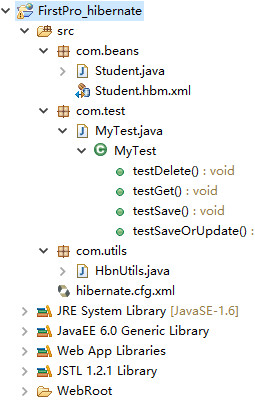
项目目录:
一、第一步要做的就是先建个数据库,这很简单,一条语句搞定;
create database test;
二、配置hibernate.cfg.xml配置文件,主要是指定与数据库的连接及其他的相关设置,看代码就懂了
<?xml version="1.0" encoding="UTF-8"?>
<!DOCTYPE hibernate-configuration PUBLIC
    "-//Hibernate/Hibernate Configuration DTD 3.0//EN"
    "http://www.hibernate.org/dtd/hibernate-configuration-3.0.dtd">
<hibernate-configuration>
    <session-factory>
        <property name="hibernate.connection.driver_class">
            com.mysql.jdbc.Driver
        </property>
        <property name="hibernate.connection.url">
            jdbc:mysql:///test
        </property>
        <property name="hibernate.connection.username">root</property>
        <property name="hibernate.connection.password">123456</property>
        <property name="hibernate.dialect">
            org.hibernate.dialect.MySQL5Dialect
        </property>
        <property name="hibernate.connection.provider_class">
            org.hibernate.c3p0.internal.C3P0ConnectionProvider
        </property>
        <property name="hibernate.current_session_context_class">
            thread
        </property>
        <property name="hibernate.hbm2ddl.auto">update</property>
        <property name="hibernate.show_sql">true</property>
        <property name="hibernate.format_sql">true</property>
        <mapping resource="com/beans/Student.hbm.xml" />
    </session-factory>
</hibernate-configuration>
三、建实体类(Student.java)和相应的映射文件(Student.hbm.xml)
Student.java:
package com.beans;

public class Student {
    int id;
    String name;
    int age;
    double score;

    public Student() {
        super();
        // TODO Auto-generated constructor stub
    }

    public Student(String name, int age, double score) {
        super();
        this.name = name;
        this.age = age;
        this.score = score;
    }

    public int getId() {
        return id;
    }

    public void setId(int id) {
        this.id = id;
    }

    public String getName() {
        return name;
    }

    public void setName(String name) {
        this.name = name;
    }

    public int getAge() {
        return age;
    }

    public void setAge(int age) {
        this.age = age;
    }

    public double getScore() {
        return score;
    }

    public void setScore(double score) {
        this.score = score;
    }

    @Override
    public String toString() {
        return "Student [id=" + id + ", name=" + name + ", age=" + age
                + ", score=" + score + "]";
    }
}
Student.hbm.xml:
<?xml version="1.0" encoding="UTF-8"?>
<!DOCTYPE hibernate-mapping PUBLIC
    "-//Hibernate/Hibernate Mapping DTD 3.0//EN"
    "http://www.hibernate.org/dtd/hibernate-mapping-3.0.dtd">
<hibernate-mapping>
    <!-- 完成类到表的映射,属性到字段的映射 -->
    <class name="com.beans.Student" table="t_student">
        <id name="id" column="tid">
            <generator class="native" />
        </id>
        <property name="name" column="tname" />
        <property name="age" column="tage" />
        <property name="score" column="tscore" />
    </class>
</hibernate-mapping>
四、junit测试,主要是测试操作实体类对象对数据库进行增删改查
MyTest.java:
package com.test;

import org.hibernate.Session;
import org.junit.Test;

import com.beans.Student;
import com.utils.HbnUtils;

public class MyTest {

    /**
     * 查询操作(查)
     */
    @Test
    public void testGet() {

        Session session = HbnUtils.getSession();
        session.beginTransaction();// 等价于session.getTransaction().begin();
        Student student = session.get(Student.class, 1);
        System.out.println(student);
        session.getTransaction().commit();
    }
    @Test
    /**
     * 保存信息(增)
     */
    public void testSave(){
        Session session = HbnUtils.getSession();//执行这一步表就会建出来
        try {
            session.beginTransaction();
            Student student = new Student("Tom",21,98);
            student.setId(1);
            session.save(student);
            session.getTransaction().commit();

        } catch (Exception e) {
            // TODO: handle exception
            e.printStackTrace();
            session.getTransaction().rollback();
        }
    }
    @Test
    /**
     * 修改信息
     */
    public void testSaveOrUpdate(){
        Session session = HbnUtils.getSession();//执行这一步表就会建出来
        try {
            session.beginTransaction();
            Student student = new Student("Tom",21,100);//更新并保存tid为1的值
            student.setId(1);
            session.saveOrUpdate(student);
            session.getTransaction().commit();

        } catch (Exception e) {
            // TODO: handle exception
            e.printStackTrace();
            session.getTransaction().rollback();
        }
    }
    @Test
    /**
     * 删除操作(删)
     */
    public void testDelete(){
        Session session = HbnUtils.getSession();//执行这一步表就会建出来
        try {
            session.beginTransaction();
            Student student = new Student();
            student.setId(1);//删除id是1的所有相关数据
            session.delete(student);
            session.getTransaction().commit();

        } catch (Exception e) {
            // TODO: handle exception
            e.printStackTrace();
            session.getTransaction().rollback();
        }
    }
}
testSave():数据库表中添加了一条数据(增)
testDelete():删除这条数据(删)
testSaveOrUpdate():更新了这条数据(改)
texstGet():查询这条数据全部信息(查)
附:个人网站www.nxl123.cn(后台采用Python Flask框架搭建,2019年1月1日将升级完成并正式启用。哎,本人是学生狗呢!网站做的不好希望大家多多提意见或建议吧!?别骂我就好!……以后SEO什么的还得多向大家学习……)