文章目录
1、创建子窗口
一个大规模的应用不可能只有一个窗口,之前我们的案例都是在一个窗口实现的,接下来我们实现一个关于窗口,来介绍如何通过 DuiLib 实现子窗口管理。
2、创建子窗口 XML 配置文件
前面我们已经做了很多 XML 的案例了,所以这里就不多说了,直接将写好的 XML 贴上来给大家做一下简单分析,然后直接使用。
<?xml version="1.0" encoding="utf-8"?>
<Window size="480,360" caption="0,0,0,35">
<Default name="Button" value="bordersize="3" bordercolor="#FF222222"" />
<Font shared="true" id="1" name="微软雅黑" size="14" />
<VerticalLayout>
<!-- 标题栏 -->
<HorizontalLayout height="35" bkcolor="#FFD6DBE9" inset="8,8,8,0">
<HorizontalLayout width="185">
<Control bkimage="logo.png" height="18" width="18" />
<Label text="关于" height="18" padding="8" font="1"/>
</HorizontalLayout>
<Control />
<HorizontalLayout width="32">
<Button name="closebtn" height="32" width="32" normalimage="btn_close_normal.png" hotimage="btn_close_hovered.png" pushedimage="btn_close_pushed.png" />
</HorizontalLayout>
</HorizontalLayout>
<HorizontalLayout bkcolor="#FFFFFFFF">
<Label align="center" text="duilib tutorial, created by jiajia_deng" />
</HorizontalLayout>
</VerticalLayout>
</Window>
窗口还是保留标题栏,但只有一个关闭按钮了,并且关闭按钮的名字我修改成了btn_close ,目的就是不想让窗口走默认的关闭流程。窗口中只有一个 Label 显示了一串文字(毕竟这不是重点)。然后我们需要新建一个类,与 MainWndFrame 窗口一样,WindowImplBase 继承 实现各个虚函数。如下所示:
second_window.h:
#pragma once

class MulWndFrame :public WindowImplBase{


protected:
	virtual CDuiString GetSkinFolder()   override;                          //获取皮肤文件的目录,如果有多层目录这里可以设置,例如xml皮肤

	virtual CDuiString GetSkinFile()     override;                          //设置皮肤的名字     就是xml文件名字

	virtual LPCTSTR    GetWindowClassName(void) const override;             //设置当前窗口的名字  class name

	virtual DuiLib::UILIB_RESOURCETYPE GetResourceType() const override;    //返回资源类型

	virtual LPCTSTR    GetResourceID()   const override;                    //如果是ZIP资源,返回资源ID

	virtual void       InitWindow()      override;                          //窗口初始化函数

	virtual void       Notify(TNotifyUI& msg) override;                     //通知事件处理函数

public:
	static const LPCTSTR	kClassName;
	static const LPCTSTR	kMulWndFrame;

private:
	CButtonUI*				close_btn_ = nullptr;
};
second_window.cpp:
#include"stdafx.h"
#include"resource.h"
#include"second_window.h"

const LPCTSTR MulWndFrame::kClassName = _T("second_wnd_frame");
const LPCTSTR MulWndFrame::kMulWndFrame = _T("second_wnd_frame.xml");

CDuiString MulWndFrame::GetSkinFolder(){


#if _DEBUG
	return _T("theme");
#else
	return m_PaintManager.GetInstancePath();
#endif
}

CDuiString MulWndFrame::GetSkinFile(){


	return kMulWndFrame;
}

LPCTSTR MulWndFrame::GetWindowClassName(void) const {


	return kClassName;
}

DuiLib::UILIB_RESOURCETYPE MulWndFrame::GetResourceType() const {


#if _DEBUG
	return UILIB_FILE;
#else
	return UILIB_ZIPRESOURCE;
#endif
}

LPCTSTR MulWndFrame::GetResourceID() const{


	//return MAKEINTRESOURCE(IDR_ZIPRES1);
	return nullptr;
}

void MulWndFrame::InitWindow(){


	close_btn_ = dynamic_cast<CButtonUI*>(m_PaintManager.FindControl(_T("closebtn")));
}

//创建新窗口
void MulWndFrame::Notify(TNotifyUI& msg){


#if 0
	if (msg.sType == DUI_MSGTYPE_CLICK)
	{


		CDuiString strName = msg.pSender->GetName();
		if (strName == _T("btn_wnd_min"))
		{


			SendMessage(WM_SYSCOMMAND, SC_MINIMIZE, 0);
		}
	}
#endif
	if (msg.sType == DUI_MSGTYPE_CLICK){


		CDuiString str_name = msg.pSender->GetName();
		if (str_name == "closebtn"){


			HWND hWndParent = GetWindowOwner(m_hWnd);
			if (hWndParent)
			{


				::EnableWindow(hWndParent, TRUE);
				::SetFocus(hWndParent);
			}
			ShowWindow(false);
		}
	}
	//__super::Notify(msg);
}
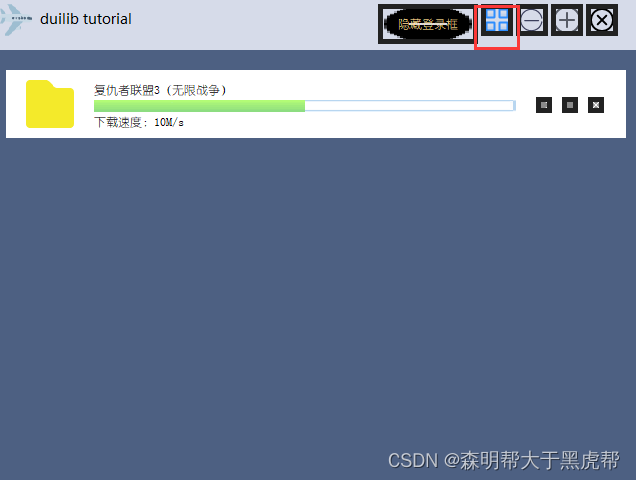
随后在 main_wnd_frame.xml 中,增加一个多窗口按钮到最小化按钮左边。
<Button name="mulbtn" height="32" width="32" normalimage="btn_mul_wnd.png" hotimage="btn_mul_wnd_hover.png" pushedimage="btn_mul_wnd_hover.png" />
此时主窗口就会显示一个关于按钮了,注意我们也修改了父容器的宽度,因为比之前多了一个按钮,我们要算上按钮宽度和间距增大父容器的宽度。
<?xml version="1.0" encoding="utf-8"?>
<Window size="640,480" mininfo="640,480" caption="0,0,0,35" sizebox="4,4,4,4">
<Default name="Button" value="bordersize="5" bordercolor="#FF222222"" />
<Font shared="true" id="0" name="幼圆" size="12" default="true" />
<Font shared="true" id="1" name="微软雅黑" size="18" underline="true" bold="true"/>
<VerticalLayout>
<!--标题栏-->
<HorizontalLayout height="50" bkcolor="#FFD6DBE9" inset="4,4,8,6" >
<HorizontalLayout width="185">
<Control bkimage="logo.png" height="32" width="32" />
<Label text="duilib tutorial" height="32" padding="8,-2,4,0" font="1" />
</HorizontalLayout>
<Control />
<HorizontalLayout childpadding="3" width="250">
<Button name="btnHideLoginDialog" text="隐藏登录框" tooltip="隐藏登录框" width="100" height="100" textcolor="#00ffda8a" normalimage="btn_min_hovered.png" hotimage="btn_min_hovered.png" />
<Button name="mulbtn" height="32" width="32" normalimage="btn_mul_wnd.png" hotimage="btn_mul_wnd_hover.png" pushedimage="btn_mul_wnd_hover.png" />
<Button name="minbtn" height="32" width="32" normalimage="btn_min_normal.png" hotimage="btn_min_hovered.png" pushedimage="btn_min_pushed.png" />
<Button name="maxbtn" height="32" width="32" normalimage="btn_max_normal.png" hotimage="btn_max_hovered.png" pushedimage="btn_max_pushed.png" />
<Button name="restorebtn" visible="false" height="32" width="32" normalimage="btn_reset_normal.png" hotimage="btn_reset_hovered.png" pushedimage="btn_reset_pushed.png" />
<Button name="closebtn" height="32" width="32" normalimage="btn_close_normal.png" hotimage="btn_close_hovered.png" pushedimage="btn_close_pushed.png" />
</HorizontalLayout>
</HorizontalLayout>
<!--窗口内容区域-->
<HorizontalLayout bkcolor="#FF4D6082">
<List name="main_wnd_list" header="hidden" padding="10,10,10,10" />
</HorizontalLayout>
</VerticalLayout>
</Window>
接下来做关于按钮的响应,首先添加一个按钮的成员变量来接收关于按钮,然后再 inlucde 关于窗口的头文件 second_window.h,并添加一个窗口的成员变量 MulWndFrame。重载 OnClick 方法判断当前点击的是否是关于按钮,如果是那么就显示关于窗口。代码如下:
void MainFrameWnd::OnClick(TNotifyUI& msg){


	CDuiString str_name = msg.pSender->GetName();
	if (str_name == _T("minbtn")){


		SendMessage(WM_SYSCOMMAND, SC_MINIMIZE, 0);
		return;
	}
	else if (str_name == _T("maxbtn")){


		SendMessage(WM_SYSCOMMAND, SC_MAXIMIZE, 0);
		return;
	}
	else if (str_name == _T("restorebtn")){


		SendMessage(WM_SYSCOMMAND, SC_RESTORE, 0);
		return;
	}
	else if (str_name == _T("closebtn")){


		Close();
		return;
	}
	else if (str_name == _T("mulbtn")){


		if (mul_wnd_frame_ == nullptr){


			mul_wnd_frame_ = new MulWndFrame;
			mul_wnd_frame_->Create(this->GetHWND(), MulWndFrame::kClassName, UI_WNDSTYLE_FRAME, 0);
		}
		mul_wnd_frame_->CenterWindow();
		mul_wnd_frame_->ShowWindow();
	}
	__super::OnClick(msg);
	return;
}
这里有个小技巧就是判断窗口是不是 nullptr,如果是 nullptr 就全新 new 一个 MulWndFrame,如果是有效的指针则直接显示窗口。在 MulWndFrame中在关闭窗口时,只需要激活父窗口然后把自己隐藏掉就可以了。如下所示:
//创建新窗口
void MulWndFrame::Notify(TNotifyUI& msg){


#if 0
	if (msg.sType == DUI_MSGTYPE_CLICK)
	{


		CDuiString strName = msg.pSender->GetName();
		if (strName == _T("btn_wnd_min"))
		{


			SendMessage(WM_SYSCOMMAND, SC_MINIMIZE, 0);
		}
	}
#endif
	if (msg.sType == DUI_MSGTYPE_CLICK){


		CDuiString str_name = msg.pSender->GetName();
		if (str_name == "closebtn"){


			HWND hWndParent = GetWindowOwner(m_hWnd);
			if (hWndParent)
			{


				::EnableWindow(hWndParent, TRUE);
				::SetFocus(hWndParent);
			}
			ShowWindow(false);
		}
	}
	//__super::Notify(msg);
}
