1.前言
现在能查到的许多csv文件自动转化为libsvm可执行文件的方法还是需要基于matlab。
而下载安装相应的libsvm安装包,写相应的配置文件总是会出现错误。原因就是现在普遍用的都是win10甚至w11系统,而这些教程都是基于w7,已经落后了。

↑↑↑↑↑↑↑↑↑↑↑↑↑↑↑↑↑↑↑↑↑↑↑↑↑↑↑↑↑↑↑↑↑↑↑↑↑↑↑↑↑↑↑↑↑↑↑↑↑↑↑↑只适用于win7!!!
如有读者想要资源链接在此:链接:https://pan.baidu.com/s/12vnI3RdcX7PAIARVc2xLyg
提取码:7yj7
---------------------------------------------------------------------------------------------------------------------------------
2.具体方法
随着python在机器学习领域广为盛行,那么我就介绍一个python的方法。
首先创建一个名为csv2libsvm.py的文件。右击以notepad++的方式打开。![]()
如果你电脑上装的python是3.0版本以上,在其中写入以下代码并保存:
#!/usr/bin/env python

"""
Convert CSV file to libsvm format. Works only with numeric variables.
Put -1 as label index (argv[3]) if there are no labels in your file.
Expecting no headers. If present, headers can be skipped with argv[4] == 1.
"""

import sys
import csv
from collections import defaultdict

def construct_line( label, line ):
	new_line = []
	if float( label ) == 0.0:
		label = "0"
	new_line.append( label )

	for i, item in enumerate( line ):
		if item == '' or float( item ) == 0.0:
			continue
		new_item = "%s:%s" % ( i + 1, item )
		new_line.append( new_item )
	new_line = " ".join( new_line )
	new_line += "\n"
	return new_line

# ---

input_file = sys.argv[1]
output_file = sys.argv[2]

try:
	label_index = int( sys.argv[3] )
except IndexError:
	label_index = 0

try:
	skip_headers = sys.argv[4]
except IndexError:
	skip_headers = 0

i = open( input_file, 'rt' )
o = open( output_file, 'wb' )

reader = csv.reader( i )

if skip_headers:
	headers = next(reader)

for line in reader:
	if label_index == -1:
		label = '1'
	else:
		label = line.pop( label_index )

	new_line = construct_line( label, line )
	o.write( new_line.encode() )
而如果你电脑上装的还是python2,那么请写入以下代码并保存:
#!/usr/bin/env python

"""
Convert CSV file to libsvm format. Works only with numeric variables.
Put -1 as label index (argv[3]) if there are no labels in your file.
Expecting no headers. If present, headers can be skipped with argv[4] == 1.
"""

import sys
import csv
from collections import defaultdict

def construct_line( label, line ):
	new_line = []
	if float( label ) == 0.0:
		label = "0"
	new_line.append( label )

	for i, item in enumerate( line ):
		if item == '' or float( item ) == 0.0:
			continue
		new_item = "%s:%s" % ( i + 1, item )
		new_line.append( new_item )
	new_line = " ".join( new_line )
	new_line += "\n"
	return new_line

# ---

input_file = sys.argv[1]
output_file = sys.argv[2]

try:
	label_index = int( sys.argv[3] )
except IndexError:
	label_index = 0

try:
	skip_headers = sys.argv[4]
except IndexError:
	skip_headers = 0

i = open( input_file, 'rb' )
o = open( output_file, 'wb' )

reader = csv.reader( i )

if skip_headers:
	headers = reader.next()

for line in reader:
	if label_index == -1:
		label = '1'
	else:
		label = line.pop( label_index )

	new_line = construct_line( label, line )
o.write( new_line )接着,把这个csv2libsvm.py文件放在python路径中,比如我放在anaconda,base环境的Scripts文件夹中(D:\anaconda\Scripts\csv2libsvm.py),如果你用的也是anaconda,可以参考我的方法。
然后,找到你需要改变的csv文件位置。比如我的在桌面。则地址则为:C:\Users\Lucy\Desktop\12.csv
接着,想好你转变后data文件的位置。比如我还想放在桌面,则位置就是:C:\Users\Lucy\Desktop\libsvm.data
然后,在命令抬输入语句:
python D:\anaconda\Scripts\csv2libsvm.py C:\Users\Lucy\Desktop\12.csv C:\Users\Lucy\Desktop\libsvm.data 0 True
紫色代表索引
灰绿色代表是否有标题。有则写True,无则空着不写
(本人没写标题,所以实际灰绿色处没写,为了展示语句完整性,在上方展示中添加了True)

输入无报错,则成功了。去你写的地址查看吧。
---------------------------------------------------------------------------------------------------------------------------------
3.效果展示
最后,看一下转变前后的文件图吧。
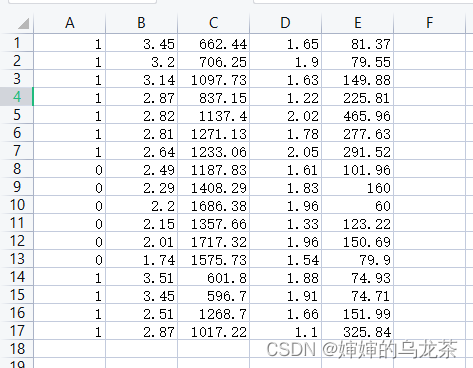
转变前的csv数据:
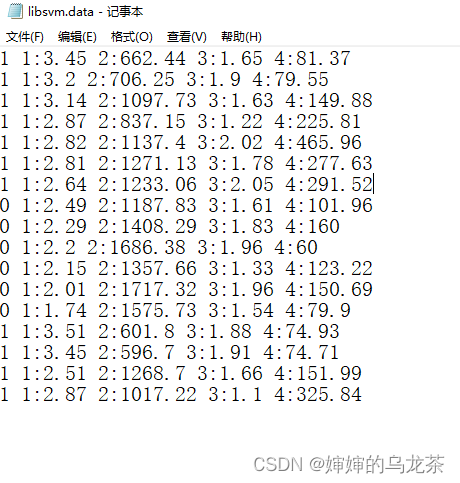
转变后的.data数据
-------------------------------------------------------------------------------------------------------------------------------
4.结语
最后声明,本文主要内容是参考链接:使用python将CSV文件转换为LIBSVM兼容数据文件 |
写文章的目的则是对于python3版本不适用参考文章中介绍的针对python2的方法,进而对csv2libsvm.py文件做出了一定的修改。