文章目录
一、概念介绍
1.SpringSecurity介绍
SpringSecurity是基于 Spring 框架,提供了一套 Web 应用安全性的完整解决方案。 核心功能主要包括:认证 、授权 、攻击防护等。 其核心就是一组过滤器链。
2.Oauth2介绍
(1)概念:是用于REST/APIs的代理授权框架;
(2)特性:基于令牌Token的授权,在无需暴露用户密码的情况下,使应用有获取用户资源的权限;
(3)使用场景:常用于APP、第三方服务的授权,如使用微信授权第三方应用系统;
(4)有四种模式:密码模式(不推荐)、授权码模式(常用)、简化模式、客户端模式。
二、实战应用
1)SpringSecurity
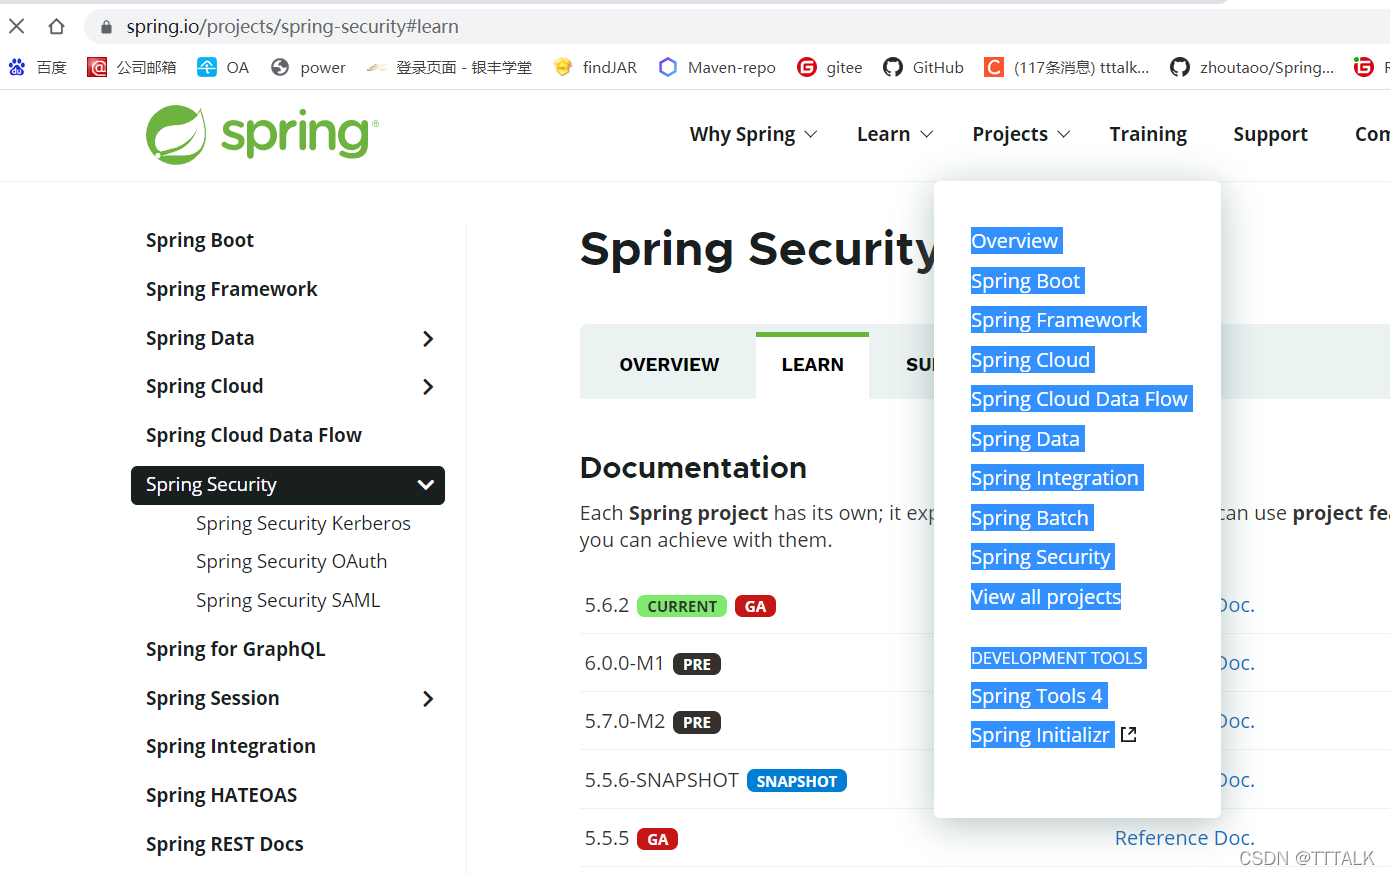
1.去官网查看文档,了解下你所使用的版本特性。网址:https://spring.io/projects/spring-security,从Projects-View all projects点进去,找到Spring Security,然后查看相关文档。
2.SpringSecurity实战
(1)简单实现用户认证功能
①首先创建一个springboot的web项目,并引入springsecurity的依赖
pom.xml如下:
<?xml version="1.0" encoding="UTF-8"?>
<project xmlns="http://maven.apache.org/POM/4.0.0" xmlns:xsi="http://www.w3.org/2001/XMLSchema-instance"
         xsi:schemaLocation="http://maven.apache.org/POM/4.0.0 https://maven.apache.org/xsd/maven-4.0.0.xsd">
    <modelVersion>4.0.0</modelVersion>
    <parent>
        <groupId>org.springframework.boot</groupId>
        <artifactId>spring-boot-starter-parent</artifactId>
        <version>2.2.6.RELEASE</version>
        <relativePath/> <!-- lookup parent from repository -->
    </parent>
    <groupId>com.example</groupId>
    <artifactId>springsecurity</artifactId>
    <version>0.0.1-SNAPSHOT</version>
    <name>springsecurity</name>
    <description>Demo project for Spring Boot</description>
    <properties>
        <java.version>11</java.version>
    </properties>
    <dependencies>
        <dependency>
            <groupId>org.springframework.boot</groupId>
            <artifactId>spring-boot-starter-web</artifactId>
        </dependency>

        <!--spring security 依赖-->
        <dependency>
            <groupId>org.springframework.boot</groupId>
            <artifactId>spring-boot-starter-security</artifactId>
        </dependency>

        <!--页面模板-->
        <dependency>
            <groupId>org.springframework.boot</groupId>
            <artifactId>spring-boot-starter-thymeleaf</artifactId>
        </dependency>

        <dependency>
            <groupId>org.springframework.boot</groupId>
            <artifactId>spring-boot-starter-test</artifactId>
            <scope>test</scope>
        </dependency>
    </dependencies>

    <build>
        <plugins>
            <plugin>
                <groupId>org.springframework.boot</groupId>
                <artifactId>spring-boot-maven-plugin</artifactId>
            </plugin>
        </plugins>
    </build>

</project>
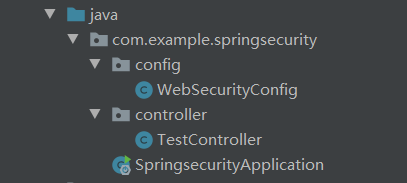
②创建controller和config等类,controller提供入口,config中配置用户名和密码
TestController:
package com.example.springsecurity.controller;

import org.springframework.stereotype.Controller;
import org.springframework.web.bind.annotation.RequestMapping;
import org.springframework.web.bind.annotation.ResponseBody;

@Controller
public class TestController {


    @RequestMapping(value="/hello")
    @ResponseBody
    public String hello(){


        return "hello";
    }
}
WebSecurityConfig.java:
package com.example.springsecurity.config;

import org.springframework.context.annotation.Configuration;
import org.springframework.security.config.annotation.authentication.builders.AuthenticationManagerBuilder;
import org.springframework.security.config.annotation.web.builders.HttpSecurity;
import org.springframework.security.config.annotation.web.configuration.EnableWebSecurity;
import org.springframework.security.config.annotation.web.configuration.WebSecurityConfigurerAdapter;
import org.springframework.security.crypto.bcrypt.BCryptPasswordEncoder;

@Configuration
@EnableWebSecurity
public class WebSecurityConfig extends WebSecurityConfigurerAdapter {


    @Override
    protected void configure(AuthenticationManagerBuilder auth) throws Exception {


        //用户名密码设置  这里使用的在内存中定义,可以把这里改成通过数据库查询
        auth.inMemoryAuthentication()
                .passwordEncoder(new BCryptPasswordEncoder())
                .withUser("admin").password(new BCryptPasswordEncoder().encode("admin123")).roles("admin");

    }


}
③验证:进入http://localhost:8080/hello,会弹出登录页面,输入我们设置的用户名及密码即可
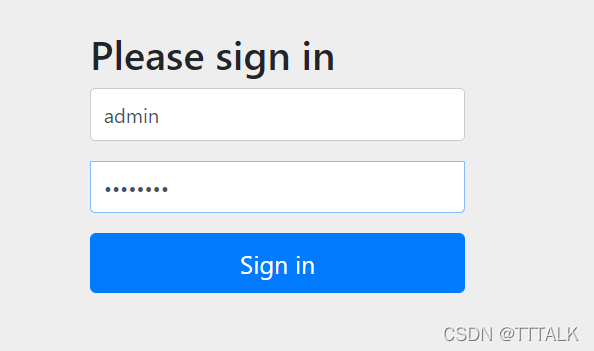
最终结果如下:

(2)在此基础上,通过角色来控制用户权限。这里使用了自定义的登陆页面,并将用户名密码的配置通过userDetailsService实现。
代码如下:
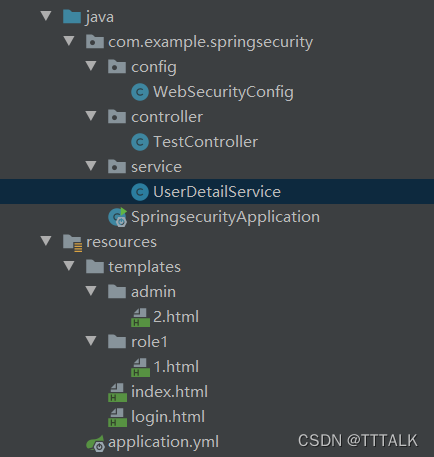
①java类
WebSecurityConfig.java:
package com.example.springsecurity.config;

import org.springframework.beans.factory.annotation.Autowired;
import org.springframework.context.annotation.Configuration;
import org.springframework.security.config.annotation.authentication.builders.AuthenticationManagerBuilder;
import org.springframework.security.config.annotation.web.builders.HttpSecurity;
import org.springframework.security.config.annotation.web.configuration.EnableWebSecurity;
import org.springframework.security.config.annotation.web.configuration.WebSecurityConfigurerAdapter;
import org.springframework.security.core.GrantedAuthority;
import org.springframework.security.core.authority.AuthorityUtils;
import org.springframework.security.core.userdetails.UserDetailsService;
import org.springframework.security.crypto.bcrypt.BCryptPasswordEncoder;

import java.util.List;

@Configuration
//@EnableWebSecurity
public class WebSecurityConfig extends WebSecurityConfigurerAdapter {


    @Autowired
    private UserDetailsService userDetailsService;

    @Override
    protected void configure(AuthenticationManagerBuilder auth) throws Exception {


        //用户名密码设置  可以把这里改成通过数据库查询
        // 这里使用的在内存中定义
        /*auth.inMemoryAuthentication()
                .passwordEncoder(new BCryptPasswordEncoder())
                .withUser("admin").password(new BCryptPasswordEncoder().encode("admin123")).roles("admin");*/
        //这里使用自定义类的方式
        auth.userDetailsService(userDetailsService).passwordEncoder(new BCryptPasswordEncoder());

    }

    @Override
    protected void configure(HttpSecurity http) throws Exception {


        //自定义登录页面
        http.formLogin()
                .loginPage("/login.html")
                .loginProcessingUrl("/login")
                //配置接收的用户名密码参数
                .usernameParameter("username")
                .passwordParameter("password")
                //登陆成功后调转的请求
                .defaultSuccessUrl("/index").permitAll();

        //关闭csrf功能:跨站请求伪造,默认只能通过post方式提交logout请求
        http.csrf().disable();

        http.authorizeRequests()
                //permitAll()的意思就是放行,这里除了登录页放行,其他的都需要认证
                .antMatchers("/","/login").permitAll()
                //赋权,指定目录下的页面需要特定角色 这里我把admin权限设置的比较高,也能访问role1的页面
                .antMatchers("/admin/2").hasAnyAuthority("admin")
                .antMatchers("/role1/1").hasAnyAuthority("admin,role1");

    }
}
TestController.java
package com.example.springsecurity.controller;

import org.springframework.stereotype.Controller;
import org.springframework.web.bind.annotation.RequestMapping;
import org.springframework.web.bind.annotation.ResponseBody;

@Controller
public class TestController {


    @RequestMapping(value="/hello")
    @ResponseBody
    public String hello(){


        return "hello";
    }

    @RequestMapping("role1/1")
    public String role1Page(){


        return "role1/1";
    }

    @RequestMapping("admin/2")
    public String adminPage(){


        return "admin/2";
    }

    @RequestMapping(value="/")
    public String test1(){


        return "login";
    }

    @RequestMapping("login")
    public String login(){


        return "login";
    }

    @RequestMapping("index")
    public String index(){


        System.out.println("logging...");
        return "index";
    }
}
UserDetailService.java
package com.example.springsecurity.service;

import org.springframework.security.core.GrantedAuthority;
import org.springframework.security.core.authority.AuthorityUtils;
import org.springframework.security.core.userdetails.User;
import org.springframework.security.core.userdetails.UserDetails;
import org.springframework.security.core.userdetails.UserDetailsService;
import org.springframework.security.core.userdetails.UsernameNotFoundException;
import org.springframework.security.crypto.bcrypt.BCryptPasswordEncoder;
import org.springframework.stereotype.Service;

import java.util.List;

@Service("userDetailsService")
public class UserDetailService implements UserDetailsService {


    @Override
    public UserDetails loadUserByUsername(String s) throws UsernameNotFoundException {


        //这里设定角色
        /*List<GrantedAuthority> authList = AuthorityUtils.commaSeparatedStringToAuthorityList("admin");
        return new User("admin",new BCryptPasswordEncoder().encode("admin123"),authList);*/
        List<GrantedAuthority> authList = AuthorityUtils.commaSeparatedStringToAuthorityList("role1");
        return new User("role1",new BCryptPasswordEncoder().encode("123"),authList);
    }
}
②html类
index.html
<!DOCTYPE html>
<html lang="en">
<head>
    <meta charset="UTF-8">
    <title>Title</title>
</head>
<body>
    登录成功!
    <br/>
    <a href="/role1/1">role1 </a>
    <br/>
    <a href="/admin/2">admin </a>
</body>
</html>
login.thml
<!DOCTYPE html>
<html xmlns="http://www.w3.org/1999/xhtml" xmlns:th="http://www.thymeleaf.org"
      xmlns:sec="http://www.thymeleaf.org/thymeleaf-extras-springsecurity3">
<head>
    <title>Spring Security Example </title>
</head>
<body>
<div th:if="${param.error}">
    用户名或密码不正确。
</div>

<form th:action="@{/login}" method="post">
    <div><label> 用户名 : <input type="text" name="username"/> </label></div>
    <div><label> 密码::<input type="password" name="password"/> </label></div>
    <div><input type="submit" value="提交"/></div>
</form>
</body>
</html>
1.html
<!DOCTYPE html>
<html xmlns="http://www.w3.org/1999/xhtml" xmlns:th="http://www.thymeleaf.org"
      xmlns:sec="http://www.thymeleaf.org/thymeleaf-extras-springsecurity3">
<head>
    <title>Spring Security Example </title>
</head>
<body>
        role1 Page
</body>
</html>
2.html
<!DOCTYPE html>
<html xmlns="http://www.w3.org/1999/xhtml" xmlns:th="http://www.thymeleaf.org"
      xmlns:sec="http://www.thymeleaf.org/thymeleaf-extras-springsecurity3">
<head>
    <title>Spring Security Example </title>
</head>
<body>
        admin Page
</body>
</html>
③其他(pom文件没有修改)
application.yml
spring:
    thymeleaf:
      #模板的模式,支持 HTML, XML TEXT JAVASCRIPT
      mode: HTML5
      #开发配置为false,避免修改模板还要重启服务器
      cache: false
④测试
第一步:UserDetailService 中使用role1的用户名及密码
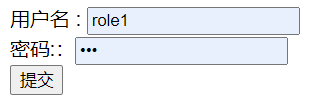
然后登录
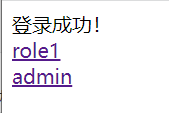
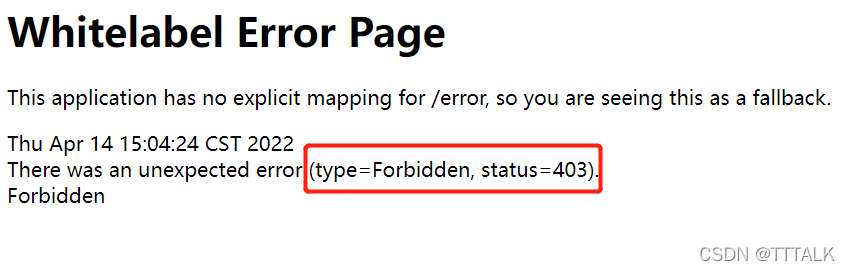
点击role1,可以进入;但是点击admin,显示403,没权限访问
第二步:UserDetailService 中使用admin的用户名及密码,修改如下图
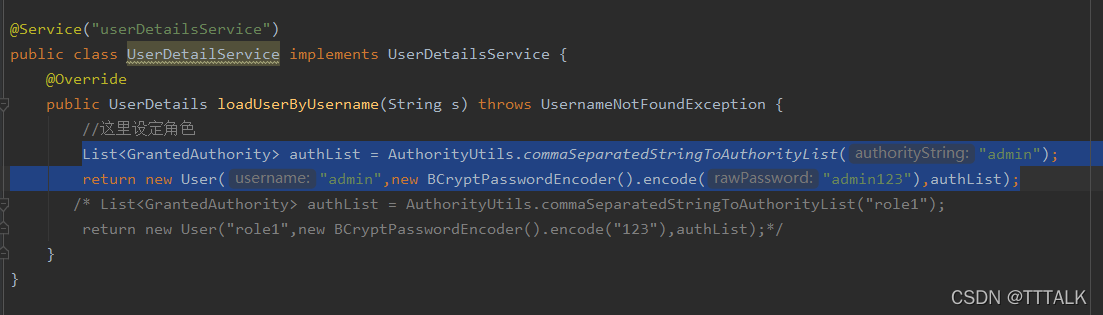
然后重启,按照上面的步骤再操作一次(用户名密码要用admin的),admin的页面可以进去。
2) SpringSecurity + Oauth2 + redis
1.Oauth2介绍
(1)概念:是用于REST/APIs的代理授权框架,它指定了将长期的令牌替换为短期的令牌的策略;
(2)特性:基于令牌Token的授权,在无需暴露用户密码的情况下,使应用有获取用户资源的权限;
(3)使用场景:常用于APP、第三方服务的授权,如使用微信授权第三方应用系统;
(4)有四种模式:密码模式(不推荐)、授权码模式(常用)、简化模式、客户端模式。
2.SpringCloudSecurity + Oauth2实践
(1)不使用redis的用法
pom.xml:
<dependency>
            <groupId>org.springframework.boot</groupId>
            <artifactId>spring-boot-starter-web</artifactId>
        </dependency>

        <!--spring security 依赖-->
        <dependency>
            <groupId>org.springframework.boot</groupId>
            <artifactId>spring-boot-starter-security</artifactId>
        </dependency>

        <!--页面模板-->
        <dependency>
            <groupId>org.springframework.boot</groupId>
            <artifactId>spring-boot-starter-thymeleaf</artifactId>
        </dependency>

        <dependency>
            <groupId>org.springframework.boot</groupId>
            <artifactId>spring-boot-starter-test</artifactId>
            <scope>test</scope>
        </dependency>

        <dependency>
            <groupId>org.springframework.boot</groupId>
            <artifactId>spring-boot-starter-security</artifactId>
        </dependency>
        <dependency>
            <groupId>org.springframework.security.oauth</groupId>
            <artifactId>spring-security-oauth2</artifactId>
            <version>2.3.3.RELEASE</version>
        </dependency>

        <!--高版本JDK缺少的jax相关jar包(大于1.8)-->
        <dependency>
            <groupId>javax.xml.bind</groupId>
            <artifactId>jaxb-api</artifactId>
            <version>2.3.0</version>
        </dependency>
        <dependency>
            <groupId>com.sun.xml.bind</groupId>
            <artifactId>jaxb-impl</artifactId>
            <version>2.3.0</version>
        </dependency>
        <dependency>
            <groupId>com.sun.xml.bind</groupId>
            <artifactId>jaxb-core</artifactId>
            <version>2.3.0</version>
        </dependency>
        <dependency>
            <groupId>javax.activation</groupId>
            <artifactId>activation</artifactId>
            <version>1.1.1</version>
        </dependency>

        <!-- redis  -->
        <dependency>
            <groupId>org.springframework.boot</groupId>
            <artifactId>spring-boot-starter-data-redis</artifactId>
            <exclusions>
                <exclusion>
                    <groupId>io.lettuce</groupId>
                    <artifactId>lettuce-core</artifactId>
                </exclusion>
            </exclusions>
        </dependency>
        <dependency>
            <groupId>redis.clients</groupId>
            <artifactId>jedis</artifactId>
        </dependency>
授权服务器AuthorizationServerConfig :
package com.example.testsecurity.config;

import org.springframework.beans.factory.annotation.Autowired;
import org.springframework.context.annotation.Bean;
import org.springframework.context.annotation.Configuration;
import org.springframework.data.redis.connection.RedisConnectionFactory;
import org.springframework.security.authentication.AuthenticationManager;
import org.springframework.security.core.Authentication;
import org.springframework.security.core.AuthenticationException;
import org.springframework.security.core.userdetails.UserDetailsService;
import org.springframework.security.crypto.bcrypt.BCryptPasswordEncoder;
import org.springframework.security.crypto.password.PasswordEncoder;
import org.springframework.security.oauth2.config.annotation.configurers.ClientDetailsServiceConfigurer;
import org.springframework.security.oauth2.config.annotation.web.configuration.AuthorizationServerConfigurerAdapter;
import org.springframework.security.oauth2.config.annotation.web.configuration.EnableAuthorizationServer;
import org.springframework.security.oauth2.config.annotation.web.configurers.AuthorizationServerEndpointsConfigurer;
import org.springframework.security.oauth2.config.annotation.web.configurers.AuthorizationServerSecurityConfigurer;
import org.springframework.security.oauth2.provider.token.TokenStore;
import org.springframework.security.oauth2.provider.token.store.redis.RedisTokenStore;

@Configuration
@EnableAuthorizationServer
public class AuthorizationServerConfig extends AuthorizationServerConfigurerAdapter {


    // 该对象用来支持 password 模式
    @Autowired
    AuthenticationManager authenticationManager;

    // 该对象用来将令牌信息存储到内存中
    @Autowired(required = false)
    TokenStore inMemoryTokenStore;

    // 该对象将为刷新token提供支持
    @Autowired
    UserDetailsService userDetailsService;

    // 指定密码的加密方式
    @Bean
    PasswordEncoder passwordEncoder() {


        // 使用BCrypt强哈希函数加密方案(密钥迭代次数默认为10)
        return new BCryptPasswordEncoder();
    }

    // 该对象用来将令牌信息存储到Redis中
    @Autowired
    RedisConnectionFactory redisConnectionFactory;


    // 配置 password 授权模式
    @Override
    public void configure(ClientDetailsServiceConfigurer clients)
            throws Exception {


        clients.inMemory()
                .withClient("client1")
                // 该client允许的授权类型 authorization_code,password,refresh_token
                .authorizedGrantTypes("authorization_code","password", "refresh_token")
                .accessTokenValiditySeconds(1800) // 配置access_token的过期时间
                .resourceIds("hello") //配置资源id
                .scopes("all")
                .secret(passwordEncoder().encode("123"));
    }

    @Override
    public void configure(AuthorizationServerEndpointsConfigurer endpoints) {


        endpoints.tokenStore(inMemoryTokenStore) //配置令牌的存储(这里存放在内存中)
        //endpoints.tokenStore(new RedisTokenStore(redisConnectionFactory)) //配置令牌的存储(这里存放在redis中)
                .authenticationManager(authenticationManager)
                .userDetailsService(userDetailsService);
    }

    @Override
    public void configure(AuthorizationServerSecurityConfigurer security) {


        // 表示支持 client_id 和 client_secret 做登录认证
        security.allowFormAuthenticationForClients();
    }
}
资源服务器ResourceServerConfig :
package com.example.testsecurity.config;

import org.springframework.context.annotation.Configuration;
import org.springframework.security.config.annotation.web.builders.HttpSecurity;
import org.springframework.security.oauth2.config.annotation.web.configuration.EnableResourceServer;
import org.springframework.security.oauth2.config.annotation.web.configuration.ResourceServerConfigurerAdapter;
import org.springframework.security.oauth2.config.annotation.web.configurers.ResourceServerSecurityConfigurer;

@Configuration
@EnableResourceServer
public class ResourceServerConfig extends ResourceServerConfigurerAdapter {


    @Override
    public void configure(ResourceServerSecurityConfigurer resources) {


        resources.resourceId("hello") // 配置资源id,这里的资源id和授权服务器中的资源id一致
                .stateless(true); // 设置这些资源仅基于令牌认证
    }

    // 配置 URL 访问权限
    @Override
    public void configure(HttpSecurity http) throws Exception {


        http.authorizeRequests()
                .antMatchers("/admin/**").hasRole("admin")
                .antMatchers("/role1/**").hasRole("role1")
                .anyRequest().authenticated();
    }
}
security配置:
package com.example.testsecurity.config;

import org.springframework.context.annotation.Bean;
import org.springframework.context.annotation.Configuration;
import org.springframework.security.authentication.AuthenticationManager;
import org.springframework.security.config.annotation.authentication.builders.AuthenticationManagerBuilder;
import org.springframework.security.config.annotation.web.builders.HttpSecurity;
import org.springframework.security.config.annotation.web.configuration.WebSecurityConfigurerAdapter;
import org.springframework.security.core.userdetails.UserDetailsService;
import org.springframework.security.crypto.bcrypt.BCryptPasswordEncoder;

@Configuration
public class WebSecurityConfig extends WebSecurityConfigurerAdapter {


    @Bean
    @Override
    public AuthenticationManager authenticationManagerBean() throws Exception {


        return super.authenticationManagerBean();
    }

    @Bean
    @Override
    protected UserDetailsService userDetailsService() {


        return super.userDetailsService();
    }

    @Override
    protected void configure(AuthenticationManagerBuilder auth) throws Exception {


        auth.inMemoryAuthentication()
                .withUser("admin")
                .password(new BCryptPasswordEncoder().encode("123"))
                .roles("admin")
                .and()
                .withUser("role1")
                .password(new BCryptPasswordEncoder().encode("123"))
                .roles("role1");
    }

    @Override
    protected void configure(HttpSecurity http) throws Exception {


        http.antMatcher("/oauth/**").authorizeRequests()
                //放行授权的请求
                .antMatchers("/oauth/**").permitAll()
                //关闭csrf功能:跨站请求伪造,默认只能通过post方式提交logout请求
                .and().csrf().disable();
    }
}
测试入口HelloController:
package com.example.testsecurity.controller;

import org.springframework.web.bind.annotation.GetMapping;
import org.springframework.web.bind.annotation.RestController;

@RestController
public class HelloController {


    @GetMapping("/admin/hello")
    public String admin() {


        return "hello admin";
    }

    @GetMapping("/role1/hello")
    public String user() {


        return "hello role1";
    }

    @GetMapping("/hello")
    public String hello() {


        return "hello";
    }
}
测试:注意这里必须用postman,首先要获取access_token
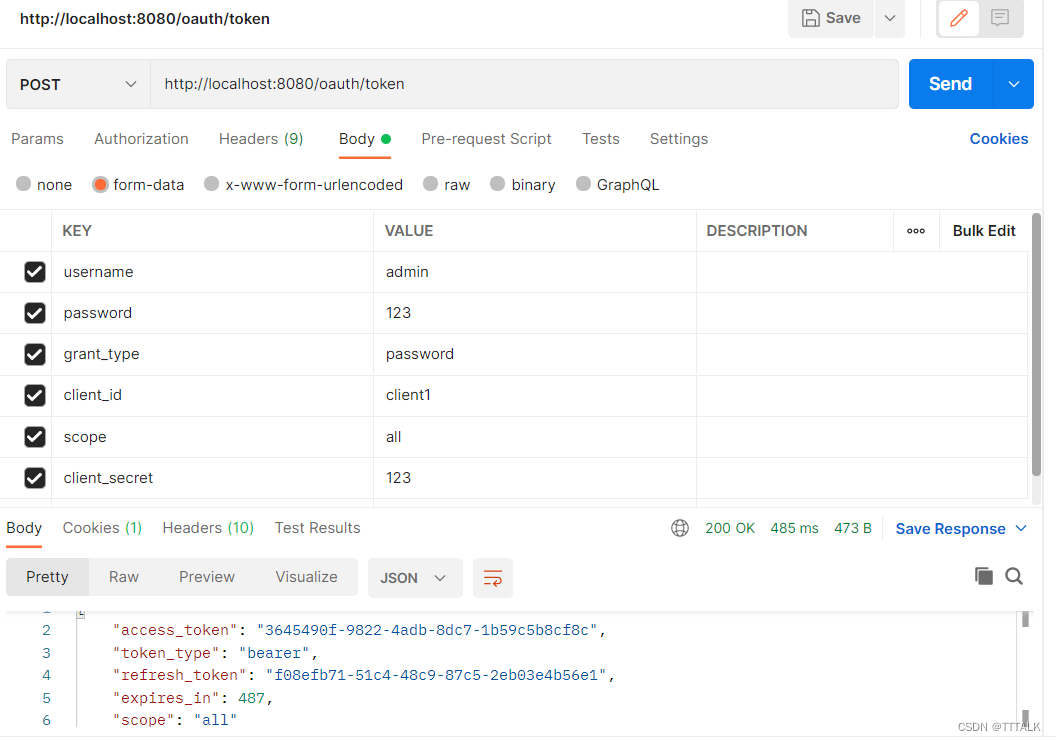
然后通过accesstoken可以访问对应的资源,其中除role1的资源外其他资源均可访问
http://localhost:8080/hello?access_token=3645490f-9822-4adb-8dc7-1b59c5b8cf8c
http://localhost:8080/admin/hello?access_token=3645490f-9822-4adb-8dc7-1b59c5b8cf8c
http://localhost:8080/role1/hello?access_token=3645490f-9822-4adb-8dc7-1b59c5b8cf8c
(2)使用redis:
1.首先我们了解下使用redis储存token的好处:
token具有时效性,redis有过期功能处理有优势;
可以在多个服务之间实现令牌共享
redis安装使用参考:https://blog.csdn.net/tttalk/article/details/122042206?spm=1001.2014.3001.5501
2.使用代码
application.yml:
spring:
  redis:
    timeout: 6000ms
    # redis数据库索引(默认为0)
    database: 0
    host: 192.168.124.128
    port: 6379
    lettuce:
      pool:
        max-active: 1000 #连接池最大连接数(使用负值表示没有限制)
        max-idle: 10 #连接池中的最大空闲连接
        min-idle: 3 #连接池中的最小空闲连接
        max-wait: -1 #连接池最大阻塞等待时间(使用负值表示没有限制)
    password: 123
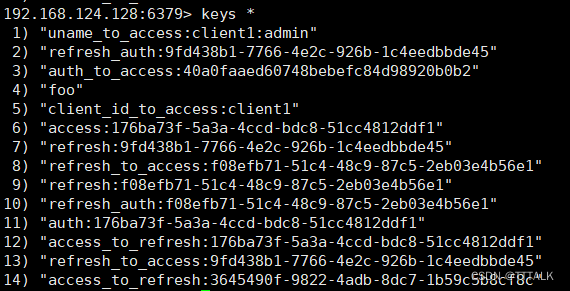
在AuthorizationServerConfig中将令牌放到redis中:
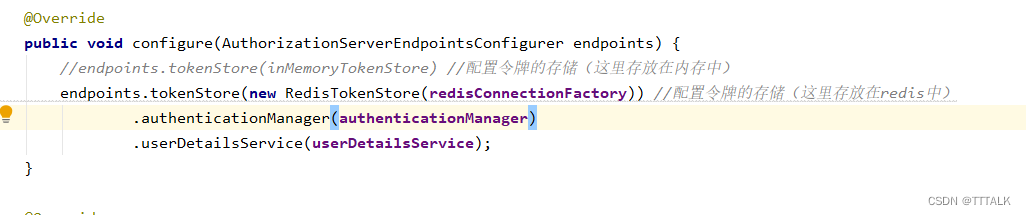
重新进行access_token的请求,可以看到已经存在redis中了