首先登录阿里云 免费试用–对象存储OSS --点击立即试用,可以有三个月的免费试用

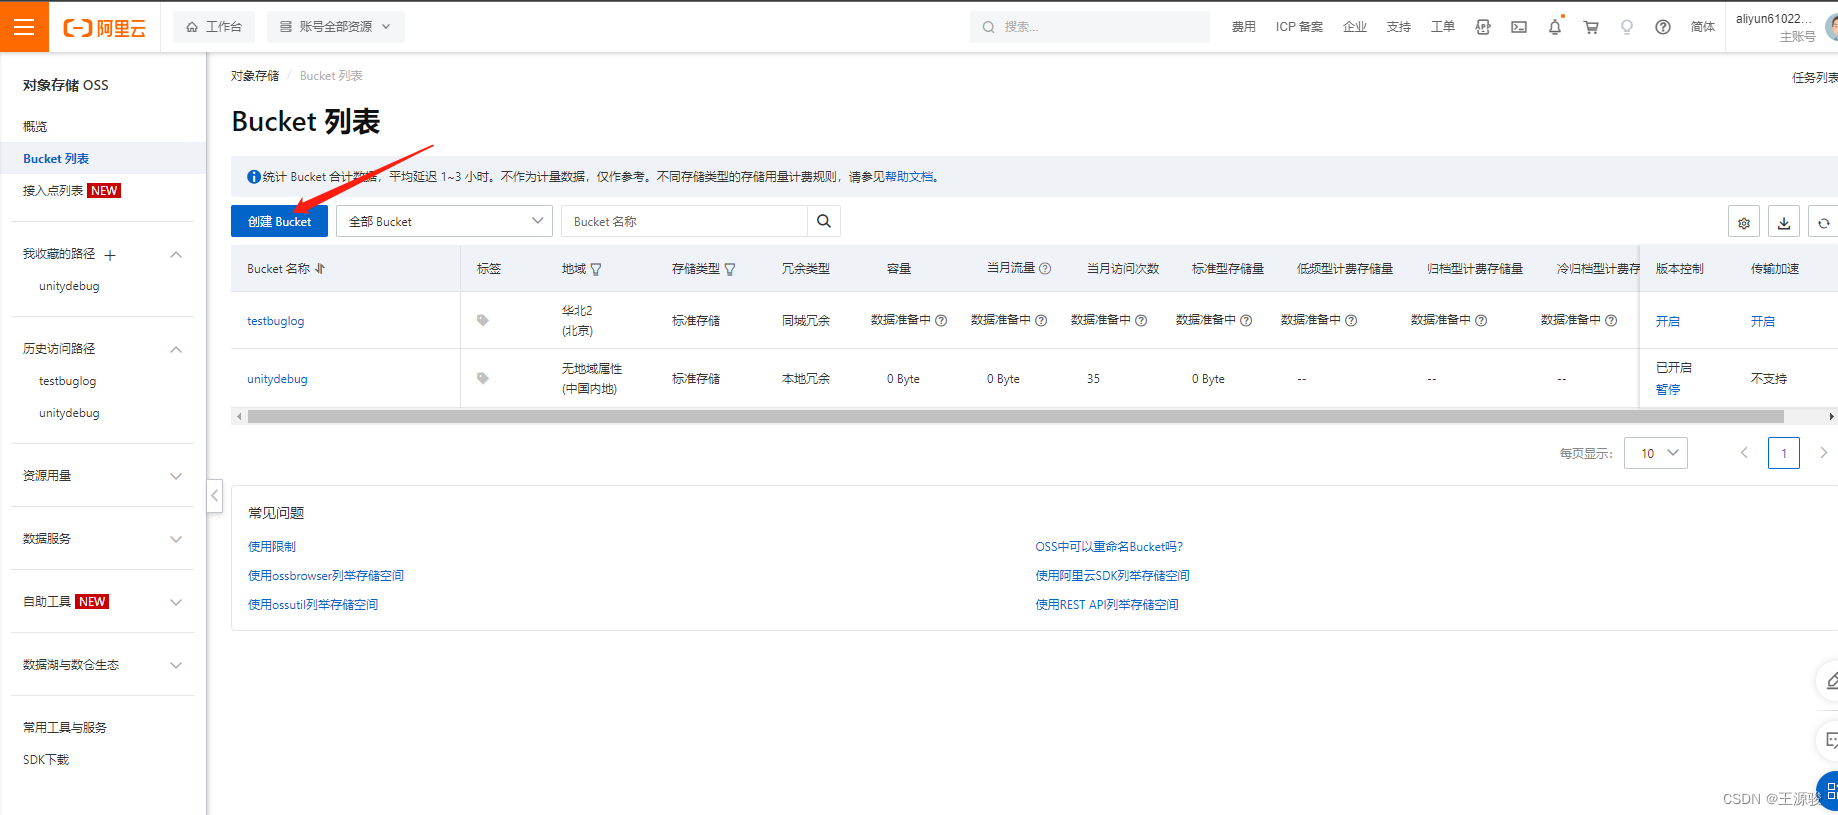
创建Buket

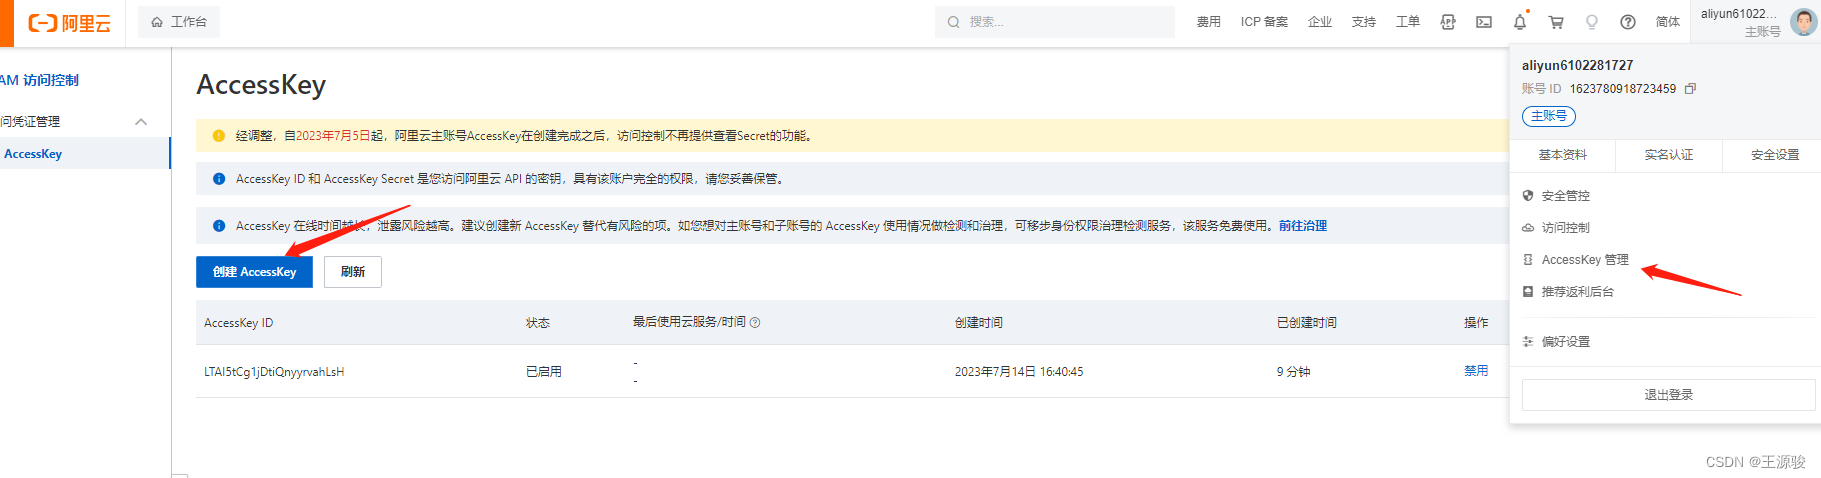
新建AccessKey ,新建完成后,会有一个CSV文件,下载下来,里面有Key ,代码中需要用到
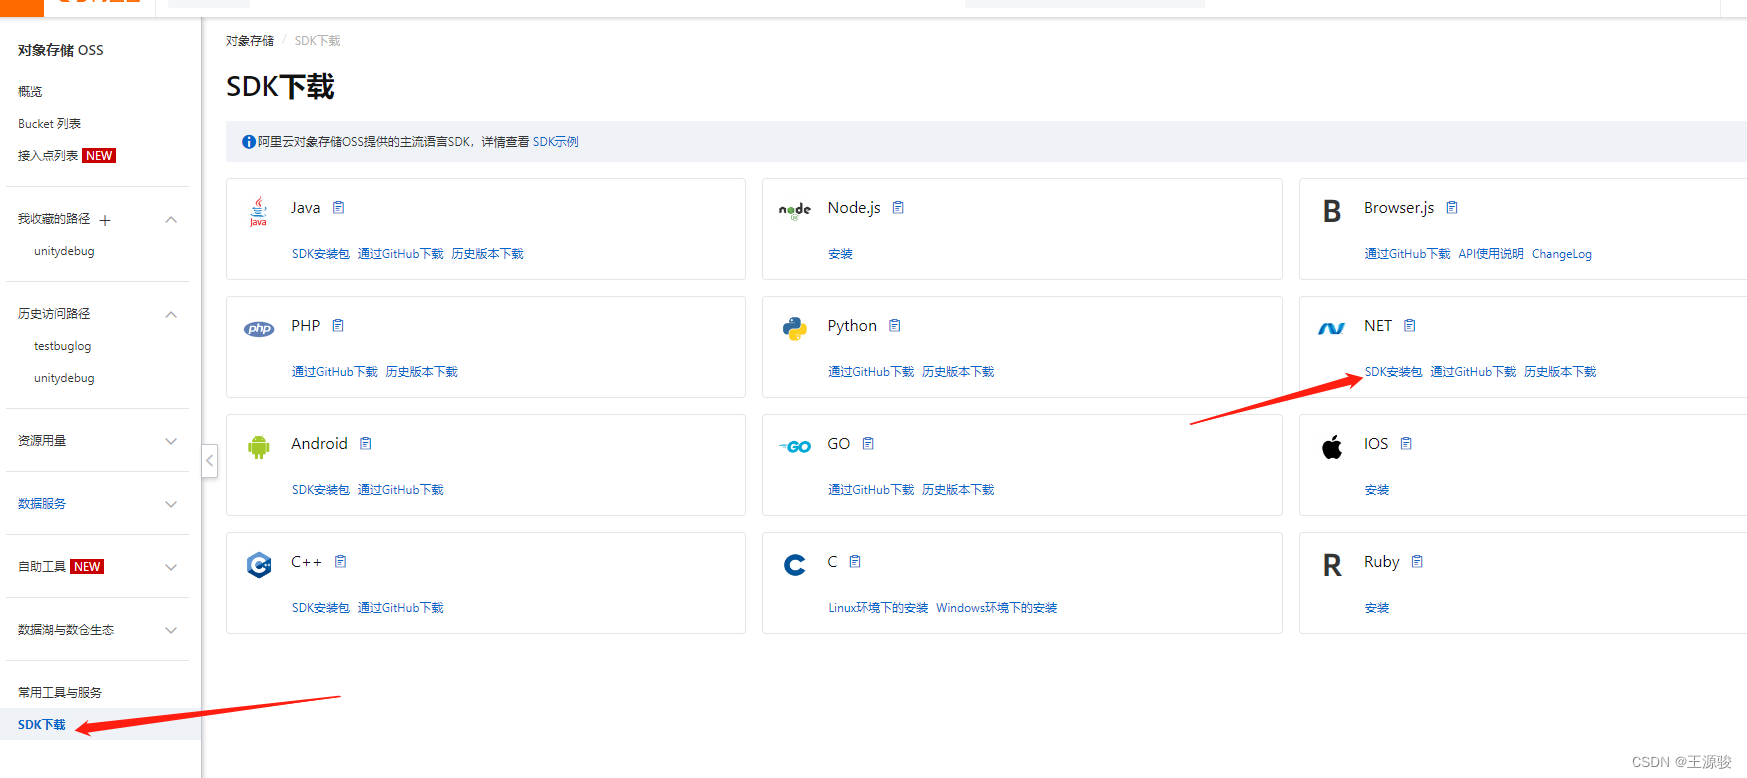
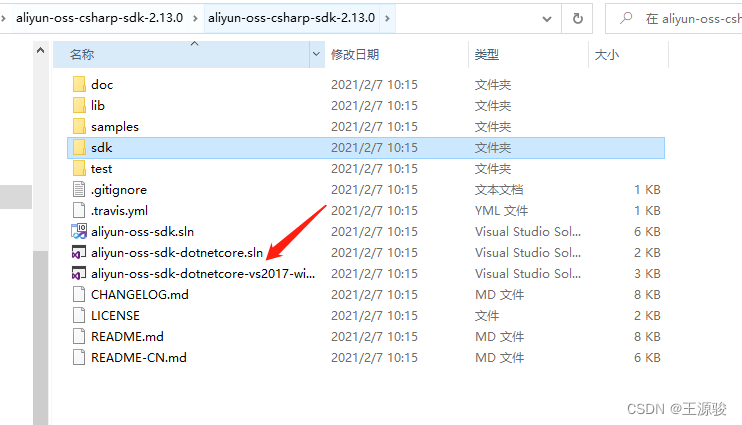
下载SDK
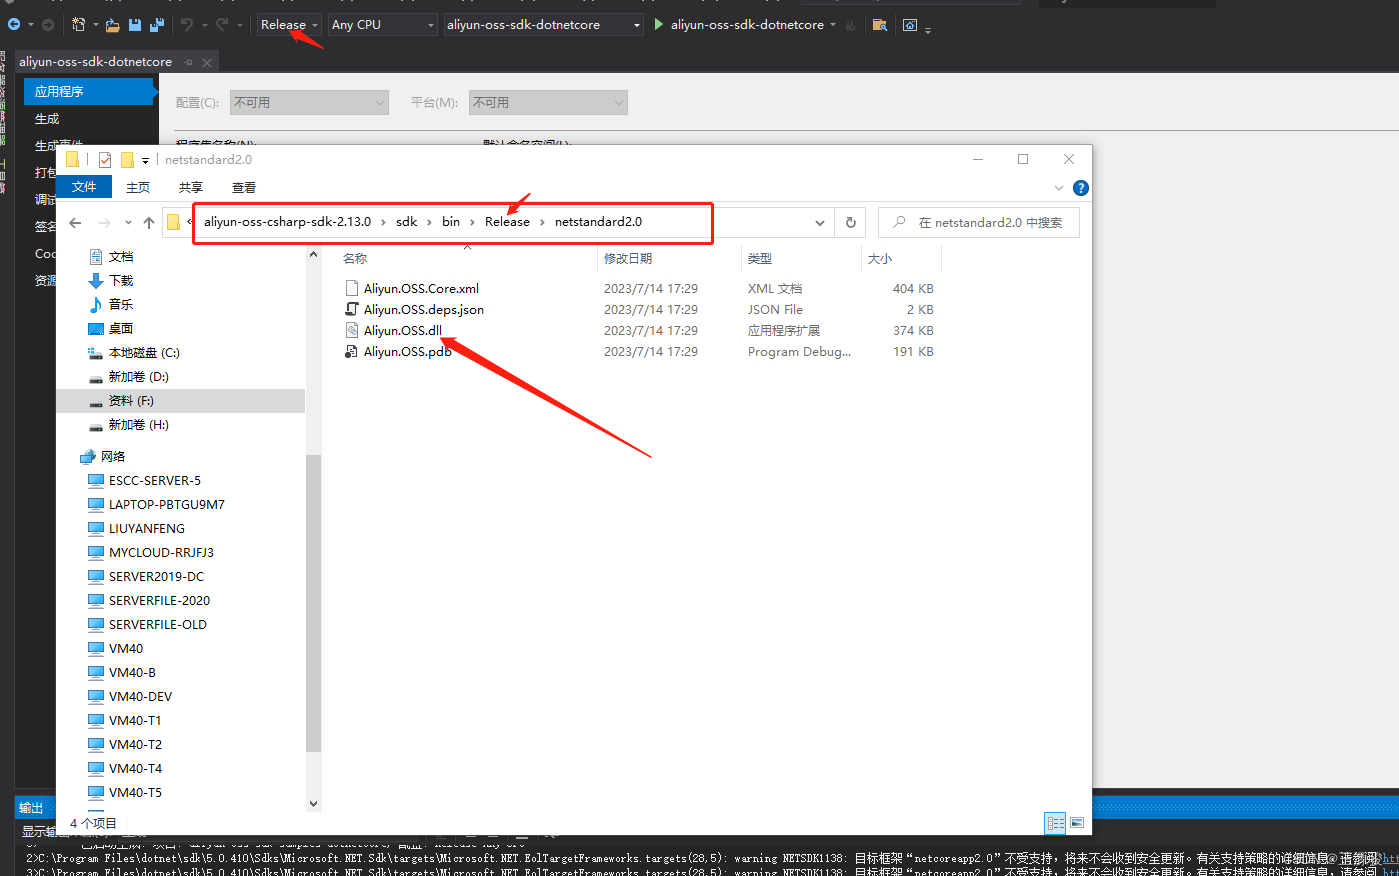
双击打开 sln文件,使用VS打开,右键项目–属性,修改程序集名字,然后点击生成–生成解决方案,这时 sdk/bin 里面就会有 Aliyun.OSS.dll了 然后把这个dll拖入到Unity 工程里即可(任意位置都可以),

剩下的就写代码了
using Aliyun.OSS;
using Aliyun.OSS.Common;
using System;
using System.Collections;
using System.Collections.Generic;
using System.IO;
using System.Threading;
using UnityEngine;
using UnityEngine.UI;
public class AliyunOSSWithProcess : MonoBehaviour
{
// UI 的相关组件变量
public Image processImage;
// Oss对象,文件路径,文件名变量
private OssClient ossClient;
string filePath;
string fileName;
// 进度的回调函数,以及线程,进度变量
Action<float> PutProcessCallback;
Thread putLocalThread;
float putProcess = 0;
// Start is called before the first frame update
void Start()
{
// new OssClient 对象
ossClient = new OssClient(Config.EndPoint, Config.AccessKeyId, Config.AccessKeySecret);
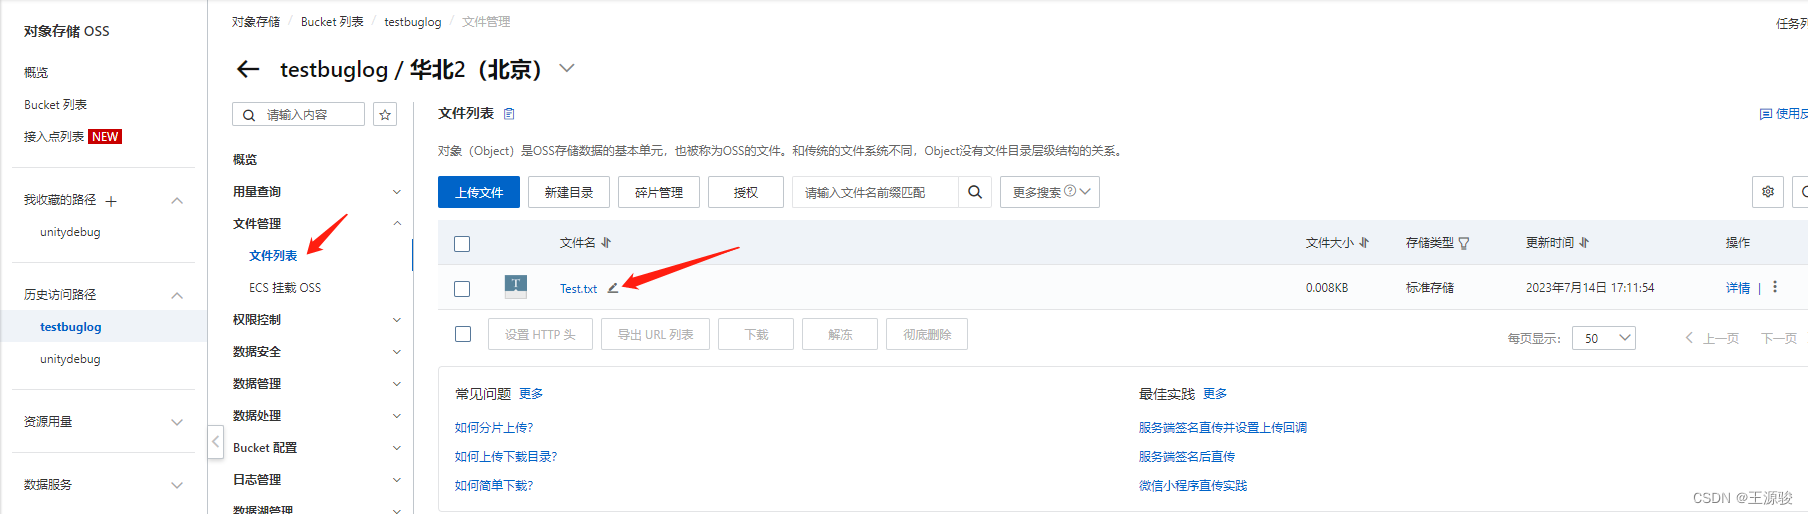
string path = Application.streamingAssetsPath + "/Test.txt";
// 多线程进度上传函数
PutObjectWithProcessByThread((process) =>
{
Debug.Log("上传进度为:" + process);
},
path,
Path.GetFileName(path.Trim()));
}
// Update is called once per frame
void Update()
{
// 因为 UI 只能在主线程中,所以在 Update 中监控进度给 UI
if (PutProcessCallback != null) {
processImage.fillAmount = putProcess;
if (putProcess >= 1) {
PutProcessCallback = null;
putProcess = 0;
}
}
}
/// <summary>
/// 子线程上传文件,避免卡顿
/// </summary>
/// <param name="action"></param>
/// <param name="filePath"></param>
/// <param name="fileName"></param>
public void PutObjectWithProcessByThread(Action<float> action, string filePath, string fileName)
{
PutProcessCallback = action;
this.fileName = fileName;
this.filePath = filePath;
putLocalThread = new Thread(PutObjectWithProcess);
putLocalThread.Start();
}
/// <summary>
/// 获取上传进度
/// </summary>
void PutObjectWithProcess()
{
try
{
using (var fs = File.Open(filePath, FileMode.Open))
{
PutObjectRequest putObjectRequest = new PutObjectRequest(Config.Bucket, fileName, fs);
putObjectRequest.StreamTransferProgress += PutStreamProcess;
ossClient.PutObject(putObjectRequest);
Debug.Log("带有进度本地文件上传成功");
}
}
catch (OssException e)
{
Debug.Log("带有进度本地文件数据上传错误:" + e);
}
catch (Exception e)
{
Debug.Log("带有进度本地文件数据上传错误:" + e);
}
finally
{
// 终止进程
putLocalThread.Abort();
}
}
/// <summary>
/// 文件上传流事件
/// </summary>
/// <param name="sender"></param>
/// <param name="args"></param>
void PutStreamProcess(object sender, StreamTransferProgressArgs args)
{
putProcess = (args.TransferredBytes * 100 / args.TotalBytes) / 100.0f;
PutProcessCallback.Invoke(putProcess);
}
}
public class Config
{
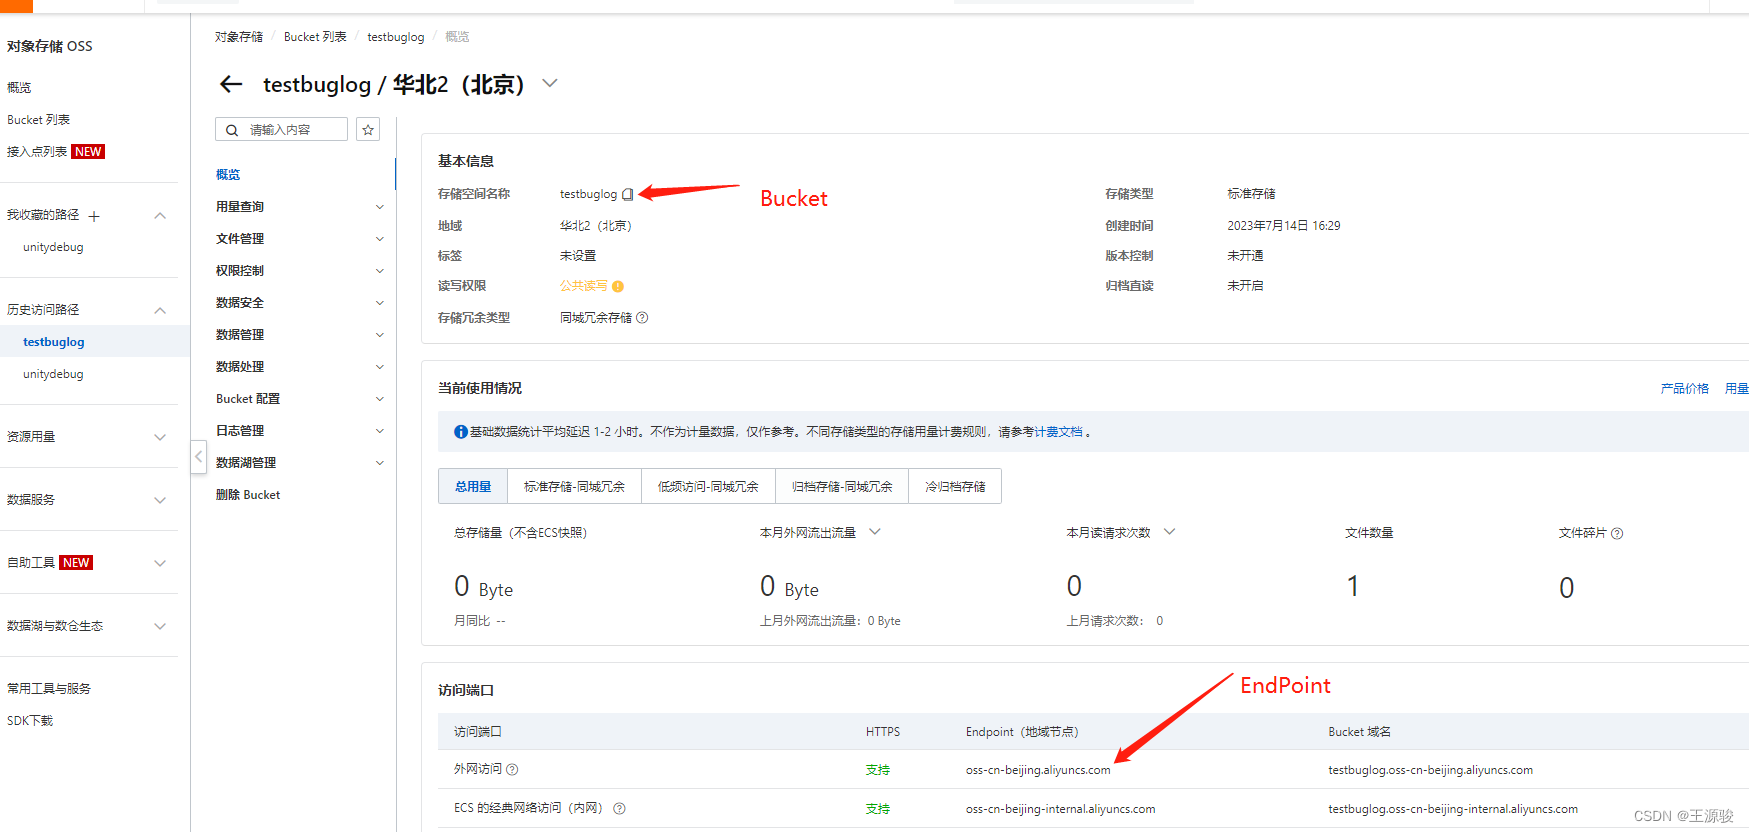
public const string AccessKeyId = "在上面提到的CSV文件里";
public const string AccessKeySecret = "在上面提到的CSV文件里";
public const string EndPoint = "oss-cn-beijing.aliyuncs.com";
public const string Bucket = "testbuglog";
}
然后脚本挂到场景里,创建一个Image, 文件路径已经要带后缀名,然后运行就可以了,