
文章目录
前言
本文是对Cyber RT的学习记录,文章可能存在不严谨、不完善、有缺漏的部分,还请大家多多指出。
课程地址: https://apollo.baidu.com/community/course/outline/329?activeId=10200
更多还请参考:
[1] Apollo星火计划学习笔记——第三讲(Apollo Cyber RT 模块详解与实战)https://blog.csdn.net/sinat_52032317/article/details/126924375
[2] 【Apollo星火计划】—— Cyber基础概念|通信机制
https://blog.csdn.net/sinat_52032317/article/details/131878429?spm=1001.2014.3001.5501
[3] 第一章:Cyber RT基础入门与实践https://apollo.baidu.com/community/article/1093
[4] 第二章:Cyber RT通信机制解析与实践https://apollo.baidu.com/community/article/1094
[5] 第三章:Component组件认知与实践https://apollo.baidu.com/community/article/1103
说明
本文1-4节以此文中的example-component例子为基础;
TEST1.Component案例和TEST2.TimerComponent案例基于星火计划中的例子相关代码整理
链接: https://pan.baidu.com/s/1ENgXE4yQ1v4nJRjcfZtd8w?pwd=ht4c 提取码: ht4c
0. 前置知识
这部分内容详见第三章:Component组件认知与实践https://apollo.baidu.com/community/article/1103
0.1 什么是 Component
Apollo 的 Cyber RT 框架是基于组件(component)概念来构建的。每个组件都是 Cyber RT 框架的一个特定的算法模块, 处理一组输入并产生其输出数椐,配合Component对应的DAG文件,Cyber RT可实现对该模块的动态加载。
0.2 Component 的类型
Component分为2类:一类是消息驱动的Component(即消息到来时,才会调用proc()),第二类是定时调用的TimerComponent。定时调度模块没有绑定消息收发,需要用户自己创建reader来读取消息,如果需要读取多个消息,可以创建多个reader。
Component提供消息融合机制,最多可以支持 4 路消息融合,当 从多个 Channel 读取数据的时候,以第一个 Channel 为主 Channel。当主 Channel 有消息到达,Cyber RT会调用 Component的Proc()进行一次数据处理。TimerComponent不提供消息融合,与Component不同的是TimeComponent的 Proc()函数不是基于主channel触发执行,而是由系统定时调用,开发者可以在配置文件中确定调用的时间间隔。
0.3 Component 的创建及工作流程
1、包含头文件;
2、定义一个类,并继承Component或者time Component;根据Component功能需要,选择继承Component或者继承TimeComponent。
3、重写Init()和Proc()函数;Init()函数在 Component 被加载的时候执行,用来对Component进行初始化,如Node创建,Node Reader创建,Node Writer创建等等;Proc()函数是实现该Component功能的核心函数,其中实现了该Component的核心逻辑功能。
4、在Cyber RT中注册该Component,只有在Cyber RT中注册了该Component,Cyber RT才能对其进行动态的加载,否则,cyber RT动态加载时报错。
见2.1头文件部分具体实现
0.4 Component 如何被加载
在 Cyber RT中,所有的 Comopnent 都会被编译成独立的.so文件,Cyber RT 会根据开发者提供的配置文件,按需加载对应的 Component。所以,开发者需要为.so文件编写好配置文.dag文件和.launch文件,以供 Cyber RT正确的加载执行Component。
Cyber RT提供两种加载启动Component的方式,分别是使用cyber_launch工具启动
component对应的launch文件,和使用mainboard启动component对应的dag文件。
cyber_launch工具可以启动dag文件和二进制文件,而mainboard执行启动dag文件。
0.5 Component 的优点
- 可以通过配置 launch 文件加载到不同进程中,可以弹性部署。
- 可以通过配置 DAG 文件来修改其中的参数配置,调度策略,Channel 名称。
- 可以接收多个种类的消息,并有多种消息融合策略。
- 接口简单,并且可以被 Cyber 框架动态地加载,更加灵活易用。
要创建并启动一个算法组件,需要通过以下 4 个步骤:
- 初始化组件的目录结构
- 实现组件类
- 设置配置文件
- 启动组件
1. 初始化组件的目录结构
以example-component 为例.(以下案例请先暂时忽略timer部分)
├── BUILD
├── cyberfile.xml
├── example-components.BUILD
├── example.dag
├── example.launch
├── proto
│   ├── BUILD
│   └── examples.proto
└── src
    ├── BUILD
    ├── common_component_example.cc
    ├── common_component_example.h
    ├── timer_common_component_example.cc
    └── timer_common_component_example.h
- C++头文件: common_component_example.h
- C++源文件: common_component_example.cc
- Bazel 构建文件: BUILD
- DAG 文件: examples.dag
- Launch 文件: examples.launch
2. 实现组件类
2.1 头文件
实现common_component_example.h有以下步骤:
- 包含头文件
- 基于模板类
Component派生出组件类CommonComponentSample - 在派生类中定义自己的
Init和Proc函数。Proc需要指定输入数椐类型。 - 使用
CYBER_REGISTER_COMPONENT宏定义把组件类注册成全局可用。
#pragma once
#include <memory>

#include "cyber/component/component.h"
#include "example_components/proto/examples.pb.h"
  //  CommonComponentSample类不能被继承
class CommonComponentSample : public apollo::cyber::Component<example::proto::Driver, example::proto::Driver> {


   //有几个数据就有几个example::proto::Driver
    public:
    bool Init() override;
    bool Proc(const std::shared_ptr<example::proto::Driver>& msg0,
        const std::shared_ptr<example::proto::Driver>& msg1) override;
};
CYBER_REGISTER_COMPONENT(CommonComponentSample)
模板类Component的定义在cyber/component/component.h中.
template <typename M0 = NullType, typename M1 = NullType,
          typename M2 = NullType, typename M3 = NullType>
class Component : public ComponentBase {


 public:
  Component() {

    }
  ~Component() override {

    }

  /**
   * @brief init the component by protobuf object.
   *
   * @param config which is defined in 'cyber/proto/component_conf.proto'
   *
   * @return returns true if successful, otherwise returns false
   */
  bool Initialize(const ComponentConfig& config) override;
  bool Process(const std::shared_ptr<M0>& msg0, const std::shared_ptr<M1>& msg1,
               const std::shared_ptr<M2>& msg2,
               const std::shared_ptr<M3>& msg3);

 private:
  /**
   * @brief The process logical of yours.
   *
   * @param msg0 the first channel message.
   * @param msg1 the second channel message.
   * @param msg2 the third channel message.
   * @param msg3 the fourth channel message.
   *
   * @return returns true if successful, otherwise returns false
   */
  virtual bool Proc(const std::shared_ptr<M0>& msg0,
                    const std::shared_ptr<M1>& msg1,
                    const std::shared_ptr<M2>& msg2,
                    const std::shared_ptr<M3>& msg3) = 0;
};
由代码可见,Component类最多接受4个模板参数,每个模板参数均表示一种输入的消息类型,这些消息在Proc函数中被周期性地接收并处理.
2.2 源文件
对于源文件 common_component_example.cc, Init 和 Proc 这两个函数需要实现。
#include "example_components/src/common_component_example.h"

bool CommonComponentSample::Init() {


    AINFO << "Commontest component init";
    return true;
}

bool CommonComponentSample::Proc(const std::shared_ptr<example::proto::Driver>& msg0,
                                    const std::shared_ptr<example::proto::Driver>& msg1) {


    AINFO << "Start common component Proc [" << msg0->msg_id() << "] ["
        << msg1->msg_id() << "]";
    return true;
}
2.3 创建 BUILD 文件
可见基于common_component_example_lib库最终生成了一个共享库文件libcommon_component_example.so,而该共享库通过Cyber RT调度程序mainboard动态加载运行
load("//tools:cpplint.bzl", "cpplint")
load("@rules_cc//cc:defs.bzl", "cc_binary", "cc_library")

package(default_visibility = ["//visibility:public"])

cc_binary(
    name = "libcomponent_examples.so",
    linkshared = True,
    linkstatic = True,
    deps = [
        ":timer_common_component_example_lib",
        ":common_component_example_lib"
    ],
)

cc_library(
    name = "timer_common_component_example_lib",
    srcs = ["timer_common_component_example.cc"],
    hdrs = ["timer_common_component_example.h"],
    visibility = ["//visibility:private"],
    alwayslink = True,
    deps = [
        "//cyber",
        "//example_components/proto:examples_cc_proto",
    ],
)

cc_library(
    name = "common_component_example_lib",
    srcs = ["common_component_example.cc"],
    hdrs = ["common_component_example.h"],
    visibility = ["//visibility:private"],
    alwayslink = True,
    deps = [
        "//cyber",
        "//example_components/proto:examples_cc_proto",
    ],
)

cpplint()
3. 设置配置文件
3.1 配置 DAG 文件
DAG配置文件是Cyber RT调度程序mainboard动态加载模块的最终配置文件.在 DAG 依赖配置文件 (例如 example.dag) 中配置如下项:
- Channel names: 输入 Channel 的名称
- Library path: 该组件生成的共享库路径
- Class name: 此组件类的名称
# Define all coms in DAG streaming.
    module_config {
# 共享库文件路径
    module_library : "/opt/apollo/neo/packages/example-components-dev/latest/lib/libcomponent_examples.so"
    timer_components {
        class_name : "TimerCommonComponentSample"
        config {
            name : "CommonComponent"
            # 消息频率:10ms
            interval : 10
        }
      }

    components {
        # 组件类名称,一定不能写错,否则mainboard无法动态创建CommonComponentSample组件对象
        class_name : "CommonComponentSample"
        config {
             # 模块名
            name : "example"
            readers {
                channel: "/apollo/channel_example/driver_test"
            }
            readers {
                channel: "/apollo/channel_example/driver_test2"
            }
        }
      }
    }
3.2 配置 Launch 启动文件
在 launch 启动文件中 (example.launch), 配置下面的项:
- name 组件的名字
- dag_conf 上一步配置的 DAG 文件路径
- process_name 运行组件时的进程名
<cyber>
    <component>
        <name>common</name>
        <dag_conf>/apollo/cyber/examples/common_component_example/common.dag</dag_conf>
        <process_name>common</process_name>
    </component>
</cyber>
4. 启动组件
通过下面的命令来编译组件:
buildtool build --packages example_components
运行(推荐)
cyber_launch start example_components/example.launch
或者运行
mainboard -d example_components/example.dag
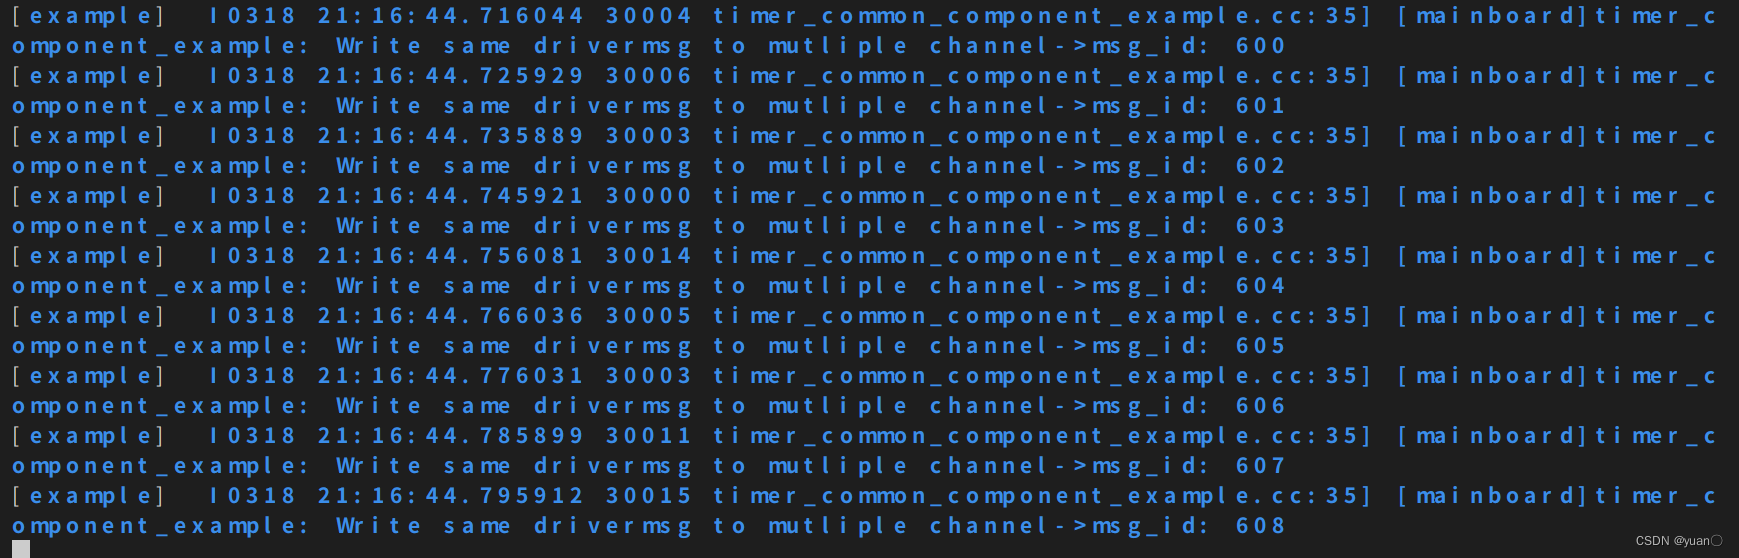
[example]  I0318 21:31:18.881103  7620 timer_common_component_example.cc:35] [mainboard]timer_component_example: Write same drivermsg to mutliple channel->msg_id: 95
[example]  I0318 21:31:18.890939  7613 common_component_example.cc:26] [mainboard]Start common component Proc [96] [95][95]
[example]  I0318 21:31:18.890986  7612 timer_common_component_example.cc:35] [mainboard]timer_component_example: Write same drivermsg to mutliple channel->msg_id: 96
[example]  I0318 21:31:18.900918  7621 common_component_example.cc:26] [mainboard]Start common component Proc [97] [96][96]
[example]  I0318 21:31:18.900992  7618 timer_common_component_example.cc:35] [mainboard]timer_component_example: Write same drivermsg to mutliple channel->msg_id: 97
[example]  I0318 21:31:18.911090  7617 common_component_example.cc:26] [mainboard]Start common component Proc [98] [97][97]
ps: 日志中也可以查看到上述信息.
同时在另一个终端开启Cyber_monitor
cyber_monitor

我对上述代码做了些调整,增加了一个channel(这里是红色的,表明未有数据流入,之后会分析原因).
对TimerComponent代码进行更改之后,编译之后,再进行cyber_launch.这时,可以看到cyber_monitor中第三个部分有数据的流入.

当Component与TimerComponent分别占据不同channel时,启动cyber_monitor应该如下图所示.

TEST1.Component案例
本节将实现一个简单的 Component 实例,实现两路channel消息融合,并将两路channel消息编号依次打印到屏幕终端。
创建目录结构
参照如下目录进行创建
apollo_workspace
|--test
   |--common_component_example
   |  |--BUILD    // bazel编译文件
   |  |--driver_writer.cc    // 向driver channel中写消息的writer
   |  |--chatter_writer.cc   // 向chatter channel中写消息的writer
   |  |--common_component_example.cc    // component 源文件
   |  |--common_component_example.h    // component 头文件
   |  |--common.dag    // component 配置文件
   |  |--common.launch    // component launch文件
   |--proto
      |--BUILD    // protobuf的编译文件
      |--examples.proto    // protobuf
   |--BUILD
   |--test.BUILD
   |--cyberfile.xml
proto文件及BUILD文件
proto
syntax = "proto2";  // proto版本

package apollo.cyber.test.proto; // proto命名空间

message Chatter {


  optional uint64 timestamp = 1;
  optional uint64 lidar_timestamp = 2;
  optional uint64 seq = 3;
  optional bytes content = 4;
};

message Driver {


  optional string content = 1;
  optional uint64 msg_id = 2;
  optional uint64 timestamp = 3;
};
BUILD
load("@rules_proto//proto:defs.bzl", "proto_library")
load("@rules_cc//cc:defs.bzl", "cc_proto_library")
load("//tools:python_rules.bzl", "py_proto_library")

package(default_visibility = ["//visibility:public"])

cc_proto_library(
    name = "examples_cc_proto",
    deps = [
        ":examples_proto",
    ],
)

proto_library(
    name = "examples_proto",
    srcs = ["examples.proto"],
)
load("@rules_proto//proto:defs.bzl", "proto_library") proto相关编译规则
load("@rules_cc//cc:defs.bzl", "cc_proto_library") c++相关编译规则
load("//tools:python_rules.bzl", "py_proto_library") python相关编译规则,apollo中自定义的
driver/chatter writer的实现
chatter_writer.cc
#include "cyber/cyber.h"
#include "test/common_component_example/proto/examples.pb.h" //自己的路径
#include "cyber/time/rate.h"
#include "cyber/time/time.h"

using apollo::cyber::Rate;
using apollo::cyber::Time;
using apollo::cyber::test::proto::Chatter; //命名空间

int main(int argc, char *argv[]) {


  apollo::cyber::Init(argv[0]);
  auto talker_node = apollo::cyber::CreateNode("chatter_writer");
  // 创建writer,写Chatter类型消息
  auto talker = talker_node->CreateWriter<Chatter>("/apollo/chatter");
  // 创建计时器
  Rate rate(3.0);

  std::string content("apollo_prediction");
  while (apollo::cyber::OK()) {


    static uint64_t seq = 0;
    auto msg = std::make_shared<Chatter>();  // Chatter的智能指针
    msg->set_timestamp(Time::Now().ToNanosecond()); // 时间戳
    msg->set_lidar_timestamp(Time::Now().ToNanosecond());
    msg->set_seq(seq++);
    msg->set_content(content + std::to_string(seq - 1));
    talker->Write(msg); // 将数据写入channel
    AINFO << "/apollo/chatter sent message, seq=" << (seq - 1) << ";";
    // 每秒3次
    rate.Sleep();
  }
  return 0;
}
driver_writer.cc
#include "cyber/cyber.h"
#include "test/common_component_example/proto/examples.pb.h"
#include "cyber/time/rate.h"
#include "cyber/time/time.h"

using apollo::cyber::Rate;
using apollo::cyber::Time;
using apollo::cyber::test::proto::Driver;

int main(int argc, char *argv[]) {


  // 初始化cyber
  apollo::cyber::Init(argv[0]);
  // 创建node
  auto talker_node = apollo::cyber::CreateNode("driver_writer");
  // 创建writer,写Driver类型消息
  auto talker = talker_node->CreateWriter<Driver>("/apollo/driver");
  // 新建计时器
  Rate rate(2.0);
  std::string content("apollo_test");
  while (apollo::cyber::OK()) {


    static uint64_t seq = 0;
    auto msg = std::make_shared<Driver>();
    // 创建一个Driver类型的消息并填入数据
    msg->set_timestamp(Time::Now().ToNanosecond());
    msg->set_msg_id(seq++);
    msg->set_content(content + std::to_string(seq - 1));
    talker->Write(msg);
    AINFO << "/apollo/driver sent message, seq=" << (seq - 1) << ";";
    // 每秒2次
    rate.Sleep();
  }
  return 0;
}
component实现
common_component_example.h
#pragma once
#include <memory>

#include "cyber/component/component.h"
#include "test/common_component_example/proto/examples.pb.h"

using apollo::cyber::Component;
using apollo::cyber::ComponentBase;
using apollo::cyber::test::proto::Driver;
using apollo::cyber::test::proto::Chatter;

// 有两个消息源,继承以Driver和Chatter为参数的Component模版类
class CommonComponentSample : public Component<Driver, Chatter> {


 public:
  bool Init() override;
  // Proc() 函数的两个参数表示两个channel中的最新的信息
  bool Proc(const std::shared_ptr<Driver>& msg0,
            const std::shared_ptr<Chatter>& msg1) override;
};
// 将CommonComopnentSample注册在cyber中
CYBER_REGISTER_COMPONENT(CommonComponentSample)
可以看到,此处继承了Component<Driver, Chatter>来读取两个 channel 中的两种格式的消息,Proc()函数参数与其相对应。以此类推,如果继承了Component<Driver, Chatter, Driver>,则Proc()函数应为 Proc(const std::shared_ptr<Driver>& msg0, const std::shared_ptr<Chatter>& msg1, const std::shared_ptr<Driver>& msg2)
common_component_example.cc
#include "test/common_component_example/com_component_test/common_component_example.h"
// 在加载component时调用
bool CommonComponentSample::Init() {


  AINFO << "Commontest component init";
  return true;
}
// 在主channel,也就是Driver有消息到达时调用
bool CommonComponentSample::Proc(const std::shared_ptr<Driver>& msg0,
                                 const std::shared_ptr<Chatter>& msg1) {


  // 将两个消息的序号格式化输出
  AINFO << "Start common component Proc [" << msg0->msg_id() << "] ["
        << msg1->seq() << "]";
  return true;
}
配置文件
DAG文件
module_config {


    module_library : "/opt/apollo/neo/packages/test-dev/latest/lib/libcommon_component_example.so"
    components {


        class_name : "CommonComponentSample"
        config {


            name : "common"
            readers {


                channel: "/apollo/driver"
            }
            readers {


                channel: "/apollo/chatter"
            }
        }
    }
 }
module_library:指向Component编译后得到的.so文件的存放目录。
*components:表示 Component 的类型,除了components外,还有一种是timer_component,将会在下个例子中讲解。class_name:表示被加载的Component的类名,在这个例子中是CommonComponentSample。name:表示被加载的类在 Cyber 中的标识名。readers:表示 Component 所读取的 Channel ,与其继承的基类读取的类型一一对应。
launch文件
<cyber>
    <module>
        <name>common</name>
        <dag_conf>/apollo_workspace/test/common_component_example/com_component_test/common.dag</dag_conf>
        <process_name>common</process_name>
    </module>
</cyber>
<name>:表示加载的 Component 在 Cyber 中的标识名,与 dag 文件中的name字段对应。
<dag_conf>:表示 dag 配置文件路径。
<process_name>:表示启动后的线程名,与线程名相同的component 会在此线程中运行。
BUILD文件
BUILD
load("@rules_cc//cc:defs.bzl", "cc_binary", "cc_library")
load("//tools/install:install.bzl", "install", "install_src_files")
load("//tools:cpplint.bzl", "cpplint")

package(default_visibility = ["//visibility:public"])

cc_binary(
    name = "libcommon_component_example.so",
    linkshared = True,
    linkstatic = True,
    deps = [":common_component_example_lib"],
)

cc_library(
    name = "common_component_example_lib",
    srcs = ["common_component_example.cc"],
    hdrs = ["common_component_example.h"],
    visibility = ["//visibility:private"],
    deps = [
        "//cyber",
        "//test/common_component_example/proto:examples_cc_proto",       // 路径按自己的改
    ],
    alwayslink = True,
)

cc_binary(
    name = "driver_writer",
    srcs = ["driver_writer.cc"],
    linkstatic = True,
    deps = [
        "//cyber",
        "//test/common_component_example/proto:examples_cc_proto",
    ],
)

cc_binary(
    name = "chatter_writer",
    srcs = ["chatter_writer.cc"],
    linkstatic = True,
    deps = [
        "//cyber",
        "//test/common_component_example/proto:examples_cc_proto",
            ],
)

filegroup(
    name = "conf",
    srcs = [
        ":common.dag",
        ":common.launch",
    ],
)

install(
    name = "install",
    data = [
        ":conf",
    ],
    runtime_dest = "test/bin",
    library_dest = "test/lib",
    data_dest = "test/common_component_example/conf",
    targets = [
        ":chatter_writer",
        ":driver_writer",
        "libcommon_component_example.so",
    ],
)

install_src_files(
    name = "install_src",
    src_dir = ["."],
    dest = "test/src/common_component_example",
    filter = "*",
)

cpplint()
进行编译
buildtool build -p test/
install关键字:runtime_dest可执行文件位置library_dest库文件位置data_dest.dag/.launch文件的位置
记得修改包管理BUILD文件中的deps.
运行
完成编译后,我们就可以运行 Cyber 并加载 Component了,如上文所说,Cyber 会根据配置文件来加载 Component。Cyber 提供了两种加载 Component 的方法:
方法一、使用mainboard启动:mainboard -d <path/to/dag>,在这个例子中,运行的命令是
mainboard -d test/common_component_example/common.dag
方法二、使用cyber_launch启动:cyber_launch start <path/to/launch>,在这个例子中,运行的命令是
cyber_launch start test/common_component/common.launch
启动三个终端
# 第一个
export GLOG_alsologtostderr=1
./bazel-bin/test/common_component_example/driver_writer
# 第二个
export GLOG_alsologtostderr=1
./bazel-bin/test/common_component_example/chatter_writer
# 第三个
export GLOG_alsologtostderr=1
cyber_launch start test/common_component_example/common.launch
cyber_monitor可以查看相关channel信息

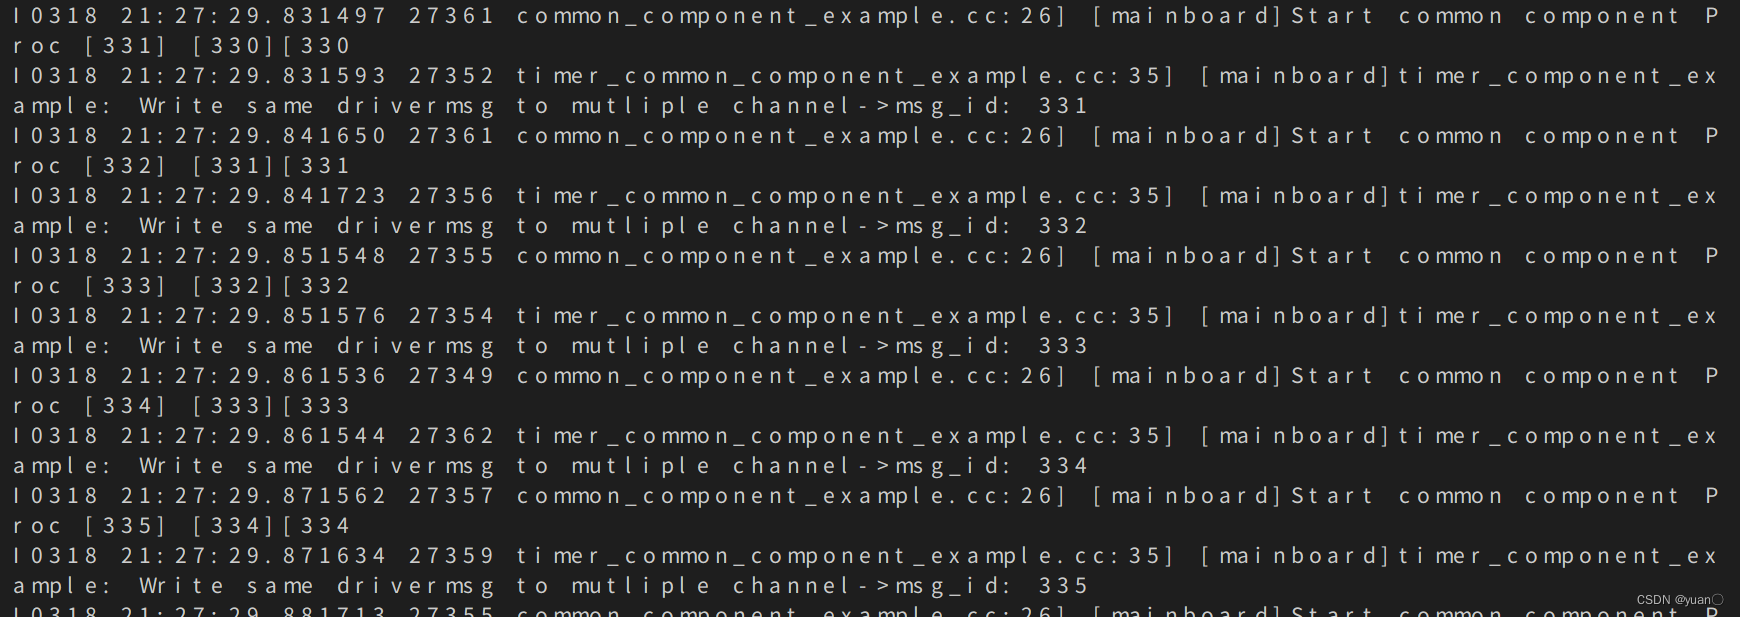
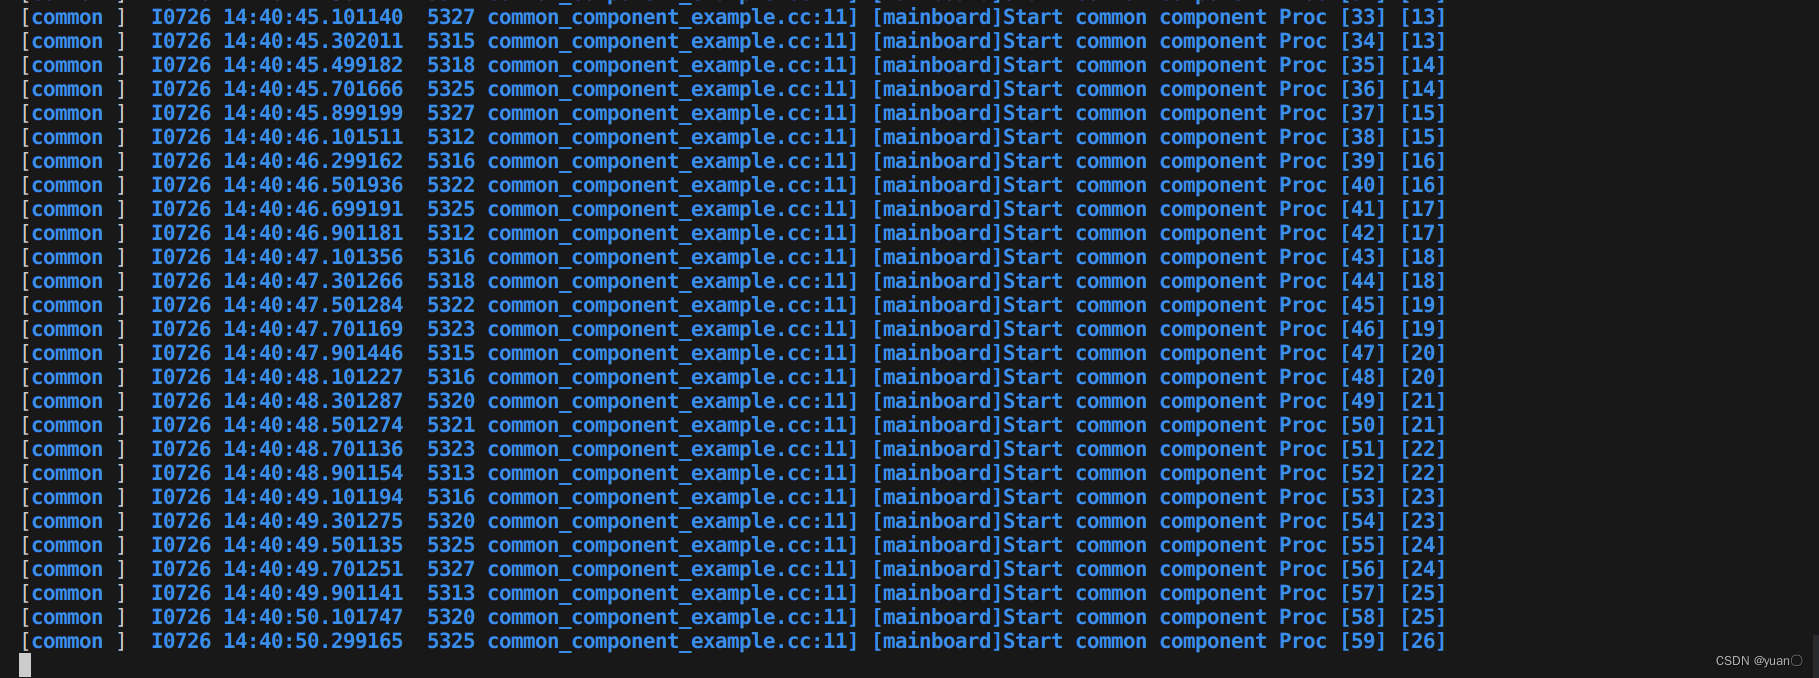
CommonComponentSample每接受到一次主channel信息,执行一次Proc()函数,Proc()函数执行消息融合逻辑依次打印出两路消息的编号到屏幕上。
可以看到CommonComponentSample打印到屏幕上的信息,其中主channel信息(Driver信息)编号是依次递增的,而非主channel信息(Chatter信息)编号会出现缺失或者重复,这是因为component的Proc()函数只有主channel消息到达时才会触发执行,Proc()函数执行时会读取所有融合channel最新消息。
TEST2.TimerComponent案例
在本节中,我们会实现两个TimerComponent,分别是TimerDriverSample和TimerChatterSample,用来替换掉上一个案例中的两个 Writer。
创建目录
apollo_workspace
|--test
   |--timer_component_example
      |--BUILD
      |--timer_chatter.h    // TimerChatterSample 头文件
      |--timer_chatter.cc    // TimerChatterSample 源文件
      |--timer_driver.h    // TimerDriverSample 头文件
      |--timer_driver.cc    // TimerDriverSample 源文件
      |--driver.dag    // TimerDriverSample 配置文件
      |--driver.launch    // TimerDriverSample launch文件
      |--chatter.dag    // TimerChatterSample 配置文件
      |--chatter.launch    // TimerChatterSample launch文件
proto文件及BUILD文件
沿用TEST1中的文件
TimerComponent 实现
timer_chatter.h
#include <memory>
#include "cyber/class_loader/class_loader.h"
#include "cyber/component/component.h"
#include "cyber/component/timer_component.h"
#include "test/common_component_example/proto/examples.pb.h"

using apollo::cyber::Component;
using apollo::cyber::ComponentBase;
using apollo::cyber::TimerComponent;
using apollo::cyber::Writer;
using apollo::cyber::test::proto::Chatter;

class TimerChatterSample : public TimerComponent {


 public:
  bool Init() override;
  bool Proc() override;

 private:
  std::shared_ptr<Writer<Chatter>> chatter_writer_ = nullptr;
};
CYBER_REGISTER_COMPONENT(TimerChatterSample)
- 可以看到,
TimeChatterComponent需要继承TimerComponent基类,代码结构与普通的 Component 几乎相同。 - 不同的是因为没有数据源,所以没有模版参数。
timer_chatter.cc
#include "test/timer_component_example/timer_chatter.h"
#include "cyber/class_loader/class_loader.h"
#include "cyber/component/component.h"
#include "test/common_component_example/proto/examples.pb.h"


bool TimerChatterSample::Init() {


  chatter_writer_ = node_->CreateWriter<Chatter>("/apollo/chatter");
  return true;
}

bool TimerChatterSample::Proc() {


  static int i = 0;
  auto out_msg = std::make_shared<Chatter>();
  out_msg->set_seq(i++);
  chatter_writer_->Write(out_msg);
  AINFO << "timer_chatter: Write chattermsg->"
        << out_msg->ShortDebugString();
  return true;
}
TimerChatter 在 Init()中初始化了 Writer,并在 Proc()中向 Channel 中写信息。
timer_driver.h
#include <memory>
#include "cyber/class_loader/class_loader.h"
#include "cyber/component/component.h"
#include "cyber/component/timer_component.h"
#include "test/common_component_example/proto/examples.pb.h"

using apollo::cyber::Component;
using apollo::cyber::ComponentBase;
using apollo::cyber::TimerComponent;
using apollo::cyber::Writer;
using apollo::cyber::test::proto::Driver;

class TimerDriverSample : public TimerComponent {


 public:
  bool Init() override;
  bool Proc() override;

 private:
  std::shared_ptr<Writer<Driver>> driver_writer_ = nullptr;
};
CYBER_REGISTER_COMPONENT(TimerDriverSample)
timer_driver.cc
#include "test/timer_component_example/timer_driver.h"
#include "cyber/class_loader/class_loader.h"
#include "cyber/component/component.h"
#include "test/common_component_example/proto/examples.pb.h"
bool TimerDriverSample::Init() {


  driver_writer_ = node_->CreateWriter<Driver>("/apollo/driver");
  return true;
}

bool TimerDriverSample::Proc() {


  static int i = 0;
  auto out_msg = std::make_shared<Driver>();
  out_msg->set_msg_id(i++);
  driver_writer_->Write(out_msg);
  AINFO << "timer_driver: Write drivermsg->"
        << out_msg->ShortDebugString();
  return true;
}
配置文件
chatter.dag
module_config {


    module_library : "/opt/apollo/neo/packages/test-dev/latest/lib/libtimer_chatter.so"
    timer_components {


        class_name : "TimerChatterSample"
        config {


            name : "timer_chatter"
            interval : 400
        }
    }
}
- interval:表示 TimerComponent 执行 Proc()的间隔,此配置中为 400 ms 执行一次。
- 因为没有数据融合,所以没有readers字段
- 其余配置和普通 Component 相同
chatter.launch
<cyber>
    <module>
        <name>timer_chatter</name>
        <dag_conf>/opt/apollo/neo/packages/test-dev/latest/timer_component_example/conf/chatter.dag</dag_conf>
        <process_name>timer_chatter</process_name>
    </module>
</cyber>
driver.dag
module_config {
    module_library : "/opt/apollo/neo/packages/test-dev/latest/lib/libtimer_driver.so"
    timer_components {
        class_name : "TimerDriverSample"
        config {
            name : "timer_driver"
            interval : 200
        }
    }
}
driver.launch
<cyber>
    <module>
        <name>timer_driver</name>
        <dag_conf>/opt/apollo/neo/packages/test-dev/latest/timer_component_example/conf/driver.dag</dag_conf>
        <process_name>timer_driver</process_name>
    </module>
</cyber>
BUILD文件
load("@rules_cc//cc:defs.bzl", "cc_binary", "cc_library")
load("//tools/install:install.bzl", "install", "install_src_files")
load("//tools:cpplint.bzl", "cpplint")

package(default_visibility = ["//visibility:public"])

cc_binary(
    name = "libcommon_component_example.so",
    linkshared = True,
    linkstatic = True,
    deps = [":common_component_example_lib"],
)

cc_library(
    name = "common_component_example_lib",
    srcs = ["common_component_example.cc"],
    hdrs = ["common_component_example.h"],
    visibility = ["//visibility:private"],
    deps = [
        "//cyber",
        "//test/common_component_example/proto:examples_cc_proto",
    ],
    alwayslink = True,
)

cc_binary(
    name = "driver_writer",
    srcs = ["driver_writer.cc"],
    linkstatic = True,
    deps = [
        "//cyber",
        "//test/common_component_example/proto:examples_cc_proto",
    ],
)

cc_binary(
    name = "chatter_writer",
    srcs = ["chatter_writer.cc"],
    linkstatic = True,
    deps = [
        "//cyber",
        "//test/common_component_example/proto:examples_cc_proto",
            ],
)

filegroup(
    name = "conf",
    srcs = [
        ":common.dag",
        ":common.launch",
    ],
)

install(
    name = "install",
    data = [
        ":conf",
    ],
    runtime_dest = "test/bin",
    library_dest = "test/lib",
    data_dest = "test/common_component_example/conf",
    targets = [
        ":chatter_writer",
        ":driver_writer",
        "libcommon_component_example.so",
    ],
)

install_src_files(
    name = "install_src",
    src_dir = ["."],
    dest = "test/src/cyberatest",
    filter = "*",
)

cpplint()
记得修改包管理BUILD文件中的deps.
运行
我们实现的两个 TimerComponent 可以用来替代上一个案例中的两个定时写消息的 Writer,启动方法也与上一案例类似,不同的是 TimerComponent 可以通过配置文件配置。
同样开启三个终端
# 第一个
export GLOG_alsologtostderr=1
cyber_launch start test/common_component_example/common.launch
# 第二个
export GLOG_alsologtostderr=1
cyber_launch start test/timer_component_example/driver.launch
# 第三个
export GLOG_alsologtostderr=1
cyber_launch start test/timer_component_example/chatter.launch
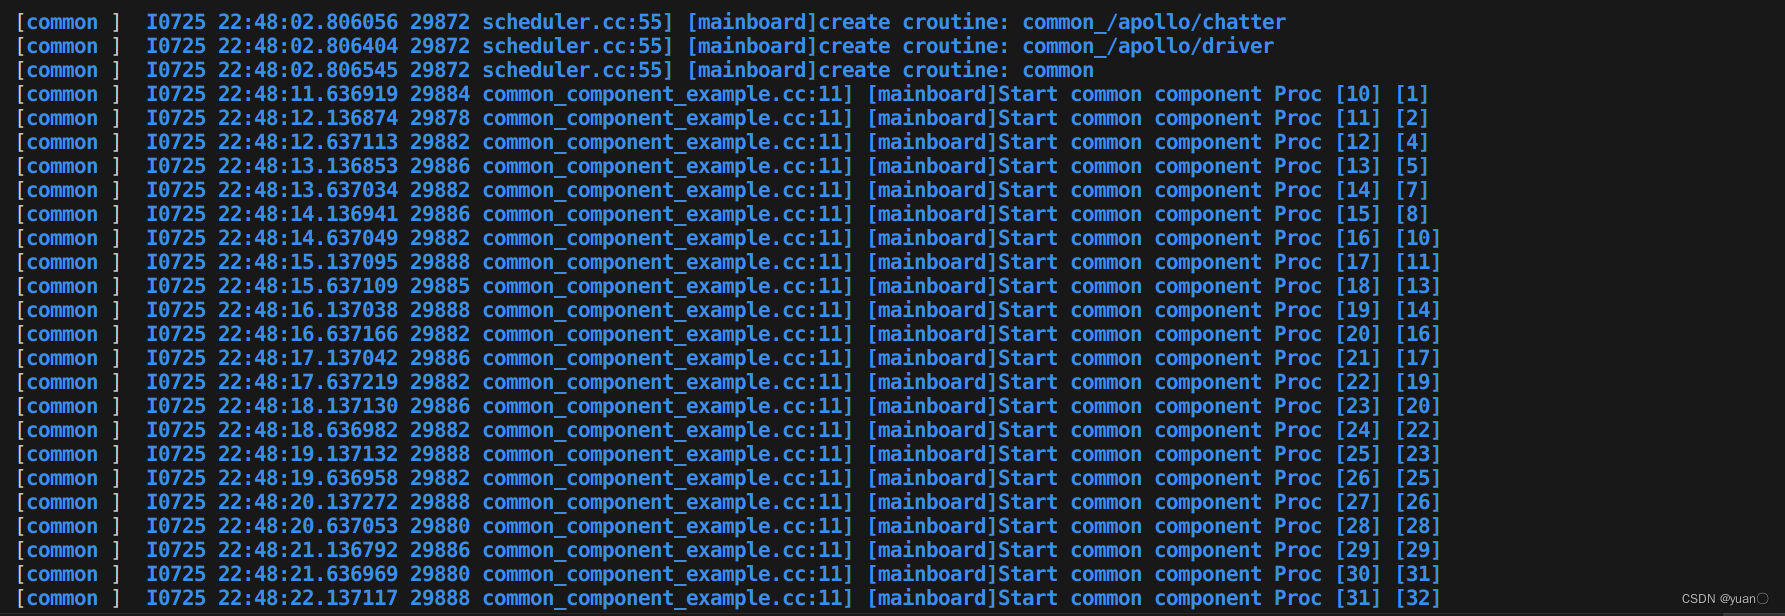
CommonComponentSample每接受到一次主channel信息,执行一次Proc()函数,Proc()函数执行消息融合逻辑依次打印出两路消息的编号到屏幕上。
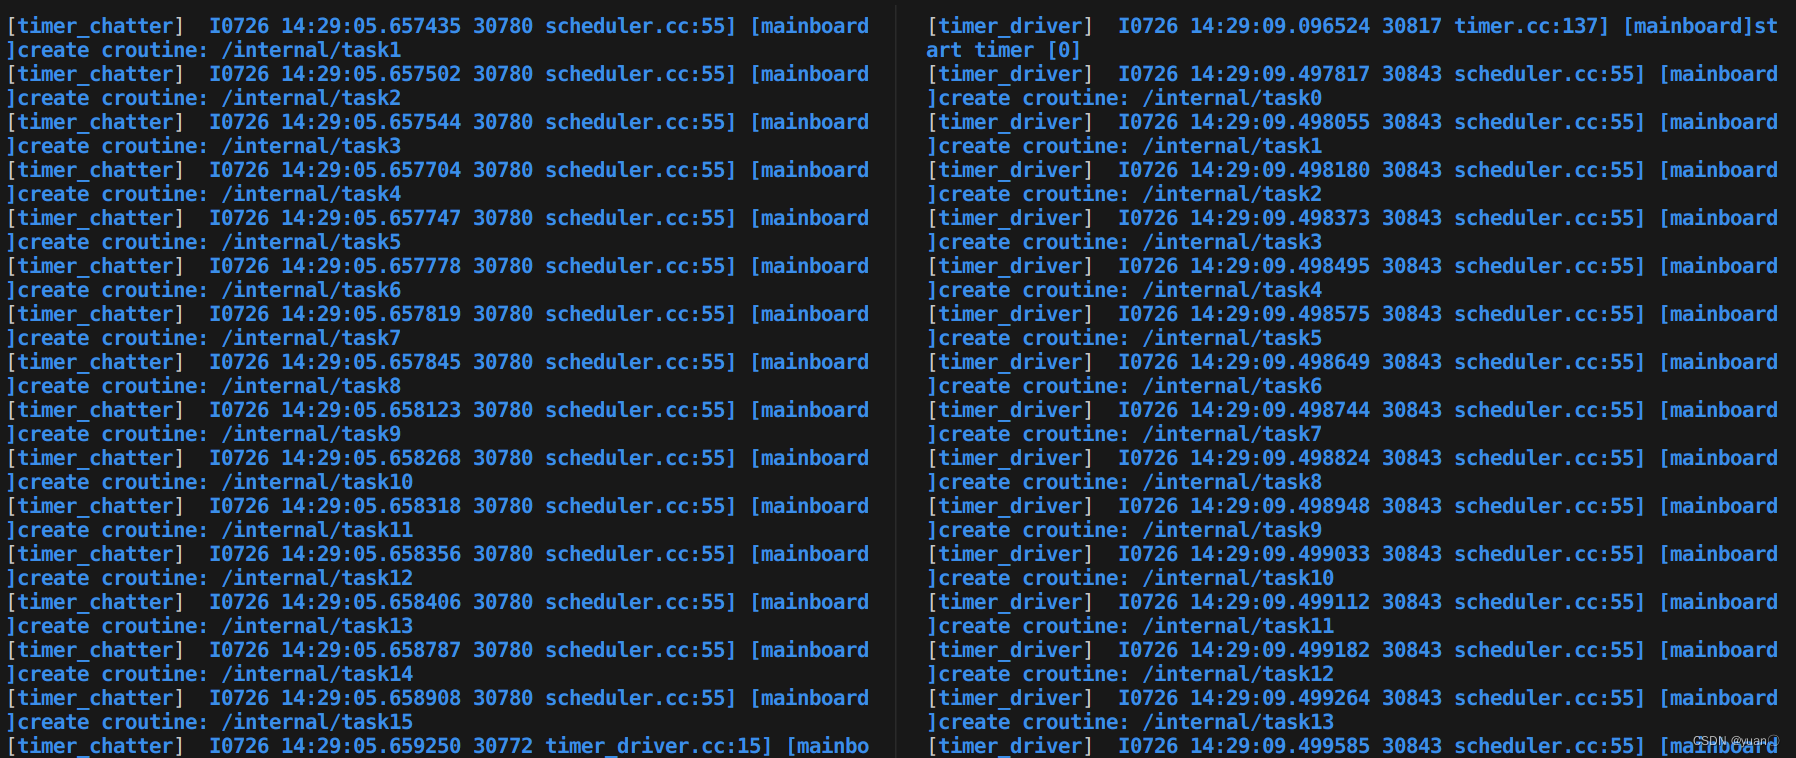
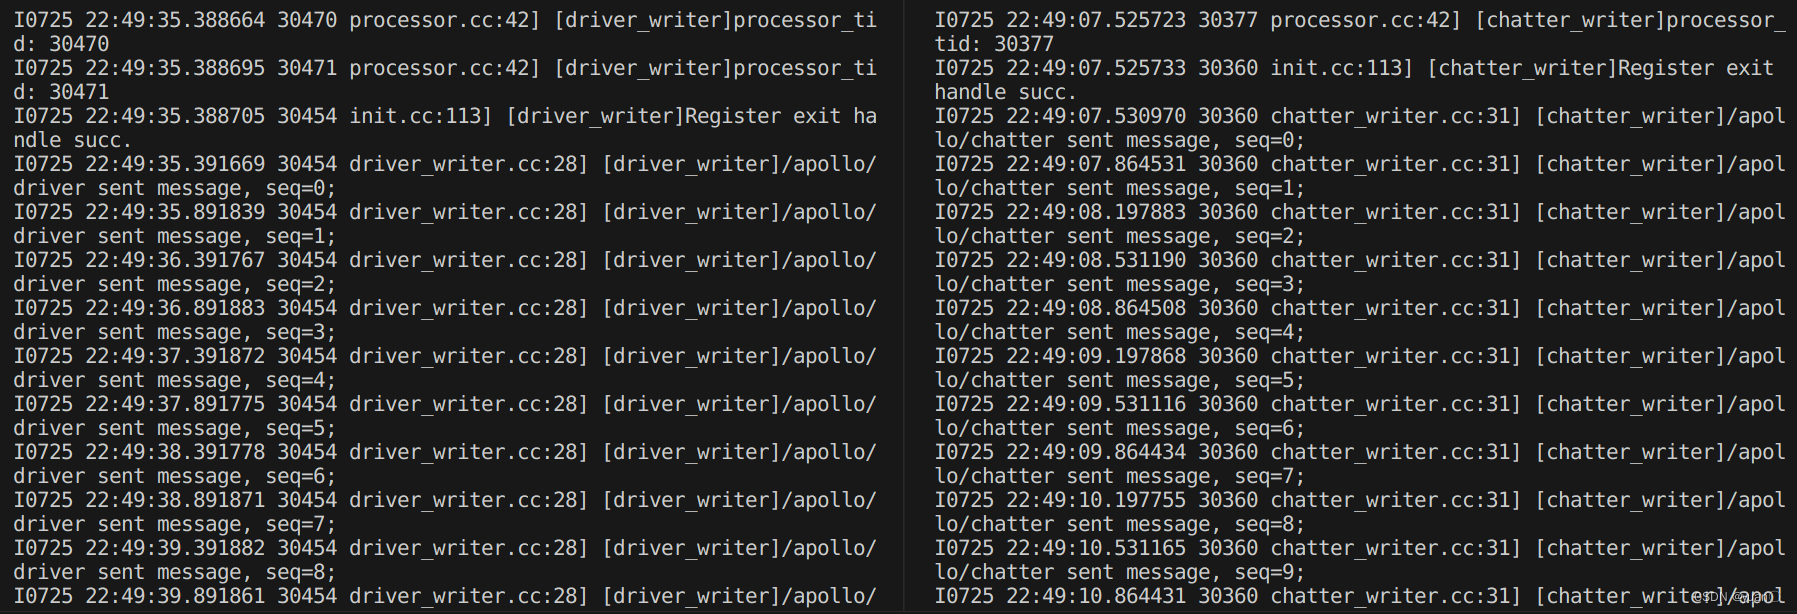
TimerChatterSample每隔400ms/200ms,由系统定时器调用Proc()函数,Proc()函数每执行一次就发出一条消息。并打印该条消息的编号到屏幕上。
参考
[1]https://github.com/ApolloAuto/apollo/blob/master/docs/04_CyberRT/CyberRT_Quick_Start_cn.md
[2] Cyber RT构建新组件
[3] apollo介绍之Cyber Component(十三)
[4] Cyber RT基础入门与实践https://apollo.baidu.com/community/article/1093
[5] 第三章:Component组件认知与实践https://apollo.baidu.com/community/article/1103