文章目录
引言
MySQL是一种广泛应用的关系型数据库管理系统,在本文中,我们将介绍如何在CentOS 7.6下通过二进制解压包的方式来安装MySQL 8。
1. 准备工作
1.1 硬件要求
- 处理器:建议使用2 GHz或更高的处理器,以确保能够处理数据库操作的需求。
- 内存:至少2 GB的内存(建议4G起),以确保MySQL能够高效地运行。实际所需的内存取决于数据库的大小和负载情况。对于较大或繁忙的数据库,可能需要更多的内存。
- 存储空间:至少20GB的磁盘空间(建议40GB的可用空间),确保有足够的磁盘空间来存储MySQL和相关数据。这将包括MySQL安装文件、数据文件、日志文件以及备份文件的存储。
1.2 系统要求
-
操作系统:确保您的操作系统是CentOS 7.6或更高版本。您可以通过运行以下命令来检查您的CentOS版本:
cat /etc/centos-release -
网络连接:为了下载MySQL 8的二进制解压包和必要的依赖项,确保服务器具有可靠的网络连接。您可以使用以下命令来测试网络连接:
ping www.mysql.com确保能够成功连接到外部网络。 -
用户权限:在进行安装之前,确保您具有足够的权限来安装软件和进行系统配置。建议使用具有管理员权限的用户进行安装。您可以使用sudo命令来执行需要特权的操作。
-
glibc版本:下载时需要用到的系统参数,通过
getconf GNU_LIBC_VERSION或ldd --version指令可以查询。
[root@localhost ~]# getconf GNU_LIBC_VERSION
glibc 2.17
[root@localhost ~]# ldd --version
ldd (GNU libc) 2.17
Copyright (C) 2012 Free Software Foundation, Inc.
This is free software; see the source for copying conditions.  There is NO
warranty; not even for MERCHANTABILITY or FITNESS FOR A PARTICULAR PURPOSE.
Written by Roland McGrath and Ulrich Drepper.
[root@localhost ~]#
- cpu架构:下载时需要用到的系统参数,通过
uname -m或arch指令可以查询。
[root@localhost ~]# uname -m
x86_64
[root@localhost ~]# arch
x86_64
[root@localhost ~]#
1.3 安装依赖
在安装MySQL 8的二进制解压包之前,需要安装一些依赖项以确保MySQL能够正常运行。以下是一些常见的依赖项:
- libaio:MySQL需要libaio库来处理异步输入输出操作
- numactl:如果您的系统具有NUMA(非统一内存访问)架构,建议安装numactl库以优化MySQL在NUMA系统上的性能
- zlib:MySQL使用zlib库来提供数据压缩和解压缩功能
- openssl:MySQL在加密和安全性方面使用openssl库
- cmake:在安装MySQL时,需要使用cmake工具进行构建和编译
执行下面的命令可以更新上面的插件(总共就9.2M左右,不需要花费很多时间)
yum -y install libaio numactl zlib openssl cmake
1.4 移除MariaDB
在CentOS中默认安装有MariaDB,是MySQL的一个分支,主要由开源社区维护。CentOS 7及以上版本已经不再使用MySQL数据库,而是使用MariaDB数据库。先卸载自带的MariaDB,再安装MySQL,可以避免在 MySQL 安装过程中出现潜在的冲突或配置问题。
# 搜索
rpm -qa|grep mariadb
# 移除,文件名对应上面搜索出来的名字
rpm -e --nodeps {文件名}
若下所示
[root@localhost ~]# rpm -qa|grep mariadb
mariadb-libs-5.5.60-1.el7_5.x86_64
[root@localhost ~]# rpm -e --nodeps mariadb-libs-5.5.60-1.el7_5.x86_64
[root@localhost ~]# rpm -qa|grep mariadb
[root@localhost ~]#
2 下载
2.1 登陆官网
登陆下载页面
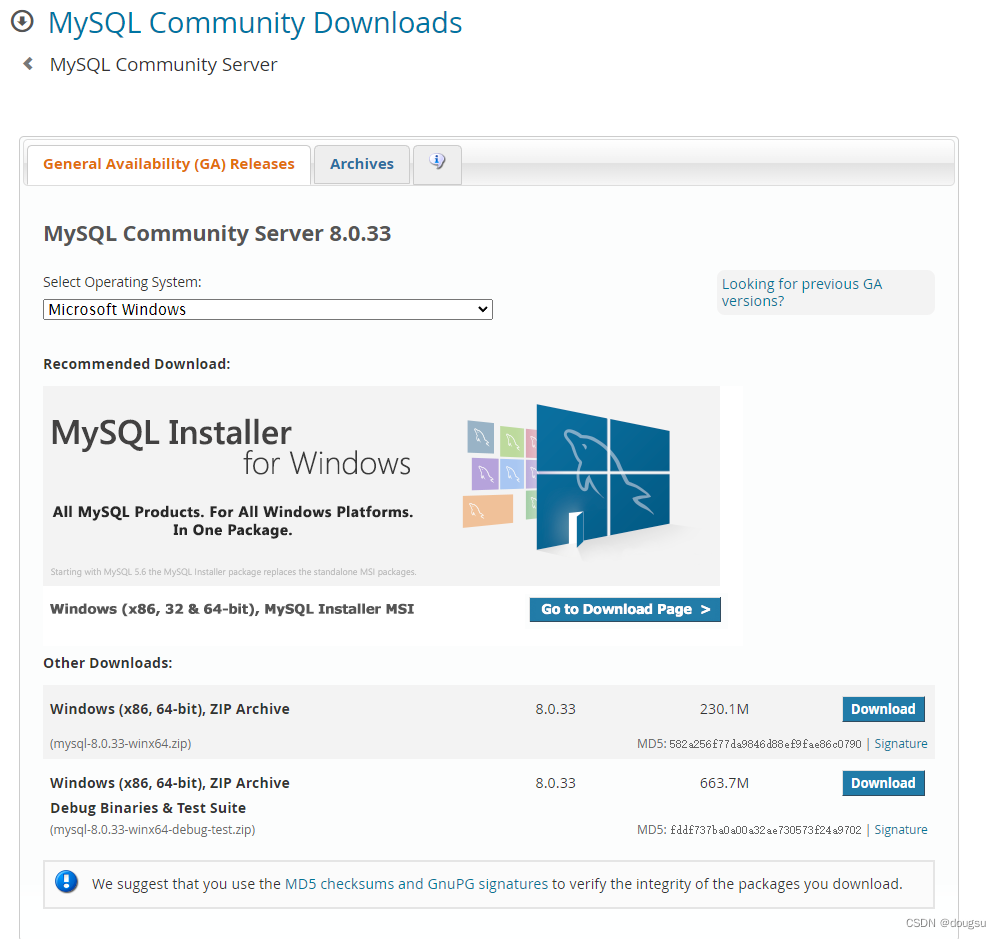
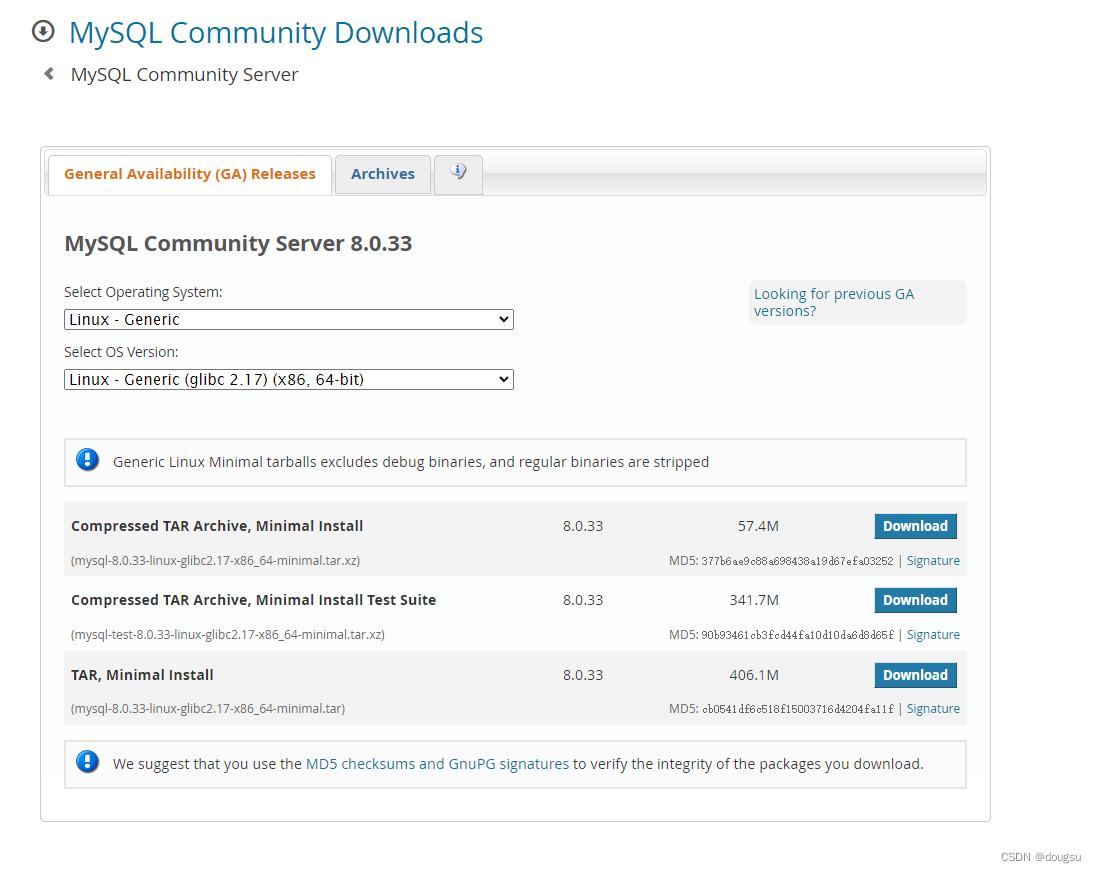
2.2 下载对应版本
根据前面系统参数里的glibc版本和cpu架构选择对应的下载选项
如果和我相同版本的可以使用我的连接直接下载
https://cdn.mysql.com//Downloads/MySQL-8.0/mysql-8.0.33-linux-glibc2.17-x86_64-minimal.tar
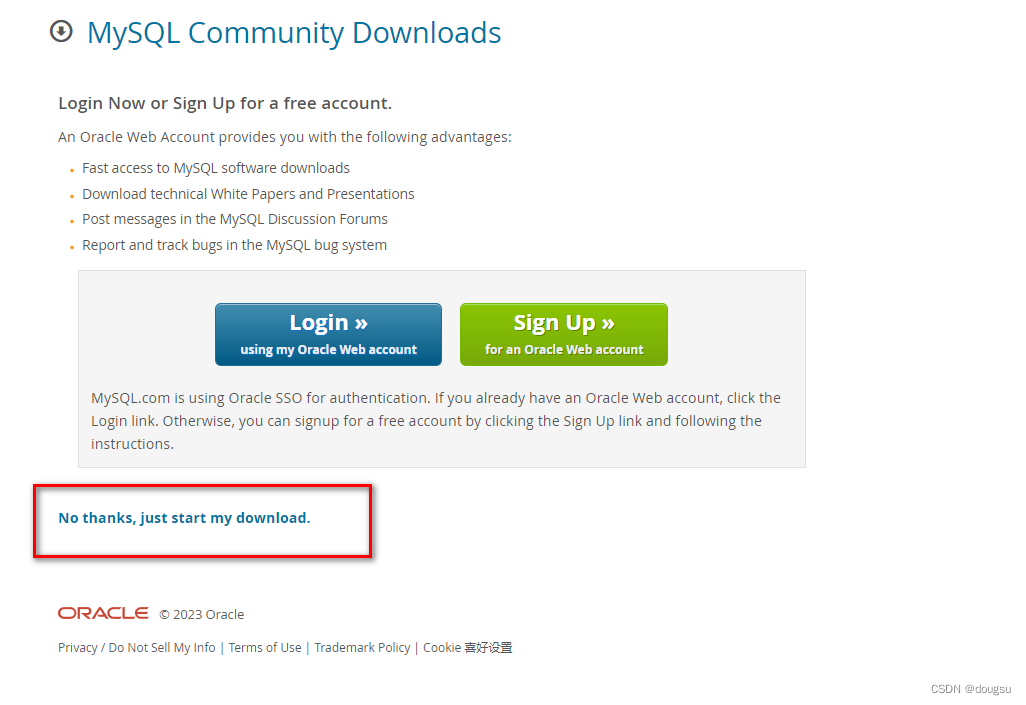
跳过登陆,选择直接下载
3 安装
3.1 上传文件
将下载到的文件上传到我们的服务,这里我下载到/home下,打印文件信息
[root@localhost home]# ll
total 425872
-rw-r--r--. 1 root root 425871360 May 28 13:13 mysql-8.0.33-linux-glibc2.17-x86_64-minimal.tar
[root@localhost home]#
3.2 解压文件
- 解压压缩包,执行
tar xvf mysql-8.0.33-linux-glibc2.17-x86_64-minimal.tar,执行后会解压出下面的三个文件,
mysql-test-8.0.33-linux-glibc2.17-x86_64-minimal.tar.xz:测试框架,用于做mysql 服务的单元,回归和一致性测试,并提供了运行单元测试和创建新单元测试的工具
mysql-8.0.33-linux-glibc2.17-x86_64-minimal.tar.xz:安装mysql必须的文件
mysql-router-8.0.33-linux-glibc2.17-x86_64-minimal.tar.xz :官方提供的一个轻量级中间件,主要作用是在应用程序与MySQL服务器之间提供透明的路由方式,是高可用性 (HA) 解决方案的构建块
- 解压主文件,执行
tar xvf mysql-8.0.33-linux-glibc2.17-x86_64-minimal.tar.xz,解压后的文件夹 mysql-8.0.33-linux-glibc2.17-x86_64-minimal - 移动目录到 /usr/local/mysql (可以根据自己喜好修改),执行
mv mysql-8.0.33-linux-glibc2.17-x86_64-minimal /usr/local/mysql
3.2 安装命令
3.2.1 执行安装命令
进入到/usr/local/mysql目录下,使用root权限按照下面的安装命令逐行执行(命令的解释在3.2.2)
1. groupadd mysql
2. useradd -r -g mysql -s /bin/false mysql
3. mkdir mysql-files
4. chown mysql:mysql mysql-files
5. chmod 750 mysql-files
6. bin/mysqld --initialize --user=mysql
7. bin/mysql_ssl_rsa_setup
8. bin/mysqld_safe --user=mysql &
执行过程如下,可以看到在执行第6步初始化的时候,程序给我们生成了一个随机的密码,记下这个后面登陆会用到
[root@localhost home]# cd /usr/local/mysql/
[root@localhost mysql]# groupadd mysql
[root@localhost mysql]#  useradd -r -g mysql -s /bin/false mysql
[root@localhost mysql]# mkdir mysql-files
[root@localhost mysql]# chown mysql:mysql mysql-files
[root@localhost mysql]#  chmod 750 mysql-files
[root@localhost mysql]# bin/mysqld --initialize --user=mysql
2023-05-28T07:02:36.342000Z 0 [System] [MY-013169] [Server] /usr/local/mysql/bin/mysqld (mysqld 8.0.33) initializing of server in progress as process 7853
2023-05-28T07:02:36.368565Z 1 [System] [MY-013576] [InnoDB] InnoDB initialization has started.
2023-05-28T07:02:38.108072Z 1 [System] [MY-013577] [InnoDB] InnoDB initialization has ended.
2023-05-28T07:02:39.268898Z 6 [Note] [MY-010454] [Server] A temporary password is generated for root@localhost: Zy-;br.I_2u8
[root@localhost mysql]# bin/mysql_ssl_rsa_setup
[root@localhost mysql]# bin/mysqld_safe --user=mysql &
[1] 7894
[root@localhost mysql]# Logging to '/usr/local/mysql/data/localhost.err'.
2023-05-28T07:02:52.662359Z mysqld_safe Starting mysqld daemon with databases from /usr/local/mysql/data
安装命令来源官网安装指南
3.2.2 安装命令的解释
上面安装命令的解释分别是:
- 创建名为 “mysql” 的用户组
- 创建名为 “mysql” 的系统用户,将其添加到 “mysql” 用户组中,并设置其登录 shell 为 /bin/false,以限制该用户的登录权限
- 创建一个名为 mysql-files 的目录,用于存放 MySQL 数据文件
- 将 mysql-files 目录的所有权(所有者和所属组)设置为 “mysql” 用户和组
- 设置 mysql-files 目录的权限为 750,以确保只有 “mysql” 用户组的成员可以读取、写入和执行该目录
- 初始化 MySQL 数据库并设置用户为 “mysql”。此命令将创建系统表、分配密码和生成其它必要的数据文件
- 为 MySQL 生成 SSL 密钥和证书,用于安全通信
- 以 “mysql” 用户身份启动 MySQL 服务器。mysqld_safe 是一个用于启动和监控 MySQL 服务器的脚本
3.2.3 检查服务
通过3.2.1安装启动后,可以通过检查mysql服务的进程是否启动,新建操作窗口执行ps -ef|grep mysql
[root@localhost ~]# ps -ef|grep mysql
root       7894   7269  0 15:02 pts/0    00:00:00 /bin/sh bin/mysqld_safe --user=mysql
mysql      7964   7894  0 15:02 pts/0    00:00:08 /usr/local/mysql/bin/mysqld --basedir=/usr/local/mysql --datadir=/usr/local/mysql/data --plugin-dir=/usr/local/mysql/lib/plugin --user=mysql --log-error=localhost.err --pid-file=localhost.pid
root       8035   7783  0 15:17 pts/1    00:00:00 bin/mysql -u root -p
root       8061   8045  0 15:21 pts/2    00:00:00 grep --color=auto mysql
[root@localhost ~]#
3.2.4 登陆和修改密码
执行上面的启动命令后,操作窗口已经被占用,我们需要创建新的操作窗口并进入 /usr/local/mysql 目录执行启动命令,bin/mysql -u root -p是登陆到服务端的命令,这时候会提示我们要输入一个密码,这个密码就是上面第六步的密码,执行过程如下
[root@localhost ~]# cd /usr/local/mysql
[root@localhost mysql]# bin/mysql -u root -p
Enter password:
Welcome to the MySQL monitor.  Commands end with ; or \g.
Your MySQL connection id is 9
Server version: 8.0.33

Copyright (c) 2000, 2023, Oracle and/or its affiliates.

Oracle is a registered trademark of Oracle Corporation and/or its
affiliates. Other names may be trademarks of their respective
owners.

Type 'help;' or '\h' for help. Type '\c' to clear the current input statement.

mysql>
在上面进入客户端后,通过操作修改user表的字段修改密码,将用户密码修改成123456
mysql> ALTER USER 'root'@'localhost' IDENTIFIED WITH mysql_native_password BY '123456';
Query OK, 0 rows affected (0.00 sec)
mysql> flush privileges;
Query OK, 0 rows affected (0.00 sec)
IDENTIFIED WITH mysql_native_password: 这是要为用户设置的新的身份验证方式。我们将用户的身份验证方式更改为 mysql_native_password。这是 MySQL 中一种常用的身份验证插件。
flush privileges:重新加载并刷新用户权限和权限表,让修改的权限立即生效(但是不影响已经建立的连接,客户端会在新的连接建立才生效)
3.2.5 允许远程登陆
继续在mysql客户端里执行,通过更新user字段修改成可以远程用户root账号登陆
mysql> use mysql
Reading table information for completion of table and column names
You can turn off this feature to get a quicker startup with -A

Database changed
mysql> update user set user.Host='%'where user.User='root';
Query OK, 1 row affected (0.00 sec)
Rows matched: 1  Changed: 1  Warnings: 0

mysql> flush privileges;
Query OK, 0 rows affected (0.00 sec)
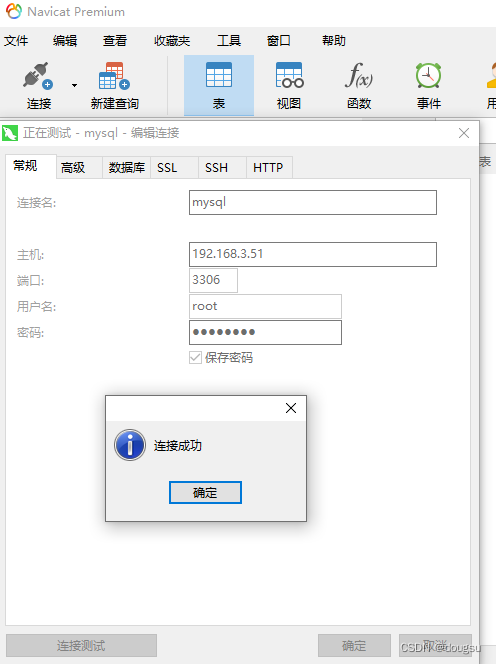
3.2.6 使用Navicat客户端连接
我安装的服务所在的机器ip是:192.168.3.51,端口默认是3306,输入账号root,密码123456,点击测试连接
4. 使用配置文件启动
MySQL程序可以从选项文件(有时称为配置文件)中读取启动选项。配置文件提供了一种方便的方式来指定常用的选项,这样每次运行程序时就不需要在命令行中输入它们。
4.1 关闭服务
先关闭已经启动的mysql服务
[root@localhost ~]# ps -ef|grep mysql
root       7894   7269  0 15:02 pts/0    00:00:00 /bin/sh bin/mysqld_safe --user=mysql
mysql      7964   7894  0 15:02 pts/0    00:00:08 /usr/local/mysql/bin/mysqld --basedir=/usr/local/mysql --datadir=/usr/local/mysql/data --plugin-dir=/usr/local/mysql/lib/plugin --user=mysql --log-error=localhost.err --pid-file=localhost.pid
root       8035   7783  0 15:17 pts/1    00:00:00 bin/mysql -u root -p
root       8061   8045  0 15:21 pts/2    00:00:00 grep --color=auto mysql
[root@localhost ~]# kill -9 7894
[root@localhost ~]# kill -9 7964
[root@localhost ~]# ps -ef|grep mysql
root       8098   8045  0 15:46 pts/2    00:00:00 grep --color=auto mysql
[root@localhost ~]#
4.2 创建配置文件
前面的安装和启动都是使用默认的配置,可以通过在/etc目录下创建my.cnf文件来启动,
[root@localhost ~]# touch /etc/my.cnf
[root@localhost ~]# vi /etc/my.cnf
填写下面的配置内容
[client]
port = 3306
#没有就创建,默认就在这里
socket = /tmp/mysql.sock

[mysqld]
###############################基础设置#####################################
#Mysql服务的唯一编号 每个mysql服务Id需唯一
server-id = 1
#服务端口号 默认3306
port = 3306
#mysql安装根目录
basedir = /usr/local/mysql
#mysql数据文件所在位置 没有改目录则创建
datadir = /usr/local/mysql/data
#临时目录 比如load data infile会用到
tmpdir = /tmp
#设置socke文件所在目录
socket = /tmp/mysql.sock
#数据库默认字符集,主流字符集支持一些特殊表情符号(特殊表情符占用4个字节)
character-set-server = utf8mb4
#数据库字符集对应一些排序等规则,注意要和character-set-server对应
collation-server = utf8mb4_general_ci
#设置client连接mysql时的字符集,防止乱码
init_connect='SET NAMES utf8mb4'
default-storage-engine=INNODB
###############################日志设置#####################################
#数据库错误日志文件
log_error = error.log
保存后执行启动命令bin/mysqld_safe --user=mysql &
检查进程,执行ps -ef|grep mysql
如果成功则显示
[root@localhost mysql]# bin/mysqld_safe --user=mysql &
[1] 8595
[root@localhost mysql]# 2023-05-28T08:07:54.842424Z mysqld_safe Logging to '/usr/local/mysql/data/error.log'.
2023-05-28T08:07:54.873484Z mysqld_safe Starting mysqld daemon with databases from /usr/local/mysql/data

[root@localhost mysql]#

[root@localhost mysql]# ps -ef|grep mysql
root       8595   7269  0 16:07 pts/0    00:00:00 /bin/sh bin/mysqld_safe --user=mysql
mysql      8835   8595 13 16:07 pts/0    00:00:01 /usr/local/mysql/bin/mysqld --basedir=/usr/local/mysql --datadir=/usr/local/mysql/data --plugin-dir=/usr/local/mysql/lib/plugin --user=mysql --log-error=error.log --pid-file=localhost.pid --socket=/tmp/mysql.sock --port=3306
root       8879   7783  0 16:08 pts/1    00:00:00 grep --color=auto mysql
[root@localhost mysql]#
5. 配置开机启动
5.1 复制启动脚本
启动脚本是 support-files/ 目录下的mysql.server 文件,将其复制到 /etc/init.d/ 目录下(复制后名字可以修改也可以继续用mysql.server)
[root@localhost mysql]# cd support-files/
[root@localhost support-files]# pwd
/usr/local/mysql/support-files
[root@localhost support-files]# cp mysql.server /etc/init.d/mysql.server
[root@localhost support-files]#
5.2 修改启动脚本
修改启动脚本mysql.server中的basedir和datadir,跟上面的my.cnf配置文件保持一致,例如我的是
basedir=/usr/local/mysql
datadir=/usr/local/mysql/data
修改完成后保存
5.3 添加启动
配置开机启动,按照下面命令执行
chkconfig --add /etc/init.d/mysql.server
chkconfig mysql.server on
执行检查命令chkconfig --list mysql.server,看到2、3、4、5状态为开或者为 on 则表示成功,没有成功则执行chkconfig --level 2345 mysql.server on
执行过程
[root@localhost support-files]# chkconfig --add /etc/init.d/mysql.server
[root@localhost support-files]# chkconfig mysql.server on
[root@localhost support-files]# chkconfig --list mysql.server

Note: This output shows SysV services only and does not include native
      systemd services. SysV configuration data might be overridden by native
      systemd configuration.

      If you want to list systemd services use 'systemctl list-unit-files'.
      To see services enabled on particular target use
      'systemctl list-dependencies [target]'.

mysql.server   	0:off	1:off	2:on	3:on	4:on	5:on	6:off
[root@localhost support-files]#
mysql.server文件里有说明:Default-Start: 2 3 4 5
5.4 常用管理命令
- 启动 MySQL 服务
sudo service mysql.server start
或
sudo systemctl start mysql.server
- 停止 MySQL 服务
sudo service mysql.server stop
或
sudo systemctl stop mysql.server
- 重启 MySQL 服务
sudo service mysql.server restart
或
sudo systemctl restart mysql.server
- 查看 MySQL 服务状态
sudo service mysql.server status
或
sudo systemctl status mysql.server
总结
本文详细介绍了在CentOS 7.6操作系统上使用二进制解压包安装MySQL 8的过程。我们首先对准备工作进行了概述,包括硬件要求、系统要求和安装依赖。接着,我们详细说明了下载MySQL 8的过程,从登录官网到选择合适的版本。在安装部分,我们逐步演示了上传、解压和安装MySQL 8的步骤,包括执行安装命令、检查服务状态、登录和修改密码、允许远程登录以及使用Navicat客户端连接MySQL。此外,本文还提供了配置文件启动MySQL服务和配置开机启动的方法,并介绍了一些常用的管理命令。通过本文的指导,希望让读者可以顺利地安装和配置MySQL 8,并开始使用强大的数据库功能。