目录
1.项目介绍
1.1项目功能
该案例为使用Vue2.X设计的头条新闻小项目。对应的功能比较简单,主要是有两个功能模块,一个为头条新闻,另一个是分类新闻。对应的设计效果图如下:

该项目的顶部有两个导航栏,分别是头条新闻和分类新闻。点击对应的导航会有相应的新闻出现。分类新闻部分还可以选择对应的新闻分类来选择自己想要的新闻种类。点击对应的新闻列表会跳转到对应的详细新闻的界面。同时,分类新闻会随机抽取一张底下新闻的图片进行展示,并且点击之后也会跳转到对应的新闻。
1.2数据接口
该项目使用到的数据接口为:聚合数据:https://www.juhe.cn/
申请 “新闻头条” 数据接⼝: https://www.juhe.cn/docs/api/id/235 (不可直接跨域访问)
按照聚合数据⽹站的规定,进⾏注册以及实名认证,然后申请 “新闻头条” 数据接⼝。
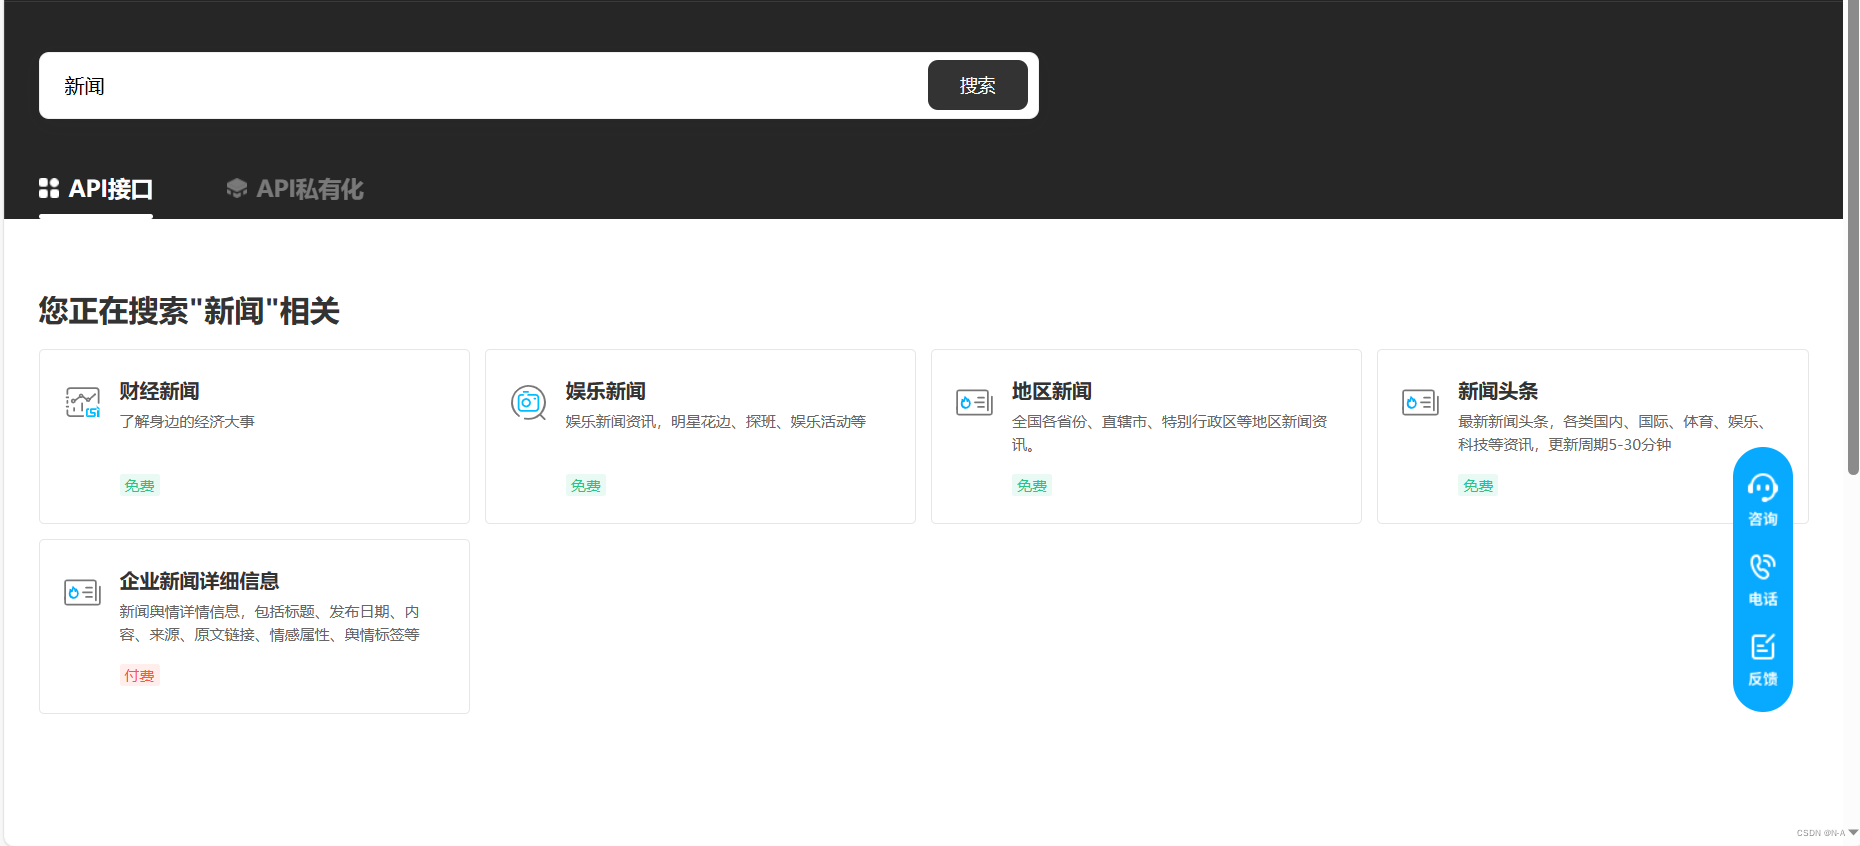
选择新闻头条的API,并且之后需要记住自己的key值,后续需要用到。
1.3设计思路
本项目的设计思路为:把最上面的标题以及导航栏放在APP主组件中, 然后再设计头条新闻组件和分类新闻组件,分别存放这两个页面独有的东西,最后再设计一个共通组件,该组件专门用于存放新闻列表。
2.创建项目并安装依赖
2.1创建步骤
1️⃣打开命令行窗口,去到你想要创建文件的对应文件中, 输入vue create news。注意文件名不能有大写字母。(这里需要等待一段时间,如果一直没有响应可以点下回车)

2️⃣安装完成之后点击Manually select features, 自定义配置。
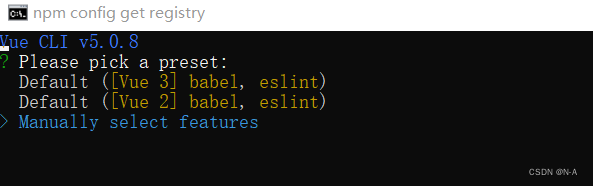
3️⃣然后选择Router, 到对应的配置前点空格即可选中。其他的不需要选择。

4️⃣版本选择2.x

5️⃣之后的选择如下:

6️⃣等待安装之后,进入对应的文件下:安装axios以及qs(注意:如何你电脑没有安装淘宝镜像,无法使用cnpm,需要先安装之后才能够使用cnpm指令。或者直接npm也可以安装,只不过需要耗费时间。)


暗转之后有显示对应的版本号就是安装成功了!
7️⃣安装之后进入对应的文件中,然后运行npm run serve,若出现以下的页面,则代表项目创建成功!

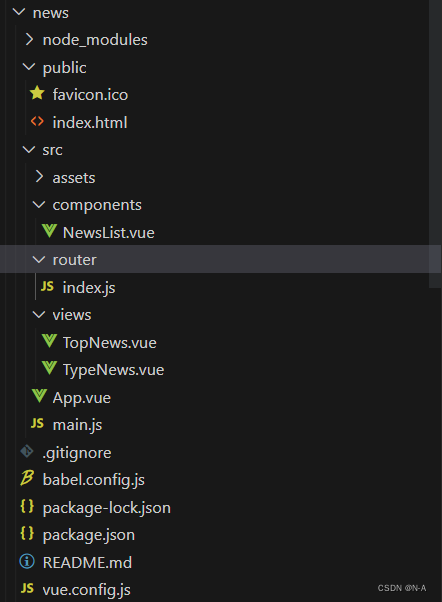
2.2工程目录结构
项目创建完成之后需要先清楚到其他原本不需要的组件和文件,对应项目的目录如下:
2.3配置文件代码
{
  "name": "topnews",
  "version": "0.1.0",
  "private": true,
  "scripts": {
    "serve": "vue-cli-service serve",
    "build": "vue-cli-service build"
  },
  "dependencies": {
    "axios": "^0.20.0",
    "core-js": "^3.6.5",
    "vue": "^2.6.11",
    "vue-router": "^3.2.0"
  },
  "devDependencies": {
    "@vue/cli-plugin-babel": "~4.5.0",
    "@vue/cli-plugin-router": "~4.5.0",
    "@vue/cli-service": "~4.5.0",
    "vue-template-compiler": "^2.6.11"
  },
  "browserslist": [
    "> 1%",
    "last 2 versions",
    "not dead"
  ]
}
这部分我们并不需要自己写,在我们加载依赖的时候就已经自动生成了。
module.exports = {
	devServer:{
		port:8080,                           //修改工程启动端口
		proxy:{
			'/juheNews':{
				target:'http://v.juhe.cn/',  //需要跨越访问的url
				ws:'true',                   //设置代理webSocket
				changeOrigin:true,           //允许跨越
				pathRewrite:{
					'^/juheNews':''          //重写路径
				}
			}
		}
	}
}
该文件主要是可以修改访问的端口号,以及使用了proxy解决了跨域的问题。
import Vue from 'vue'
import App from './App.vue'
import router from './router'

import axios from 'axios'
import qs from 'qs'

Vue.prototype.$axios = axios;
Vue.prototype.$qs = qs;

Vue.config.productionTip = false

new Vue({
  router,
  render: h => h(App)
}).$mount('#app')
该文件为项目的入口文件,在该文件中引入了外部的资源,并且让axios以及qs添加到原型中,因此在其他的文件使用它们时就不需要再进行导入了,直接使用$axios以及$qs即可以使用。
import Vue from 'vue'
import VueRouter from 'vue-router'
import TopNews from '../views/TopNews.vue'
import TypeNews from '../views/TypeNews.vue'

Vue.use(VueRouter)

const routes = [
	{
		path: '/',
		name: 'Home',
		component: TopNews
	},{
		path: '/topNews',
		name: 'TopNews',
		component: TopNews
	},{
		path: '/typeNews',
		name: 'TypeNews',
		component: TypeNews
	}
]

const router = new VueRouter({
	routes
})

export default router
该文件主要对路由进行了设计,让主页显示topnews路由,需要注意的是路由的名字不能相同。
3.App主组件开发
3.1设计思路
该部分主要存放了标题以及对应的导航栏。对导航栏绑定事件,但点击对应的导航时,会触发事件,并传入对应的参数,让其显示相应的路由组件。而created函数主要是为了避免页面刷新之后,无法保留原本点击的页面。
3.2对应代码
<template>
	<div id="app">
		<header>新闻头条</header>
		<nav>
			<ul>
				<li :class="{navinit:isActive=='topNews'}" @click="changeNav('topNews')">头条新闻</li>
				<li :class="{navinit:isActive=='typeNews'}" @click="changeNav('typeNews')">分类新闻</li>
			</ul>
		</nav>
		<router-view />
	</div>
</template>

<script>
	export default{
		data(){
			return {
				isActive:'typeNews'
			}
		},
		created() {
			let path = location.href;
			this.isActive = path.substring(path.lastIndexOf('/')+1);
		},
		methods:{
			changeNav(param){
				this.isActive = param;
				if(param=='topNews'){
					this.$router.push('/topNews');
				}else if(param=='typeNews'){
					this.$router.push('/typeNews');
				}
			}
		}
	}
</script>

<style>
	/******************** css reset ********************/
	html,body,div,header,nav,h1,h2,h3,h4,h5,h6,ul,li{
		margin: 0;
		padding: 0;
		font-family: "微软雅黑";
	}
	ul{
		list-style: none;
	}
	a{
		text-decoration: none;
	}

	header{
		width: 100%;
		height: 48px;
		background-color: #E03D3E;

		display: flex;
		justify-content: center;
		align-items: center;

		font-size: 20px;
		color: #fff;
		/*设置字间距*/
		letter-spacing: 4px;
	}
	nav{
		width: 100%;
		height: 56px;
		display: flex;
		justify-content: center;
		align-items: center;
	}
	nav ul{
		width: 160px;
		height: 26px;

		display: flex;
		justify-content: space-between;
	}
	nav ul li{
		width: 70px;
		height: 26px;

		display: flex;
		justify-content: center;
		align-items: center;
	}
	.navinit{
		color: #E03D3E;
		border-bottom: solid 2px #E03D3E;
	}
</style>
4.共通组件开发
4.1设计思路
该部分主要是实现新闻列表的展示,因此主要是接受其父组件,也就是Topnews以及Typenews两个组件对其传入的值。并使用v-for遍历数据,让显示在列表上。
4.2对应代码
<template>
	<div>
		<ul>
			<li v-for="item in data" @click="toNews(item.url)" :key="item.id">
				<div class="img-box" v-show="item.thumbnail_pic_s">
					<img :src="item.thumbnail_pic_s">
				</div>
				<div class="text-box">
					<h3>{

   {item.title | titleFilter}}</h3>
					<p>{

   {item.date}}</p>
				</div>
			</li>
		</ul>
	</div>
</template>

<script>
	export default{
		props:['data'],
		methods:{
			toNews(url){
				location.href = url;
			}
		},
		filters:{
			titleFilter(value){
				if(value.length>24){
					value=value.substr(0,24)+'...';
				}
				return value;
			},


		}
	}
</script>

<style scoped>
	ul{
		width: 100%;
	}
	ul li{
		box-sizing: border-box;
		padding: 6px;
		width: 100%;
		height: 93px;

		display: flex;
		border-bottom: dashed 1px #AAA;

		user-select: none;
		cursor: pointer;
	}
	ul li .img-box{
		flex: 0 0 100px;
		height: 80px;
	}
	ul li .img-box img{
		width: 100px;
		height: 80px;
	}
	ul li .text-box{
		flex: 1;
		box-sizing: border-box;
		padding-left: 10px;
	}
	ul li .text-box h3{
		font-size: 16px;
		font-weight: 300;
	}
	ul li .text-box p{
		font-size: 14px;
		text-align: right;

	}
</style>
5.头条新闻组件开发
5.1设计思路
该组件主要是利用axios向数据接口发送请求得到新闻数据,并将其数据传送给子组件,也就是传给上面的共通组件。如何你对组件间的通信不太懂的,可以看看我之前发布的文章:http://t.csdn.cn/AEFrI
5.2对应代码
<template>
	<div>
		<img src="../assets/logo.png">
		<NewsList :data="newsList"></NewsList>
	</div>
</template>

<script>
	import NewsList from '../components/NewsList'

	export default{
		data(){
			return {
				newsList:[]
			}
		},
		created() {
			this.$axios.get('/juheNews/toutiao/index',{
				params:{
					type:'top',
					key:'自己的key值'
				}
			}).then(response=> {
					this.newsList = response.data.result.data;
				})
				.catch(error=> {
					console.log(error);
				});
		},
		components:{
			NewsList
		}
	}
</script>

<style scoped>
	img{
		width: 100%;
		height: 100px;
		display: block;
	}
</style>
6.分类新闻组件开发
6.1设计思路
该组件主要是再向数据接口传一个新闻类型的参数,并将返回的数据传递给共同组件。同时在返回的数据中,随机挑选一条新闻,并将对应的新闻图片放在页面上,并且设计对应的链接跳转到对应的新闻详细页面。并且默认页面上的新闻类型为社会类型。
6.2对应代码
<template>
	<div>
		<div class="news-img">
			<a :href="news.url">
				<img :src="news.thumbnail_pic_s">
			</a>
		</div>
		<div class="type-news">
			<ul>
				<li v-for="item in typeList" :class="{typeinit:isAlive==item.id}" @click="change(item.id)" :key="item.id">
				    {

   {item.name}}
				</li>
			</ul>
		</div>
		<NewsList :data="newsList"></NewsList>
	</div>
</template>

<script>
	import NewsList from '../components/NewsList';
	export default{
		data(){
			return {
				typeList:[
					{id:'shehui',name:'社会'},
					{id:'guonei',name:'国内'},
					{id:'guoji',name:'国际'},
					{id:'yule',name:'娱乐'},
					{id:'tiyu',name:'体育'},
					{id:'junshi',name:'军事'},
					{id:'keji',name:'科技'},
					{id:'caijing',name:'财经'},
					{id:'shishang',name:'时尚'}
				],
				isAlive:'shehui',
				newsList:[],
				news:{}
			}
		},
		created() {
			this.getNews('shehui');
		},
		methods:{
			getNews(type){
				this.$axios.get('/juheNews/toutiao/index',{
					params:{
						type:type,
						key:'e78f3ce657ae840a4056b7d9f76b38d1'
					}
				}).then(response=> {
						this.newsList = response.data.result.data;
						this.news = this.newsList[Math.floor(Math.random()*this.newsList.length)];
					})
					.catch(error=> {
						console.log(error);
					});
			},
			change(id){
				this.isAlive = id;
				this.getNews(id);
			}
		},
		components:{
			NewsList
		}
	}
</script>

<style scoped>
	.news-img img{
		width: 100%;
		height: 200px;
		display: block;
	}
	.type-news{
		width: 100%;
		margin-top: 8px;
	}
	.type-news ul{
		width: 100%;

		display: flex;
		justify-content: center;
		flex-wrap: wrap;
	}
	.type-news ul li{
		box-sizing: border-box;
		width: 48px;
		height: 22px;
		border: solid 1px #E03D3E;
		border-radius: 11px;
		margin: 5px 10px;

		font-size: 14px;
		color: #E03D3E;

		display: flex;
		justify-content: center;
		align-items: center;
	}

	.typeinit{
		background-color: #E03D3E;
		color: #fff !important;     /*!important:将优先级提升最高*/
	}
</style>
7.项目打包
在项目的配置文件vue.config.js文件中,设置打包基本目录,输出目录医用级静态资源目录。之后在终端中进入文件,并输入npm run build。则项目打包成功。打包之后的文件将会保存在项目根目录的dist文件夹中。
module.exports = {
	// 打包基本目录
	publicPath:'./',
	// 输出目录
	outputDir:'dist',
	// 静态资源目录
	assetsDir:'assets',
	devServer:{
		port:8080,                           //修改工程启动端口
		proxy:{
			'/juheNews':{
				target:'http://v.juhe.cn/',  //需要跨越访问的url
				ws:'true',                   //设置代理webSocket
				changeOrigin:true,           //允许跨越
				pathRewrite:{
					'^/juheNews':''          //重写路径
				}
			}
		}
	}
}
至此,本次项目就结束啦!赶快去试一下吧,有啥不懂的也可以留言进行提问,或者给我私信!拜拜~~