上一篇:银河麒麟服务器v10 sp1 nginx开机自动启动_csdn_aspnet的博客-CSDN博客
由于项目为前后端分离,前端项目使用nginx部署,VUE项目打包后上传至银河麒麟服务器:

8063 为前端项目文件目录,修改配置 ,默认配置没有处理:

sudo systemctl stop nginx.service
sudo systemctl status nginx.service
sudo systemctl start nginx.service

异常信息:Job for nginx.service failed because the control process exited with error code.
See "systemctl status nginx.service" and "journalctl -xe" for details.
开始以为是配置文件的问题,然而在本机测试是可以正常启动,于是开始查找端口是否占用问题:

并没有占用,还能是什么问题?使用 命令 sudo systemctl status nginx.service 看看能不能锁定具体问题:

明显看到80端口被占用了,这才想到开始修改配置的时候默认80端口并没有处理:
netstat -apn|grep :80
kill 58758 #杀死进程

将配置文件下载到本机,修改后上传服务器,配置如下:
#user  nobody;
worker_processes  1;

#error_log  logs/error.log;
#error_log  logs/error.log  notice;
#error_log  logs/error.log  info;

#pid        logs/nginx.pid;


events {
    worker_connections  1024;
}


http {
	include       mime.types;
    default_type  application/octet-stream;
    client_max_body_size 50M;
    fastcgi_intercept_errors on;
    add_header X-Frame-Options SAMEORIGIN;
    add_header Strict-Transport-Security "max-age=63072000; includeSubdomains; preload";

    #log_format  main  '$remote_addr - $remote_user [$time_local] "$request" '
    #                  '$status $body_bytes_sent "$http_referer" '
    #                  '"$http_user_agent" "$http_x_forwarded_for"';

    #access_log  logs/access.log  main;

    sendfile        on;
    #tcp_nopush     on;

    #keepalive_timeout  0;
    keepalive_timeout  65;

    #gzip  on;

    gzip on;
    gzip_static on;
    gzip_disable "msie6";
    gzip_vary on;
    gzip_proxied any;
    gzip_comp_level 6;
    gzip_buffers 16 8k;
    gzip_http_version 1.1;
    gzip_types text/plain text/css application/json application/javascript text/xml application/xml application/xml+rss text/javascript;


    server {
        listen       8063;
        server_name  localhost;
        location / {
            root   html/8063;
            index  index.html index.htm;
            try_files $uri $uri/ /index.html;
        }
        location ^~ /apis/ {
            proxy_pass http://127.0.0.1:8061/;
        }
        location ^~ /apiz/ {
            proxy_pass http://127.0.0.1:8071/;
        }
    }


    # another virtual host using mix of IP-, name-, and port-based configuration
    #
    #server {
    #    listen       8000;
    #    listen       somename:8080;
    #    server_name  somename  alias  another.alias;

    #    location / {
    #        root   html;
    #        index  index.html index.htm;
    #    }
    #}


    # HTTPS server
    #
    #server {
    #    listen       443 ssl;
    #    server_name  localhost;

    #    ssl_certificate      cert.pem;
    #    ssl_certificate_key  cert.key;

    #    ssl_session_cache    shared:SSL:1m;
    #    ssl_session_timeout  5m;

    #    ssl_ciphers  HIGH:!aNULL:!MD5;
    #    ssl_prefer_server_ciphers  on;

    #    location / {
    #        root   html;
    #        index  index.html index.htm;
    #    }
    #}

}
执行命令:
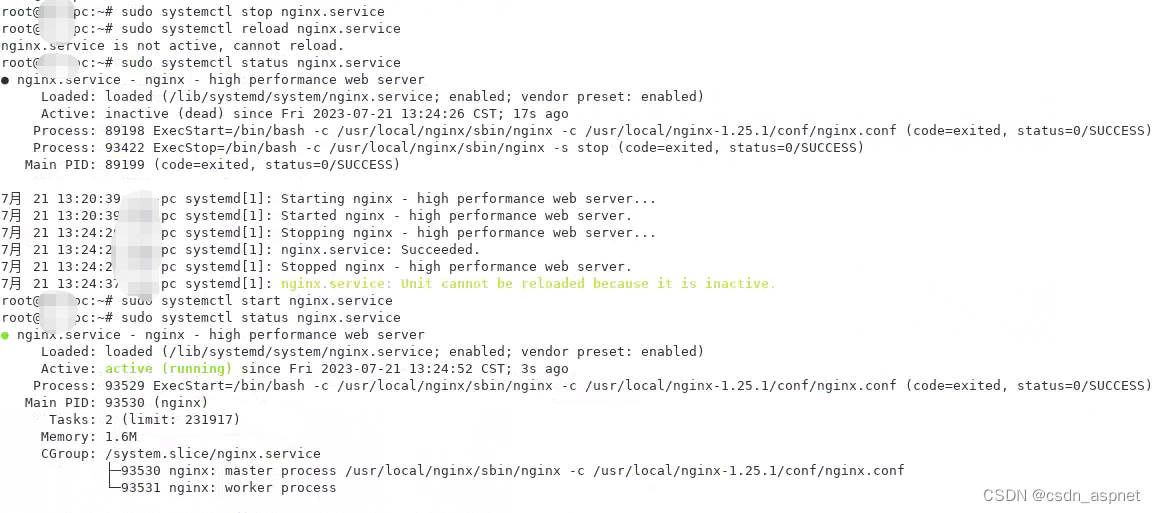
sudo systemctl stop nginx.service
sudo systemctl status nginx.service
sudo systemctl start nginx.service

使用命令:sudo systemctl status nginx.service 查看具体错误:

nqinx: [emerg] unknown directive "gzip_static"
启动异常:未知指令,于是将gzip_static on; 注释 #gzip_static on;,再次执行上面命令启动:
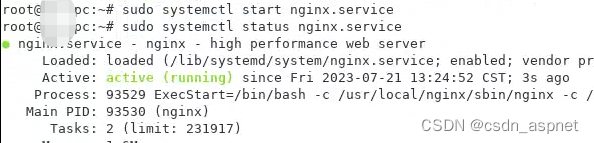
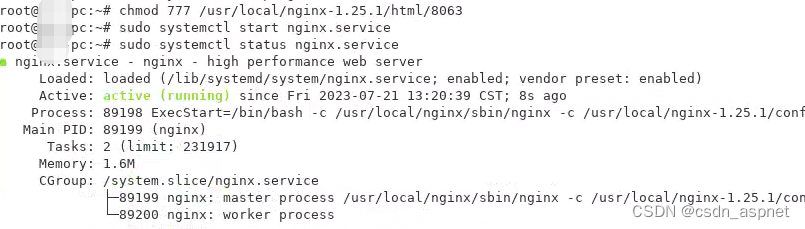
通过上图看到已经启动成功,在浏览器访问:

难道是静态文件没有访问权限,对8063目录进行授权操作:
chmod 777 /usr/local/nginx1.25.1/html/8063
再次访问依然为500,于是开始查找资料:
1. 设置静态网页或者文件夹权限
chmod 755 /home/ubuntu/nginxPic/
2. nginx 配置文件,配置server
sudo vi /etc/nginx/nginx.conf
在http里面加sever
server {
listen 92.168.2.380;
server_name 1;
autoindex on; #是否允许访问目录
location / {
root html;
index index.html index.htm;
}
在server节点添加上面红色部分:
server {
listen 8063;
server_name localhost;
autoindex on; #是否允许访问目录
location / {
root html/8063;
index index.html index.htm;
try_files $uri $uri/ /index.html;
}
location ^~ /apis/ {
proxy_pass http://127.0.0.1:8061/;
}
location ^~ /apiz/ {
proxy_pass http://127.0.0.1:8071/;
}
}
停止,重新启动nginx,依然没有解决。查看配置到 root html/8063; 这一行的时候,在windows中会自动匹配到nginx下的html的目录,将此路径补全,由于代理获取ip均为127.0.0.1或::1,在server的location节点下添加请求IP配置,完整配置如下:
#user  nobody;
worker_processes  1;

#error_log  logs/error.log;
#error_log  logs/error.log  notice;
#error_log  logs/error.log  info;

#pid        logs/nginx.pid;


events {
    worker_connections  1024;
}


http {
	include       mime.types;
    default_type  application/octet-stream;
    client_max_body_size 50M;
    fastcgi_intercept_errors on;
    add_header X-Frame-Options SAMEORIGIN;
    add_header Strict-Transport-Security "max-age=63072000; includeSubdomains; preload";

    #log_format  main  '$remote_addr - $remote_user [$time_local] "$request" '
    #                  '$status $body_bytes_sent "$http_referer" '
    #                  '"$http_user_agent" "$http_x_forwarded_for"';

    #access_log  logs/access.log  main;

    sendfile        on;
    #tcp_nopush     on;

    #keepalive_timeout  0;
    keepalive_timeout  65;

    #gzip  on;

    gzip on;
    #gzip_static on;
    gzip_disable "msie6";
    gzip_vary on;
    gzip_proxied any;
    gzip_comp_level 6;
    gzip_buffers 16 8k;
    gzip_http_version 1.1;
    gzip_types text/plain text/css application/json application/javascript text/xml application/xml application/xml+rss text/javascript;


    server {
        listen       8063;
        server_name  localhost;
		autoindex on; #是否允许访问目录
        location / {
            root   /usr/local/nginx-1.25.1/html/8063;
            index  index.html index.htm;
            try_files $uri $uri/ /index.html;
			proxy_set_header X-Real-IP $remote_addr;
			proxy_set_header X-Forwarded-For $proxy_add_x_forwarded_for;
        }
        location ^~ /apis/ {
            proxy_pass http://127.0.0.1:8061/;
        }
        location ^~ /apiz/ {
            proxy_pass http://127.0.0.1:8071/;
        }
    }


    # another virtual host using mix of IP-, name-, and port-based configuration
    #
    #server {
    #    listen       8000;
    #    listen       somename:8080;
    #    server_name  somename  alias  another.alias;

    #    location / {
    #        root   html;
    #        index  index.html index.htm;
    #    }
    #}


    # HTTPS server
    #
    #server {
    #    listen       443 ssl;
    #    server_name  localhost;

    #    ssl_certificate      cert.pem;
    #    ssl_certificate_key  cert.key;

    #    ssl_session_cache    shared:SSL:1m;
    #    ssl_session_timeout  5m;

    #    ssl_ciphers  HIGH:!aNULL:!MD5;
    #    ssl_prefer_server_ciphers  on;

    #    location / {
    #        root   html;
    #        index  index.html index.htm;
    #    }
    #}

}
vue项目完整目录:
root /usr/local/nginx-1.25.1/html/8063;
IP配置:
proxy_set_header X-Real-IP $remote_addr;
proxy_set_header X-Forwarded-For $proxy_add_x_forwarded_for;
配置完成后启动:

项目访问也是成功的,希望对你有帮助。