创建“服务消费者”
创建一个基础的Spring Boot工程,命名为springboot-consumer,并在pom.xml中引入需要的依赖内容:
<dependency>
            <groupId>org.springframework.boot</groupId>
            <artifactId>spring-boot-starter-web</artifactId>
        </dependency>

        <dependency>
            <groupId>org.springframework.cloud</groupId>
            <artifactId>spring-cloud-starter-eureka-server</artifactId>
        </dependency>
        <dependency>
            <groupId>org.springframework.boot</groupId>
            <artifactId>spring-boot-starter-test</artifactId>
            <scope>test</scope>
        </dependency>
        <dependency>
            <groupId>com.netflix.hystrix</groupId>
            <artifactId>hystrix-core</artifactId>
            <version>1.5.3</version>
        </dependency>
        <dependency>
            <groupId>org.springframework.cloud</groupId>
            <artifactId>spring-cloud-starter-ribbon</artifactId>
        </dependency>

    <dependencyManagement>
        <dependencies>
            <dependency>
                <groupId>org.springframework.cloud</groupId>
                <artifactId>spring-cloud-dependencies</artifactId>
                <version>Brixton.SR5</version>
                <type>pom</type>
                <scope>import</scope>
            </dependency>
        </dependencies>
    </dependencyManagement>
创建一个controller
@RestController
public class HelloController {
    private final Logger logger = Logger.getLogger(getClass());

    @Autowired
    RestTemplate restTemplate;

    @RequestMapping(value = "/ribbon-consumer", method = RequestMethod.GET)
    public String helloConsumer() {
        return restTemplate.getForEntity("http://HELLO-SERVICE/hello", String.class).getBody();
    }
}
通过@@EnableDiscoveryClient注解启动一个服务注册中心提供给其他应用进行对话:
@EnableCircuitBreaker
@EnableDiscoveryClient
@SpringBootApplication
public class ApplicationConsumer {

    /**
     * 负载均衡
     * @return
     */
    @Bean
    @LoadBalanced
    RestTemplate restTemplate() {
        return new RestTemplate();
    }

    public static void main(String[] args) {
        SpringApplication.run(ApplicationConsumer.class, args);
    }

}
在application.properties配置文件中增加如下信息:
server.port=9000
spring.application.name=ribbon-consumer
eureka.client.serviceUrl.defaultZone=http://localhost:1111/eureka/
访问:http://localhost:1111/ ,如图所示:

访问http://localhost:9000/ribbon-consumer /

成功调用了hello-service.
添加熔断机制
在pom.xml中引入需要的依赖内容:
<dependency>
            <groupId>org.springframework.cloud</groupId>
            <artifactId>spring-cloud-starter-hystrix</artifactId>
        </dependency>
创建一个service:
@Service
public class HelloService {

    @Autowired
    RestTemplate restTemplate;

    @HystrixCommand(fallbackMethod = "helloFallback")
    public String helloService() {
        return restTemplate.getForEntity("http://HELLO-SERVICE/hello", String.class).getBody();
    }


    public String helloFallback() {
        return "奥,NO!";
    }
}
在controller里调用helloService:
@RestController
public class HelloController {
    private final Logger logger = Logger.getLogger(getClass());


    @Autowired
    HelloService helloService;

    @RequestMapping(value = "/ribbon-consumer", method = RequestMethod.GET)
    public String helloConsumer() {
        return helloService.helloService();
    }
}
启动程序,访问http://localhost:9000/ribbon-consumer / :

当hello-service服务挂了以后,再访问http://localhost:9000/ribbon-consumer / :
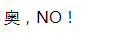
我们的熔断机制作用突显出来了。