1. STM32 可以配置UASRT,使用串口来打印日志,还有另外一种方式,使用ITM 调试功能来打印日志, 主要使用到的三个函数 core_cm3.h
1.1 发送函数 static __INLINE uint32_t ITM_SendChar(uint32_t ch),相当于串口的发送函数usart_send(), 将参数ch发送到keil 的日志打印窗口,一次只能发送一个字符,字符串需要排队发送,发送速度跟系统时钟主频相关,所以比串口要快很多很多
static __INLINE uint32_t ITM_SendChar(uint32_t ch)
{
    if ((CoreDebug->DEMCR & CoreDebug_DEMCR_TRCENA_Msk)  && // Trace enabled
        (ITM->TCR & ITM_TCR_ITMENA_Msk) && // ITM enabled
        (ITM->TER & (1ul << 0))) // ITM Port #0 enabled
    {
        while (ITM->PORT[0].u32 == 0);
        ITM->PORT[0].u8 = (uint8_t) ch;
    }
    return (ch);
}
1.2 接收函数 static __INLINE int ITM_ReceiveChar(void),第一次见在头文件中
static __INLINE int ITM_ReceiveChar(void)
{
    int ch = -1; /* no character available */

    if (ITM_RxBuffer != ITM_RXBUFFER_EMPTY)
    {
        ch = ITM_RxBuffer;
        ITM_RxBuffer = ITM_RXBUFFER_EMPTY; /* ready for next character */
    }

    return (ch);
}
1.3 检查标志位函数 static __INLINE int ITM_CheckChar(void), 相当于串口里面的传输完成中断标志位监测
static __INLINE int ITM_CheckChar(void)
{
    if (ITM_RxBuffer == ITM_RXBUFFER_EMPTY)
    {
        return (0); /* no character available */
    }
    else
    {
        return (1); /* character available */
    }
}
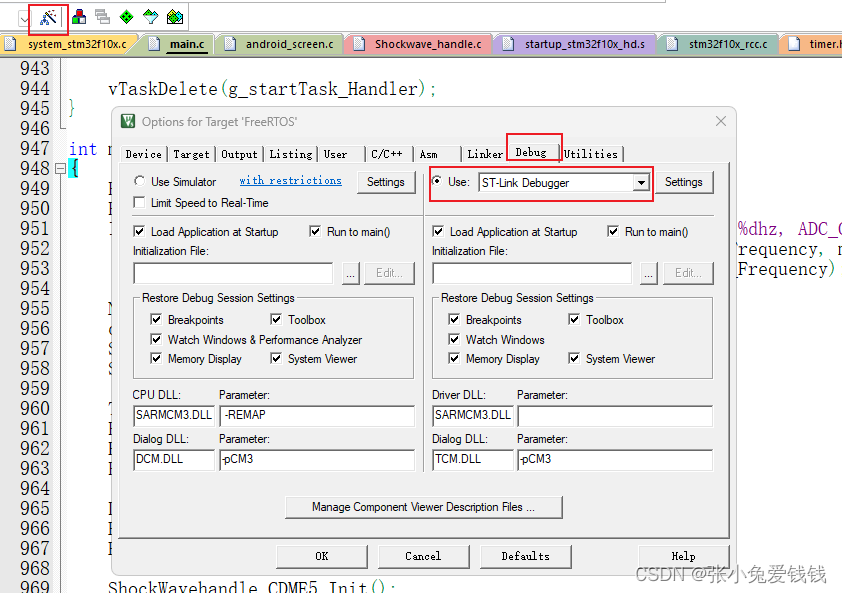
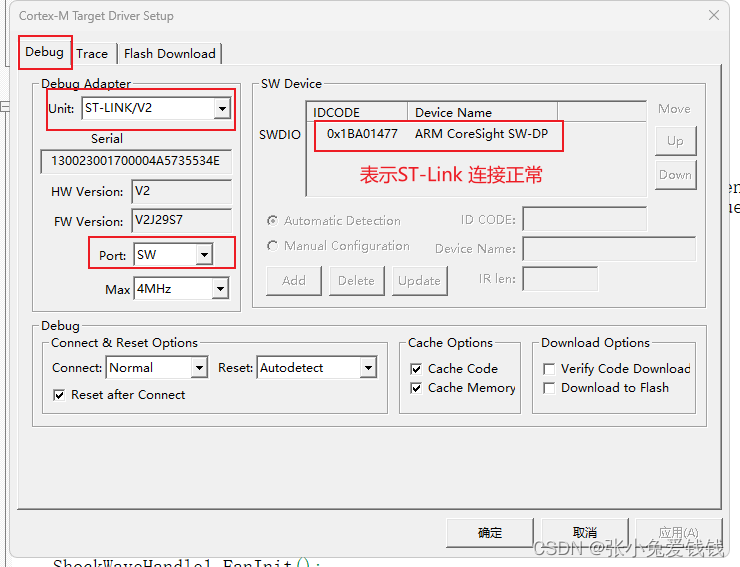
2. keil 配置,使用ST-Link 下载器调试, 点击Setting
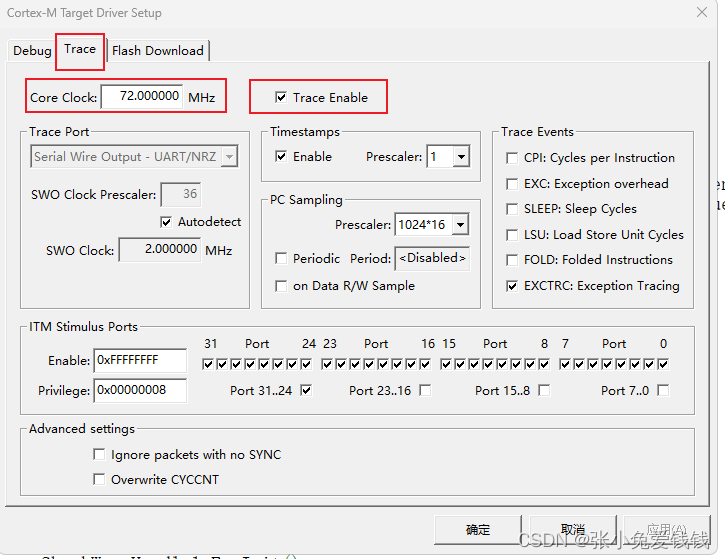
3. 点击 Trace
4. Core Clock 与系统时钟主频相关,不同芯片主频会有差异,我的是STM32F105RCT6,系统时钟配置的是72Mhz
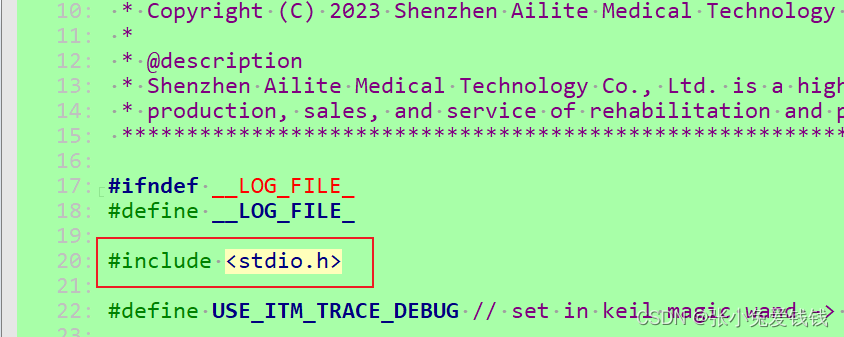
5. 代码配置,必须要包含系统头文件 #include <stdio.h> 不然会报错的
6. 我自己写了一个log.h 文件,专门用来管理日志打印的, 可以实现不同等级的日志打印,在华为搞蓝牙耳机项目的时候就是这样搞的,基本都会封装printf 函数,搞高通项目的时候也是,小型项目可能就不会搞这种操作了,直接就printf()
6.1 log.h
#ifndef __LOG_FILE_
#define __LOG_FILE_

#include <stdio.h>

#define USE_ITM_TRACE_DEBUG // set in keil magic wand -> Debug -> Setting -> Trace -> Trace Enable

// log level
#define ERROR_LEVEL    4
#define WARN_LEVEL    3
#define INFO_LEVEL    2
#define DEBUG_LEVEL    1

/*
 * current log level
 * error level: log only printf erro log
 * warn level: only printf warn and erro log
 * info level: only printf info, warn and error log
 * debug level: printf debug, info, warn and error
 */
#define CURRENT_LOG_LEVEL INFO_LEVEL

#if CURRENT_LOG_LEVEL <= DEBUG_LEVEL
    #define DEBUG_LOG(fmt, ...) printf("[DEBUG]" fmt, ##__VA_ARGS__)
#else
    #define DEBUG_LOG(fmt, ...)
#endif

#if CURRENT_LOG_LEVEL <= INFO_LEVEL
    #define INFO_LOG(fmt, ...) printf("[INFO]" fmt, ##__VA_ARGS__)
#else
    #define INFO_LOG(fmt, ...)
#endif

#if CURRENT_LOG_LEVEL <= WARN_LEVEL
    #define WARN_LOG(fmt, ...) printf("[WARN]" fmt, ##__VA_ARGS__)
#else
    #define WARN_LOG(fmt, ...)
#endif

#if CURRENT_LOG_LEVEL <= ERROR_LEVEL
    #define ERROR_LOG(fmt, ...) printf("[ERROR]" fmt, ##__VA_ARGS__)
#else
    #define ERROR_LOG(fmt, ...)
#endif

#endif // __LOG_FILE_
7. 我是在usart.c 里面配置软件支持ITM 调试功能的
7.1 usart.c 禁用半主机模式,这是很早以前的一种调试手段,开半主机模式的话会影响性能,所以后面ARM 就出台了ITM 功能,代替半主机模式
// when select ARMCC 5 compiler, need define __FILE and disable half host mode
#pragma import(__use_no_semihosting_swi) // 用软件中断的方式实现printf software interrupt
7.2 也可以写成
#pragma import(__use_no_semihosting) // 正点原子的例程就是这样写的
8. 定义文件IO 标准输入输出句柄
// support functions required for standard libraries
struct __FILE
{
    int handle;
    // Whatever you require here. If the only file you are using is standard output using printf() for debugging, no file handling is required
};

// FILE defined in <stdio.h>
FILE __stdout;
FILE __stdin;
9. 定义系统死循环退出
函数是一个模拟系统退出的函数。它接受一个整数类型的返回码作为参数,但实际上并没有执行任何系统退出的操作,而是通过一个无限循环来使程序陷入死循环状态。
这段代码通常被用于无嵌入式系统或者操作系统环境下的调试目的。通过将程序置于无限循环中,可以使程序停留在某个特定点,方便进行调试和观察程序行为。
void _sys_exit(int return_code)
{
label:
    goto label; // endless loop
}
10. 改写fputc 函数,printf 函数就是调用这个函数实现的打印日志的
int fputc(int ch, FILE *f)
{
    return ITM_SendChar(ch);
}
11. 改写fgetc 函数,scanf 函数最终会调用这个函数
int fgetc(FILE *f)
{
    while (ITM_CheckChar() != 1)
    {
        __NOP();
    }
    return (ITM_ReceiveChar());
}
12. 初始化接收buffer 为空
volatile int32_t ITM_RxBuffer = ITM_RXBUFFER_EMPTY;
13. 监测文件流是否发生错误,错误处理
int ferror(FILE   *f)
{
    // your implementation of ferror, handle error here

    return EOF;
}
14. 辅助函数,将字符输出到标准输出文件流中
void _ttywrch(int c)
{
    fputc(c, &__stdout);
}
15. 回退函数
int __backspace()
{
    return 0;
}
16. 将上面几行代码拷贝到文件你的.c 文件里面(main.c 或其它的.c 文件)
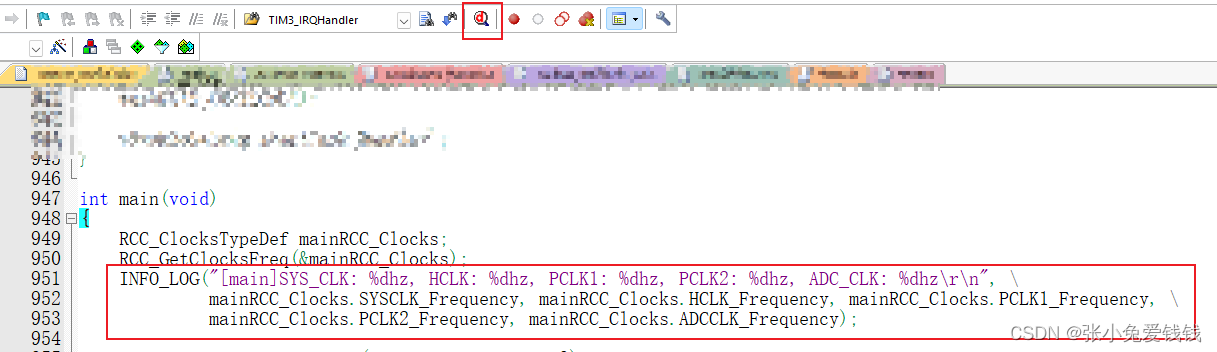
17. 在main函数里面写测试代码
int main(void)
{
	char c;
	printf("hello world");
	scanf("%c", &c);
	printf("hello world, %c\r\n", c);

	return 0;
}
18. 用我自己的测试代码debug, 点击小红d 进debug 模式
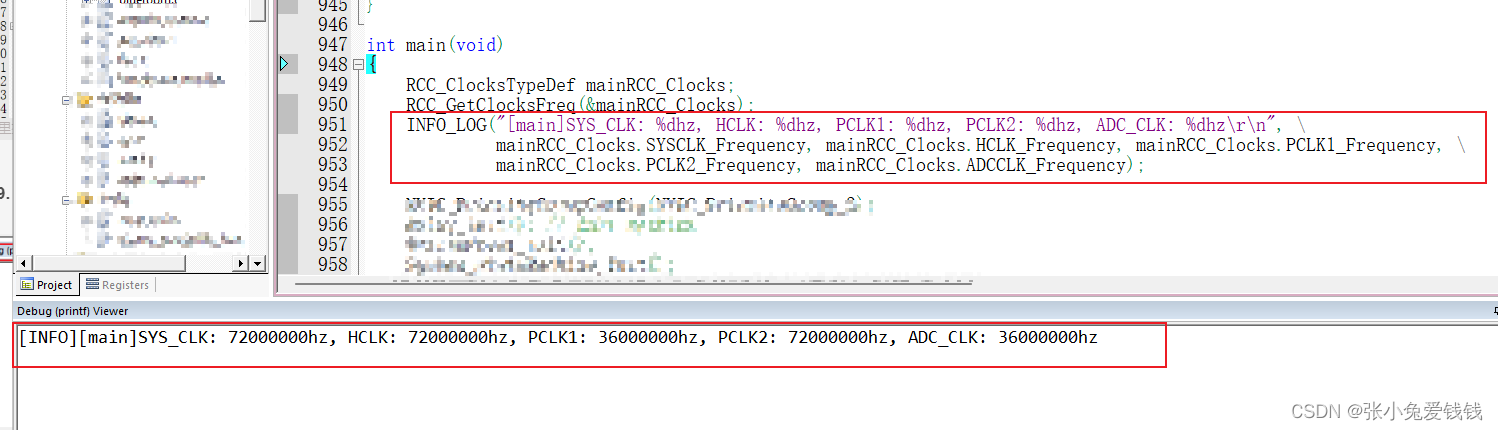
19. 进debug模式后,把keil 的日志窗口调出来 view -》 serial windows -》debug (printf) Viewer
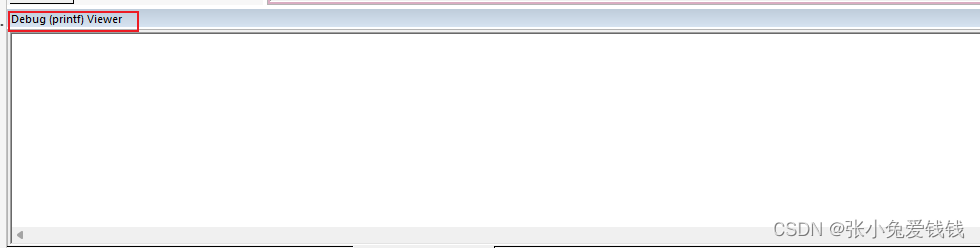
20. 刚进debug 模式,停在main函数这里,按一下F5全速跑,日志就出来了