准备
官方教程: 任意风格的快速风格转换
模型下载地址: https://tfhub.dev/google/magenta/arbitrary-image-stylization-v1-256/2
学习
加载要处理的内容图片和风格图片
# 用于将图像裁剪为方形
def crop_center(image):
# 图片原始形状
shape = image.shape
# 新形状
new_shape = min(shape[1], shape[2])
offset_y = max(shape[1]-shape[2], 0) // 2
offset_x = max(shape[2]-shape[1], 0) // 2
# 返回新图片
image = tf.image.crop_to_bounding_box(
image, offset_y, offset_x, new_shape, new_shape)
return image
# 加载并预处理图片
def load_image(image_url, image_size=(256, 256), preserve_aspect_ratio=True):
# 缓存图像文件
image_path = tf.keras.utils.get_file(
os.path.basename(image_url)[-128:], image_url)
# 加载并转换为float32 numpy数组,添加批次维度,并规范化为范围[0,1]。
img = tf.io.decode_image(
tf.io.read_file(image_path),
channels=3, dtype=tf.float32)[tf.newaxis, ...]
img = crop_center(img)
img = tf.image.resize(img, image_size, preserve_aspect_ratio=True)
return img
# 展示图片
def show_n(images, titles=('',)):
n = len(images)
image_sizes = [image.shape[1] for image in images]
w = (image_sizes[0] * 6) // 320
plt.figure(figsize=(w * n, w))
gs = gridspec.GridSpec(1, n, width_ratios=image_sizes)
for i in range(n):
plt.subplot(gs[i])
plt.imshow(images[i][0], aspect='equal')
plt.axis('off')
plt.title(titles[i] if len(titles) > i else '')
plt.show()
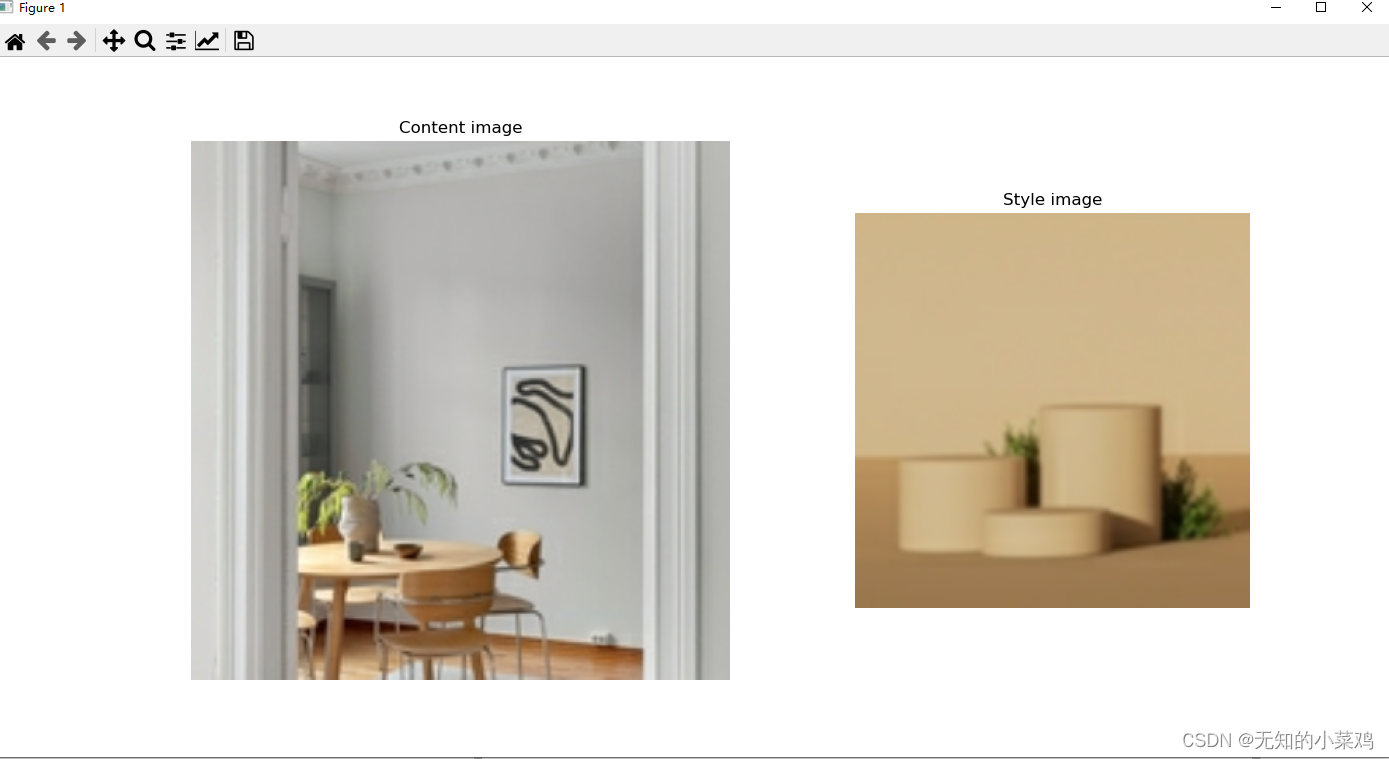
content_image_url = 'https://scpic3.chinaz.net/files/default/imgs/2023-11-16/6e397d19e172be9f_s.jpg'
style_image_url = 'https://scpic3.chinaz.net/files/default/imgs/2023-11-05/d217bbaf821e3a73_s.jpg'
output_image_size = 384
# 调整内容图像的大小
content_img_size = (output_image_size, output_image_size)
# 样式图片大小
style_img_size = (256, 256)
# 加载并展示图片
content_image = load_image(content_image_url, content_img_size)
style_image = load_image(style_image_url, style_img_size)
style_image = tf.nn.avg_pool(
style_image, ksize=[3, 3], strides=[1, 1], padding='SAME')
show_n([content_image, style_image], ['Content image', 'Style image'])
加载模型进行风格迁移
# 加载模型
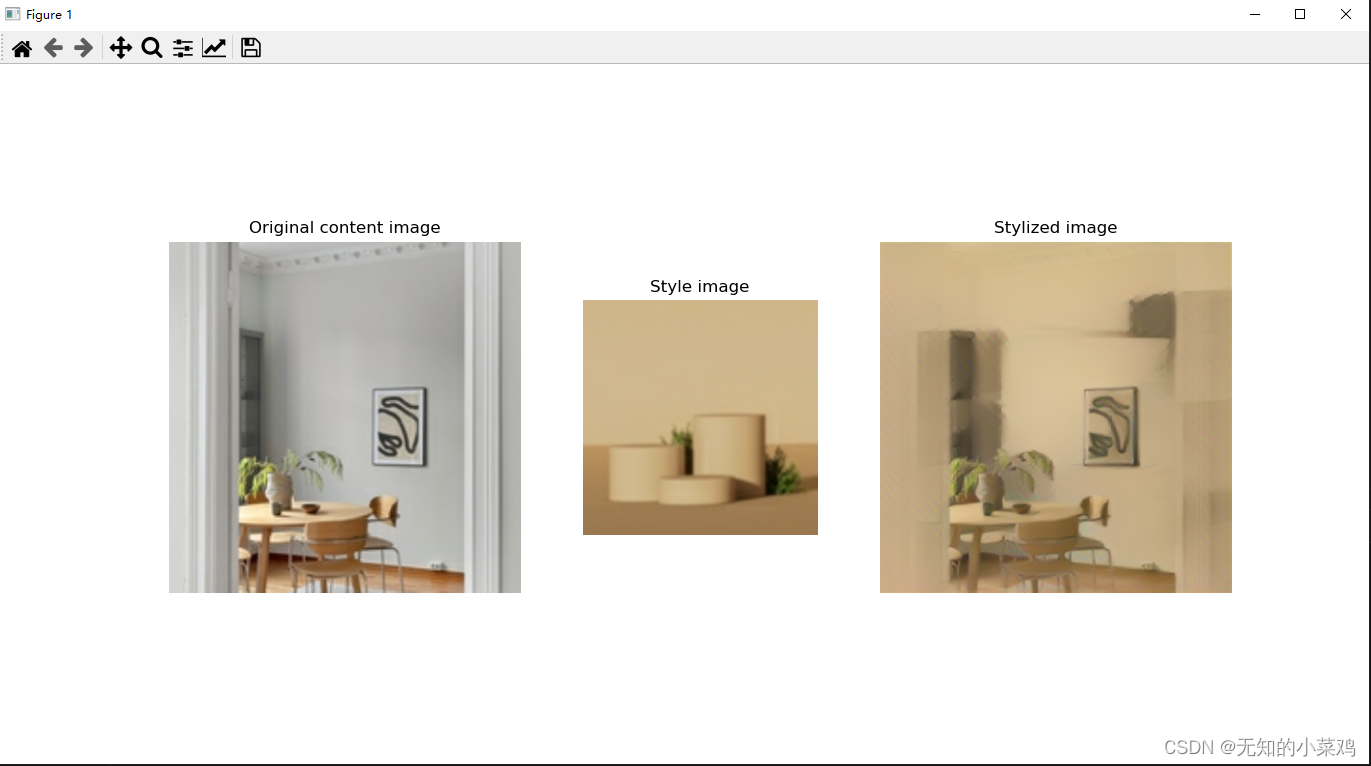
hub_module = hub.load('./magenta_arbitrary-image-stylization-v1-256_2')
# 风格迁移
outputs = hub_module(tf.constant(content_image), tf.constant(style_image))
stylized_image = outputs[0]
# 展示迁移后的图片
show_n([content_image, style_image, stylized_image], titles=[
'Original content image', 'Style image', 'Stylized image'])
加载本地图片
加载本地图片的话,只需要将加载网络图片的代码改成下面的
def load_image(image_url, image_size=(256, 256), preserve_aspect_ratio=True):
    # 缓存图像文件
    # image_path = tf.keras.utils.get_file(
    #     os.path.basename(image_url)[-128:], image_url)
    # 加载并转换为float32 numpy数组,添加批次维度,并规范化为范围[0,1]。
    img = tf.io.decode_image(
        tf.io.read_file(image_url),
        channels=3, dtype=tf.float32)[tf.newaxis, ...]
    img = crop_center(img)
    img = tf.image.resize(img, image_size, preserve_aspect_ratio=True)
    return img
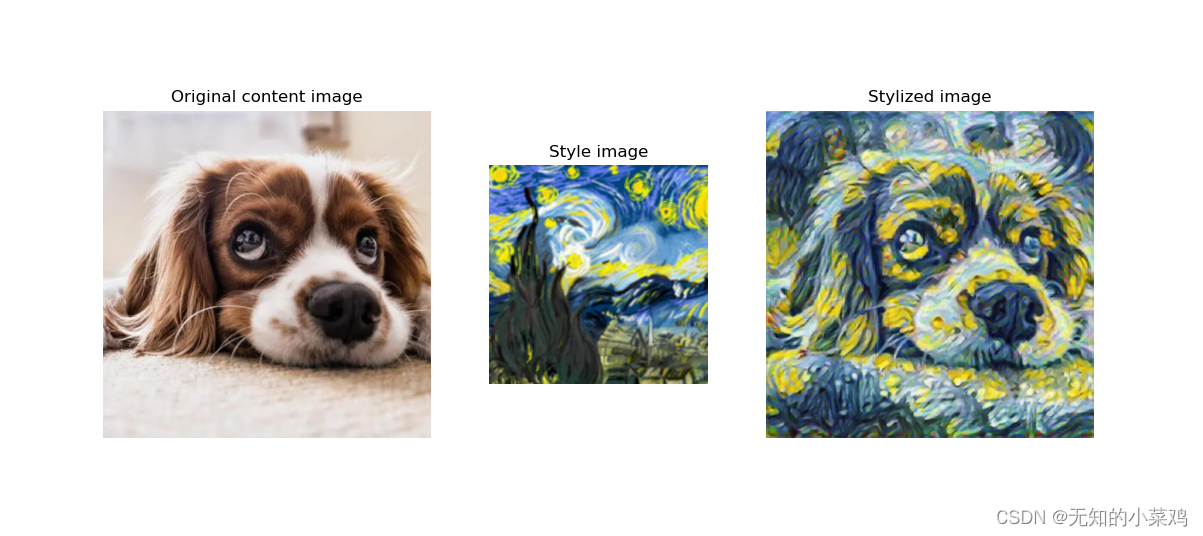
下面的效果图是基于一只狗和梵高的星空生成的
完整代码
# import os
from matplotlib import gridspec
import matplotlib.pylab as plt
import numpy as np
import tensorflow as tf
import tensorflow_hub as hub

# 用于将图像裁剪为方形


def crop_center(image):
    # 图片原始形状
    shape = image.shape
    # 新形状
    new_shape = min(shape[1], shape[2])
    offset_y = max(shape[1]-shape[2], 0) // 2
    offset_x = max(shape[2]-shape[1], 0) // 2
    # 返回新图片
    image = tf.image.crop_to_bounding_box(
        image, offset_y, offset_x, new_shape, new_shape)
    return image

# 加载并预处理图片


def load_image(image_url, image_size=(256, 256), preserve_aspect_ratio=True):
    # 缓存图像文件
    # image_path = tf.keras.utils.get_file(
    #     os.path.basename(image_url)[-128:], image_url)
    # 加载并转换为float32 numpy数组,添加批次维度,并规范化为范围[0,1]。
    img = tf.io.decode_image(
        tf.io.read_file(image_url),
        channels=3, dtype=tf.float32)[tf.newaxis, ...]
    img = crop_center(img)
    img = tf.image.resize(img, image_size, preserve_aspect_ratio=True)
    return img

# 展示图片


def show_n(images, titles=('',)):
    n = len(images)
    image_sizes = [image.shape[1] for image in images]
    w = (image_sizes[0] * 6) // 320
    plt.figure(figsize=(w * n, w))
    gs = gridspec.GridSpec(1, n, width_ratios=image_sizes)
    for i in range(n):
        plt.subplot(gs[i])
        plt.imshow(images[i][0], aspect='equal')
        plt.axis('off')
        plt.title(titles[i] if len(titles) > i else '')
    plt.show()


content_image_url = 'image/dog.png'
style_image_url = 'image/fangao.png'
output_image_size = 384

# 调整内容图像的大小
content_img_size = (output_image_size, output_image_size)
#  样式图片大小
style_img_size = (256, 256)
# 加载图片
content_image = load_image(content_image_url, content_img_size)
style_image = load_image(style_image_url, style_img_size)
style_image = tf.nn.avg_pool(
    style_image, ksize=[3, 3], strides=[1, 1], padding='SAME')
# 展示图片
# show_n([content_image, style_image], ['Content image', 'Style image'])


# 加载模型
hub_module = hub.load('./magenta_arbitrary-image-stylization-v1-256_2')
# 风格迁移
outputs = hub_module(tf.constant(content_image), tf.constant(style_image))
stylized_image = outputs[0]
# 展示迁移后的图片
show_n([content_image, style_image, stylized_image], titles=[
       'Original content image', 'Style image', 'Stylized image'])