Django之Django debug toolbar调试工具
一、安装Django debug toolbar调试工具
|
1
|
pip3 install django
-
debug
-
toolbar
|
二、setting.py文件中配置debug_toolbar
|
1
2
3
4
5
6
7
8
9
10
11
12
13
14
15
16
17
18
19
20
21
22
23
24
25
26
|
# 将debug_toolbar加入到APP中
INSTALLED_APPS
=
[
...
'debug_toolbar'
,
]
# 在中间件中添加debug_toolbar组件
MIDDLEWARE
=
[
...
'debug_toolbar.middleware.DebugToolbarMiddleware'
,
]
# debug toolbar只会在你设置的IP上显示,这是一个元组,可以添加多个
INTERNAL_IPS
=
(
'127.0.0.1'
, )
# debug toolbar需要jQuery的支持,默认会去搜Google的jQuery,但是不会找到的
# 所有我们需要设置本地的jQuery给他使用
# 在当前的项目目录下新建static目录,然后将下载好的jQuery文件放进去
DEBUG_TOOLBAR_CONFIG
=
{
'JQUERY_URL'
: r
"/static/jquery-1.12.4.min.js"
}
# 配置静态文件目录
STATIC_URL
=
'/static/'
STATICFILES_DIRS
=
[
os.path.join(BASE_DIR,
'static'
),
]
|
三、配置urls.py文件
|
1
2
3
4
5
6
7
8
9
10
11
12
13
14
15
|
from
django.conf.urls
import
url, include
from
django.contrib
import
admin
from
app01
import
views
from
django.conf
import
settings
urlpatterns
=
[
url(r
'^admin/'
, admin.site.urls),
url(r
'^index/'
, views.index),
]
if
settings.DEBUG:
import
debug_toolbar
urlpatterns
=
[
url(r
'^__debug__/'
, include(debug_toolbar.urls)),
]
+
urlpatterns
|
四、配置views.py文件
|
1
2
3
4
5
|
# Django debug toolbar test
def
index(request):
# obj = Book.objects.all().select_related("publisher")
obj
=
Book.objects.
all
().prefetch_related(
"publisher"
)
return
render(request,
"index.html"
,
locals
())
|
注意:必须要用render返回
五、配置index.html文件
|
1
2
3
4
5
6
7
8
9
10
11
12
13
|
<!DOCTYPE html>
<
html
lang
=
"en"
>
<
head
>
<
meta
charset
=
"UTF-8"
>
<
title
>Title</
title
>
</
head
>
<
body
>
<
p
>django debug toolbar!</
p
>
{% for item in obj %}
{{ item.title }} {{ item.price }} {{ item.publisher.name }}
{% endfor %}
</
body
>
</
html
>
|
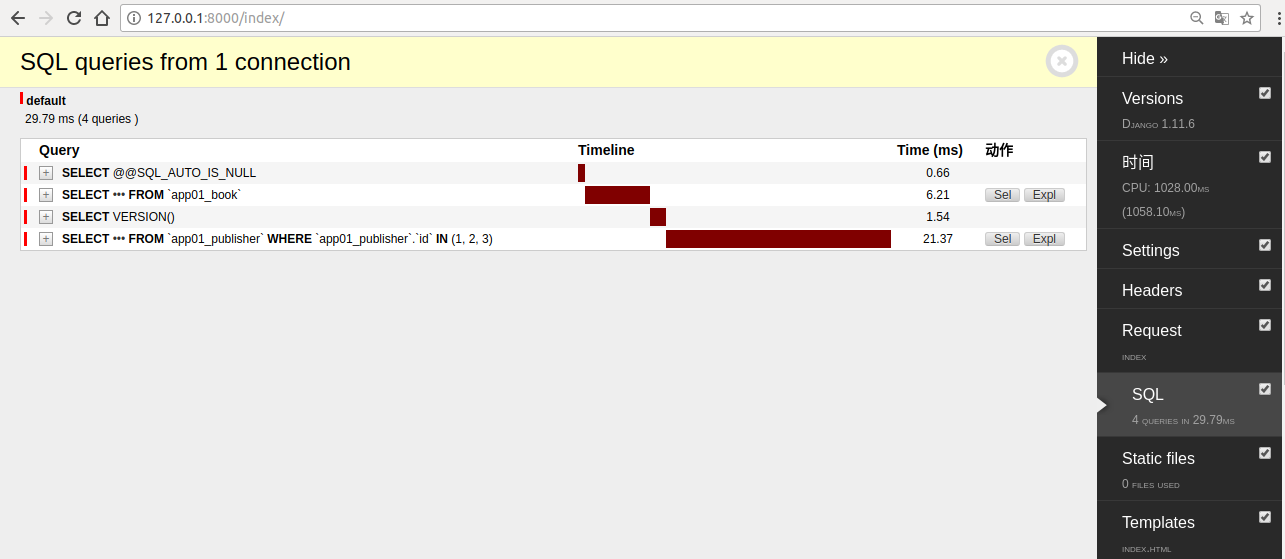
六、运行服务器,打开http://127.0.0.1/index/
七、官方文档链接地址
扫描二维码关注公众号,回复:
1771797 查看本文章


http://django-debug-toolbar.readthedocs.io/en/stable/index.html
