1、hover
当鼠标移动到上面,设置其样式
如当鼠标移动到红色边框上时,显示红色背景
<!DOCTYPE html>
<html lang="en">
<head>
    <meta charset="UTF-8">
    <title>Title</title>
    <style>
         .c2:hover{
            background-color: red;

        }
    </style>
</head>
<body>
    <div class="c2" style="height: 100px;width:100px;border: 1px red solid"></div>
</body>
</html>
浏览器显示一个100*100的红色边框,当鼠标移动到边框上,就显示c2的样式(红色背景)
如果想移动到边框上时不光显示背景色还显示文字,则在div里加文字内容,且给这个文字设置为白色
<!DOCTYPE html>
<html lang="en">
<head>
    <meta charset="UTF-8">
    <title>Title</title>
    <style>
         .c2:hover{
            background-color: red;

        }
    </style>
</head>
<body>
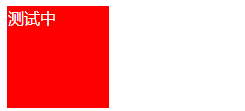
    <div class="c2" style="height: 100px;width:100px;border: 1px red solid;color: white">测试中</div>
</body>
</html>
浏览器显示一个100*100的红色边框,当鼠标移动到边框上,就显示红色背景和白色文字,如图:
2、position 分层
1)背景框怎么顶头显示
<!DOCTYPE html>
<html lang="en">
<head>
    <meta charset="UTF-8">
    <title>Title</title>
</head>
<body>
    <div style="height:48px;background-color: #00c2c9"></div>
</body>
</html>
显示一个背景色,但会发现并没与顶头显示,最上面,左边还是有一点白色的背景,其实这个是body标签中默认有一个边距:
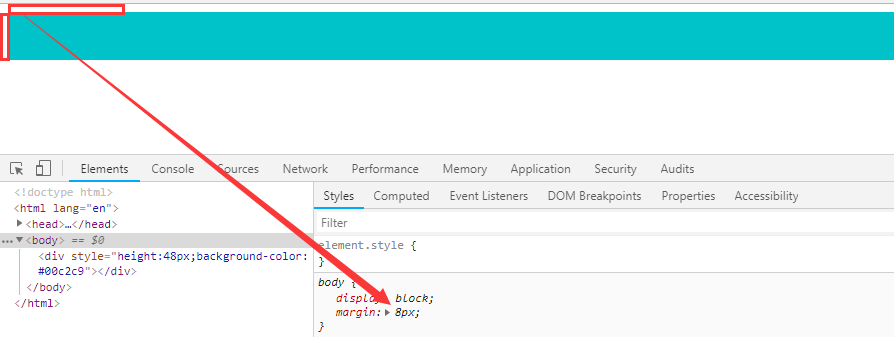
margin简写表示上下左右都有这个边距,那么怎么让背景框顶头跟顶最左边显示呢,要在body标签中加style属性,将margin变为0
<!DOCTYPE html>
<html lang="en">
<head>
    <meta charset="UTF-8">
    <title>Title</title>
</head>
<body style="margin: 0 auto">
    <div style="height:48px;background-color: #00c2c9"></div>
</body>
</html>
再看界面显示,上边和左边都是顶头显示,其实下边和右边也是,只是这样看不明显

2)固定上方背景框不随滚动条滚动
首先,先来看下边框随滚动条移动的效果
<!DOCTYPE html>
<html lang="en">
<head>
    <meta charset="UTF-8">
    <title>Title</title>
</head>
<body style="margin: 0 auto">
    <div style="height:48px;width:100%;background-color: #00c2c9"></div>
    <div style="height: 1000px;width: 100%;border: 1px red solid"></div>
</body>
</html>
界面最上方显示背景框,下面是一个红色边框,因为红色边框比较高,所以要拉动滚动条才能看全,在拉动滚动条的时候,会发现最上方的背景框随着滚动条移动没了。
如果我们想在拖动滚动条时最上方的背景框不跟着移动,则需要使用position=fixed进行固定
<!DOCTYPE html>
<html lang="en">
<head>
    <meta charset="UTF-8">
    <title>Title</title>
</head>
<body style="margin: 0 auto">
    <div style="height:48px;width:100%;background-color: #00c2c9;position: fixed"></div>
    <div style="height: 1000px;width: 100%;border: 1px red solid"></div>
</body>
</html>
这时候再看界面显示,拖动滚动条下拉会发现最上面的背景框不会有任何变化,会一直在最上方。
用position固定的时候按道理是不用宽度的,可以设定距离上面为0,距离左边为0,距离右边为0,如下,效果是一样的
<!DOCTYPE html>
<html lang="en">
<head>
    <meta charset="UTF-8">
    <title>Title</title>
</head>
<body style="margin: 0 auto">
    <div style="height:48px;top: 0;left:0;right: 0;background-color: #00c2c9;position: fixed"></div>
    <div style="height: 1000px;width: 100%;border: 1px red solid"></div>
</body>
</html>
还有一个方面是如果我们在下面这个div里面写点内容,会发现在界面显示不出来,这是什么原因呢?其实position 是分层的意思,上面的div固定在最上方跟下面的div就不在一个层上,所以下面div的内容其实是被上面div的背景框挡住了,所以看不见,那么我们可以设置下面div的外边距,往下移点,移到背景框的高度之外就可以,如下:
<!DOCTYPE html>
<html lang="en">
<head>
    <meta charset="UTF-8">
    <title>Title</title>
</head>
<body style="margin: 0 auto">
    <div style="height:48px;top: 0;left:0;right: 0;background-color: #00c2c9;position: fixed"></div>
    <div style="height: 1000px;width: 100%;border: 1px red solid;margin-top: 48px">11111</div>
</body>
</html>
这个时候界面上就能看见第二个div的内容以及红色边框的上边框线。

3)relative用法
单独的relative没有任何意思,要跟absolute连用才行,absolute的定位针对于relative的定位。
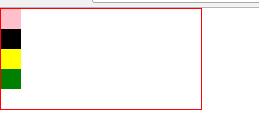
有这样一个需求,在一个大的边框中有四个小的背景框,如图:
<!DOCTYPE html>
<html lang="en">
<head>
    <meta charset="UTF-8">
    <title>Title</title>
</head>
<body style="margin: 0 auto">
   <div style="width:200px;height: 100px;border: 1px red solid;">
        <div style="width: 20px;height: 20px;background-color: pink;"></div>
        <div style="width: 20px;height: 20px;background-color: black;"></div>
        <div style="width: 20px;height: 20px;background-color: yellow;"></div>
        <div style="width: 20px;height: 20px;background-color: green;"></div>
    </div>
</body>
</html>
怎么将这四个背景框分别放到这个大边框的四个角呢,这时候就要用到relative。在外层大边框使用relative,然后里面的背景框使用absolute针对relative的大边框进行上下左右的定位。
<!DOCTYPE html>
<html lang="en">
<head>
    <meta charset="UTF-8">
    <title>Title</title>
</head>
<body style="margin: 0 auto">
   <div style="width:200px;height: 100px;border: 1px red solid;position: relative">
        <div style="width: 20px;height: 20px;background-color: pink;position: absolute;bottom: 0;right: 0"></div>
        <div style="width: 20px;height: 20px;background-color: black;position: absolute;bottom: 0;left: 0"></div>
        <div style="width: 20px;height: 20px;background-color: yellow;position: absolute;top:0;right: 0"></div>
        <div style="width: 20px;height: 20px;background-color: green;position: absolute;top: 0;left: 0"></div>
    </div>
</body>
</html>
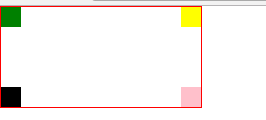
上面四个背景框分别位于右下角、左下角、右上角、左上角,以右下角举例:在右下角的话,bottom(底部)距离大边框的距离就是0,right距离大边框的距离也是0。界面显示如下图:
4)z-index 层级关系
还是上面四个背景框的例子,如果我们只是使用了relative和position,但是没给每个背景框规定bottom等值,那么四个背景框会都重叠在左上角,且显示为代码中最后一个背景框的颜色。
<!DOCTYPE html>
<html lang="en">
<head>
    <meta charset="UTF-8">
    <title>Title</title>
</head>
<body style="margin: 0 auto">
   <div style="width:200px;height: 100px;border: 1px red solid;position: relative">
        <div style="width: 20px;height: 20px;background-color: pink;position: absolute;"></div>
        <div style="width: 20px;height: 20px;background-color: black;position: absolute;"></div>
        <div style="width: 20px;height: 20px;background-color: yellow;position: absolute;"></div>
        <div style="width: 20px;height: 20px;background-color: green;position: absolute;"></div>
    </div>
</body>
</html>

因为使用了position,其实这四个背景框是分了4层,我们可以规定层级关系,用z-index。z-index=999是最高层级
如果我们想先看到粉色,那么只需要在粉色背景框那一行加上z-index=999,如图:
!DOCTYPE html>
<html lang="en">
<head>
    <meta charset="UTF-8">
    <title>Title</title>
</head>
<body style="margin: 0 auto">
   <div style="width:200px;height: 100px;border: 1px red solid;position: relative">
        <div style="width: 20px;height: 20px;background-color: pink;position: absolute;z-index: 999"></div>
        <div style="width: 20px;height: 20px;background-color: black;position: absolute;"></div>
        <div style="width: 20px;height: 20px;background-color: yellow;position: absolute;"></div>
        <div style="width: 20px;height: 20px;background-color: green;position: absolute;"></div>
    </div>
</body>
</html>

如果去掉粉色的话,就会显示出绿色。如果我们想要显示的层级为粉色、黑色、绿色、黄色,那么z-index分别按照层级进行对应就可以
<!DOCTYPE html>
<html lang="en">
<head>
    <meta charset="UTF-8">
    <title>Title</title>
</head>
<body style="margin: 0 auto">
   <div style="width:200px;height: 100px;border: 1px red solid;position: relative">
        <div style="width: 20px;height: 20px;background-color: pink;position: absolute;z-index: 999"></div>
        <div style="width: 20px;height: 20px;background-color: black;position: absolute;z-index: 900"></div>
        <div style="width: 20px;height: 20px;background-color: yellow;position: absolute;z-index: 700"></div>
        <div style="width: 20px;height: 20px;background-color: green;position: absolute;z-index: 801"></div>
    </div>
</body>
</html>
3、overflow
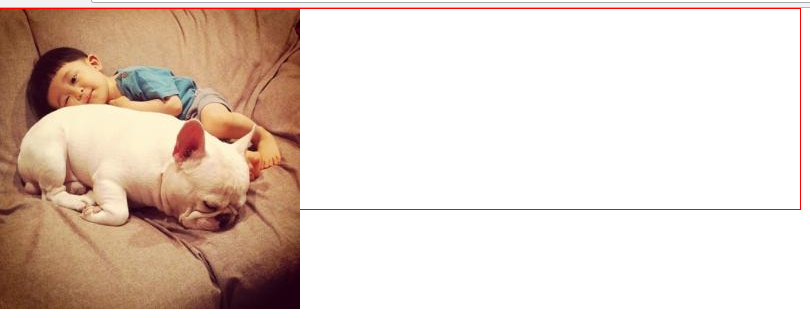
当div内的内容溢出div的高宽时,如何处理?先看图片如果超过了边框,如何显示:
<!DOCTYPE html>
<html lang="en">
<head>
    <meta charset="UTF-8">
    <title>Title</title>
</head>
<body style="margin: 0 auto">
  <div style="width: 800px;height:200px;border: 1px red solid;">
        <img src="http://ui.imdsx.cn/static/image/dsx.jpg">
    </div>
</body>
</html>
1)hidden 属性
如果我们想将超出边框的不显示,则要用到overflow:hidden,如下图
<!DOCTYPE html>
<html lang="en">
<head>
    <meta charset="UTF-8">
    <title>Title</title>
</head>
<body style="margin: 0 auto">
  <div style="width: 800px;height:200px;border: 1px red solid;overflow: hidden">
        <img src="http://ui.imdsx.cn/static/image/dsx.jpg">
    </div>
</body>
</html>
图片超出边框的部分就不显示了

2)scroll 属性
<!DOCTYPE html>
<html lang="en">
<head>
    <meta charset="UTF-8">
    <title>Title</title>
</head>
<body style="margin: 0 auto">
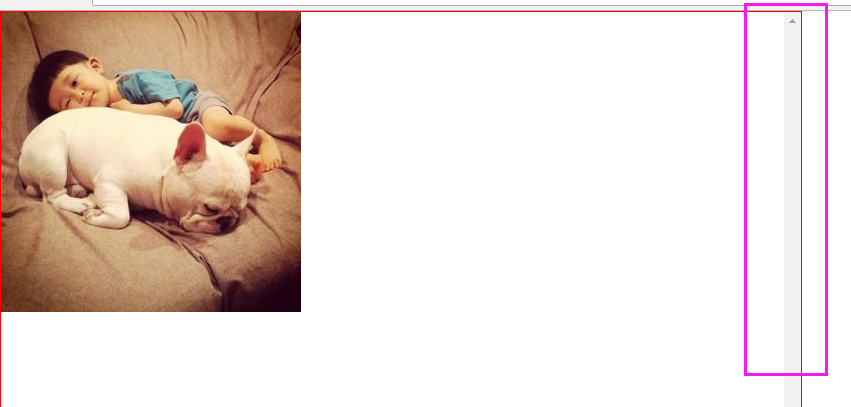
  <div style="width: 800px;height:200px;border: 1px red solid;overflow: scroll">
        <img src="http://ui.imdsx.cn/static/image/dsx.jpg">
    </div>
</body>
</html>
界面显示增加了滚动条:

3)auto属性
<!DOCTYPE html>
<html lang="en">
<head>
    <meta charset="UTF-8">
    <title>Title</title>
</head>
<body style="margin: 0 auto">
  <div style="width: 800px;height:200px;border: 1px red solid;overflow: auto">
        <img src="http://ui.imdsx.cn/static/image/dsx.jpg">
    </div>
</body>
</html>
按照上面这段代码,scroll跟auto效果一样,那么区别在哪呢?在图片小于div的大小时就能看出来
<!DOCTYPE html>
<html lang="en">
<head>
    <meta charset="UTF-8">
    <title>Title</title>
</head>
<body style="margin: 0 auto">
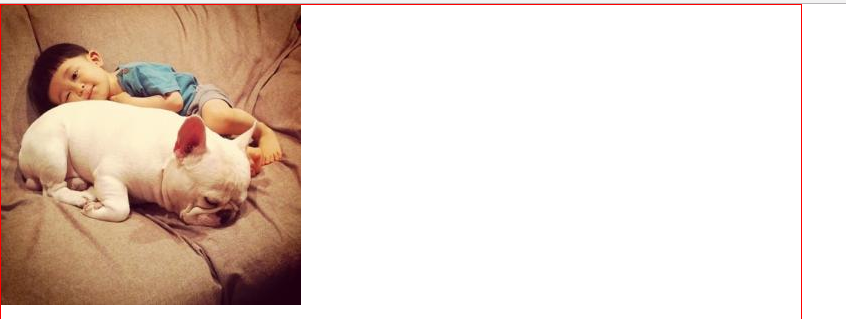
  <div style="width: 800px;height:800px;border: 1px red solid;overflow: auto">
        <img src="http://ui.imdsx.cn/static/image/dsx.jpg">
    </div>
</body>
</html>
<!DOCTYPE html>
<html lang="en">
<head>
    <meta charset="UTF-8">
    <title>Title</title>
</head>
<body style="margin: 0 auto">
  <div style="width: 800px;height:800px;border: 1px red solid;overflow: scroll">
        <img src="http://ui.imdsx.cn/static/image/dsx.jpg">
    </div>
</body>
</html>
上面两段代码图片都是比div小,一个用scroll属性,一个用auto属性,界面显示很容易发现,用scroll属性,尽管图片要比边框小,还是会加上滚动条,但是用auto属性就不会。
4、background
针对背景的一些样式设置。
1)background-image 背景图
<!DOCTYPE html>
<html lang="en">
<head>
    <meta charset="UTF-8">
    <title>Title</title>
</head>
<body style="margin: 0 auto">
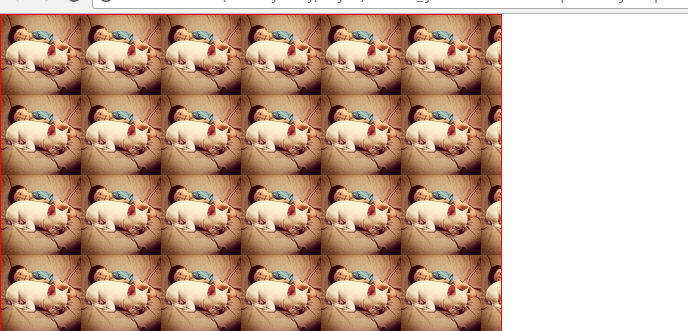
  <div style="width: 500px;height: 500px;border: 1px red solid;background-image: url('http://ui.imdsx.cn/static/image/dsx_Small.jpg')">
  </div>
</body>
</html>
图片大小小于div大小,无限堆叠,水平垂直都堆叠,如图所示:
2)background-repeat
如果我们不想让堆叠,使用background-repeat =no-repeat
<!DOCTYPE html>
<html lang="en">
<head>
    <meta charset="UTF-8">
    <title>Title</title>
</head>
<body style="margin: 0 auto">
  <div style="width: 500px;height: 500px;border: 1px red solid;background-image: url('http://ui.imdsx.cn/static/image/dsx_Small.jpg');background-repeat: no-repeat">
  </div>
</body>
</html>
界面显示如下:
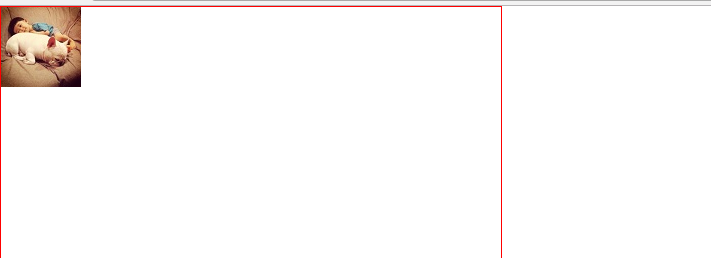
这个background-repeat对应属性还有:repeat-y 纵向堆叠、repeat-x 横向堆叠,下面的例子时纵向堆叠:
<!DOCTYPE html>
<html lang="en">
<head>
    <meta charset="UTF-8">
    <title>Title</title>
</head>
<body>
 <div style="width: 500px;height: 500px;border: 1px red solid;
   background-image: url('http://ui.imdsx.cn/static/image/dsx_Small.jpg');background-repeat: repeat-y">
    </div>
</body>
</html>
3)background-position
横向和纵向移动图片:background-position: xxpx xxpx
<!DOCTYPE html>
<html lang="en">
<head>
    <meta charset="UTF-8">
    <title>Title</title>
    <style>
        #id{
            width: 20px;
            height: 20px;
            border: 1px red solid;
            background-image: url('http://ui.imdsx.cn/static/image/icon.png');
            background-repeat: no-repeat;
            background-position: 0 0;
        }
    </style>
</head>
<body>
 <div id="id">12</div>
</body>
</html>
界面显示,在20*20边框中有个图片,现在是在最中间,如图:

现在我们修改background-position的横向值,再查看界面展示:
<!DOCTYPE html>
<html lang="en">
<head>
    <meta charset="UTF-8">
    <title>Title</title>
    <style>
        #id{
            width: 20px;
            height: 20px;
            border: 1px red solid;
            background-image: url('http://ui.imdsx.cn/static/image/icon.png');
            background-repeat: no-repeat;
            background-position: 15px 0;
        }
    </style>
</head>
<body>
 <div id="id">12</div>
</body>
</html>
此时再看界面显示,图片的横向位置发生了变化,向右移动了一部分,如图所示:

纵向移动也是一样的道理。我们也可以直接在界面上,改动横向和纵向值,直接观察界面变化:
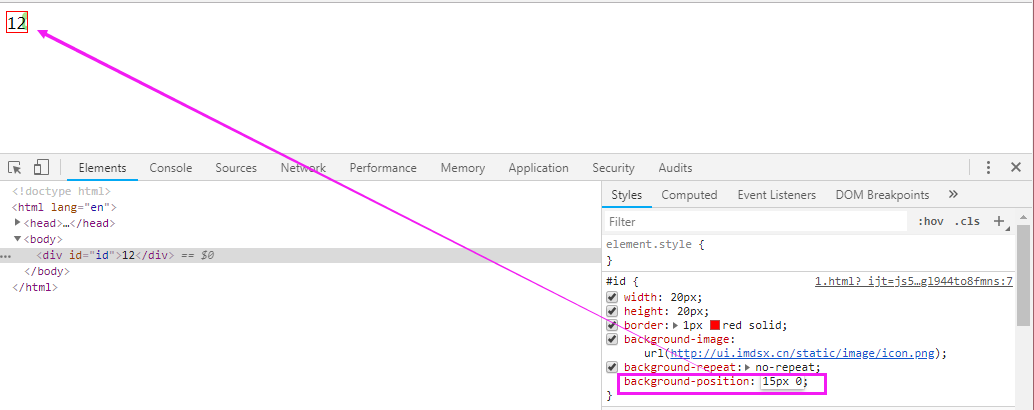
调整上图position的横向纵向值,观察界面。