Spring Security认识
Spring Security是基于spring的应用程序提供声明式安全保护的安全性框架,它提供了完整的安全性解决方案,能够在web请求级别和方法调用级别
处理身份证验证和授权.它充分使用了依赖注入和面向切面的技术.
下面是我接触Spring Security的第一个小Demo
第一个案例是直接基于内存的,并没有用到数据库的物理表,不过后面也会具体出详细的博客
开发环境:Intellij idea
1.首先引入所需要用到的依赖
        <dependency>
            <groupId>org.thymeleaf.extras</groupId>
            <artifactId>thymeleaf-extras-springsecurity4</artifactId>
        </dependency>
        <!--spring Security依赖-->
        <dependency>
            <groupId>org.springframework.boot</groupId>
            <artifactId>spring-boot-starter-security</artifactId>
        </dependency>
2.SecurityConfig类的编写:
package cn.leon.util;
import org.springframework.beans.factory.annotation.Autowired;
import org.springframework.security.config.annotation.authentication.builders.AuthenticationManagerBuilder;
import org.springframework.security.config.annotation.web.builders.HttpSecurity;
import org.springframework.security.config.annotation.web.configuration.EnableWebSecurity;
import org.springframework.security.config.annotation.web.configuration.WebSecurityConfigurerAdapter;

@EnableWebSecurity
public class SecurityConfig extends WebSecurityConfigurerAdapter {
    @Override
    protected void configure(HttpSecurity http) throws Exception {
        http
                .authorizeRequests()
                .antMatchers("/css/**","/js/**","/fonts/**", "/index").permitAll() //都可以访问
                .antMatchers("/users/**").hasRole("ADMIN") //需要相应的角色才能访问
                .and()
                .formLogin() //基于Form表单登录验证
                .loginPage("/login") //自定义登录信息
               .failureUrl("/login-error");
    }

    @Autowired
    public void configureGlobal(AuthenticationManagerBuilder auth) throws Exception {
        auth
                .inMemoryAuthentication() //认证信息存储在内存中
                .passwordEncoder(new MyPasswordEncoder())//在此处应用自定义PasswordEncoder
                .withUser("leon").password("123").roles("ADMIN");
    }

}
3.自定义一个MyPasswordEncoder
package cn.leon.util;

import org.springframework.security.crypto.password.PasswordEncoder;


public class MyPasswordEncoder implements PasswordEncoder {

    @Override
    public String encode(CharSequence arg0) {
        return arg0.toString();
    }

    @Override
    public boolean matches(CharSequence arg0, String arg1) {
        return arg1.equals(arg0.toString());
    }

}
4.Controller编写
扫描二维码关注公众号,回复:
1936138 查看本文章

package cn.leon.controller;

import org.springframework.stereotype.Controller;
import org.springframework.ui.Model;
import org.springframework.web.bind.annotation.GetMapping;
import org.springframework.web.bind.annotation.RequestMapping;


@Controller
public class MainController {
   /* @GetMapping("/")
    public String root(){
        return "redirect:/index";
    }*/

    @GetMapping("/index")
    public String index(){
        return "index";
    }

    @GetMapping("/login")
    public String login(){
        return "login";
    }

    @GetMapping("/login-error")
    public String loginError(Model model){
        model.addAttribute("loginError",true);
        model.addAttribute("errorMsg","登录失败,用户名或密码错误");
        return "login";
    }


}
UI界面:
login.html
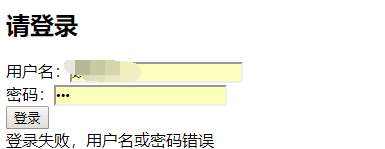
<!DOCTYPE html>
<html xmlns="http://www.w3.org/1999/xhtml" xmlns:th="http://www.thymeleaf.org"
         xmlns:sec="http://www.thymeleaf.org/thymeleaf-extras-springsecurity3"
>
    <meta charset="UTF-8">
    <title>登录</title>
    <script type="text/javascript" th:src="@{/js/jquery-1.8.3.min.js}"></script>
    <script type="text/javascript">

    </script>
</head>
<body>
   <div>
       <form th:action="@{/login}" method="post">
           <h2>请登录</h2>
           用户名:<input name="username" type="text"/><br/>
           密码:<input name="password" type="password"/><br/>
           <input type="submit" value="登录"/><br/>
           <div th:if="${loginError}"></div>
           <div th:text="${errorMsg}"></div>
       </form>
   </div>
</body>
</html>
index.html
<!DOCTYPE html>
<html xmlns="http://www.w3.org/1999/xhtml" xmlns:th="http://www.thymeleaf.org"
      xmlns:sec="http://www.thymeleaf.org/thymeleaf-extras-springsecurity4"
>
<head>
    <meta charset="UTF-8">
    <title>博客系统</title>
    <script type="text/javascript" th:src="@{/js/jquery-1.8.3.min.js}"></script>
    <script type="text/javascript">

    </script>
</head>
<body>
   <div>
      <div sec:authorize="isAuthenticated()">
          <p>登录的用户名为:<span sec:authentication="name"></span></p>
          <p>登录的角色为:<span sec:authentication="principal.authorities"></span></p>
      </div>
       <div sec:authorize="isAnonymous()">
            <p>未登录</p>
       </div>
   </div>
</body>
</html>
最后我们走一遍测试数据 如果成功的话就是下图:会展示登陆的用户名字和对应的权限信息

如果是失败: