本文主要介绍elasticsearch5.0安装及head插件安装。确保系统已经安装好jdk1.8以上,操作系统CentOS6以上。
一、elasticsearch安装配置
1.官网下载源码包
https://artifacts.elastic.co/downloads/elasticsearch/elasticsearch-5.0.0.tar.gz
2.解压安装
useradd elasticsearch

tar xf elasticsearch-5.0.0.tar.gz -C /usr/local

cd /usr/local

ln -sv elasticsearch-5.0.0 elasticsearch

mkdir -pv /data/elasticsearch/{data,logs}

chown -R elasticsearch.elasticsearch /data/elasticsearch
3.修改配置文件
cat /usr/local/elasticsearch/config/elasticsearch.yml

path.data:/data/elasticsearch/data

path.logs:/data/elasticsearch/logs

network.host:192.168.1.12

http.cors.enabled:true

http.cors.allow-origin:"*"
4.修改系统参数
cat /etc/security/limits.conf

*              soft    nproc          65536

*              hard    nproc          65536

*              soft    nofile          65536

*              hard    nofile          65536

cat /etc/sysctl.conf

vm.max_map_count= 262144

sysctl -p
5.启动服务
su - elasticsearch -c "/usr/local/elasticsearch/bin/elasticsearch &"
浏览器访问:http://192.168.1.12:9200/

二、head插件的安装
在5.0版本中不支持直接安装head插件,需要启动一个服务
1.下载插件安装
先安装node 自带一个npm。
git clone git://github.com/mobz/elasticsearch-head.git

cd elasticsearch-head

npm install

在elasticsearch-head目录下node_modules/grunt下如果没有grunt二进制程序,需要执行
cd elasticsearch-head

npm install grunt --save
2.修改配置
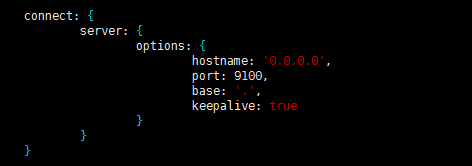
修改elasticsearch-head下Gruntfile.js文件,默认监听在127.0.0.1下9200端口
3.启动服务
/usr/local//node-v4.4.7-linux-x64/bin/npm start

浏览器访问 http://123.56.154.68:9100/

到此安装完成了!
附:
elasticsearch 5.0 安装过程中遇到了一些问题,这是在网上找的一些资料
警告提示
[2016-11-06T16:27:21,712][WARN ][o.e.b.JNANatives ] unable to install syscall filter: java.lang.UnsupportedOperationException: seccomp unavailable: requires kernel 3.5+ with CONFIG_SECCOMP and CONFIG_SECCOMP_FILTER compiled in at org.elasticsearch.bootstrap.Seccomp.linuxImpl(Seccomp.java:349) ~[elasticsearch-5.0.0.jar:5.0.0] at org.elasticsearch.bootstrap.Seccomp.init(Seccomp.java:630) ~[elasticsearch-5.0.0.jar:5.0.0] 报了一大串错误,其实只是一个警告。使用心得linux版本,就不会出现此类问题了。
ERROR: bootstrap checks failed
max file descriptors [4096] for elasticsearch process likely too low, increase to at least [65536] max number of threads [1024] for user [lishang] likely too low, increase to at least [2048] max virtual memory areas vm.max_map_count [65530] likely too low, increase to at least [262144] 解决:切换到root用户,编辑limits.conf 添加类似如下内容
vi /etc/security/limits.conf
添加如下内容:
* soft nofile 65536
* hard nofile 131072
* soft nproc 2048
* hard nproc 4096
对于第二条错误同意需要切换到root用户,进入limits.d目录下修改配置文件。
vi /etc/security/limits.d/90-nproc.conf
修改如下内容:
* soft nproc 1024
#修改为
* soft nproc 2048
第三条错误需要切换到root用户修改配置sysctl.conf
vi /etc/sysctl.conf
添加下面配置:
vm.max_map_count=655360
并执行命令:
sysctl -p
然后,重新启动elasticsearch,即可启动成功。
启动问题
**1、Java HotSpot(TM) 64-Bit Server VM warning: INFO: os::commit_memory(0x0000000085330000, 2060255232, 0) failed; error='Cannot allocate memory' (errno=12)** 由于elasticsearch5.0默认分配jvm空间大小为2g,修改jvm空间分配
# vim config/jvm.options
-Xms2g
-Xmx2g
修改为
-Xms512m
-Xmx512m
2、max number of threads [1024] for user [elasticsearch] is too low, increase to at least [2048]修改 /etc/security/limits.d/90-nproc.conf
*          soft    nproc     1024
*          soft    nproc     2048
3、max virtual memory areas vm.max_map_count [65530] is too low, increase to at least [262144]
修改/etc/sysctl.conf配置文件,
cat /etc/sysctl.conf | grep vm.max_map_countvm.max_map_count=262144
如果不存在则添加
echo "vm.max_map_count=262144" >>/etc/sysctl.conf
4、max file descriptors [65535] for elasticsearch process likely too low, increase to at least [65536]
需要执行下面的命令
ulimit -n 65536