首先建议阅读官方文档http://axis.apache.org/axis2/java/core/docs/spring.html
然后就是实践了
1、maven的pom.xml中关于axis2的配置
- <dependency>
- <groupId>org.apache.axis2</groupId>
- <artifactId>axis2-transport-http</artifactId>
- <version>1.7.2</version>
- </dependency>
- <dependency>
- <groupId>org.apache.axis2</groupId>
- <artifactId>axis2-spring</artifactId>
- <version>1.7.2</version>
- </dependency>
- <dependency>
- <groupId>org.apache.axis2</groupId>
- <artifactId>axis2</artifactId>
- <version>1.6.2</version>
- </dependency>
- <dependency>
- <groupId>org.apache.axis2</groupId>
- <artifactId>axis2-transport-local</artifactId>
- <version>1.7.2</version>
- </dependency>
- <dependency>
- <groupId>org.apache.axis2</groupId>
- <artifactId>axis2-kernel</artifactId>
- <version>1.6.2</version>
- </dependency>
2、编写axis2的对外提供服务的类以及方法(我这里不写接口了,熟悉spring的应该知道最好使用接口以及接口的实现)
我的项目名称是 mavenssh,包路径为com.bestcxx.mavenstu.mavenssh.axis2,类名为Axis2Webservice,方法只有一个叫getStrA
- package com.bestcxx.mavenstu.mavenssh.axis2;
- public class Axis2Webservice {
- public String getStrA(){
- String str="123";
- System.out.println("你输入的是:"+str);
- return str;
- }
- }
- <!--如果没有ServletContext配置 则需要增加下面这句 -->
- <!--<bean id="applicationContext"
- class="org.apache.axis2.extensions.spring.receivers.ApplicationContextHolder" /> -->
- <bean id="springAwareService" class="com.bestcxx.mavenstu.mavenssh.axis2.Axis2Webservice" scope="prototype"/>
4、web.xml编写
- <listener>
- <description>Spring ApplicationContext 载入</description>
- <listener-class>org.springframework.web.context.ContextLoaderListener</listener-class>
- </listener>
- <!-- Spring ApplicationContext配置文件的路径,可使用通配符,多个路径用,号分隔 此参数用于后面的Spring Context
- Loader -->
- <context-param>
- <param-name>contextConfigLocation</param-name>
- <param-value>classpath:spring/applicationContext.xml</param-value>
- </context-param>
- <!-- axis2设置 -->
- <servlet>
- <servlet-name>AxisServlet</servlet-name>
- <servlet-class>org.apache.axis2.transport.http.AxisServlet</servlet-class>
- </servlet>
- <servlet-mapping>
- <servlet-name>AxisServlet</servlet-name>
- <url-pattern>/services/*</url-pattern>
- </servlet-mapping>
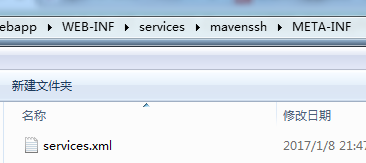
5、最后是services.xml的编写,这里需要注意路径
比如这里我的项目名称为mavenssh
就需要把services.xml放置到项目的如下路径中
-webapp
-WEB-INF
-services
-mavenssh
-META-INF
-services.xml
services.xml的内容为
- <service name="SpringAwareService"><!-- 访问的时候,这个是wsdl服务的名字 -->
- <description>
- simple spring example
- </description>
- <parameter name="ServiceObjectSupplier">org.apache.axis2.extensions.spring.receivers.SpringServletContextObjectSupplier</parameter>
- <parameter name="SpringBeanName">springAwareService</parameter><!-- 这个是spring中配置的bean名字 -->
- <parameter name="getStrA"><!-- 这个是对外提供的服务的具体方法名 -->
- <span style="white-space:pre;"> </span> <messageReceiver class="org.apache.axis2.receivers.RawXMLINOutMessageReceiver"/>
- </parameter>
- </service>
http://localhost:8085/mavenssh/services/SpringAwareService?wsdl
7、但是控制台提示
Please update your axis2.xml file!
只需把我们上面实验的axis2.war中的WEB_INF/conf/下的axis2.xml复制到mavenssh(你的项目)下的WEB_INF目录下即可
里面有个用户名和密码,建议注释掉。
转载请声明出处:http://blog.csdn.net/bestcxx/article/details/53889270