Node管理
-
node隔离与恢复
将某些node隔离,脱离k8s集群的调度范围
#①、使用yaml配置文件创建隔离

#cat unschedulabe.yaml

apiVersion: v1
kind: Node
metadata:
  name: 192.168.132.136                #节点名称
  labels:
    kubernetes.io/hostname: 192.168.132.136      #这里写节点名称
spec:
  unschedulable: true                  #true 表示隔离

#②、使用命令直接隔离
kubectl patch node 192.168.132.136 -p '{"spec":{"unschedulable":false}}'     #false表示不进行隔离

#③、使用 uncordon和cordon
kubectl cordon 节点名称             #对某个node进行隔离
kubectl uncordon 节点名称                #对node恢复调度
pod脱离k8s调度时,pod内的容器不会自动停止,需要手动停止在该node上运行的pod
-
Node扩容
新的node加入集群,在node节点上安装docker、kubernetes-node(kubelet)、kube-proxy,flannel服务,然后配置kubelet、kube-proxy的启动参数,将master url指定为当前k8s集群master地址,启动这些服务。通过kubelet默认的自动注册机制,新的node会自动加入现有的node
-
更新资源对象label
例:
#给创建的pod添加标签 role=backend
kubectl label pod pod名称 role=backend

#删除一个label,只需在命令行最后指定label的key名并与一个减号相即可
kubectl label pod pod名称 role-

#修改一个label的值,需要加上 --overwrite参数
kubectl label pod podname role=master(新标签名称) --overwrite
-
Namespace集群环境共享与隔离
k8s通过命名空间和context的设置来对不同的工作组进行区分,使得他们既可以共享同一个kubernets集群的服务,也能够互不干扰
假设有运维组和开发组两个组。每个组的资源对象互相不干扰
①、为两个组创建namesapce dev和production并查看
[root@k8s_master operation]# cat namespace-development.yaml
apiVersionn: v1
kind: Namespace
metadata:
  name: dev
[root@k8s_master operation]# cat namespace-production.yaml
apiVersionn: v1
kind: Namespace
metadata:
  name: product

[root@k8s_master operation]# kubectl create -f namespace-production.yaml -f namespace-development.yaml
namespace "product" created
namespace "dev" created

[root@k8s_master operation]# kubectl get namespaces
NAME          STATUS    AGE
default       Active    278d
dev           Active    32s
kube-system   Active    278d
product       Active    32s


②、为这两个组创建运行环境Context并查看

[root@k8s_master operation]# kubectl config set-cluster kubernetes-cluster --server=http://192.168.132.148:8080
Cluster "kubernetes-cluster" set.

[root@k8s_master operation]# kubectl config set-context ctx-dev --namespace=dev --cluster=kubernetes-cluser --user=dev
Context "ctx-dev" set.
[root@k8s_master operation]# kubectl config set-context ctx-product --namespace=product --cluster=kubernetes-cluser --user=product
Context "ctx-product" set.

#查看创建的context
[root@k8s_master operation]# kubectl config view
apiVersion: v1
clusters:
- cluster:
    server: http://192.168.132.148:8080
  name: kubernetes-cluster
contexts:
- context:
    cluster: kubernetes-cluser
    namespace: dev
    user: dev
  name: ctx-dev
- context:
    cluster: kubernetes-cluser
    namespace: product
    user: product
  name: ctx-product
current-context: ""
kind: Config
preferences: {}
users: []

#注:此时会在${home}/.kube目录下生成config文件,里面内容为上面config view的结果


#③、设置工作组在特定的Context环境中工作
#使用语法
 kubectl config use-contetxt <context-name>

#将当前运行环境设置为ctx-dev
[root@k8s_master operation]# kubectl config use-context ctx-dev
Switched to context "ctx-dev".

通过这个命令,当前的环境被设置文开发组需要的环境,所有操作都会在dev命名空间完成

#④创建pod进行测试
[root@k8s_master operation]# cat redis-slave-controller.yaml
apiVersion: v1
kind: ReplicationController
metadata:
    name: redis-slave
    labels:
        name: redis-slave
spec:
    replicas: 2
    selector:
        name: redis-slave
    template:
        metadata:
            labels:
                name: redis-slave
        spec:
            containers:
            - name: slave
              image: docker.io/kubeguide/guestbook-redis-slave
              imagePullPolicy: IfNotPresent
              ports:
              - containerPort: 6379

#查看pod
[root@k8s_master operation]# kubectl get pods --namespace=dev    #默认创建在dev命名空间
NAME                READY     STATUS    RESTARTS   AGE
redis-slave-0f6vp   1/1       Running   0          1m
redis-slave-pgrhk   1/1       Running   0          1m
[root@k8s_master operation]# kubectl get pods --namespace=product
No resources found.
[root@k8s_master operation]# kubectl get pods --namespace=deafult
No resources found.


#切换到product运行环境进行查看
[root@k8s_master operation]# kubectl config use-context ctx-product
Switched to context "ctx-product".
[root@k8s_master operation]# kubectl get rc
No resources found.
[root@k8s_master operation]# kubectl get pods
No resources found.
[root@k8s_master operation]# kubectl config use-context kube-system    #由于kube-system运行环境不存在,所以报错(运行环境和namespace是两码事)
error: no context exists with the name: "kube-system".
-
kubernetes资源管理
计算资源管理
计算资源配置项:
- 资源请求(Resource Requests)
- 资源限制(Resource Limits),容器最多能够使用到的资源量的上限
计算资源类型:
- CPU : 基本单位核心数(Cores)
- memory :基本单位字节数(Bytes)
(1)pod容器的Requests和Limits
每个容器都可以配置4个参数
spec.container[].resources.requests.cpu
spec.container[].resources.limits.cpu
spec.container[].resources.requests.memory
spec.container[].resources.limits.memory

特点:
①、requests和limits都是可选的,如果都不设定,会使用系统提供的默认值
②、如果Request没有配置,默认会被设置为limits
③、任何情况下Limits都应该设置为大于或者等于Requests
Cpu的Requests和Limits是通过CPU数来度量,如果容器的 spec.container[].resources.requests.cpu 设置为0.5 那么他会获得半个cpu,k8s Api会将0.5 转化为500m(millicpu)
内存(memory)的Requests和Limits的计量单位是字节数(Bytes)内存值使用证书或者定点整数
k8s 的计算资源大小写敏感,因为m为千分之一单位,而M可以表示十进制的1000,示例如下:
apiVersion: v1
kind: Pod
metadata:
  name: webapp
  labels:
    name: webapp
spec:
  containers:
  - name: webapp
    image: tomcat
    resources:
      requests:
        memory: "64Mi"
        cpu: "500m"
      limits:
        memory: "128Mi"
        cpu: "500m"
  - name: wp
    images: wordprocess
    resources:
      requests:
        memory: "64Mi"
        cpu: "250m"
      limits:
        memory: "128Mi"
        cpu: "500m"

#该pod包含两个容器,两个容器配置相同,这个pod的Reqources和Limits等于pod中所有容器对应配置的总合,
(2)基于Requests和Limits的Pod调度机制
一个pod创建成功时,k8s调度器(scheduler)为该pod选择一个节点来执行,对于每种计算资源来说,每个节点都有一个能用于运行pod的最大容量值,调度器在调度时,首先要确保调度后该节点上所有pod的cpu和memory的Requests总合不能超过该节点能提供给pod使用的cpu和memory的最大值
如果某节点的Requsts值很高,并且加上需要调度的pod的Requests值会超过该节点提供给pod的资源容量的上限,k8s仍然不会将pod调度到该节点
(3)计算资源相关问题分析
pod状态为pending,错误为failedScheduling
如果k8s调度器一直找不到合适的节点来运行pod,那么这个pod一直处于未调度状态,知道调度器找到合适的节点为止,每次调度失败都会产生一个事件,通过如下命令查看原因
kubectl describe pod <pod-name> | grep -A Events
可以使用decribe命令来查看集群中节点的计算资源容量和使用量
kubectl describe nodes <node-name>
容器被强行终止
如果容器使用的资源超过了它配置的limits,容器可能会被强制终止,同样可以通过describe命令 查看到
可以通过 使用 kubectl get pod 命令时添加-o go-template=。。格式来读取已终止容器之前的状态信息
资源配置范围管理
默认情况下,kubernetes 的pod会以无限制的cpu和内存运行,即k8s系统中任何的pod都可以使用其所在节点上的所有可用的cpu和内存,通过配置pod的计算资源Requests和Limits,可以限制pod的资源使用,由于配置每一个pod的资源限制繁琐,所以需要对集群内Requests和Limits的配置做全局的统一的限制,常见场景:
- 集群中每个节点中pod申请的资源不能超过节点的内存
- 集群中为不同的namespace设置不同的资源大小
- 新建一个pod需要的资源刚好比整个节点的资源上限小一点,但是剩下的资源又不足以运行其他任务,整个集群的资源加起来又有些浪费,设置每个pod必须至少使用集群平均资源值的20%
针对以上场景,k8s提供了LimitRange机制,对pod和容器的Requests和Limits配置做进一步限制,将LimitRange应用到namespace中。
示例:
#创建一个namespace
kubectl create namespace limit-exm

#新建一个limitRange
[root@k8s_master operation]# cat limitRange.yaml
apiVersion: v1
kind: LimitRange
metadata:
  name: mylimits
spec:
  limits:
  - max:
      cpu: "1"
      memory: 1Gi
    min:
      cpu: 200m
      memory: 6Mi
    maxLimitRequestRatio:
      cpu: 1
      memory: 1
    type: Pod

  - default:
      cpu: 300m
      memory: 200Mi
    defaultRequest:
      cpu: 200m
      memory: 100Mi
    max:
      cpu: "1"
      memory: 1Gi
    min:
      cpu: 100m
      memory: 3Mi
    maxLimitRequestRatio:
      cpu: 5
      memory: 4
    type: Container

#创建并查看
[root@k8s_master operation]# kubectl create -f limitRange.yaml --namespace=limit-exm      #为namespace创建一个limitRange
limitrange "mylimits" created

[root@k8s_master operation]# kubectl describe limits mylimits --namespace=limit-exm
Name:        mylimits
Namespace:    limit-exm
Type        Resource    Min    Max    Default Request    Default Limit    Max Limit/Request Ratio
----        --------    ---    ---    ---------------    -------------    -----------------------
Pod          cpu        200m    1     -                   -                1  #这个值是自己定义的,目的为与pod内全部limits总和与Requests总和的比例做比较
Pod          memory     6Mi    1Gi    -                   -                1
Container    cpu        100m    1     200m                300m             5
Container    memory     3Mi    1Gi    100Mi               200Mi            4
解释:
(1)无论是cpu还是内存,在LimitRange中,Pod或者container都可以设置 Min、Max和Max Limit/Requests Ratio这三个参数;
Container 还可以设置 Default Request和Default Limit这两种参数
(2)对Pod和Container的参数解释
(2.1) Container的Min 是pod中所有容器的Request值的下线,Max是pod中所有容器的Limit值的上限
Container的DefaultRequest 是pod中所有未指定Requests值的容器的默认Requests值
Container的Default Limit是pod 中所有未指定的Limits值得容器的默认的Limits值
对于同一资源类型(pod,service等),4个参数必须满足如下:Min<= Default Requests <= Default Limit <= Max
(2.2) Pod 的Min 是pod中所有容器的Requests值的总和的下限
Pod 的Max 是pod中所有容器的Limits值的总和的上限
当容器未指定Requests值或者 Limits值时,将使用Container的DefaultRequest值或者DefaultLimit值
(2.3) Container 的MaxLimit/Requests Ratio 限制了pod中所有容器的Limits值与Request值总和的比例上限
Pod的 Max Limit/Requests Ratio 限制了pod中所有容器的Limits值总和与Requests值总和的比例上限
(3) 如果设置了 Container的Max,那么对于该类资源而言,整个集群中所有容器都必须设置Limits,否则无法创建成功;
如果Pod内的容器未配置Limit时,将使用Default Limit的值(本例为default指定的 300mcpu和200Mi内存),
如果Default未配置,也无法创建成功
(4) 如果设置了 Container的Min,那么对于该类资源而言,整个集群中所有容器都必须设置Requests,否则无法创建成功;
如果Pod内的容器未配置requests时,将使用defaultRequest的值(本例为defaultRequest指定的 200mcpu和100Mi内存),
如果defaultRequest未配置,则会默认等于该容器的Limits,如果Limits为定义则会报错
(5) 对于任意一个Pod而言,该Pod中所有容器的Requests综合必须大于6Mi,而且所有容器的Limits总合必须小于或者等于1Gi
同样,所有容器的Cpu的Requests总和必须大于或等于200m,而且所有容器的cpu Limits总和必须小于或等于2
(6) Pod里任何容器的limit 与Requests的比例不超过Container的Max Limit/Requests Ratio
Pod里所有容器的Limit总和与Requests的总和比例不能超过Pod的Max Limit/Requests Ratio
命名空间的限制,只会在pod创建或者更新的时候执行检查,如果手动修改了限制为一个新的值,name这个新的值不会去检查之前在此命名空间创建过的pod
资源配额管理
资源限额(Resource Quota),解决集群被多个团队共享使用资源时超过公平原则分配的资源量的问题
资源限额可以为每一个命名空间提供一个总体的资源使用的限制,限制命名空间某种类型的资源对象的总数目上线,限制pod可以使用到的计算资源的总上限,使用场景方式:
- 为每个命名空间创建一个或多个资源配额项
- 当用户在命名空间中使用资源时,k8s的配额系统统计、监控、检查资源用量,以确保使用的资源用量没有超过资源配额的配置
- 如果创建或更新应用时,资源使用超过了某项资源配额限制,创建或更新会报错
- 如果命名空间的资源配额启用,那么用户必须为相应的资源类型设置 Request和Limits,否则配额系统会直接拒绝pod的创建,这里可以使用LimitRange来配合使用
示例
(1)master 通过kub-apiserver 的--adminission-controll=参数值中添加ResourceQuata参数开启资源配额,一个命名空间可以有多个资源配额
(2)配额的作用域
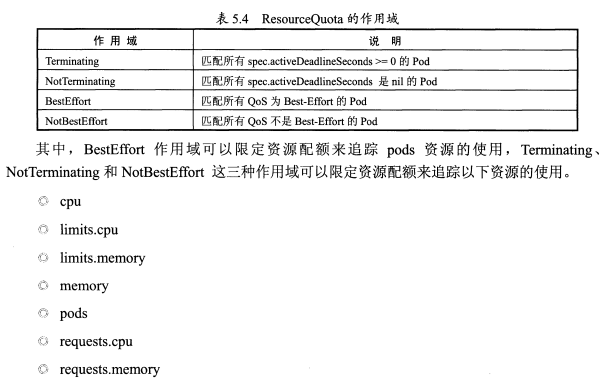
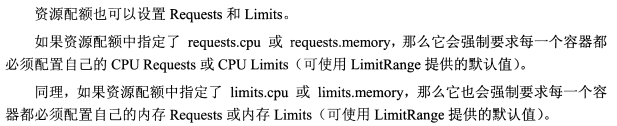
(3)资源配额中使用Requests和Limits
(4) 资源配额(ResourceQouta)定义
示例:
与LimitRange一样,资源配额也设置在namespace中,首先创建一个namespace
kubectl create namespace myspace
创建ResourceQuota配置文件 compute-reqources.yaml,用于设置计算资源的配额
[root@k8s_master operation]# cat compute-resources.yaml
apiVersion: v1
kind: ResourceQuota
metadata:
  name: compute-resource
spec:
  hard:
    pods: "4"
    requests.cpu: "1"
    requests.memory: 1Gi
    limits.cpu: "2"
    limits.memory: 2Gi
[root@k8s_master operation]# kubectl create -f compute-reqources.yaml --namespace=myspace #创建配额
resourcequota "compute-resource" created
创建ResourceQuota配置文件object-counts.yaml,用于设置对象数量的限额
[root@k8s_master operation]# cat object-counts.yaml
apiVersion: v1
kind: ResourceQuota
metadata:
  name: object-counts
spec:
  hard:
    configmaps: "10"
    persistentvolumeclaims: "4"
    replicationcontrollers: "20"
    secrets: "10"
    services: "10"
    services.loadbalancers: "2"

[root@k8s_master operation]# kubectl create -f object-counts.yaml  --namespace=myspace      #创建配额
resourcequota "object-counts" created
查看配额详细信息,具体解释说明看上面表格
[root@k8s_master operation]# kubectl describe quota compute-resource --namespace=myspace
Name:        compute-resource
Namespace:    myspace
Resource    Used    Hard
--------    ----    ----
limits.cpu    0    2
limits.memory    0    2Gi
pods        0    4
requests.cpu    0    1
requests.memory    0    1Gi

[root@k8s_master operation]# kubectl describe quota object-counts --namespace=myspace
Name:            object-counts
Namespace:        myspace
Resource        Used    Hard
--------        ----    ----
configmaps        0    10              #configmap数量
persistentvolumeclaims    0    4          #volume数量
replicationcontrollers    0    20          #rc数量
secrets            0    10
services        0    10               #service数量
services.loadbalancers    0    2          #负载均衡器数量
ResourceQuota与 LmitRange实践
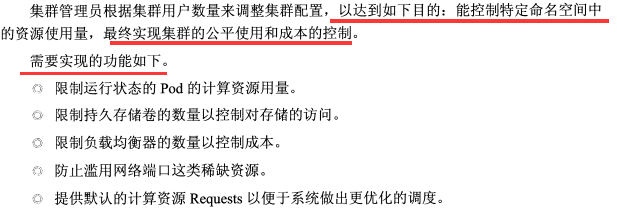
目标
(1)创建命名空间
kubectl create namespace quota-example
(2)设置限定对象数目的资源配额,控制以下资源数量
- 持久存储卷
- 负载均衡器
- NodePort
[root@k8s_master operation]# cat object-counts.yaml
apiVersion: v1
kind: ResourceQuota
metadata:
  name: object-counts
spec:
  hard:
    persistentvolumeclaims: "2"
    services.loadbalancers: "2"
    services.nodeports: "0"

#创建并查看配额
[root@k8s_master operation]# kubectl create -f object-counts.yaml --namespace=quota-example
resourcequota "object-counts" created

[root@k8s_master operation]# kubectl describe quota  object-counts --namespace=quota-example
Name:            object-counts
Namespace:        quota-example
Resource        Used    Hard
--------        ----    ----
persistentvolumeclaims    0    2
services.loadbalancers    0    2
services.nodeports    0    0
(3) 设置限定计算资源的资源配额
[root@k8s_master operation]# cat compute-reqources.yaml
apiVersion: v1
kind: ResourceQuota
metadata:
  name: compute-resource
spec:
  hard:
    pods: "4"
    requests.cpu: "1"
    requests.memory: 1Gi
    limits.cpu: "2"
    limits.memory: 2Gi

[root@k8s_master operation]# kubectl create -f compute-reqources.yaml --namespace=quota-example
resourcequota "compute-resource" created


[root@k8s_master operation]# kubectl describe quota compute-resource --namespace=quota-example
Name:        compute-resource
Namespace:    quota-example
Resource    Used    Hard
--------    ----    ----
limits.cpu    0    2
limits.memory    0    2Gi
pods        0    4
requests.cpu    0    1
requests.memory    0    1Gi
(4) 配置默认Requests和Limits
命名空间已经限定了计算资源的资源配额,在创建pod时,不指定cpu和内存的Requests和Limits,默认是创建不成功的,为了避免创建失败,可以创建一个LimitRange来为这个pod下的资源提供一个默认的资源配置
[root@k8s_master operation]# cat limits.yaml
apiVersion: v1
kind: LimitRange
metadata:
  name: mylimits
spec:
  limits:
  - max:
      cpu: "1"
      memory: 1Gi
    min:
      cpu: 200m
      memory: 6Mi
    maxLimitRequestRatio:
      cpu: 1
      memory: 1
    type: Pod

  - default:
      cpu: 300m
      memory: 200Mi
    defaultRequest:
      cpu: 200m
      memory: 100Mi
    max:
      cpu: "1"
      memory: 1Gi
    min:
      cpu: 100m
      memory: 3Mi
    maxLimitRequestRatio:
      cpu: 5
      memory: 4
    type: Container

[root@k8s_master operation]# kubectl create -f limits.yaml  --namespace=limit-exmaple
LimitRange创建成功后,用户在该命名空间创建未指定资源配置的pod时,就会使用默认的资源配置
随时查看资源配额的使用情况
kubectl describe quota --namespace=quota-example
kubernetes集群高可用部署
etcd高可用查看k8s集群安装文档
master高可用,略
-
kubernets集群监控
通过cAdvisor监控容器的运行状态,只需要在kubelet的启动参数中加入 --cadvisor-port=端口号 即可,默认是4194,重启服务即可
访问nodeip:端口可查看监控页面
由于cadvisor 是在每台nod上运行的,只能采集本机的性能指标数据,所以需要对每台node主机单独监控,,针对大型集群可用开源组件解决方案 Heapster、InfluxDB、Grafana
-
kubernetes 日志收集
见 https://www.cnblogs.com/FRESHMANS/p/9389635.html
-
kubelet垃圾回收机制
kubectl的以下启动参数用于设置镜像GC回收
- image-gc-high-threshold,磁盘消耗的最高百分比,超过的话就会触发image垃圾回收,默认90%。
- image-gc-low-threshold,磁盘消耗的最低百分比,应该是当磁盘消耗比低于这个值时,不触发或者停止image垃圾回收,默认值80%。
kubectl的以下启动参数用于设置container GC回收
- minimum-container-ttl-duration,表示在被垃圾回收之前,一个结束运行容器的最小寿命,默认是1分钟,意思是只要超过此时间,立即就可以回收。
- maximum-dead-containers-per-container,每个容器可以被保留的最大个数的过期实例的个数,默认值是2。
- maximum-dead-containers,节点全局范围内,能够保留的容器过期实例的最大个数,默认-1,表示没有限制。
-
kubernetes常见问题解决思路
kubectl describe pod/service/rc/deployment <pod/service/rc/deployment-name> #查看资源的详细信息
kubectl logs <pod-name> #查看程序日志
systemctl status kube-controller-manager -l #查看 kube-controller-manager服务日志
journalctl -u kube-controller-manager #查看 kube-controller-manager服务错误日志