在弄android刷新的时候,可算是耗费了一番功夫,最后发觉有现成的控件,并且非常好用,这里记录一下。
原文是 https://blog.csdn.net/huangxin112/article/details/78781682 ,这里是看了之后,结合自己实际遇到的问题写的。
首先引入包。
    //下拉框
    implementation 'com.android.support:recyclerview-v7:28.0.0-beta01'
    implementation 'com.scwang.smartrefresh:SmartRefreshLayout:1.0.3'
    implementation 'com.scwang.smartrefresh:SmartRefreshHeader:1.0.3'//没有使用特殊Header,可以不加这行
recyclerview 是为了数据显示用,因为在使用中,发现 使用ListView 会报错,不过我看别人用成功了的,具体我也懒得去查了。
recyclerview 以后具体在学习吧,反正是个比较好用的东西就是了。
首先是页面文件 activity_main.xml
<com.scwang.smartrefresh.layout.SmartRefreshLayout
    xmlns:android="http://schemas.android.com/apk/res/android"
xmlns:app="http://schemas.android.com/apk/res-auto"
xmlns:tools="http://schemas.android.com/tools"
android:id="@+id/refreshLayout"
android:layout_width="match_parent"
android:layout_height="match_parent"
tools:context=".MainActivity"
    >
<android.support.v7.widget.RecyclerView
    android:id="@+id/recyclerview"
    android:layout_width="match_parent"
    android:layout_height="match_parent"
    android:overScrollMode="never"
    android:background="#fff" />

</com.scwang.smartrefresh.layout.SmartRefreshLayout>
接着是具体的布局显示文件: item.xml
<?xml version="1.0" encoding="utf-8"?>
<LinearLayout xmlns:android="http://schemas.android.com/apk/res/android"
    android:orientation="horizontal"
    android:layout_width="match_parent"
    android:layout_height="60dp"
    android:gravity="center">

    <ImageView
        android:id="@+id/iv_image"
        android:layout_width="60dp"
        android:layout_height="60dp"
        android:gravity="center"
        android:background="@mipmap/ic_launcher"></ImageView>

    <LinearLayout
        android:layout_width="match_parent"
        android:layout_height="match_parent"
        android:orientation="vertical">

        <TextView
            android:id="@+id/tv_title"
            android:layout_width="match_parent"
            android:layout_height="30dp"
            android:text="title"
            android:gravity="center"
            ></TextView>

        <TextView
            android:id="@+id/tv_content"
            android:layout_width="match_parent"
            android:layout_height="30dp"
            android:text="content1231231231232323"
            android:gravity="center"
            ></TextView>
    </LinearLayout>


</LinearLayout>
显示的bean 对象,
package com.example.administrator.shuaxin;

public class ItemBean {
    int itemImage;
    String itemTitle;
    String itemContent;

    public ItemBean(int itemImage , String itemTitle, String itemContent) {
        this.itemTitle = itemTitle;
        this.itemContent = itemContent; this.itemImage = itemImage; } }
适配器MyAdapter:
package com.example.administrator.shuaxin;

import android.support.v7.widget.RecyclerView;
import android.view.LayoutInflater;
import android.view.View;
import android.view.ViewGroup;
import android.widget.ImageView; import android.widget.TextView; import java.util.List; public class MyAdapter extends RecyclerView.Adapter<MyAdapter.ViewHolder>{ private List<ItemBean> mList; static class ViewHolder extends RecyclerView.ViewHolder{ View myView; ImageView imageView; TextView title; TextView content; public ViewHolder(View itemView) { super(itemView); myView = itemView; imageView = (ImageView) itemView.findViewById(R.id.iv_image); title = (TextView) itemView.findViewById(R.id.tv_title); content = (TextView) itemView.findViewById(R.id.tv_content); } } public MyAdapter(List<ItemBean> list){ this.mList = list; } @Override public ViewHolder onCreateViewHolder(ViewGroup parent, int viewType) { View view = LayoutInflater.from(parent.getContext()).inflate(R.layout.item,null); final ViewHolder holder = new ViewHolder(view); return holder; } //将数据绑定到控件上  @Override public void onBindViewHolder(ViewHolder holder, int position) { ItemBean bean = mList.get(position); holder.imageView.setBackgroundResource(bean.itemImage); holder.title.setText(bean.itemTitle); holder.content.setText(bean.itemContent); } @Override public int getItemCount() { return mList.size(); } //下面两个方法提供给页面刷新和加载时调用 public void add(List<ItemBean> addMessageList) { //增加数据 int position = mList.size(); mList.addAll(position, addMessageList); notifyItemInserted(position); } public void refresh(List<ItemBean> newList) { //刷新数据  mList.removeAll(mList); mList.addAll(newList); notifyDataSetChanged(); } }
然后是Activity文件。
 package com.example.administrator.shuaxin;

import android.support.v7.app.AppCompatActivity;
import android.os.Bundle;
import android.support.v7.widget.LinearLayoutManager;
import android.support.v7.widget.RecyclerView;

import com.scwang.smartrefresh.header.MaterialHeader; import com.scwang.smartrefresh.layout.api.RefreshLayout; import com.scwang.smartrefresh.layout.footer.ClassicsFooter; import com.scwang.smartrefresh.layout.header.ClassicsHeader; import com.scwang.smartrefresh.layout.listener.OnLoadmoreListener; import com.scwang.smartrefresh.layout.listener.OnRefreshListener; import java.util.ArrayList; import java.util.Date; import java.util.List; public class MainActivity extends AppCompatActivity { private List<ItemBean> list; private MyAdapter myAdapter; private RecyclerView recyclerView; RefreshLayout refreshLayout; @Override protected void onCreate(Bundle savedInstanceState) { super.onCreate(savedInstanceState); setContentView(R.layout.activity_main); refreshLayout = (RefreshLayout)findViewById(R.id.refreshLayout); //初始数据加载  initDate(); //刷新数据加载  setPullRefresher(); } private void initDate(){ list = new ArrayList<ItemBean>(); for (int i=0;i<20;i++){ list.add(new ItemBean( R.mipmap.ic_launcher, "initTitle"+i, new Date().toString()+"" )); } myAdapter = new MyAdapter(list); recyclerView = (RecyclerView) findViewById(R.id.recyclerview); LinearLayoutManager layoutManager = new LinearLayoutManager(this);//纵向线性布局  recyclerView.setLayoutManager(layoutManager); recyclerView.setAdapter(myAdapter); } private void setPullRefresher(){ //设置 Header 为 MaterialHeader //设置 Header 为 ClassicsFooter 比较经典的样式 refreshLayout.setRefreshHeader(new ClassicsHeader(this)); //设置 Footer 为 经典样式 refreshLayout.setRefreshFooter(new ClassicsFooter(this)); refreshLayout.setOnRefreshListener(new OnRefreshListener() { @Override public void onRefresh(RefreshLayout refreshlayout) { //在这里执行上拉刷新时的具体操作(网络请求、更新UI等) //模拟网络请求到的数据 ArrayList<ItemBean> newList = new ArrayList<ItemBean>(); for (int i=0;i<20;i++){ newList.add(new ItemBean( R.mipmap.ic_launcher, "newTitle"+i, new Date().toString()+"" )); } myAdapter.refresh(newList); refreshlayout.finishRefresh(2000/*,false*/); //不传时间则立即停止刷新 传入false表示刷新失败  } }); refreshLayout.setOnLoadmoreListener(new OnLoadmoreListener() { @Override public void onLoadmore(RefreshLayout refreshlayout) { //模拟网络请求到的数据 ArrayList<ItemBean> newList = new ArrayList<ItemBean>(); for (int i=0;i<20;i++){ newList.add(new ItemBean( R.mipmap.ic_launcher, "addTitle"+i, new Date().toString()+"" )); } myAdapter.add(newList); //在这里执行下拉加载时的具体操作(网络请求、更新UI等) refreshlayout.finishLoadmore(2000/*,false*/);//不传时间则立即停止刷新 传入false表示加载失败  } }); } }
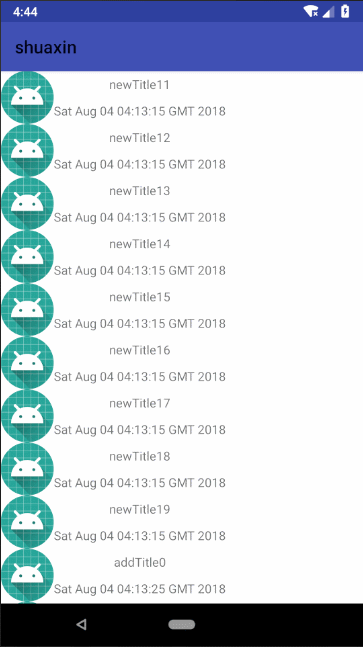
看下效果。