简单音乐播放器(三)
一、前言
- 时隔一年,终于回来填坑了。前段时间把这个以前写的东西拿出来大改了UI,然后用去作为数字媒体开发课的作业交了,课上演示效果还不错。因为到了要找实习的时间了,最近的半年主要精力都花在学Java了,C#用得也少了许多。
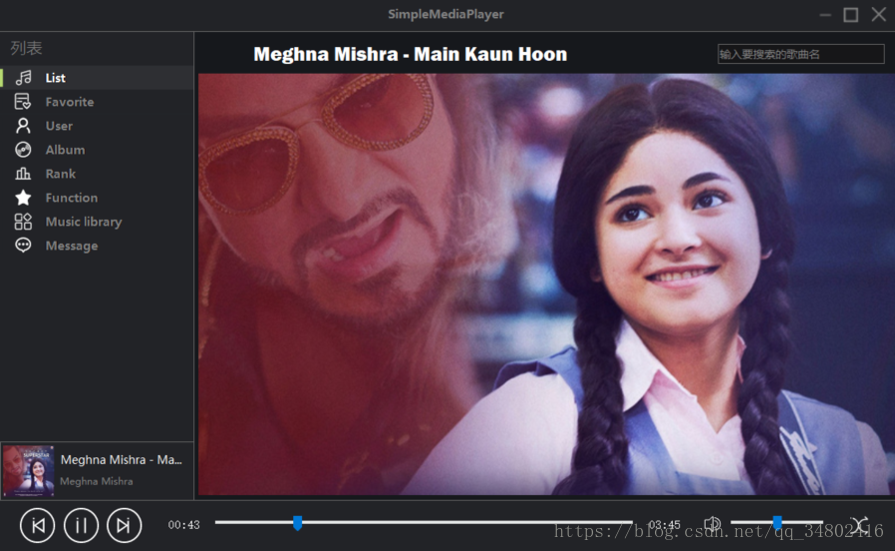
- 这次主要是把项目的UI进行了美化,自己重绘了两个控件,现在的界面不再是小白框了。(先上界面)
(专辑封面界面)
(播放列表界面) - 对于使用C#开发桌面程序而已,更漂亮的界面与更好看的动画几乎在Winform上很难实现,更应该去考虑使用WPF。虽然Winform框架已经过时,但博主使用起来更顺手,开发起来更快,所以选择继续使用Winform开发,尽量的美化了程序的UI。
- 本篇博客不再讲程序里的代码逻辑,这一次分享美化界面,控件重绘的相关内容(如果想了解播放器的代码逻辑部分,可以参考本系列的前两篇博客内容)。
- 另外本项目源码及资源都已上传至码云,有需要可进行下载(代码存在有些许bug,如有疑问,乐意回答)。

二、界面设计
资源
- UI设计主要参考了花瓣网上的播放器UI以及网易云音乐播放器(虽然比网易云丑多了…);
- 图标都下载自阿里iconfont网站,根据需要适当调整颜色;
交互
按钮
程序中使用的按钮几乎所有都是picturebox控件,通过MouseEnter与MouseLeave事件,更改按钮的显示样式。
列表
程序中主要包含了两个列表,左侧的菜单栏,右侧的播放列表。
1. 左侧菜单使用ListBox控件重绘,播放列表使用ListView控件重绘。所以接下来会分别介绍这两种控件的重绘方法与重绘过程。
2. 另外进度条与音量条没有进行重绘(感兴趣的读者可以自己尝试着去重绘控件)。
三、重绘控件
菜单
控件介绍
左侧的菜单栏使用控件ListBox,功能是用于选择不同的列表(本地音乐、收藏夹等)。
本程序中只实现了List(本地音乐)、Favorite(收藏夹)这两个页面的功能,其他的功能读者可以按照个人需要进行设计和添加。
重绘事件
- DrawItem(绘制子项)
- MeasureItem(设置子项高度)
ListBox通过以上两个事件,使用GDI+即可按照自己需要的样式进行重绘(如果还不会使用GDI+绘图,推荐学习下,做开发迟早都会使用到)。
重绘步骤
- 首先要将ListBox控件的DrawMode修改为OwnerDrawVariable(默认是由系统帮我们自动绘制)。
- 编写DrawItem与MeasureItem事件代码。
重绘代码
注释已经很详细了,稍懂GDI+绘图函数应该很容易就能看懂。
绘制时,需要注意两个问题:
- 重绘闪烁:重绘控件必遇到的问题。解决办法有有很多(比如双缓冲、缓存等),本次使用的是缓存方式,即将要绘制的内容先全部绘制在一个Bitmap上,在所有绘制结束后再将其给重绘的控件。
- 绘制顺序:后绘制的内容会覆盖先绘制的内容,有点PS里图层相互遮盖的意思。
/*
 * 绘制子项样式
 */
private void lbMenu_DrawItem(object sender, DrawItemEventArgs e)
{
    Bitmap bitmap = new Bitmap(e.Bounds.Width, e.Bounds.Height);

    int index = e.Index;       //获取当前要进行绘制的行的序号,从0开始。
    Graphics g = e.Graphics;   //获取Graphics对象。

    Graphics tempG = Graphics.FromImage(bitmap);
    //使绘图质量最高,消除锯齿
    tempG.SmoothingMode = SmoothingMode.AntiAlias;
    tempG.InterpolationMode = InterpolationMode.HighQualityBicubic;
    tempG.CompositingQuality = CompositingQuality.HighQuality;

    //获取当前要绘制的行的一个矩形范围。
    Rectangle bound = e.Bounds;
    //获取当前要绘制的行的显示文本。
    string text = this.menuItemList[index].Text.ToString();

    //绘制选中时的背景,要注意绘制的顺序,后绘制的会覆盖先复制的
    Color backgroundColor = Color.FromArgb(34, 35, 39);            //背景色
    Color guideTagColor = Color.FromArgb(183, 218, 114);           //高亮指示色
    Color selectedBackgroundColor = Color.FromArgb(46, 47, 51);    //选中背景色
    Color fontColor = Color.Gray;                                  //字体颜色
    Color selectedFontColor = Color.White;                         //选中字体颜色
    Font textFont = new Font("微软雅黑", 9, FontStyle.Bold);        //文字格式
    Image itmeImage = this.menuItemList[index].Img;                //图标

     //矩形大小
     Rectangle backgroundRect = new Rectangle(0, 0, bound.Width, bound.Height);
     Rectangle guideRect = new Rectangle(0, 4, 5, bound.Height - 8);
     Rectangle textRect = new Rectangle(55, 0, bound.Width, bound.Height);
     Rectangle imgRect = new Rectangle(20, 4, 22, bound.Height - 8);

     //当前选中行
     if ((e.State & DrawItemState.Selected) == DrawItemState.Selected)
     {
         backgroundColor = selectedBackgroundColor;
         fontColor = selectedFontColor;
     }
     else
     {
         guideTagColor = backgroundColor;
     }
     //绘制背景色
     tempG.FillRectangle(new SolidBrush(backgroundColor), backgroundRect);
     //绘制左前高亮指示
     tempG.FillRectangle(new SolidBrush(guideTagColor), guideRect);
     //绘制显示文本
     TextRenderer.DrawText(tempG, text, textFont, textRect, fontColor,
                           TextFormatFlags.VerticalCenter | TextFormatFlags.Left);
     //绘制图标
     tempG.DrawImage(itmeImage, imgRect);

     g.DrawImage(bitmap, bound.X, bound.Y, bitmap.Width, bitmap.Height);
     tempG.Dispose();
}

/*
 * 设置子项行高
 */
private void lbMenu_MeasureItem(object sender, MeasureItemEventArgs e)
{
     e.ItemHeight = 30;
}
播放列表
控件介绍
右侧的播放列表使用ListView控件,主要功能是显示歌曲列表。

播放列表奇数行与偶数行颜色不同,选中高亮突出显示,右键操作菜单。
重绘事件
- DrawColumnHeader(绘制表头)
- DrawSubItem(绘制子项)
ListView通过以上两个事件,同样使用GDI+即可按照自己需要的样式进行重绘。
重绘步骤
- 设置ListView控件属性
- View设置为Details
- OwnerDraw设置为True
- HeaderStyle设置为Nonclickable
- Scrollable设置为False
- BorderStyle设置为None
- FullRowSelect设置为True
- 编写DrawColumnHeader与DrawSubItem事件代码。
重绘事件代码
不难理解,一看就能明白。
/*
 * 绘制表头
 */
private void lvSongList_DrawColumnHeader(object sender, DrawListViewColumnHeaderEventArgs e)
{
    //获取子项的索引值
    int index = e.ColumnIndex;
    //绘制边框
    e.Graphics.FillRectangle(new SolidBrush(Color.FromArgb(27, 27, 25)), e.Bounds);
    //绘制文本文字
    TextRenderer.DrawText(e.Graphics, lvSongList.Columns[index].Text, new Font("微软雅黑", 9, FontStyle.Regular), e.Bounds, Color.Gray, TextFormatFlags.VerticalCenter | TextFormatFlags.Left);

    //绘制背景色
    Pen pen = new Pen(Color.FromArgb(34, 35, 39), 2);
    Point p = new Point(e.Bounds.Left - 1, e.Bounds.Top + 1);
    Size s = new Size(e.Bounds.Width, e.Bounds.Height - 2);
    Rectangle r = new Rectangle(p, s);
    e.Graphics.DrawRectangle(pen, r);
}

/*
 * 绘制子项
 */
private void lvSongList_DrawSubItem(object sender, DrawListViewSubItemEventArgs e)
{
    //没有子项
    if (e.ItemIndex == -1)
        return;

    //偶数项
    if (e.ItemIndex % 2 == 0)
    {
        e.SubItem.BackColor = Color.FromArgb(27, 29, 32);
        e.DrawBackground();
    }
    //设置字体颜色(歌曲名白色,其他项灰色)
    if (e.ColumnIndex == 1)
        e.SubItem.ForeColor = Color.White;
    else
        e.SubItem.ForeColor = Color.Gray;

    //如果是被选中的项
    if ((e.ItemState & ListViewItemStates.Selected) == ListViewItemStates.Selected)
    {
        using (SolidBrush brush = new SolidBrush(Color.Blue))
        {
            e.Graphics.FillRectangle(new SolidBrush(Color.FromArgb(46, 47, 51)), e.Bounds);
        }
    }

    if (!string.IsNullOrEmpty(e.SubItem.Text))
    {
        this.DrawText(e, e.Graphics, e.Bounds, 2);
    }
}
四、码云地址
项目地址:https://gitee.com/Rhine/SimpleMediePlayer
另外如果对git使用不熟,这里推荐廖老师写的非常棒的git教程。
有任何疑问,可在评论下留言。