DHT11传感器很小,当时看着觉得不错,又能看温度又能看湿度,就买了一个。感觉。。。一言难尽。
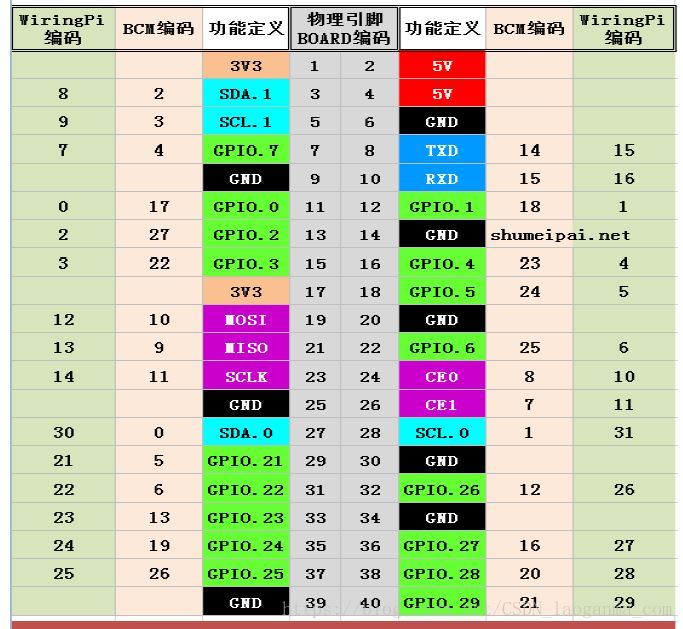
先说步骤吧,把DHT11连在树莓派上:
+ 连 1
out 连 7
- 连 GND ,我选的9.这样线好看些。
附张图吧:
代码如下,感谢@绝世好阿狸
import RPi.GPIO as GPIO
import time

channel =4
data = []
j = 0

GPIO.setmode(GPIO.BCM)

time.sleep(1)

GPIO.setup(channel, GPIO.OUT)
GPIO.output(channel, GPIO.LOW)
time.sleep(0.02)
GPIO.output(channel, GPIO.HIGH)
GPIO.setup(channel, GPIO.IN)

while GPIO.input(channel) == GPIO.LOW:
  continue
while GPIO.input(channel) == GPIO.HIGH:
  continue

while j < 40:
  k = 0
  while GPIO.input(channel) == GPIO.LOW:
    continue
  while GPIO.input(channel) == GPIO.HIGH:
    k += 1
    if k > 100:
      break
  if k < 8:
    data.append(0)
  else:
    data.append(1)

  j += 1

print "sensor is working."
print data

humidity_bit = data[0:8]
humidity_point_bit = data[8:16]
temperature_bit = data[16:24]
temperature_point_bit = data[24:32]
check_bit = data[32:40]

humidity = 0
humidity_point = 0
temperature = 0
temperature_point = 0
check = 0

for i in range(8):
  humidity += humidity_bit[i] * 2 ** (7-i)
  humidity_point += humidity_point_bit[i] * 2 ** (7-i)
  temperature += temperature_bit[i] * 2 ** (7-i)
  temperature_point += temperature_point_bit[i] * 2 ** (7-i)
  check += check_bit[i] * 2 ** (7-i)

tmp = humidity + humidity_point + temperature + temperature_point

if check == tmp:
  print "temperature :", temperature, "*C, humidity :", humidity, "%"
else:
  print "wrong"
  print "temperature :", temperature, "*C, humidity :", humidity, "% check :", check, ", tmp :", tmp

GPIO.cleanup()
注意第四行channel = 4.是因为我连着第7个针脚。它的编号是4.
然后我们运行这个程序,就可以监测到温度了:

然后我们希望用物联数据平台来承载我们的数据。这样可以实现数据的远程监控。并且可以有个不错的界面,我是真的不想自己写界面。。。
我们使用的物联数据平台是乐为物联平台。https://www.lewei50.com/
首先申请一个设备,放我们的数据。具体的教程我觉得他们平台写的不错,不会的可以自己看看。
我们修改之前的代码,将成功读出的温湿度用JSON格式保存到一个文本文件中;
#/home/pi/Desktop/robotFeatures/temperatureMonitoring/datafile.txt


if check == tmp:
  res = '[ { "Name":"temperature","Value":%f},{"Name":"humidity","Value":%f}]' %(temperature,humidity)
  output = open('/home/pi/Desktop/robotFeatures/temperatureMonitoring/datafile.txt', 'w')
  output.write(res)
  output.close
然后我们写一个leweilink.sh脚本,位于/home/pi/Desktop/robotFeatures/temperatureMonitoring目录下:

最后,添加计划任务:
#为脚本增加可执行权限

sudo chmod +x leweilink.sh
#将脚本加入cronjob(计划任务)

sudo crontab -e
然后输入:

## For excuting leweilink.sh every 30 seconds##on 2018-8-21
*/1 * * * *  /home/pi/Desktop/robotFeatures/temperatureMonitoring/leweilink.sh
*/1 * * * * sleep 30 && /home/pi/Desktop/robotFeatures/temperatureMonitoring/leweilink.sh
#-----------------------------------------------------------------
这样每30s会把数据传上去一次。
因为我是免费用户,所以时间设定的比较长。
搞定!