版权声明:感谢您阅读我的文章,转载注明出处哦~~ https://blog.csdn.net/haoding205/article/details/82257010
昊鼎王五:如何配置mongodb集群的用户认证方式及创建访问权限用户?
1.基础知识:
1.1前提:
本文基于:《昊鼎王五:linux(centos7)如何七分钟搭建mongodb集群服务器?》
https://blog.csdn.net/haoding205/article/details/82253048
1.2为什么要配置mongodb集群的用户认证方式?
为了mongodb集群服务器的数据安全。1.3mongodb用户认证应用原理
略 1.4如何配置mongodb集群的用户认证方式?
往下看2.配置mongodb集群的用户认证方式:
2.1.登录
./bin/mongo -port 300002.2.初始化一个用户
> use admin
switched to db admin
> db.createUser({user:'haoding',pwd:'mimabugaosuni',roles:[{role:'dbOwner',db:'userdb'}]})     #必须要存在一个用户后才能修改认证方式#
2.3.修改认证方式:
> use admin
switched to db admin
>  var schema = db.system.version.findOne({"_id" : "authSchema"})
> schema.currentVersion = 3
3
> db.system.version.save(schema)
WriteResult({ "nMatched" : 1, "nUpserted" : 0, "nModified" : 1 })
2.4.建立公有的用户
>use admin
>db.createUser( { "user" : "userAdminAnyDatabase",
                 "pwd": "user_admin",
                 "roles" : [
                             { role: "userAdminAnyDatabase", db: "admin" },
                             "dbOwner"
                             ] }
             )
>db.createUser( { "user" : "dbAdminAnyDatabase",
                 "pwd": "db_admin",
                 "roles" : [
                             { role: "dbAdminAnyDatabase", db: "admin" },
                             "dbOwner"
                             ] }
             )
>db.createUser( { "user" : "readAnyDatabase",
                 "pwd": "read_admin",
                 "roles" : [
                             { role: "readAnyDatabase", db: "admin" },
                             "dbOwner"
                             ] }
             )
>db.createUser( { "user" : "readWriteAnyDatabase",
                 "pwd": "read_write_admin",
                 "roles" : [
                             { role: "readWriteAnyDatabase", db: "admin" },
                             "dbOwner"
                             ] }
             )
2.5.以认证方式启动MongoDB
2.5.1.退出mongos并创建key(密钥)文件夹
>exit
mkdir -p /hd205/service/mongodbwork/key     #五台机器都执行 , key是密钥存放地
2.5.2.生成keyFile文件
cd /hd205/service/mongodbwork/key
openssl rand -base64 753 > keyfile     #生成命令
chmod 600 keyfile                     #设置600权限
mv keyfile  keyHaoDingfile            #命名成想要的名字
2.5.3.复制keyFile文件
把key文件夹里面的keyHaoDingfile复制到其他四台服务器的相同目录里
2.5.4.把五台服务的mongos/mongod 全部关掉
ps -ef | grep mongo | awk '{print $2}' | xargs kill -22.5.5.以认证方式启动MongoDB
#执行前请先看“注”内容
/hd205/service/mongodbwork/mongodb/bin/mongod -f /etc/mongo_shard1.conf   #注:每台机器执行成功该条命令后,才能执行下一条
/hd205/service/mongodbwork/mongodb/bin/mongod -f /etc/mongo_shard2.conf   #注:每台机器执行成功该条命令后,才能执行下一条
/hd205/service/mongodbwork/mongodb/bin/mongod -f /etc/mongo_shard3.conf   #注:每台机器执行成功该条命令后,才能执行下一条
/hd205/service/mongodbwork/mongodb/bin/mongod -f /etc/mongo_config.conf   #注:每台机器执行成功该条命令后,才能执行下一条
/hd205/service/mongodbwork/mongodb/bin/mongos -f /etc/mongo_mongos.conf   #注:在1台或者3台机器上执行即可
3.验证认证效果
3.1.不输入密码
$ ./mongo -port 30000
MongoDB shell version: 3.0.6
connecting to: 127.0.0.1:30000/test
mongos> show dbs;
2018-08-31T15:44:04.241+0800 E QUERY    Error: listDatabases failed:{
    "ok" : 0,
    "errmsg" : "not authorized on admin to execute command { listDatabases: 1.0 }",
    "code" : 13                           #鉴权失败,与预期一致#
}
    at Error (<anonymous>)
    at Mongo.getDBs (src/mongo/shell/mongo.js:47:15)
    at shellHelper.show (src/mongo/shell/utils.js:630:33)
    at shellHelper (src/mongo/shell/utils.js:524:36)
    at (shellhelp2):1:1 at src/mongo/shell/mongo.js:47
mongos> exit
3.2.输入无效密码
$ ./mongo -port 30000
MongoDB shell version: 3.0.6
connecting to: 127.0.0.1:30000/test
mongos> use admin
switched to db admin
mongos> db.auth('abc','xyz');
Error: 18 Authentication failed.           #鉴权失败,与预期一致#
0
mongos> show dbs;
2018-08-31T16:00:06.847+0800 E QUERY    Error: listDatabases failed:{
    "ok" : 0,
    "errmsg" : "not authorized on admin to execute command { listDatabases: 1.0 }",
    "code" : 13
}
    at Error (<anonymous>)
    at Mongo.getDBs (src/mongo/shell/mongo.js:47:15)
    at shellHelper.show (src/mongo/shell/utils.js:630:33)
    at shellHelper (src/mongo/shell/utils.js:524:36)
    at (shellhelp2):1:1 at src/mongo/shell/mongo.js:47
mongos> exit
3.3.输入有效密码
./mongo -port 30000
MongoDB shell version: 3.0.6
connecting to: 127.0.0.1:30000/test
mongos> use admin
switched to db admin
mongos> db.auth('userAdminAnyDatabase','user_admin')
1                                   #鉴权成功,与预期一致#
mongos> db.system.users.find();
{ "_id" : "admin.userAdminAnyDatabase", "user" : "userAdminAnyDatabase", "db" : "admin", "credentials" : { "MONGODB-CR" : "917cfb18271f55efcad8c434ed7b3732" }, "roles" : [ { "role" : "userAdminAnyDatabase", "db" : "admin" }, { "role" : "dbOwner", "db" : "admin" } ] }
{ "_id" : "admin.dbAdminAnyDatabase", "user" : "dbAdminAnyDatabase", "db" : "admin", "credentials" : { "MONGODB-CR" : "943f27fdbbadcd956bb37f61b17e8515" }, "roles" : [ { "role" : "dbAdminAnyDatabase", "db" : "admin" }, { "role" : "dbOwner", "db" : "admin" } ] }
{ "_id" : "admin.readAnyDatabase", "user" : "readAnyDatabase", "db" : "admin", "credentials" : { "MONGODB-CR" : "a15f5ed095fc8f59d371d5460bd51e6e" }, "roles" : [ { "role" : "readAnyDatabase", "db" : "admin" }, { "role" : "dbOwner", "db" : "admin" } ] }
{ "_id" : "admin.readWriteAnyDatabase", "user" : "readWriteAnyDatabase", "db" : "admin", "credentials" : { "MONGODB-CR" : "f3762b56c7261b842ee21570457ba61a" }, "roles" : [ { "role" : "readWriteAnyDatabase", "db" : "admin" }, { "role" : "dbOwner", "db" : "admin" } ] }
mongos>  exit
4.创建访问权限用户
在上一步中,已经验证“密码认证方式”起作用了,此时,我们在该认证方式下创建常用的访问权限用户:
4.1.用户角色分类原理
一般将用户或角色分为如下几类:
4.1.1.按照作用域来分:
⑴公有账户(给所有数据库实例使用),比如“2.4.建立公有的用户”章节中的用户。
⑵私有账户(给某一个数据库实例使用)
4.1.2.按照功能来分:
root                 #超级账号,超级权限
userAdminAnyDatabase #任何数据库用户的管理权限(赋予用户所有数据库的userAdmin权限)
dbAdminAnyDatabase   #任何数据库的管理权限(赋予用户所有数据库的dbAdmin权限)
readAnyDatabase      #任何数据库的只读权限(赋予用户所有数据库的读权限)
readWriteAnyDatabase #任何数据库的读写权限(赋予用户所有数据库的读写权限)
clusterAdmin         #集群管理权限(副本集、分片、主从等相关管理)(赋予用户所有分片和复制集相关函数的管理权限)
userAdmin            #指定数据库的用户管理权限(允许用户向system.users集合写入,可以找指定数据库里创建、删除和管理用户)
dbAdmin              #指定数据库的管理权限(允许用户在指定数据库中执行管理函数,如索引创建、删除,查看统计或访问system.profile)
read                 #指定数据库的只读权限,允许用户读取指定数据库
readWrite            #拥有指定数据库的读写权限,允许用户读写指定数据库
4.1.3.按照内置角色来分:
数据库用户角色:read、readWrite;
数据库管理角色:dbAdmin、dbOwner、userAdmin;
集群管理角色:clusterAdmin、clusterManager、clusterMonitor、hostManager;
备份恢复角色:backup、restore;
所有数据库角色:readAnyDatabase、readWriteAnyDatabase、userAdminAnyDatabase、dbAdminAnyDatabase
超级用户角色:root        #还有几个角色间接或直接提供了系统超级用户的访问(dbOwner 、userAdmin、userAdminAnyDatabase)
内部角色:__system
好了,知道了用户角色之后,就开始创建想要的用户角色了,如下。
4.2.按需创建用户角色
./mongo -port 30000
mongos> use admin
switched to db admin
mongos> db.auth('userAdminAnyDatabase','user_admin')
1                                   #鉴权成功,才能继续下一步#
mongos> use hd_205_db               #切换数据库
mongos> db.createUser({user:"haoding_205_read",pwd:"Hd_haoding_205_read_passwd",roles:[{role:"read",db:"hd_205_db"}]})
mongos> db.createUser({user:"haoding_205_read_write",pwd:"Hd_haoding_205_read_write_passwd",roles:[{role:"readWrite",db:"hd_205_db"}]})
mongos> db.createUser({user:"haoding_205_owner",pwd:"Hd_haoding_205_owner_passwd",roles:[{role:"dbOwner",db:"hd_205_db"}]})
mongos> db.createUser({user:"haoding_205_admin",pwd:"Hd_haoding_205_admin_passwd",roles:[{role:"dbAdmin",db:"hd_205_db"}]})
mongos> db.createUser({user:"haoding_205_user",pwd:"Hd_haoding_205_user_passwd",roles:[{role:"userAdmin",db:"hd_205_db"}]})
mongos> db.createUser({"user":"haoding_205_backup","pwd":"Hd_haoding_205_backup_passwd","roles":[{role:"backup",db:"admin"},"dbOwner"]})
mongos> db.createUser({"user":"haoding_205_restore","pwd":"Hd_haoding_205_restore_passwd","roles":[{role:"restore",db:"admin"},"dbOwner"]})
4.3.验证所创建的用户的正确性
4.3.1.用find命令查找用户
mongos> use admin
switched to db admin
mongos>  db.system.users.find();
{ "_id" : "hd_205_db.haoding_205_read", "user" : "haoding_205_read", "db" : "hd_205_db", "credentials" : { "MONGODB-CR" : "48ef28b61ab953fe1ed7a4a67b34d202" }, "roles" : [ { "role" : "read", "db" : "hd_205_db" } ] }
{ "_id" : "hd_205_db.haoding_205_read_write", "user" : "haoding_205_read_write", "db" : "hd_205_db", "credentials" : { "MONGODB-CR" : "305bd5a66c6ea6dbb047f4dcaed14c05" }, "roles" : [ { "role" : "readWrite", "db" : "hd_205_db" } ] }
{ "_id" : "hd_205_db.haoding_205_owner", "user" : "haoding_205_owner", "db" : "hd_205_db", "credentials" : { "MONGODB-CR" : "a3a6a54a71d7e1830cae1565de27f3a9" }, "roles" : [ { "role" : "dbOwner", "db" : "hd_205_db" } ] }
{ "_id" : "hd_205_db.haoding_205_admin", "user" : "haoding_205_admin", "db" : "hd_205_db", "credentials" : { "MONGODB-CR" : "9eb2fd25b3a0d71b32b50552683ec9ea" }, "roles" : [ { "role" : "dbAdmin", "db" : "hd_205_db" } ] }
{ "_id" : "hd_205_db.haoding_205_user", "user" : "haoding_205_user", "db" : "hd_205_db", "credentials" : { "MONGODB-CR" : "4e139b3a78b2d77539e3d32e9fa4e0e6" }, "roles" : [ { "role" : "userAdmin", "db" : "hd_205_db" } ] }
{ "_id" : "hd_205_db.haoding_205_backup", "user" : "haoding_205_backup", "db" : "hd_205_db", "credentials" : { "MONGODB-CR" : "9118f8f583da4fdf4e6951f32ee6df36" }, "roles" : [ { "role" : "backup", "db" : "admin" }, { "role" : "dbOwner", "db" : "hd_205_db" } ] }
{ "_id" : "hd_205_db.haoding_205_restore", "user" : "haoding_205_restore", "db" : "hd_205_db", "credentials" : { "MONGODB-CR" : "f4aa957de7673281b74ec706c70efe3c" }, "roles" : [ { "role" : "restore", "db" : "admin" }, { "role" : "dbOwner", "db" : "hd_205_db" } ] }
mongos>
4.3.2.用创建的用户登录mongodb
mongos> use hd_205_db
switched to db hd_205_db
mongos> db.auth('haoding_205_read','Hd_haoding_205_read_passwd')
1 #鉴权成功,登录成功#
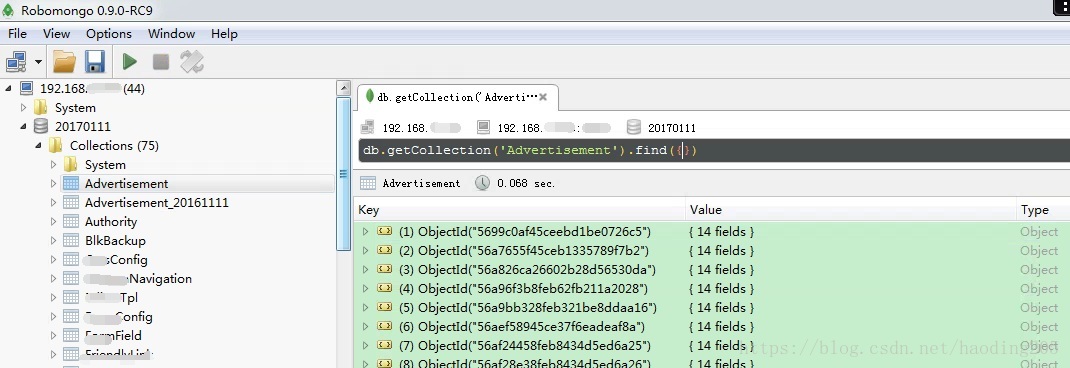
mongos> 4.3.3.用第三方客户端工具连接登录mongodb
这里推荐一个好用的工具“Robomongo”。如下图:
好了,聪明如你,知道了如何配置mongodb集群的用户认证方式及创建访问权限用户,是不是很欢喜 ^_^
还有其他问题的可以在评论区留言或者扫码加博主获取资源或者提问。