该文作者开源了测试代码,源代码可以在我之前的文章中或者Github中去下载,我对源代码的数据输入部分做了一些改动以更方便的实现人脸检测,即将 facedetect_mtcnn.py主函数文件更改为如下代码:
# coding=utf-8
from __future__ import absolute_import
from __future__ import division
from __future__ import print_function

import sys
import os
import argparse
import tensorflow as tf
import numpy as np
import detect_face
import cv2
import time
import shutil


def reseach_image_name(root_dir):
    if (os.path.exists(root_dir)):
        fileNames = os.listdir(root_dir)
        fileNames = sorted(fileNames)
        return fileNames


def main(input_file_list):
    sess = tf.Session()
    pnet, rnet, onet = detect_face.create_mtcnn(sess, None)
    minsize = 40                        # minimum size of face
    threshold = [0.6, 0.7, 0.9]        # three steps's threshold
    factor = 0.709                      # scale factor

    output_root_dir = "./output_face_result"
    if (not os.path.exists(output_root_dir)):
        os.mkdir(output_root_dir )
        # 假如path_01 = 'Test\\path_01\\path_02\\path_03',os.mkdir(path_01)创建路径中的最后一级目录,
        # 即:只创建path_03目录,而如果之前的目录不存在并且也需要创建的话,就会报错。
        # os.makedirs(path_01)创建多层目录,即:Test,path_01,path_02,path_03如果都不存在的话,会自动创建。
    else:
        shutil.rmtree(output_root_dir )     # 先删除原来的目录
        os.mkdir(output_root_dir)           # 再创建一个新目录

    for index in range(len(input_file_list)):
        print("***********开始检测第%d张图像***********"%index)
        filename = input_file_list[index]
        input_image_dir = os.path.join(  input_root_dir, filename)
        output_image_dir =os.path.join( output_root_dir,filename.split(".")[0]+"_result.jpg")

        draw = cv2.imread(input_image_dir)
        # cv2.imshow("source image",draw )
        # cv2.waitKey(0)
        # cv2.destroyAllWindows()

        img = cv2.cvtColor(draw, cv2.COLOR_BGR2RGB)

        bounding_boxes, points = detect_face.detect_face(img, minsize, pnet, rnet, onet, threshold, factor)

        nrof_faces = bounding_boxes.shape[0]

        for b in bounding_boxes:
            cv2.rectangle(draw, (int(b[0]), int(b[1])), (int(b[2]), int(b[3])), (0, 255, 0))
            print("人脸坐标:{0}".format(b))

        for p in points.T:
            for i in range(5):
                cv2.circle(draw, (p[i], p[i + 5]), 1, (0, 0, 255), 2)

        print('总共%d个人脸被检测到,保存到%s' % (nrof_faces, output_image_dir))
        cv2.imshow("detected image", draw)
        cv2.waitKey(0)
        cv2.destroyAllWindows()
        cv2.imwrite(output_image_dir, draw)


def detect_video_face(video_file):
    sess = tf.Session()
    pnet, rnet, onet = detect_face.create_mtcnn(sess, None)
    minsize = 40  # minimum size of face
    threshold = [0.6, 0.7, 0.9]  # three steps's threshold
    factor = 0.709  # scale factor

    camera = cv2.VideoCapture(video_file)
    while True:
        (grabbed, frame) = camera.read()
        if  grabbed == True:
            img = cv2.cvtColor(frame, cv2.COLOR_BGR2GRAY)
            # cv2.imshow("frame",frame)

            bounding_boxes, points = detect_face.detect_face(img, minsize, pnet, rnet, onet, threshold, factor)

            nrof_faces = bounding_boxes.shape[0]

            for b in bounding_boxes:
                cv2.rectangle(frame, (int(b[0]), int(b[1])), (int(b[2]), int(b[3])), (0, 255, 0))
                print("人脸坐标:{0}".format(b))

            for p in points.T:
                for i in range(5):
                    cv2.circle(frame, (p[i], p[i + 5]), 1, (0, 0, 255), 2)

            print('总共%d个人脸被检测到' %nrof_faces)
            cv2.imshow("detected image", frame)

            if cv2.waitKey(1) & 0xFF == ord('q'):
                # 通过cap.read() 的返回值ret,若ret值为False,则停止捕获视频。
                break
    cap.release()
    cv2.destroyAllWindows()


def detect_single_pic(image_file):
    sess = tf.Session()
    pnet, rnet, onet = detect_face.create_mtcnn(sess, None)

    minsize = 40  # minimum size of face
    threshold = [0.6, 0.7, 0.9]  # three steps's threshold
    factor = 0.709  # scale factor

    print("***********开始检测图像***********" )
    filename = image_file
    draw = cv2.imread(filename)
    cv2.imshow("source image", draw)
    cv2.waitKey(0)
    cv2.destroyAllWindows()

    img = cv2.cvtColor(draw, cv2.COLOR_BGR2RGB)

    bounding_boxes, points = detect_face.detect_face(img, minsize, pnet, rnet, onet, threshold, factor)

    nrof_faces = bounding_boxes.shape[0]

    for b in bounding_boxes:
        cv2.rectangle(draw, (int(b[0]), int(b[1])), (int(b[2]), int(b[3])), (0, 255, 0))
        print("人脸坐标:{0}".format(b))

    for p in points.T:
        for i in range(5):
            cv2.circle(draw, (p[i], p[i + 5]), 1, (0, 0, 255), 2)

    print('总共%d个人脸被检测到'% nrof_faces)
    cv2.imshow("detected image", draw)
    cv2.waitKey(0)
    cv2.destroyAllWindows()


if __name__ == '__main__':
    input_root_dir = "./input_face_image"
    input_file_list = reseach_image_name( input_root_dir)
    main(input_file_list)
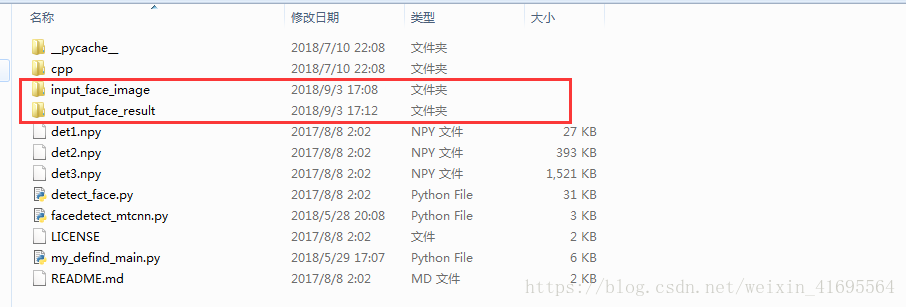
新建了两个文件夹,一个文件夹放待检测的图片,另一个文件夹放检测后的结果图片,如下所示:
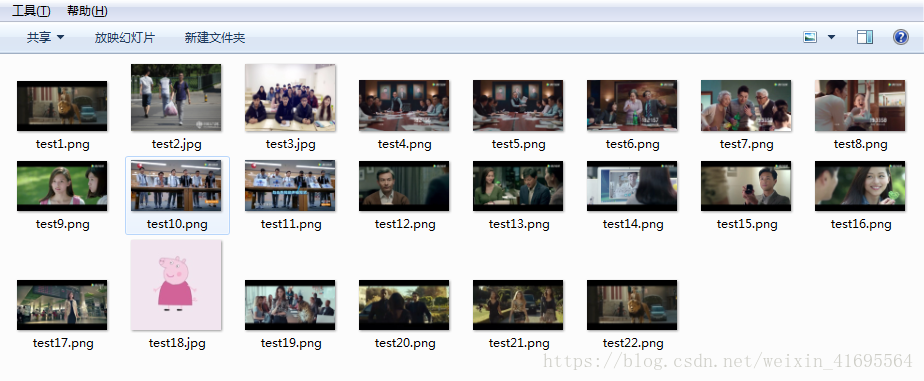
这是 input_face_image文件夹下的待测试图片:
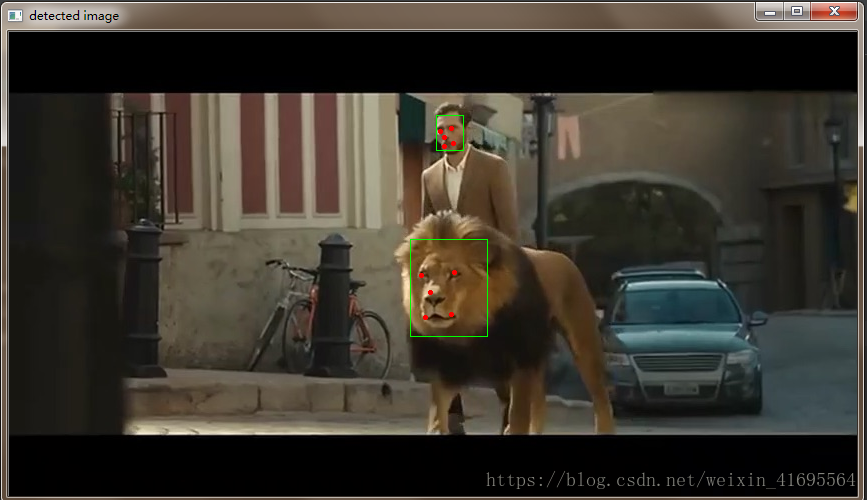
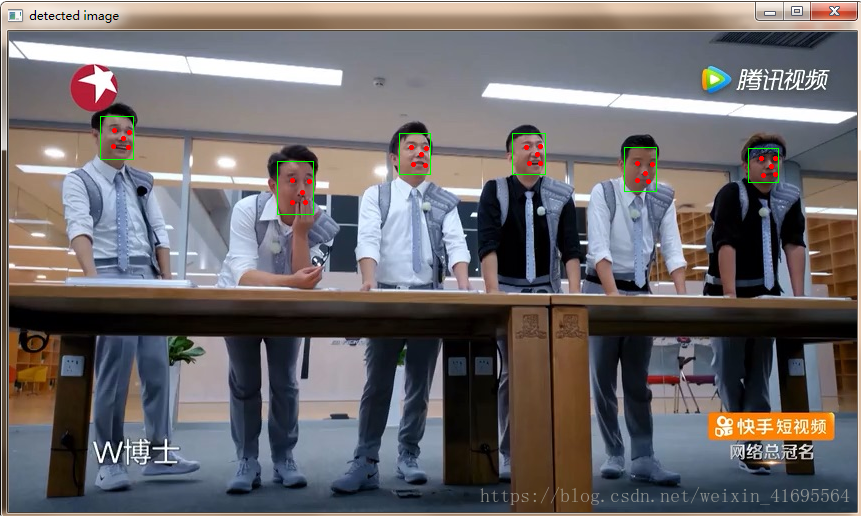
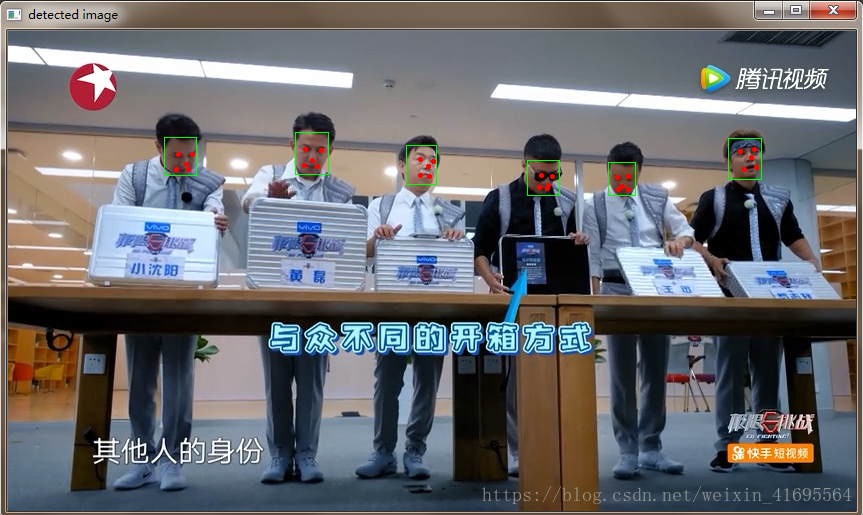
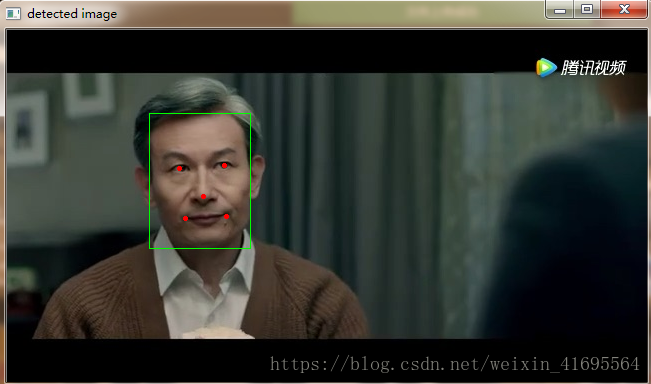
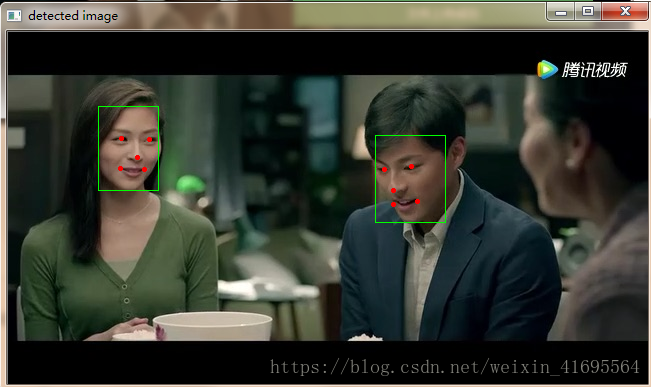
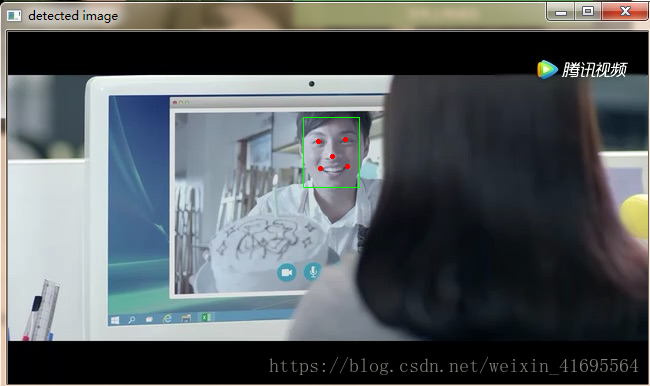
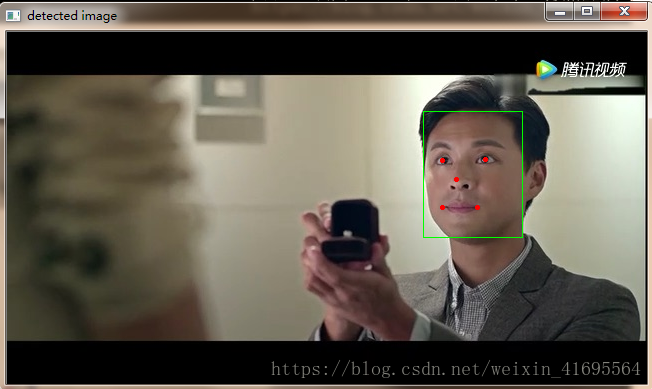
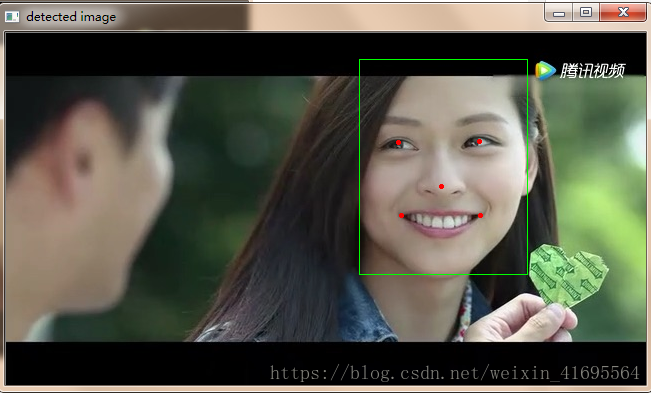
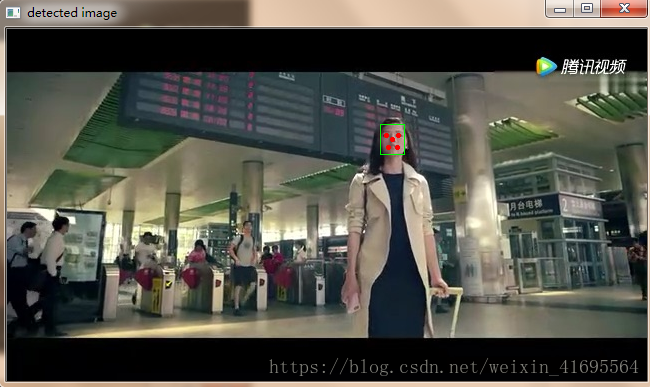
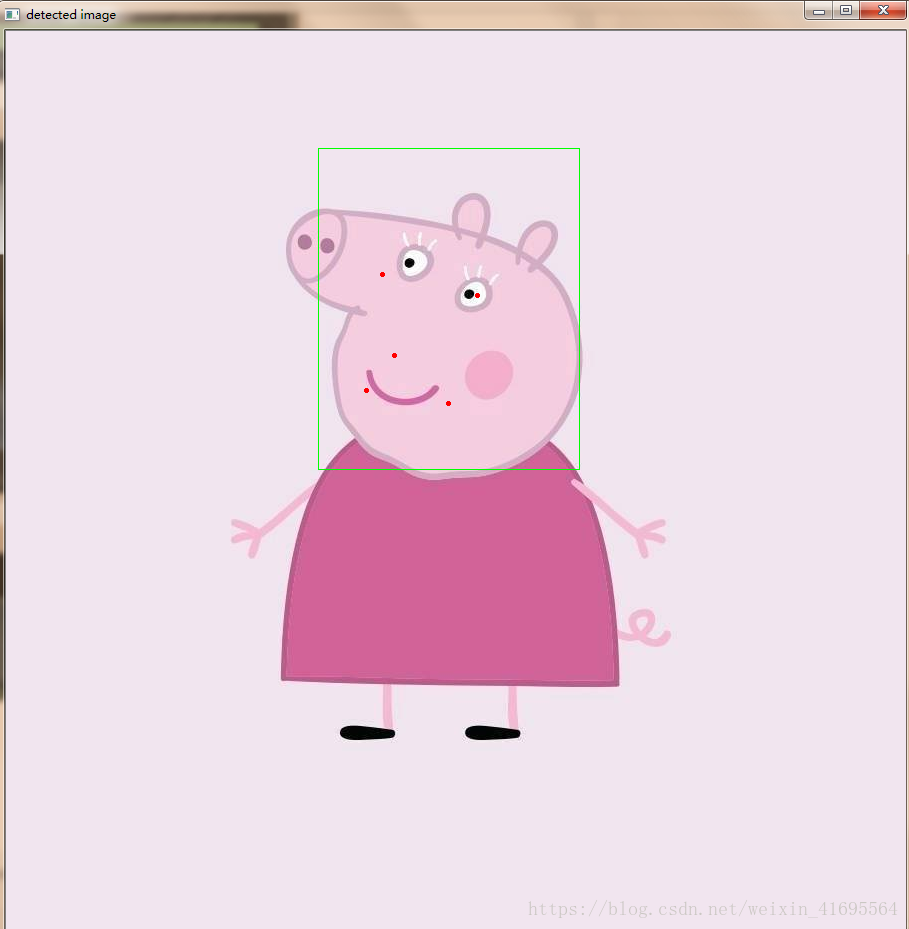
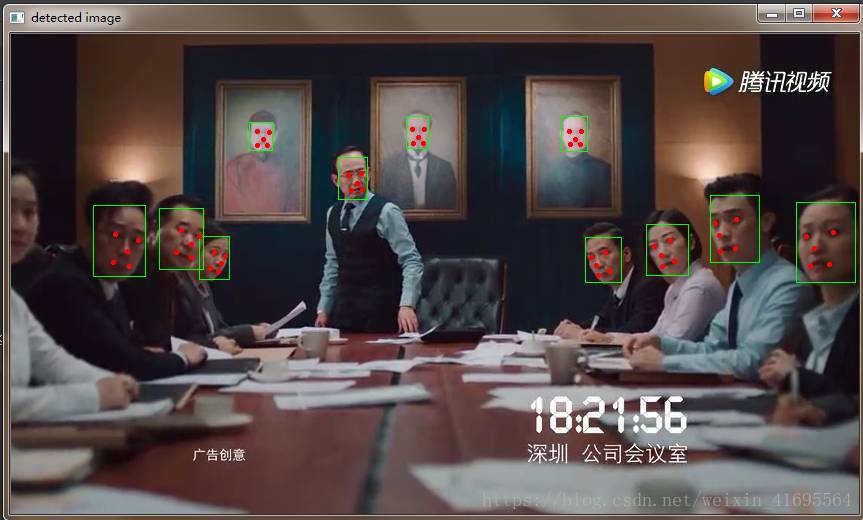
运行程序,可以看到检测效果:
扫描二维码关注公众号,回复:
3050903 查看本文章

......
当然,检测结果图片都被保存到了 output_face_image文件夹下。