对表单和数据表格应用样式
创建有吸引力且可以访问的数据表格
创建简单&复杂的表单布局
对各种表单元素应用样式
提供可访问的表单反馈
一.对数据表格应用样式(&日历&)
1.表格特有的元素:
①.summary作用于表格标签用来描述表格的内容,与图像的alt相似。
caption作用于表格的标题
<table class="cal" summary="A calendar style date picker">
<caption>
<a href="cal.php?month=dec08" rel="prev"><</a>January 2017
<a href="cal.php?month=feb09" rel="next">></a>
</caption>
</table>
效果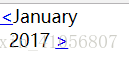
②. thead、tbody、tfoot
thead:包含所有列标题
注:若选择使用thead或tfoot则必须至少使用一次tbody,在一个表格中只能使用一个thead和tfoot但是可以使用多个tbody
th:标记行标题和列标题
当某些内容既是标题又是数据,使用td
注:标题可以用row和col的scope属性,还有rowgroup和colgroup
<thead>
     <tr>
         <th>Sun</th>
         <th>Mon</th>
         <th>Tue</th>
         <th>Wed</th>
         <th>Tur</th>
         <th>Fri</th>
         <th>Sat</th>
     </tr>
</thead>

<thead>
     <tr>
         <th scope="col">Sun</th>
         <th scope="col">Mon</th>
         <th scope="col">Tue</th>
         <th scope="col">Wed</th>
         <th scope="col">Tur</th>
         <th scope="col">Fri</th>
         <th scope="col">Sat</th>
     </tr>
</thead>

③.col和colgroup
tr对整行应用样式,但是很难对整列应用样式,所以引入col和colgroup
colgroup能使用col对一个或多个列定义和分组
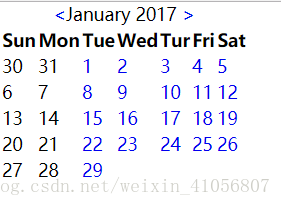
2.数据表格标记
<table class="cal" summary="A calendar style date picker">
<caption>
<a href="#" rel="prev"><</a>January 2017
<a href="#" rel="next">></a>
</caption>
<colgroup>
<col id="sun" />
<col id="mon" />
<col id="tue" />
<col id="wed" />
<col id="thur" />
<col id="fri" />
<col id="sat" />
</colgroup>
<thead>
<tr>
<th scope="col">Sun</th>
<th scope="col">Mon</th>
<th scope="col">Tue</th>
<th scope="col">Wed</th>
<th scope="col">Tur</th>
<th scope="col">Fri</th>
<th scope="col">Sat</th>
</tr>
</thead>
</table>
效果:

————————————————————————————————
<table class="cal" summary="A calendar style date picker">
<caption>
<a href="#" rel="prev"><</a>January 2017
<a href="#" rel="next">></a>
</caption>
<colgroup>
<col id="sun" />
<col id="mon" />
<col id="tue" />
<col id="wed" />
<col id="thur" />
<col id="fri" />
<col id="sat" />
</colgroup>
<thead>
<tr>
<th scope="col">Sun</th>
<th scope="col">Mon</th>
<th scope="col">Tue</th>
<th scope="col">Wed</th>
<th scope="col">Tur</th>
<th scope="col">Fri</th>
<th scope="col">Sat</th>
</tr>
</thead>
<tbody>
<tr>
<td class="null">30</td>
<td class="null">31</td>
<td><a href="#">1</a></td>
<td><a href="#">2</a></td>
<td><a href="#">3</a></td>
<td><a href="#">4</a></td>
<td><a href="#">5</a></td>
</tr>
<tr>
<td class="null">6</td>
<td class="null">7</td>
<td><a href="#">8</a></td>
<td><a href="#">9</a></td>
<td><a href="#">10</a></td>
<td><a href="#">11</a></td>
<td><a href="#">12</a></td>
</tr>
<tr>
<td class="null">13</td>
<td class="null">14</td>
<td><a href="#">15</a></td>
<td><a href="#">16</a></td>
<td><a href="#">17</a></td>
<td><a href="#">18</a></td>
<td><a href="#">19</a></td>
</tr>
<tr>
<td class="null">20</td>
<td class="null">21</td>
<td><a href="#">22</a></td>
<td><a href="#">23</a></td>
<td><a href="#">24</a></td>
<td><a href="#">25</a></td>
<td><a href="#">26</a></td>
</tr>
<tr>
<td class="null">27</td>
<td class="null">28</td>
<td><a href="#">29</a></td>
<td><a href="#"></a></td>
<td><a href="#"></a></td>
<td><a href="#"></a></td>
<td><a href="#"></a></td>
</tr>
</tbody>
</table>
效果
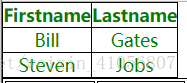
3.对表格应用样式
①表格边盒模型:单独的和叠加的
普通表格:自带双层边框
table, td, th {
    border:1px solid black;
}
</table>
<table>
    <tr>
        <th>Firstname</th>
        <th>Lastname</th>
    </tr>
    <tr>
        <td>Bill</td>
        <td>Gates</td>
    </tr>
    <tr>
        <td>Steven</td>
        <td>Jobs</td>
    </tr>
</table>
效果:

实现单层的表格
table.cal{
    border-collapse: collapse;
    border-spacing: 0;//控制单元格之间的距离,cellspacing属性一样
    text-align: center;
    color: green;
}
table, td, th
{
    border:1px solid black;
}
<table cellspacing="0" class="cal" summary="A calendar style date picker">
    <tr>
        <th>Firstname</th>
        <th>Lastname</th>
    </tr>
    <tr>
        <td>Bill</td>
        <td>Gates</td>
    </tr>
    <tr>
        <td>Steven</td>
        <td>Jobs</td>
    </tr>
</table>
效果:
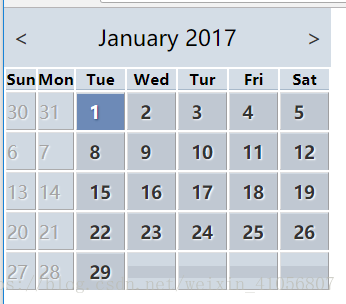
4.添加视觉样式——完整版(日历)
<!DOCTYPE html>
<html lang="en">
<head>
<meta charset="UTF-8">
<title>Title</title>
<style type="text/css">
*{
margin: 0;
padding: 0;
}
/*给日历标题设置样式*/
.cal caption{
font-size: 1.25em;
padding-top: 0.692em;
padding-bottom: 0.692em;
background: #d4dde6;
}
/*使用属性选择器来确定当前月份前后链接的位置*/
.cal caption [rel="prev"]{
float: left;
margin-left: 0.2em;
}
.cal caption [rel="next"]{
float: right;
margin-right: 0.2em;
}
/*设置左右箭头的样式*/
.cal caption a:link,.cal caption a:visited{
text-decoration: none;
color: #333;
padding: 0 0.2em;
}
/*鼠标滑过箭头时候的样式*/
.cal caption a:hover,.cal caption a:focus,.cal caption a:active{
background: #6d8ab7;
}
/*设置列标题样式*/
.cal thead th{
background: #d4dde6;
border-bottom: 1px solid #a9bacb;
font-size: 0.875em;
}
/*设置表格体文本*/
.cal tbody{
color: #a4a4a4;
/*文本阴影*/
text-shadow: 1px 1px 1px white;
background: #d0d9e2;
}
/*表格单元格斜面效果,将顶边和左边设置浅色,底边和右边设置深色,然后设置锚链接样式*/
.cal tbody td{
border-top: 1px solid #e0e0e1;
border-right: 1px solid #9f9fa1;
border-bottom: 1px solid #acacad;
border-left: 1px solid #dfdfe0;
}
.cal tbody a{
display: block;
text-decoration: none;
color: #333;
background: #c0c8d2;
font-weight: bold;
padding: 0.385em 0.692em 0.308em 0.692em;
}
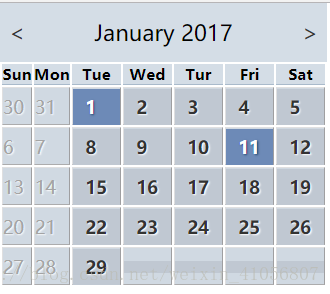
/*设置a链接还有类selected标记的a的样式*/
.cal tbody a:hover,
.cal tbody a:focus,
.cal tbody a:active,
.cal tbody .selected a:link,
.cal tbody .selected a:visited,
.cal tbody .selected a:hover,
.cal tbody .selected a:focus,
.cal tbody .selected a:active{
background: #6d8ab7;
color: white;
text-shadow: 1px 1px 2px #22456b;
}
</style>
</head>
<body>
<table class="cal" summary="A calendar style date picker">
<caption>
<a href="#" rel="prev"><</a>January 2017
<a href="#" rel="next">></a>
</caption>
<colgroup>
<col id="sun" />
<col id="mon" />
<col id="tue" />
<col id="wed" />
<col id="thur" />
<col id="fri" />
<col id="sat" />
</colgroup>
<thead>
<tr>
<th scope="col">Sun</th>
<th scope="col">Mon</th>
<th scope="col">Tue</th>
<th scope="col">Wed</th>
<th scope="col">Tur</th>
<th scope="col">Fri</th>
<th scope="col">Sat</th>
</tr>
</thead>
<tbody>
<tr>
<td >30</td>
<td class="null">31</td>
<td class="selected"><a href="#">1</a></td>
<td><a href="#">2</a></td>
<td><a href="#">3</a></td>
<td><a href="#">4</a></td>
<td><a href="#">5</a></td>
</tr>
<tr>
<td class="null">6</td>
<td class="null">7</td>
<td><a href="#">8</a></td>
<td><a href="#">9</a></td>
<td><a href="#">10</a></td>
<td><a href="#">11</a></td>
<td><a href="#">12</a></td>
</tr>
<tr>
<td class="null">13</td>
<td class="null">14</td>
<td><a href="#">15</a></td>
<td><a href="#">16</a></td>
<td><a href="#">17</a></td>
<td><a href="#">18</a></td>
<td><a href="#">19</a></td>
</tr>
<tr>
<td class="null">20</td>
<td class="null">21</td>
<td><a href="#">22</a></td>
<td><a href="#">23</a></td>
<td><a href="#">24</a></td>
<td><a href="#">25</a></td>
<td><a href="#">26</a></td>
</tr>
<tr>
<td class="null">27</td>
<td class="null">28</td>
<td><a href="#">29</a></td>
<td><a href="#"></a></td>
<td><a href="#"></a></td>
<td><a href="#"></a></td>
<td><a href="#"></a></td>
</tr>
</tbody>
</table>
</body>
</html>
效果:
——————————————————————————————————————————————————————
二.简单的表单布局
1.表单标签:label:帮助添加结构和增加表单的可用性可访问性(用来添加有意义的描述性标签)
2.标签和表单控件关联使用方式
①隐式方式:把表单元素嵌套在label元素中
<label>email <input type="text" name="email"></label>
②显示方式:把label的for属性设置为相关联的表单元素的id名称
<label for="email">email</label>
<input type="text" name="email" id="email">
这个方式效果(相同);

注:输入控件及所有表单控件都包含name和id属性。表单输入控件和变迁之间创建关联需要id属性,表单数据发送回服务器需要name属性,id和name不必相同,但是为了保持一致,可以让他们相同。
多用隐式,少用或不用for属性
3.
*{
    margin: 0;
    padding: 0;
}
fieldset{
    margin: 1em 0;
    padding: 1em;
    border: 1px solid #cccccc;
    background: #f8f8f8f8;
}
legend{
    font-weight: bold;
}
<fieldset>
    <legend>Your Contact Details</legend>
    <div>
        <label for="author">Name:(Required)</label>
        <input type="text" id="author" name="author">
    </div>
    <div>
        <label for="email">Email Address:</label>
        <input type="text" id="email" name="email">
    </div>
    <div>
        <label for="url">Web Address:</label>
        <input type="text" id="url" name="url">
    </div>
</fieldset>
效果:没有样式之前
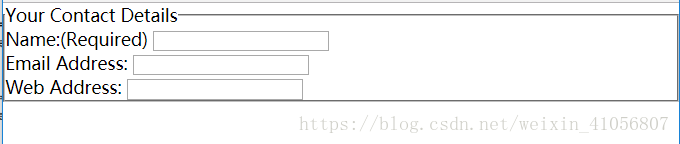
效果:添加样式之后

注:当标签label设置为行内元素的时候display:block,是输入元素转到下一行所以,文本输入框宽度不一样,要设置宽度
所以添加代码
<!DOCTYPE html>
<html lang="en">
<head>
    <meta charset="UTF-8">
    <title>Title</title>
    <style type="text/css">
        *{
            margin: 0;
            padding: 0;
        }
        fieldset{
            margin: 1em 0;
            padding: 1em;
            border: 1px solid #cccccc;
            background: #f8f8f8f8;
        }
        legend{
            font-weight: bold;
        }
        label{
            display: block;
            /*光标呈现为指示链接的指针(一只手)*/
            cursor: pointer;
        }
        input{
            width: 20em;
        }
    </style>
</head>
<body>
    <fieldset>
        <legend>Your Contact Details</legend>
        <div>
            <label for="author">Name:(Required)</label>
            <input type="text" id="author" name="author">
        </div>
        <div>
            <label for="email">Email Address:</label>
            <input type="text" id="email" name="email">
        </div>
        <div>
            <label for="url">Web Address:</label>
            <input type="text" id="url" name="url">
        </div>
    </fieldset>
</body>
</html>

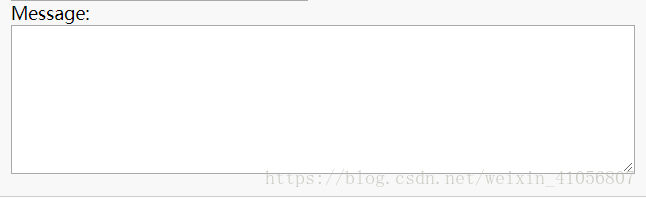
4.其他元素
① textarea文本区域
textarea{
    width: 100%;
    height: 10em;
}
<div>
    <label for="text">Message:</label>
    <textarea type="text" id="text" name="text">
    </textarea>
</div>
②.单选按钮radio
input[type="text"]{
    width: 20em;
}
/*将单选按钮的宽度设置为auto,来覆盖前面对输入元素的设置,还有复选框和提交按钮也可以这么做*/
radio,checkbox,sumit{
    width: auto;
}
<fieldset>
    <legend>Remember Me</legend>
    <div>
        <label for="remember-yes">
            <input type="radio" id="remember-yes" name="remember" value="yes">
        Yes</label>
    </div>
    <div>
        <label for="remember-no">
            <input type="radio" id="remember-no" name="remember" value="no" checked="checked">
        No</label>
    </div>
</fieldset>
效果:

5.修饰
布局完成后,可以对于元素获得焦点时改变背景颜色
*{
    margin: 0;
    padding: 0;
}
fieldset{
    margin: 1em 0;
    padding: 1em;
    border: 1px solid #cccccc;
    background: #f8f8f8f8;
}
legend{
    font-weight: bold;
}
label{
    display: block;
    /*光标呈现为指示链接的指针(一只手)*/
    cursor: pointer;
}
input[type="text"]:focus{
    background: #ffc;
}
<fieldset>
    <legend>Remember Me</legend>
    <div>
        <label for="author">Name:(Required)</label>
        <input type="text" id="author" name="author">
    </div>
</fieldset>
效果:

鼠标点击文本框后:

6.[type="password"]输入密码
7.必填域
.required{
    font-size: 0.75em;
    color: #760000;
}
<div>
    <label for="author">Name:
        <em class="required">(Required)</em>
    </label>
    <input type="text" id="author" name="author">
</div>

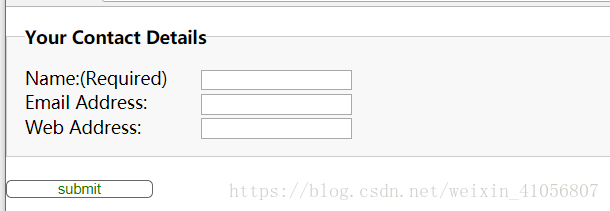
三.复杂的表单布局
1.处理较长的复杂的表单 垂直间距不统一的问题
<!DOCTYPE html>
<html lang="en">
<head>
    <meta charset="UTF-8">
    <title>Title</title>
    <style type="text/css">
        *{
            margin: 0;
            padding: 0;
        }
        fieldset{
            margin: 1em 0;
            padding: 1em;
            border: 1px solid #cccccc;
            background: #f8f8f8f8;
        }
        legend{
            font-weight: bold;
        }
        label{
            /*对标签设置左浮动,且给标签设置宽度使所有比哦啊单元素排齐*/
            float: left;
            width: 10em;
            /*光标呈现为指示链接的指针(一只手)*/
            cursor: pointer;
        }
        input{
            width: 10em;
        }
        textarea{
            width: 100%;
            height: 10em;
        }
        input[type="radio"]{
            width: 20em;
        }
        input[type="submit"]{
            border: 1px solid #666666;
            color: green;
            background: #fff;
            border-radius: 5px;
        }
        .clear{
            clear: both;
        }
    </style>
</head>
<body>
    <fieldset>
        <legend>Your Contact Details</legend>
        <div>
            <label for="author">Name:(Required)</label>
            <input type="text" id="author" name="author">
        </div>
        <div>
            <label for="email">Email Address:</label>
            <input type="text" id="email" name="email">
        </div>
        <div>
            <label for="url">Web Address:</label>
            <input type="text" id="url" name="url">
        </div>
    </fieldset>

    <input type="submit" id="Submit" name="submit" value="submit">
</body>
</html>
2.可访问的数据输入元素
<!DOCTYPE html>
<html lang="en">
<head>
    <meta charset="UTF-8">
    <title>Title</title>
    <style type="text/css">
        *{
            margin: 0;
            padding: 0;
        }

        #monthOfBirth, #yearOfBirth{
            /*将这两个标签定位到屏幕之外,为了防止标签影响布局所以宽度设置为0*/
            text-indent: -1000em;
            width: 0;
        }
       /*单独设置各表单控件的尺寸,并且用外边距控制他们的水平间距*/

        input#dateOfBirth{
            width: 3em;
            margin-right: 0.5em;
        }
        select#monthOfBirth{
            width: 10em;
            margin-right: 0.5em;
        }
        input#yearOfBirth{
            width: 8em;
        }
    </style>
</head>
<body>
    <div>
        <label for="dateOfBirth">Date of Birth</label>
        <input type="text" id="dateOfBirth" name="dateOfBirth">
        <label for="monthOfBirth" id="monthOfBirth">Month of Birth:</label>

        <select name="monthOfBirth" id="monthOfBirth">
            <option value="1">January</option>
            <option value="2">February</option>
            <option value="3">Marth</option>
        </select>
        <label for="yearOfBirth" id="yearOfBirth">Year of Birth:</label>
        <input type="text" id="yearOfBirth" name="yearOfBirth">
    </div>
</body>
</html>

3.多列复选框
<!DOCTYPE html>
<html lang="en">
<head>
    <meta charset="UTF-8">
    <title>Title</title>
    <style type="text/css">
        *{
            margin: 0;
            padding: 0;
        }
        fieldset#favoriteColor{
            border: none;
            /*将背景颜色设置为透明*/
            background: transparent;
        }

        #favoriteColor h2{
            width: 10em;
            /*h2左浮*/
            float: left;
            font-size: 1em;
            /*设置字体粗细设置为normal并且减小字号*/
            font-weight: normal;
        }
        /*div左浮设置宽度,创建出两列布局, clear: none;覆盖 div在默认情况下被清理的声明*/
        #favoriteColor .col{
            width: 8em;
            float: left;
            clear: none;
        }
        #favoriteColor label{
            /*复选框的标签不需要浮动*/
            float: none;
        }
        button{
            background: greenyellow ;
            width: 90px;
            height: 20px;
            border: 1px solid #989898;
            -moz-border-radius: 6px;
            -webkit-border-radius: 6px;
            border-radius: 6px;
            -moz-box-shadow: 2px 2px 2px #ccc;
            -webkit-box-shadow: 2px 2px 2px #ccc;
            box-shadow: 2px 2px 2px #ccc;
            color: white;
            font-size: 14px;
            font-weight: bold;
            text-shadow: 1px 1px 1px #666;
        }
    </style>
</head>
<body>
    <fieldset id="favoriteColor">
        <h2>Favorite Color</h2>
        <div class="col">
            <div>
                <label><input type="checkbox" class="checkbox" id="red" name="red" value="red">red</label>
            </div>
        </div>
        <div class="col">
            <div>
                <label><input type="checkbox" class="checkbox" id="orange" name="orange" value="orange">orange</label>
            </div>
        </div>
        <div>
            <button type="submit">
                Book Now
            </button>
        </div>
    </fieldset>
</body>
</html>

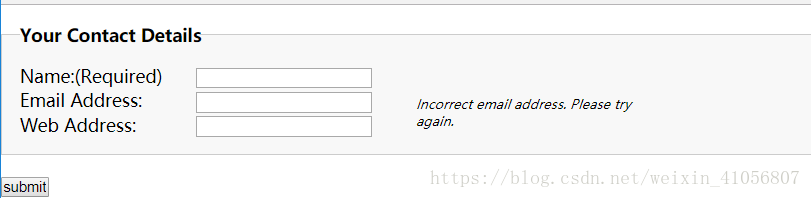
4.表单反馈
将em放在源代码中文本输入元素的后面,排列时对em和input浮动,防止对整个布局产生影响,css定位处理
<!DOCTYPE html>
<html lang="en">
<head>
    <meta charset="UTF-8">
    <title>Title</title>
    <style type="text/css">
        *{
            margin: 0;
            padding: 0;
        }
        fieldset{
            margin: 1em 0;
            padding: 1em;
            border: 1px solid #cccccc;
            background: #f8f8f8f8;
        }
        legend{
            font-weight: bold;
        }
        label{
            /*对标签设置左浮动,且给标签设置宽度使所有比哦啊单元素排齐*/
            float: left;
            width: 10em;
            /*光标呈现为指示链接的指针(一只手)*/
            cursor: pointer;
        }
        div{
           position: relative;
       }
        .feedback{
            position: absolute;
            left: 30em;
            right: 0;
            top: 0.5em;
            width: 18em;
            font-size: 12px;
        }
    </style>
</head>
<body>
<fieldset>
    <legend>Your Contact Details</legend>
    <div>
        <label for="author">Name:(Required)</label>
        <input type="text" id="author" name="author">
    </div>
    <div>
        <label for="email">Email Address:
            <em class="feedback">Incorrect email address. Please try again.</em>
        </label>
        <input type="text" id="email" name="email">
    </div>
    <div>
        <label for="url">Web Address:</label>
        <input type="text" id="url" name="url">
    </div>
</fieldset>

<input type="submit" id="Submit" name="submit" value="submit">
</body>
</html>