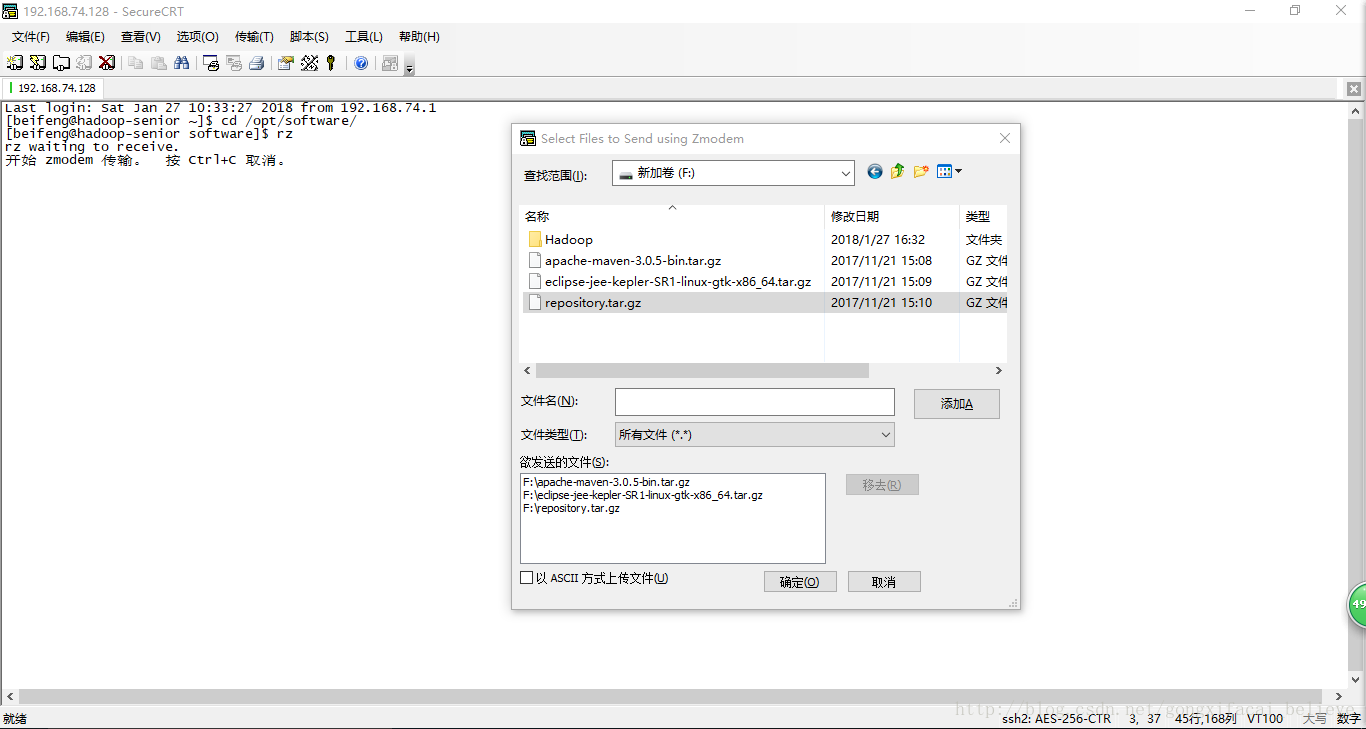
1、进入/opt/software,用rz工具上传下载好的Eclipse、Maven及repository包。
2、解压maven和eclipse。
$ tar -zxf apache-maven-3.0.5-bin.tar.gz -C /opt/modules/
$ tar -zxf eclipse-jee-kepler-SR1-linux-gtk-x86_64.tar.gz -C /opt/tools/
3、配置Maven
vim /etc/profile
添加环境变量
#MAVEN_HOME

export MAVEN_HOME=/opt/modules/apache-maven-3.0.5
export PATH=$PATH:$MAVEN_HOME/bin
保存
source /etc/profile
退出登陆,配置文件即可生效。
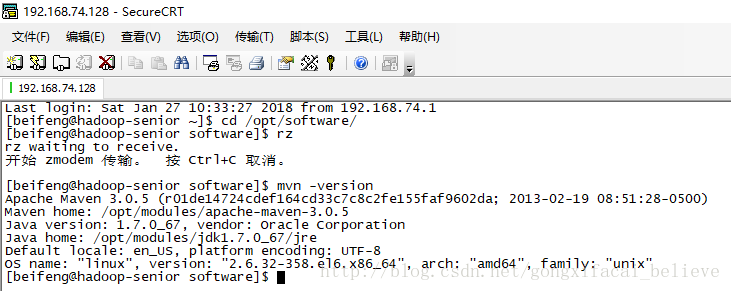
mvn -version 检查配置
4、进入/opt/tools/eclipse/,./eclipse启动Eclipse脚本,工作路径:/opt/tools/workspace。
5、配置maven
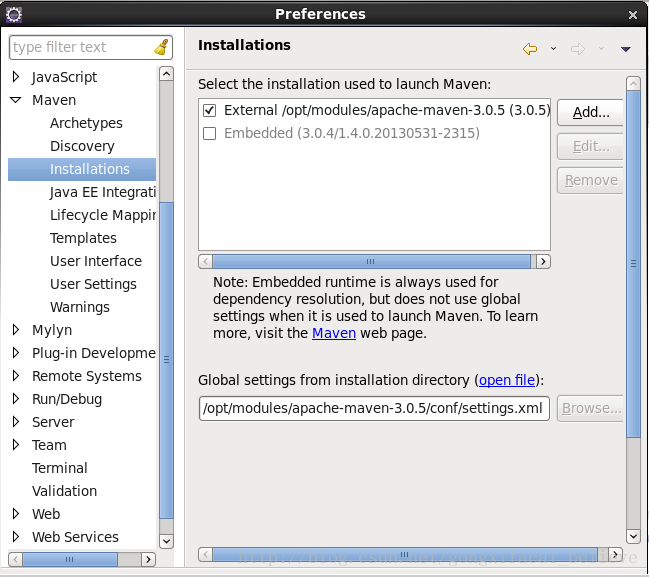
(1)进入Window->Preferences->Maven->Installations->Add,添加解压好的maven路径,如下图。
6、进入Window->Preferences->Maven->User Settings,报警告:User settings file doesn't exist.
则按照/home/beifeng/.m2/settings.xml路径,建.m2文件夹,当前路径/home/beifeng/.m2/,并
cp /opt/modules/apache-maven-3.0.5/conf/settings.xml .
则User Settngs中的settings.xml文件找到。
$ tar -zxf /opt/software/repository.tar.gz -C /opt/modules/
cp -r /opt/modules/repository/ .
则仓库文件/home/beifeng/.m2/repository找到。
警告消失。

7、创建Maven Project。
archetypes选择maven-archetype-quickstart。
8、在新建的Maven Project中新建Source Folder为:src/main/resources。
设置输出路径:build path->Source->bigdata-hdfs/src/main/resources的Output folder为target/classes。
9、在pom.xml中添加maven依赖。
在maven官网:https://mvnrepository.com/artifact/org.apache.hadoop/hadoop-client/2.5.0,搜索到2.5.0的坐标。
pom.xml文件配置如下:
<?xml version="1.0"?>

-<project xsi:schemaLocation="http://maven.apache.org/POM/4.0.0 http://maven.apache.org/xsd/maven-4.0.0.xsd" xmlns:xsi="http://www.w3.org/2001/XMLSchema-instance" xmlns="http://maven.apache.org/POM/4.0.0">

<modelVersion>4.0.0</modelVersion>

<groupId>bigdata-senior</groupId>

<artifactId>bigdata-hdfs</artifactId>

<version>0.0.1-SNAPSHOT</version>

<packaging>jar</packaging>

<name>bigdata-hdfs</name>

<url>http://maven.apache.org</url>


-<properties>

<project.build.sourceEncoding>UTF-8</project.build.sourceEncoding>

<hadoop.version>2.5.0</hadoop.version>

</properties>


-<repositories>


-<repository>

<id>nexus-aliyun</id>

<name>Nexus aliyun</name>

<url>http://maven.aliyun.com/nexus/content/groups/public</url>

</repository>

</repositories>


-<dependencies>


-<dependency>

<groupId>org.apache.hadoop</groupId>

<artifactId>hadoop-client</artifactId>

<version>2.5.0</version>

</dependency>


-<dependency>

<groupId>junit</groupId>

<artifactId>junit</artifactId>

<version>3.8.1</version>

<scope>test</scope>

</dependency>

</dependencies>

</project>
这样便导入了hadoop 2.5.0的全部依赖包。如果依赖包导入有问题,删除/home/beifeng/.m2/repository/org/apache/hadoop下的全部文件,并重新保存pom.xml,直到pom.xml的依赖包全部导入。
10、Eclipse和Maven的配置全部完成。