版权声明:转载请注明出处:https://blog.csdn.net/strugglein https://blog.csdn.net/Strugglein/article/details/82800998
项目路径: https://github.com/zhaopeng01/springboot-study/tree/master/study9
Mybatis是对jdbc的封装,他让数据库底层操作变得透明,Mybatis操作都是围绕一个sqlsessionFactory实例开展,Mybatis通过配置文件关联到各实体类的Mapper文件,Mapper文件中配置了每个类对数据库所需进行的sql语句映射,在每次与数据库交互时,通过sqlSessionFactory,拿到sqlSession,在执行sql命令
本文是基于SpringBoot 2.x 以上版本进行的整合
添加了一些其他的功能
PageHelper分页插件
搭建
添加基本依赖
其他依赖
在基本依赖后面添加一些其他依赖
 <!--添加其他依赖-->
        <!-- 分页插件 -->
        <dependency>
            <groupId>com.github.pagehelper</groupId>
            <artifactId>pagehelper-spring-boot-starter</artifactId>
            <version>1.2.5</version>
        </dependency>
        <!-- alibaba的druid数据库连接池 -->
        <dependency>
            <groupId>com.alibaba</groupId>
            <artifactId>druid-spring-boot-starter</artifactId>
            <version>1.1.9</version>
        </dependency>
目录结构:

在启动类中使用@MapperScan
@MapperScan可以指定要扫描的Mapper类的包的路径
package com.zyc;

import org.mybatis.spring.annotation.MapperScan;
import org.springframework.boot.SpringApplication;
import org.springframework.boot.autoconfigure.SpringBootApplication;

@SpringBootApplication
@MapperScan("com.zyc.mapper")
public class Study9Application {

    public static void main(String[] args) {
        SpringApplication.run(Study9Application.class, args);
    }
}
配置文件
我这里用的是yml,这里也可以根据自己喜欢的用properties
server:
  port: 8080


spring:
    datasource:
        name: mysql_test
        type: com.alibaba.druid.pool.DruidDataSource
        #druid相关配置
        druid:
          #监控统计拦截的filters
          filters: stat
          driver-class-name: com.mysql.jdbc.Driver
          #基本属性
          url: jdbc:mysql://127.0.0.1:3306/zyc?useUnicode=true&characterEncoding=UTF-8&allowMultiQueries=true
          username: root
          password: 123456
          #配置初始化大小/最小/最大
          initial-size: 1
          min-idle: 1
          max-active: 20
          #获取连接等待超时时间
          max-wait: 60000
          #间隔多久进行一次检测,检测需要关闭的空闲连接
          time-between-eviction-runs-millis: 60000
          #一个连接在池中最小生存的时间
          min-evictable-idle-time-millis: 300000
          validation-query: SELECT 'x'
          test-while-idle: true
          test-on-borrow: false
          test-on-return: false
          #打开PSCache,并指定每个连接上PSCache的大小。oracle设为true,mysql设为false。分库分表较多推荐设置为false
          pool-prepared-statements: false
          max-pool-prepared-statement-per-connection-size: 20
## 该配置节点为独立的节点,有可能容易将这个配置放在spring的节点下,导致配置无法被识别
mybatis:
  mapper-locations: classpath:mapper/*.xml  #注意:一定要对应mapper映射xml文件的所在路径
  type-aliases-package: com.winterchen.model  # 注意:对应实体类的路径

#pagehelper
pagehelper:
    helperDialect: mysql
    reasonable: true
    supportMethodsArguments: true
    params: count=countSql
    returnPageInfo: check
创建表
CREATE TABLE users(
  userId INT NOT NULL PRIMARY KEY AUTO_INCREMENT,
  userName VARCHAR(255) NOT NULL ,
  password VARCHAR(255) NOT NULL ,
  phone VARCHAR(255) NOT NULL
) ENGINE=INNODB AUTO_INCREMENT=1000 DEFAULT CHARSET=utf8;
实体类
package com.zyc.entity;

public class Users {
    private Integer userId;

    private String userName;

    private String password;

    private String phone;

    public Integer getUserId() {
        return userId;
    }

    public void setUserId(Integer userId) {
        this.userId = userId;
    }

    public String getUserName() {
        return userName;
    }

    public void setUserName(String userName) {
        this.userName = userName;
    }

    public String getPassword() {
        return password;
    }

    public void setPassword(String password) {
        this.password = password;
    }

    public String getPhone() {
        return phone;
    }

    public void setPhone(String phone) {
        this.phone = phone;
    }
}
创建Mapper
package com.zyc.mapper;

import com.zyc.entity.Users;

import java.util.List;

public interface UserMapper {

    int insert(Users users);

    List<Users> selectUsers();
}
创建映射文件
<?xml version="1.0" encoding="UTF-8" ?>
<!DOCTYPE mapper PUBLIC "-//mybatis.org//DTD Mapper 3.0//EN" "http://mybatis.org/dtd/mybatis-3-mapper.dtd" >
<mapper namespace="com.zyc.mapper.UserMapper">
    <sql id="BASE_TABLE">
    users
  </sql>

    <sql id="BASE_COLUMN">
    userId,userName,password,phone
  </sql>

    <insert id="insert" parameterType="com.zyc.entity.Users">
        INSERT INTO
        <include refid="BASE_TABLE"/>
        <trim prefix="(" suffix=")" suffixOverrides=",">
            userName,password,
            <if test="phone != null">
                phone,
            </if>
        </trim>
        <trim prefix="VALUES(" suffix=")" suffixOverrides=",">
            #{userName, jdbcType=VARCHAR},#{password, jdbcType=VARCHAR},
            <if test="phone != null">
                #{phone, jdbcType=VARCHAR},
            </if>
        </trim>
    </insert>

    <select id="selectUsers" resultType="com.zyc.entity.Users">
        SELECT
        <include refid="BASE_COLUMN"/>
        FROM
        <include refid="BASE_TABLE"/>
    </select>
</mapper>
在这里
namespace一定要对应自己的mapper接口对应的包路径
service接口
package com.zyc.service;

import com.github.pagehelper.PageInfo;
import com.zyc.entity.Users;

public interface UserService {

    int addUser(Users user);

    PageInfo<Users> findAllUser(int pageNum, int pageSize);
}
service实现类
package com.zyc.service.impl;

import com.github.pagehelper.PageHelper;
import com.github.pagehelper.PageInfo;
import com.zyc.entity.Users;
import com.zyc.mapper.UserMapper;
import com.zyc.service.UserService;
import org.springframework.beans.factory.annotation.Autowired;
import org.springframework.stereotype.Service;

import java.util.List;

@Service
public class UserServiceImpl implements UserService {

    @Autowired
    private UserMapper userMapper;

    @Override
    public int addUser(Users user) {

        return userMapper.insert(user);
    }

    /*
     * 在service层传入参数,然后将参数传递给一个插件的一个静态方法即可;
     * pageNum 开始页数
     * pageSize 每页显示的数据条数
     * */
    @Override
    public PageInfo<Users> findAllUser(int pageNum, int pageSize) {
        //将参数传给这个方法就可以实现物理分页了,非常简单。
        PageHelper.startPage(pageNum, pageSize);
        List<Users> userDomains = userMapper.selectUsers();
        PageInfo result = new PageInfo(userDomains);
        return result;
    }

}
controller
package com.zyc.controller;

import com.zyc.entity.Users;
import com.zyc.service.UserService;
import org.springframework.beans.factory.annotation.Autowired;
import org.springframework.stereotype.Controller;
import org.springframework.web.bind.annotation.*;

/**
 * @Description: 测试用户controller
 * @author zhaopeng
 * @email [email protected]
 */

@Controller
@RequestMapping(value = "/user")
public class UserController {

    @Autowired
    private UserService userService;

    @ResponseBody
    @PostMapping("/add")
    public int addUser(@RequestBody Users user){
        return userService.addUser(user);
    }

    @ResponseBody
    @GetMapping("/all")
    public Object findAllUser(
            @RequestParam(name = "pageNum", required = false, defaultValue = "1")
                    int pageNum,
            @RequestParam(name = "pageSize", required = false, defaultValue = "10")
                    int pageSize){
        return userService.findAllUser(pageNum,pageSize);
    }
}
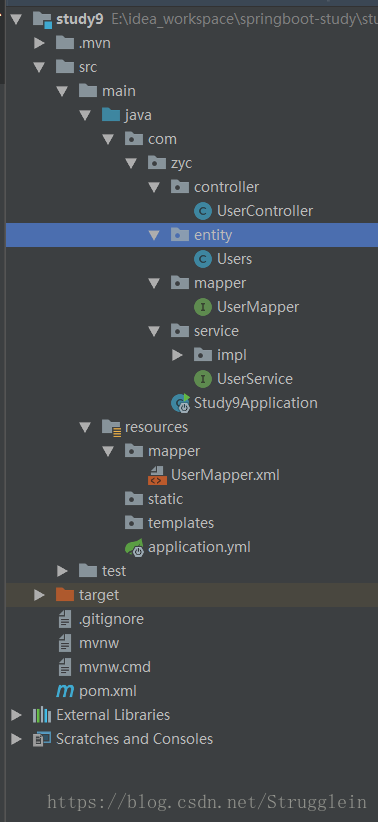
最终项目路径
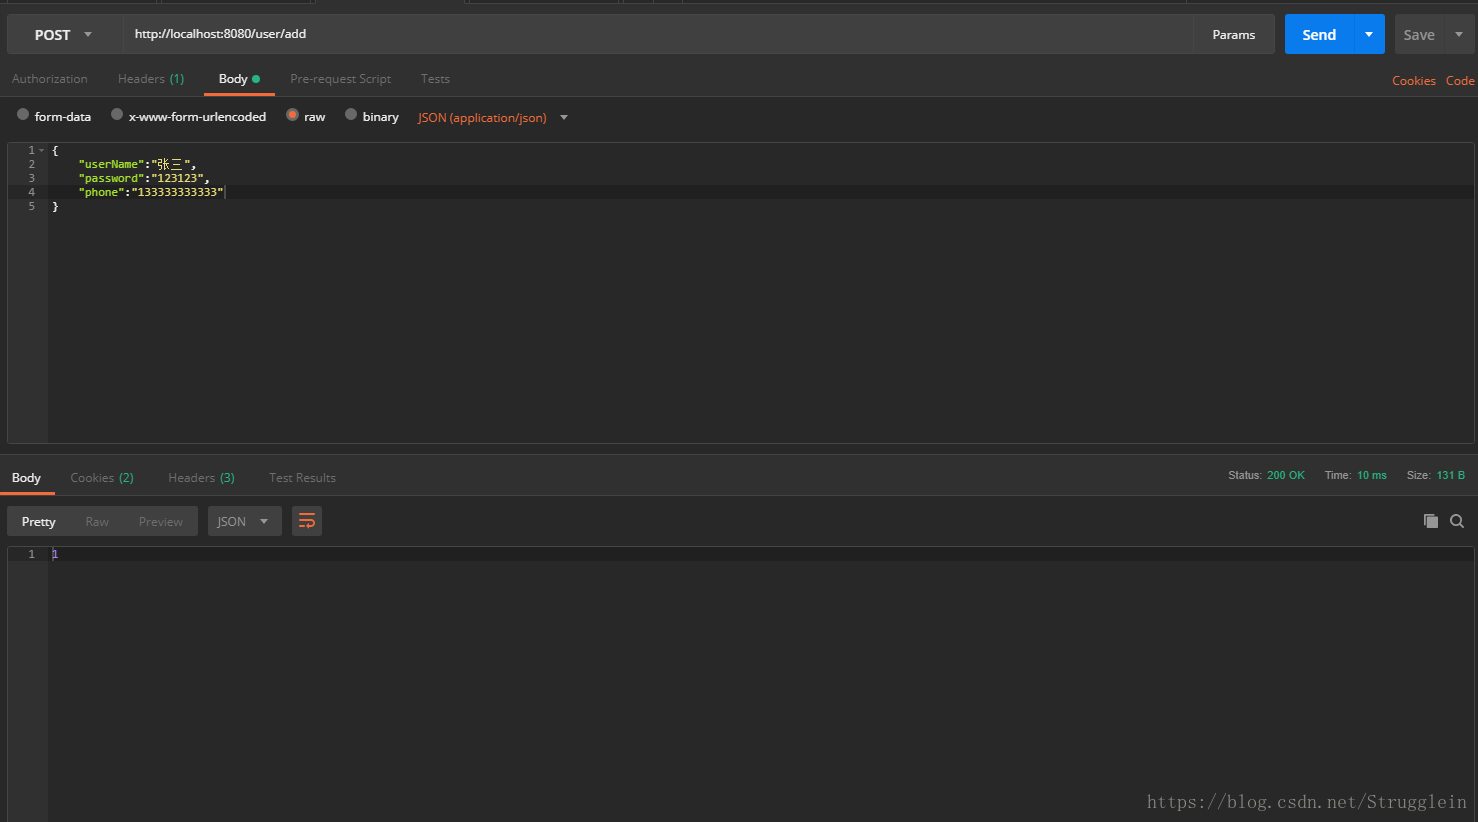
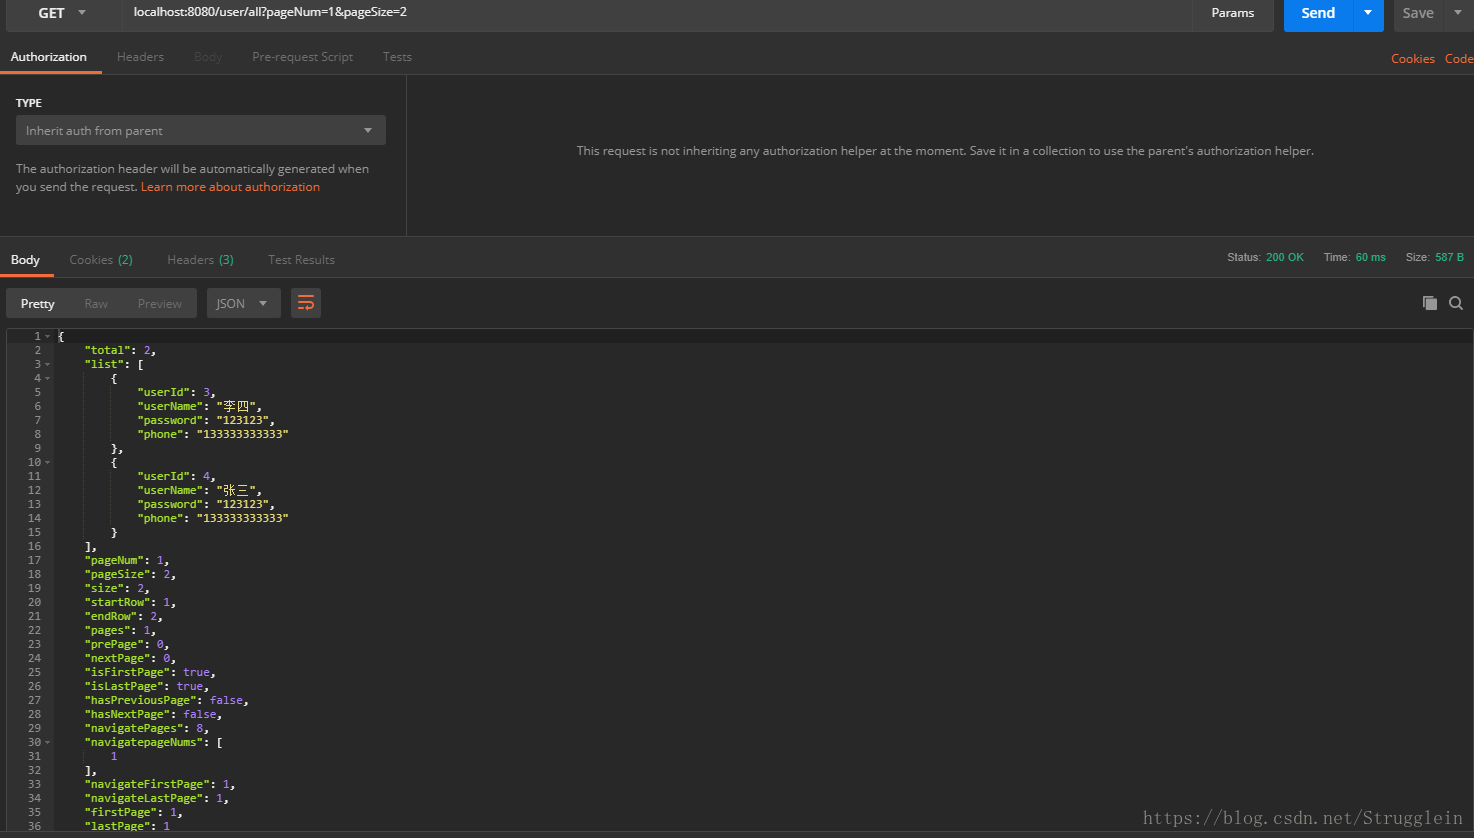
然后启动项目在这里使用的是postman来进行的测试
添加一条数据
查询数据
好的到这里本篇文章就先到此了,创作不易,如果那里有不合适的地方还请大家多多指教,写这篇博的目的主要就是为了方便自己以后的一个回忆和朋友学习时的一个参考,希望为大家可以带来帮助 ~ ~&
虚心的去学习,自信的去工作~