前言
内容主要参考自《Spring源码深度解析》一书,算是读书笔记或是原书的补充。进入正文后可能会引来各种不适,毕竟阅读源码是件极其痛苦的事情。
本文主要涉及书中第六章的部分,依照书中内容以及个人理解对Spring进行了注释,详见Github仓库:https://github.com/MrSorrow/spring-framework
前面的文章中,我们以 BeanFactory 接口以及它的实现类 XmlBeanFactory 为例分析了整个Spring加载配置文件、创建获取 bean 的过程。除此以外,Spring还有另一个接口 ApplicationContext,用于扩展 BeanFactory 中现有的功能。下面我们就仔细来研究一下这个接口及其实现类。
I. ApplicationContext使用
ApplicationContext 和 BeanFactory 都是用于加载 bean 的,但是 ApplicationContext 提供了更多的功能,包含了 BeanFactory 的所有功能。通常情况下,在大多数应用中都使用的是 ApplicationContext,同时, XmlBeanFactory 在Spring3.1后已经被废弃,标记为过时。
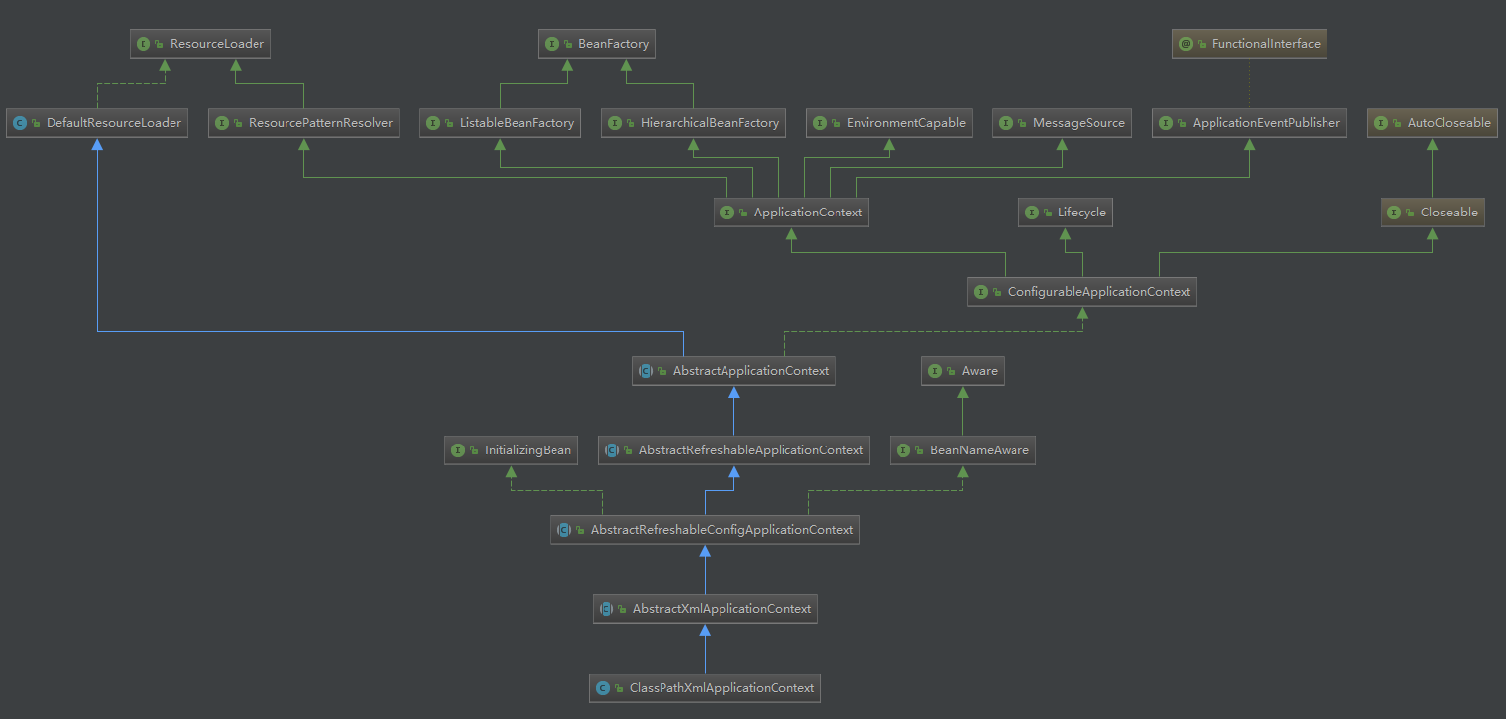
查看 ClassPathXmlApplicationContext 类的继承结构,发现其也实现了 BeanFactory 接口。
首先来看一下两者在加载配置文件的写法差异:
-
使用
BeanFactory方式加载 XMLXmlBeanFactory context = new XmlBeanFactory(new ClassPathResource("customTag-Test.xml")); -
使用
ApplicationContext方式加载 XMLApplicationContext context = new ClassPathXmlApplicationContext("customTag-Test.xml");
同样,我们从 ClassPathXmlApplicationContext 出发,开始一步步深入探究。
/**
 * Create a new ClassPathXmlApplicationContext, loading the definitions
 * from the given XML file and automatically refreshing the context.
 * @param configLocation resource location
 * @throws BeansException if context creation failed
 */
public ClassPathXmlApplicationContext(String configLocation) throws BeansException {
   this(new String[] {configLocation}, true, null);
}

/**
 * Create a new ClassPathXmlApplicationContext with the given parent,
 * loading the definitions from the given XML files.
 * @param configLocations array of resource locations
 * @param refresh whether to automatically refresh the context,
 * loading all bean definitions and creating all singletons.
 * Alternatively, call refresh manually after further configuring the context.
 * @param parent the parent context
 * @throws BeansException if context creation failed
 * @see #refresh()
 */
public ClassPathXmlApplicationContext(
    String[] configLocations, boolean refresh, @Nullable ApplicationContext parent)
    throws BeansException {

    super(parent);
    setConfigLocations(configLocations);
    if (refresh) {
        refresh();
    }
}
查看其构造函数,configLocation 代表了配置文件的路径,是必传的参数。也可以设置多个路径,作为数组形式传入。对于XML的解析和功能实现则都在 refresh() 中实现。
II. 设置配置文件路径
在 ClassPathXmlApplicationContext 中支持多个配置文件以数组方式同时传入:
/**
 * 设置配置文件们的路径
 * Set the config locations for this application context.
 * <p>If not set, the implementation may use a default as appropriate.
 */
public void setConfigLocations(@Nullable String... locations) {
   if (locations != null) {
      Assert.noNullElements(locations, "Config locations must not be null");
      this.configLocations = new String[locations.length];
      for (int i = 0; i < locations.length; i++) {
         // 解析路径
         this.configLocations[i] = resolvePath(locations[i]).trim();
      }
   }
   else {
      this.configLocations = null;
   }
}
该函数通过 resolvePath() 解析给定的配置文件路径数组,如果路径包含特殊的符号,如 ${var},那么将会搜寻配置的环境变量并进行替换。我们在IDEA中测试一下:
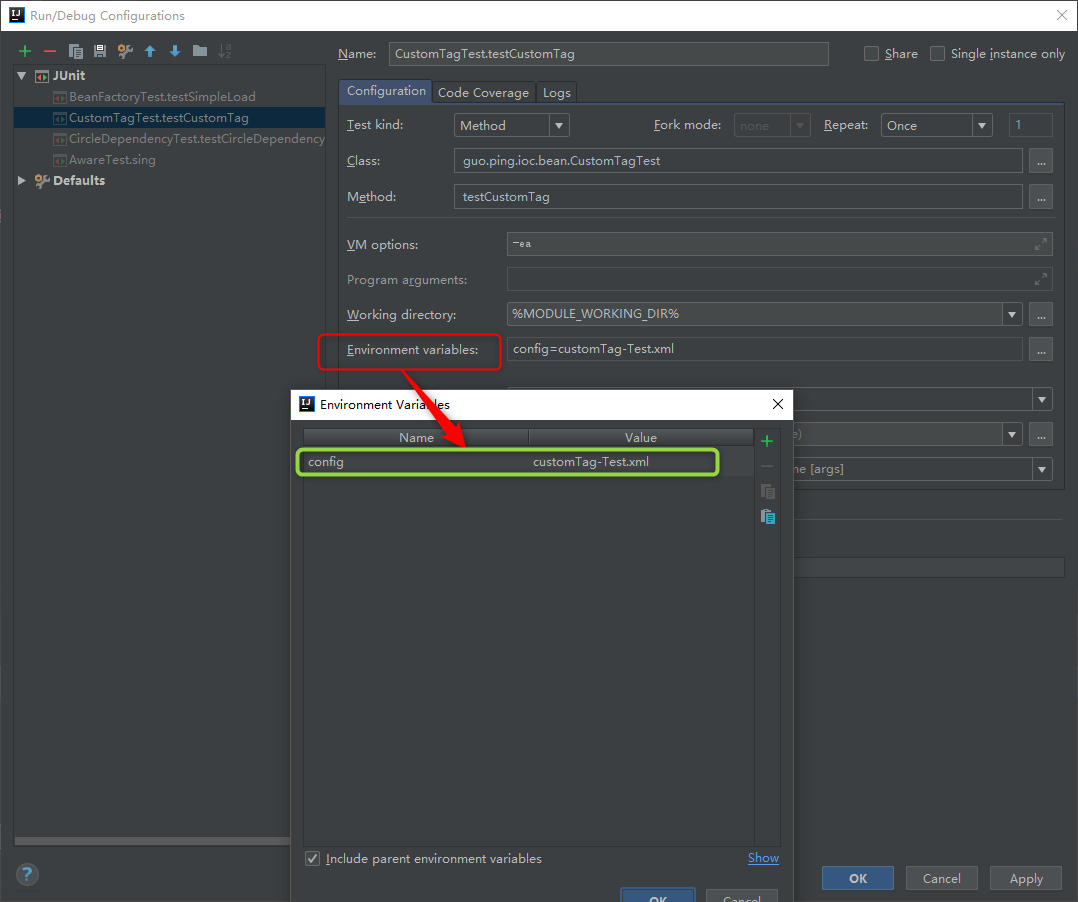
我们在调用的时候,替换成:
ApplicationContext context = new ClassPathXmlApplicationContext("${config}");
IDEA中我们配置了环境变量 config=custtomTag-Test.xml,Spring会解析出该值。
/**
 * Resolve the given path, replacing placeholders with corresponding
 * environment property values if necessary. Applied to config locations.
 * @param path the original file path
 * @return the resolved file path
 * @see org.springframework.core.env.Environment#resolveRequiredPlaceholders(String)
 */
protected String resolvePath(String path) {
   return getEnvironment().resolveRequiredPlaceholders(path);
}
resolvePath 通过 ConfigurableEnvironment 环境实例调用 resolveRequiredPlaceholders 方法进行解析,首先需要先获取 Environment,如果 AbstractApplicationContext 的 this.environment 属性为空,那么需要初始新建 StandardEnvironment 实例进行初始化。
/**
 * Return the {@code Environment} for this application context in configurable
 * form, allowing for further customization.
 * <p>If none specified, a default environment will be initialized via
 * {@link #createEnvironment()}.
 */
@Override
public ConfigurableEnvironment getEnvironment() {
   if (this.environment == null) {
      this.environment = createEnvironment();
   }
   return this.environment;
}

/**
 * Create and return a new {@link StandardEnvironment}.
 * <p>Subclasses may override this method in order to supply
 * a custom {@link ConfigurableEnvironment} implementation.
 */
protected ConfigurableEnvironment createEnvironment() {
    return new StandardEnvironment();
}
StandardEnvironment 继承自 AbstractEnvironment, AbstractEnvironment 中有一个 MutablePropertySources 类型的属性 propertySources,其中存放了我们配置的环境变量信息。读者可移自行debug进行验证。而Spring接着需要做的就是从中依据 key=config 来获取到 value=custtomTag-Test.xml。
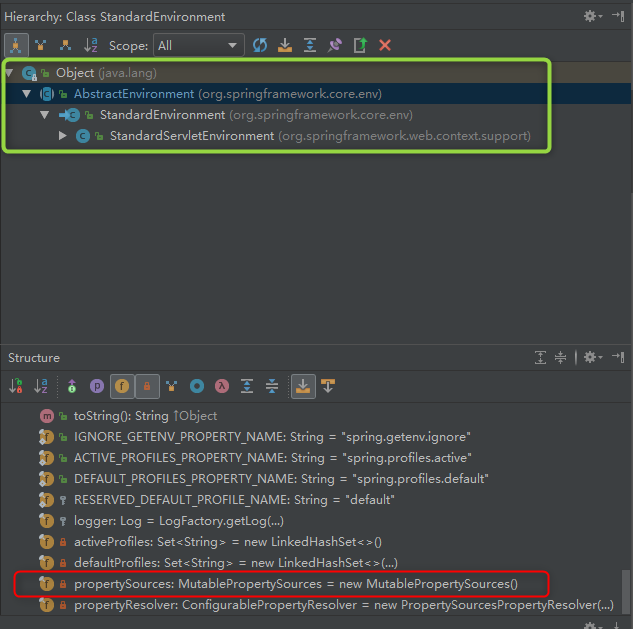
解析提取的工作委托给了 AbstractEnvironment 的 AbstractPropertyResolver 实例 propertyResolver。
@Override
public String resolveRequiredPlaceholders(String text) throws IllegalArgumentException {
   return this.propertyResolver.resolveRequiredPlaceholders(text);
}

@Override
public String resolveRequiredPlaceholders(String text) throws IllegalArgumentException {
    if (this.strictHelper == null) {
        this.strictHelper = createPlaceholderHelper(false);
    }
    return doResolvePlaceholders(text, this.strictHelper);
}
最终在 doResolvePlaceholders 中层层调用,这里就不继续深入了,可以自行debug:
protected String parseStringValue(
      String value, PlaceholderResolver placeholderResolver, Set<String> visitedPlaceholders) {

   StringBuilder result = new StringBuilder(value);

   int startIndex = value.indexOf(this.placeholderPrefix);
   while (startIndex != -1) {
      int endIndex = findPlaceholderEndIndex(result, startIndex);
      if (endIndex != -1) {
         // 获取${}中的内容
         String placeholder = result.substring(startIndex + this.placeholderPrefix.length(), endIndex);
         String originalPlaceholder = placeholder;
         if (!visitedPlaceholders.add(originalPlaceholder)) {
            throw new IllegalArgumentException(
                  "Circular placeholder reference '" + originalPlaceholder + "' in property definitions");
         }
         // Recursive invocation, parsing placeholders contained in the placeholder key.
         placeholder = parseStringValue(placeholder, placeholderResolver, visitedPlaceholders);
         // Now obtain the value for the fully resolved key...
         // 根据key=config获取到value=custtomTag-Test.xml
         String propVal = placeholderResolver.resolvePlaceholder(placeholder);
         ....
      }
      else {
         startIndex = -1;
      }
   }

   return result.toString();
}
III. ApplicationContext扩展功能
解析完配置文件路径之后,保存在 ApplicationContext 成员变量 this.configLocations 中,然后便能够读取配置文件进行解析以及实现各种功能,这些都在 refresh() 中进行实现。
/**
 * 包含ApplicationContext所有功能
 * @throws BeansException
 * @throws IllegalStateException
 */
@Override
public void refresh() throws BeansException, IllegalStateException {
   synchronized (this.startupShutdownMonitor) {
      // 准备刷新的上下文环境,初始化前准备工作,对环境变量的验证
      prepareRefresh();

      // Tell the subclass to refresh the internal bean factory.
      // 初始化BeanFactory,并进行XML文件读取
      ConfigurableListableBeanFactory beanFactory = obtainFreshBeanFactory();

      // Prepare the bean factory for use in this context.
      // 对BeanFactory进行各种功能填充
      prepareBeanFactory(beanFactory);

      try {
         // Allows post-processing of the bean factory in context subclasses.
         // 允许子类覆盖该方法做额外的处理
         postProcessBeanFactory(beanFactory);

         // Invoke factory processors registered as beans in the context.
         // 激活各种BeanFactory处理器
         invokeBeanFactoryPostProcessors(beanFactory);

         // Register bean processors that intercept bean creation.
         // 注册 拦截Bean创建的 Bean处理器,这里只是注册,真正的调用是在getBean时候
         registerBeanPostProcessors(beanFactory);

         // Initialize message source for this context.
         // 为上下文初始化Message消息资源,即不同语言的消息体,国际化处理
         initMessageSource();

         // Initialize event multicaster for this context.
         // 初始化应用消息广播器,并放入"applicationEventMulticaster"bean中,与Spring的事件监听有关
         initApplicationEventMulticaster();

         // Initialize other special beans in specific context subclasses.
         // 留给子类来初始化其他bean
         onRefresh();

         // Check for listener beans and register them.
         // 在所有注册的bean中查找Listener bean,注册到消息广播器中
         registerListeners();

         // Instantiate all remaining (non-lazy-init) singletons.
         // 初始化剩下的单实例(非惰性的)
         finishBeanFactoryInitialization(beanFactory);

         // Last step: publish corresponding event.
         // 完成刷新过程,通知生命周期处理器 lifecycleProcessor 刷新过程,同时发出 ContextRefreshEvent 通知别人
         finishRefresh();
      }

      catch (BeansException ex) {
         if (logger.isWarnEnabled()) {
            logger.warn("Exception encountered during context initialization - " +
                  "cancelling refresh attempt: " + ex);
         }

         // Destroy already created singletons to avoid dangling resources.
         destroyBeans();

         // Reset 'active' flag.
         cancelRefresh(ex);

         // Propagate exception to caller.
         throw ex;
      }

      finally {
         // Reset common introspection caches in Spring's core, since we
         // might not ever need metadata for singleton beans anymore...
         resetCommonCaches();
      }
   }
}
方法中包含了本文需要讲的所有内容,每一个函数调用便是流程中的一个环节,我们先来配合注释整体把握一下:
-
初始化 Context 前的准备工作,例如对系统属性和环境变量进行准备以及验证等。
在某种情况下,可能项目需要读取系统变量,而系统变量的设置可能会影响系统的正确性,那么
ClassPathXmlApplicationContext为我们提供的这个准备函数prepareRefresh()就显得非常必要,它可以在Spring启动的时候提前对必须的变量进行存在性验证。 -
初始化 BeanFactory,并进行XML文件读取。
BeanFactory 作为
ClassPathXmlApplicationContext的成员变量,会在这里进行初始化(赋值),拥有了 BeanFactory 所有的功能。这里顺便提一下,BeanFactory 就是常说的Spring容器,在 BeanFactory 的一些实现类如DefaultListableBeanFactory中存在着 beanDefinitionMap 这样成员变量存放着所有的BeanDefinition对象,每一个BeanDefinition对应一个XML中的 <bean> 标签。 -
对 BeanFactory 进行各种功能填充。
这一部分主要增加一些对Spring表达式语言的支持、一些属性编辑器的注册和其他一些扩展 beanFactory 琐碎细节。
-
子类重写 postProcessBeanFactory(beanFactory) 方法做额外处理。
Spring的强大另一方面在于它的完美架构,开放式的架构让使用它的程序员容易的根据业务需要扩展已经存在的功能。这种开放式的设计在Spring中随处可见,如
postProcessBeanFactory(beanFactory)在AbstractApplicationContext中是一个实现方法,子类可以重写进行扩展。顺便提一句,postprocess 可以翻译为后期处理或后处理。 -
激活各种 BeanFactory 处理器。
-
注册拦截 bean 创建的 bean 处理器。
标题注意断句!这里只是注册,真正调用是在
getBean()的时候。 -
为 Context 初始化 Message 源,即不同语言的消息体进行国际化处理。
-
初始化应用消息广播器,并放入 applicationEventMulticaster 的 bean 中。
-
留给子类重写来初始化其他的 bean。
-
在所有注册的 bean 中查找 listener bean,注册到消息广播器中。
-
初始化剩下的单实例(非惰性)。
-
完成刷新过程。
完成 Context 的刷新,通知生命周期处理器 lifecycleProcessor 刷新过程,同时发出 ContextRefreshEvent 通知其他监听器做进一步处理。
下面,就对这12步骤一一进行细致分析。
IV. 环境准备
prepareRefresh 函数主要是做些准备工作,例如对系统属性及环境变量的初始化及验证。
/**
 * 做一些准备工作,例如对系统属性及环境变量的初始化及验证
 * Prepare this context for refreshing, setting its startup date and
 * active flag as well as performing any initialization of property sources.
 */
protected void prepareRefresh() {
   this.startupDate = System.currentTimeMillis();
   this.closed.set(false); // AtomicBoolean类型,并发
   this.active.set(true); // AtomicBoolean类型,并发

   if (logger.isDebugEnabled()) {
      logger.debug("Refreshing " + this);
   }

   // Initialize any placeholder property sources in the context environment
   // 留给子类覆盖实现
   initPropertySources();

   // 验证需要的属性文件是否都已经放入环境中
   // see ConfigurablePropertyResolver#setRequiredProperties
   getEnvironment().validateRequiredProperties();

   // Allow for the collection of early ApplicationEvents,
   // to be published once the multicaster is available...
   this.earlyApplicationEvents = new LinkedHashSet<>();
}
该函数感觉好像没什么用处,因为主要就是中文注释的两个函数,然而 initPropertySources 是一个空函数,没有任何逻辑,而 getEnvironment().validateRequiredProperties 也因为没有需要验证的属性而没做任何处理。其实不然。
initPropertySources 符合Spring开放式的结构设计,给用户最大扩展Spring能力。用户可以根据自身的需要重写该方法,并在该方法进行个性化的属性设置和处理;
validateRequiredProperties 是对属性进行验证,最终调用的其实是:
/**
 * 对属性进行验证
 */
@Override
public void validateRequiredProperties() {
   MissingRequiredPropertiesException ex = new MissingRequiredPropertiesException();
   // this.requiredProperties可以通过getEnvironment().setRequiredProperties()方法设置
   for (String key : this.requiredProperties) {
      if (this.getProperty(key) == null) {
         ex.addMissingRequiredProperty(key);
      }
   }
   if (!ex.getMissingRequiredProperties().isEmpty()) {
      throw ex;
   }
}
这里验证的过程中用了Spring自定义的 MissingRequiredPropertiesException 异常类:
public class MissingRequiredPropertiesException extends IllegalStateException {

   private final Set<String> missingRequiredProperties = new LinkedHashSet<>();

   void addMissingRequiredProperty(String key) {
      this.missingRequiredProperties.add(key);
   }

   @Override
   public String getMessage() {
      return "The following properties were declared as required but could not be resolved: " + getMissingRequiredProperties();
   }

   public Set<String> getMissingRequiredProperties() {
      return this.missingRequiredProperties;
   }

}
该异常类中包含 missingRequiredProperties 属性,当 this.requiredProperties 中有属性没有时,会添加到其中。只要最后 missingRequiredProperties 属性中存在没有的,便会抛出 MissingRequiredPropertiesException 异常。this.requiredProperties 可以通过 getEnvironment().setRequiredProperties() 方法设置。
为了更好的理解,举个实际使用的例子。我们新建一个 ClassPathXmlApplicationContext 的子类,重写 initPropertySources() 方法,在其中添加需要验证的属性。
package guo.ping.ioc.validateproperties;

import org.springframework.beans.BeansException;
import org.springframework.context.support.ClassPathXmlApplicationContext;

/**
 * @description: 自定义扩展ClassPathXmlApplicationContext
 * @author: guoping wang
 * @date: 2018/10/3 12:34
 * @project: spring
 */
public class MyClassPathXmlAppllicationContext extends ClassPathXmlApplicationContext {

   public MyClassPathXmlAppllicationContext(String... configLocations) throws BeansException {
      super(configLocations);
   }

   /**
    * 重写方法添加需要验证的Properties
    */
   @Override
   protected void initPropertySources() {
      getEnvironment().setRequiredProperties("VAR");
   }
}
新建我们继承的类的测试类:
package guo.ping.ioc.bean;

import guo.ping.ioc.customtag.User;
import guo.ping.ioc.validateproperties.MyClassPathXmlAppllicationContext;
import org.junit.Test;
import org.springframework.context.ApplicationContext;

/**
 * @description: 测试验证属性
 * @author: guoping wang
 * @date: 2018/10/3 13:15
 * @project: spring
 */
public class ValidatePropertiesTest {

   @Test
   public void testValidateProperties() {
      ApplicationContext context = new MyClassPathXmlAppllicationContext("customTag-Test.xml");
      User user = (User) context.getBean("testUserBean");
   }
}
测试结果如下,如果系统并没有检测到对应 VAR 的环境变量,将抛出异常。
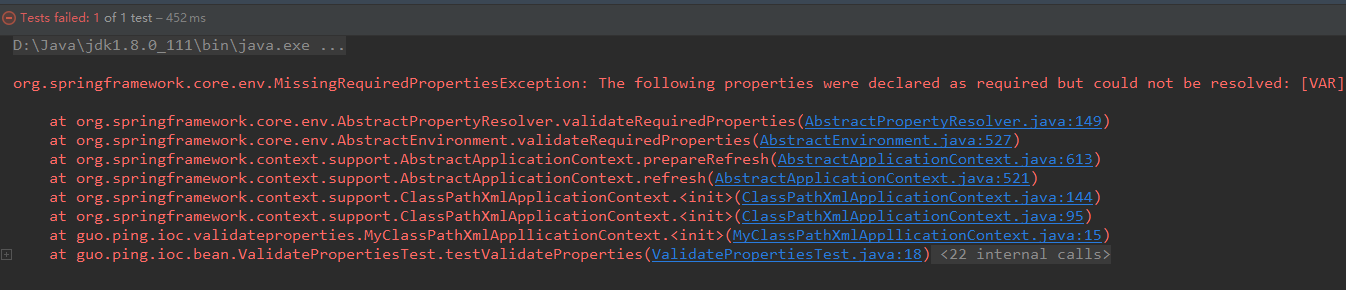
按照之前在IDEA设置环境变量的方法,设置了 VAR 环境变量,即可解决异常。
V. 加载BeanFactory
obtainFreshBeanFactory() 方法字面意思获取刷新的 BeanFactory,就是初始化 ApplicationContext 的成员变量 beanFactory,经过 obtainFreshBeanFactory() 方法,ApplicationContext 就会拥有 BeanFactory 的全部功能。
/**
 * 经过该函数后,ApplicationContext就拥有BeanFactory的功能
 * Tell the subclass to refresh the internal bean factory.
 * @return the fresh BeanFactory instance
 * @see #refreshBeanFactory()
 * @see #getBeanFactory()
 */
protected ConfigurableListableBeanFactory obtainFreshBeanFactory() {
   // 初始化BeanFactory,并进行XML文件读取,将得到的BeanFactory记录在当前实体的属性中
   refreshBeanFactory();
   // 返回当前实体的beanFactory属性
   return getBeanFactory();
}
真正的核心实现是在 refreshBeanFactory() 中,我们先看看 getBeanFactory():
@Override
public final ConfigurableListableBeanFactory getBeanFactory() {
   synchronized (this.beanFactoryMonitor) {
      if (this.beanFactory == null) {
         throw new IllegalStateException("BeanFactory not initialized or already closed - " +
               "call 'refresh' before accessing beans via the ApplicationContext");
      }
      return this.beanFactory;
   }
}
方法中主要是返回成员变量 this.beanFactory,我们可以推测出 this.beanFactory 在 refreshBeanFactory() 中进行了赋值初始化。
/**
 * 初始化BeanFactory,并进行XML文件读取,将得到的BeanFactory记录在当前实体的属性中
 * This implementation performs an actual refresh of this context's underlying
 * bean factory, shutting down the previous bean factory (if any) and
 * initializing a fresh bean factory for the next phase of the context's lifecycle.
 */
@Override
protected final void refreshBeanFactory() throws BeansException {
   if (hasBeanFactory()) {
      destroyBeans();
      closeBeanFactory();
   }
   try {
      // 创建DefaultListableBeanFactory,就是XmlBeanFactory继承的
      DefaultListableBeanFactory beanFactory = createBeanFactory();
      // 为了序列化指定id,如果需要的话,让这个BeanFactory从id反序列化到BeanFactory对象
      beanFactory.setSerializationId(getId());
      // 定制beanFactory,设置相关属性,包括允许覆盖同名称的不同定义的对象、循环依赖
      // 可以被子类重新实现设置DefaultListableBeanFactory的任何配置
      customizeBeanFactory(beanFactory);
      // 初始化DocumentReader,并进行XML文件的读取和解析
      loadBeanDefinitions(beanFactory);
      // 使用全局变量记录BeanFactory类实例
      synchronized (this.beanFactoryMonitor) {
         this.beanFactory = beanFactory;
      }
   }
   catch (IOException ex) {
      throw new ApplicationContextException("I/O error parsing bean definition source for " + getDisplayName(), ex);
   }
}
主要的执行流程如下:
-
创建
DefaultListableBeanFactory。没错,就是之前研究的
XmlBeanFactory所继承的,DefaultListableBeanFactory是容器的基础,ApplicationContext想要实现容器的功能,必须执行实例化DefaultListableBeanFactory步骤。 -
指定序列化 ID。
-
定制
BeanFactory。 -
加载
BeanDefinition。 -
使用全局变量记录
BeanFactory类实例。第五步正是我们推测一般,将创建的 beanFactory 赋值给成员变量,便于之后所有函数能够通过
getBeanFactory()获得到 beanFactory 实例。
创建DefaultListableBeanFactory
创建该实例是通过 createBeanFactory() 方法实现的,调用 DefaultListableBeanFactory 的构造函数进行创建。
/**
 * Create an internal bean factory for this context.
 * Called for each {@link #refresh()} attempt.
 * <p>The default implementation creates a
 * {@link org.springframework.beans.factory.support.DefaultListableBeanFactory}
 * with the {@linkplain #getInternalParentBeanFactory() internal bean factory} of this
 * context's parent as parent bean factory. Can be overridden in subclasses,
 * for example to customize DefaultListableBeanFactory's settings.
 * @return the bean factory for this context
 * @see org.springframework.beans.factory.support.DefaultListableBeanFactory#setAllowBeanDefinitionOverriding
 * @see org.springframework.beans.factory.support.DefaultListableBeanFactory#setAllowEagerClassLoading
 * @see org.springframework.beans.factory.support.DefaultListableBeanFactory#setAllowCircularReferences
 * @see org.springframework.beans.factory.support.DefaultListableBeanFactory#setAllowRawInjectionDespiteWrapping
 */
protected DefaultListableBeanFactory createBeanFactory() {
   return new DefaultListableBeanFactory(getInternalParentBeanFactory());
}
指定序列化ID
BeanFactory 实现了序列化接口,BeanFactory 的序列化 id 通过获取 applicationContext 的 id 属性进行设置,applicationContext 的 id 属性设置是通过
/** Unique id for this context, if any. */
private String id = ObjectUtils.identityToString(this);
方法设置的。id 由类名称加上 @ 符号以及对象的 hashCode():
public static String identityToString(@Nullable Object obj) {
   if (obj == null) {
      return EMPTY_STRING;
   }
   return obj.getClass().getName() + "@" + getIdentityHexString(obj);
}

public static String getIdentityHexString(Object obj) {
    return Integer.toHexString(System.identityHashCode(obj));
}
如果需要的话,可以从 id 反序列化回 BeanFactory 对象。
定制BeanFactory
通过 customizeBeanFactory(beanFactory) 方法名便知道这里开始对 BeanFactory 进一步扩展,主要设置 beanFactory 能否允许覆盖同名称的不同定义的对象,循环依赖。
/**
 * 扩展beanFactory,添加相关属性,包括允许覆盖同名称的不同定义的对象、循环依赖
 * 可以被子类重新实现设置DefaultListableBeanFactory的任何配置
 * Customize the internal bean factory used by this context.
 * Called for each {@link #refresh()} attempt.
 * <p>The default implementation applies this context's
 * {@linkplain #setAllowBeanDefinitionOverriding "allowBeanDefinitionOverriding"}
 * and {@linkplain #setAllowCircularReferences "allowCircularReferences"} settings,
 * if specified. Can be overridden in subclasses to customize any of
 * {@link DefaultListableBeanFactory}'s settings.
 * @param beanFactory the newly created bean factory for this context
 * @see DefaultListableBeanFactory#setAllowBeanDefinitionOverriding
 * @see DefaultListableBeanFactory#setAllowCircularReferences
 * @see DefaultListableBeanFactory#setAllowRawInjectionDespiteWrapping
 * @see DefaultListableBeanFactory#setAllowEagerClassLoading
 */
protected void customizeBeanFactory(DefaultListableBeanFactory beanFactory) {
   if (this.allowBeanDefinitionOverriding != null) {
      beanFactory.setAllowBeanDefinitionOverriding(this.allowBeanDefinitionOverriding);
   }
   if (this.allowCircularReferences != null) {
      beanFactory.setAllowCircularReferences(this.allowCircularReferences);
   }
}
对于允许覆盖和允许依赖的设置这里只判断了是否为空,一开始确实肯定是空,但我们哪里去设置呢?同样,方式之一可以子类重写 customizeBeanFactory 方法在其中进行设置:
public class MyClassPathXmlAppllicationContext extends ClassPathXmlApplicationContext {

   public MyClassPathXmlAppllicationContext(String... configLocations) throws BeansException {
      super(configLocations);
   }

   /**
    * 设置允许覆盖和依赖
    * @param beanFactory the newly created bean factory for this context
    */
   @Override
   protected void customizeBeanFactory(DefaultListableBeanFactory beanFactory) {
      setAllowBeanDefinitionOverriding(true);
      setAllowCircularReferences(true);
      super.customizeBeanFactory(beanFactory);
   }
}
测试结果:
书中还有关于 @Qualifier 和 @AutoWire 注解的设置,然而至少在新版Spring5去掉了相关设置代码了。先留给坑位,以后看到回来补充…

加载BeanDefinition
之前我们已经获得了 DefaultListableBeanFactory 的实例,Spring容器已经创建好了,现在需要读取XML配置文件。按照之前的套路,需要利用 XmlBeanDefinitonReader 来读取,所以,在 ApplicationContext 中也创建了该类对象来进行读取XML并进行配置文件的加载。
/**
 * 加载BeanDefinition
 * Loads the bean definitions via an XmlBeanDefinitionReader.
 * @see org.springframework.beans.factory.xml.XmlBeanDefinitionReader
 * @see #initBeanDefinitionReader
 * @see #loadBeanDefinitions
 */
@Override
protected void loadBeanDefinitions(DefaultListableBeanFactory beanFactory) throws BeansException, IOException {
   // 为指定的beanFactory创建XmlBeanDefinitionReader,用于读取XML
   XmlBeanDefinitionReader beanDefinitionReader = new XmlBeanDefinitionReader(beanFactory);

   // 对beanDefinitionReader进行环境变量设置
   beanDefinitionReader.setEnvironment(this.getEnvironment());
   beanDefinitionReader.setResourceLoader(this);
   beanDefinitionReader.setEntityResolver(new ResourceEntityResolver(this));

   // 对BeanDefinitionReader进行设置,默认为空实现,可以子类重新实现对BeanDefinitionReader定制
   initBeanDefinitionReader(beanDefinitionReader);
   // 调用重载方法加载BeanDefinition
   loadBeanDefinitions(beanDefinitionReader);
}
方法内容还是易于理解的,中间对于 beanDefinitionReader 进行了一些属性的设置,设置 ResourceLoader 时,传入了 this 对象,因为本身 ClassPathXmlApplicationContext 实现了 ResourceLoader 接口。至于 EntityResolver 的作用已经在第一篇文章就已经提及了。
当然,如果用户需要对 beanDefinitionReader 特殊的设置,同样Spring留了扩展的空方法 initBeanDefinitionReader(beanDefinitionReader),子类依然可以重写:
public class MyClassPathXmlAppllicationContext extends ClassPathXmlApplicationContext {
   ....

   @Override
   protected void initBeanDefinitionReader(XmlBeanDefinitionReader reader) {
      // 扩展
      super.initBeanDefinitionReader(reader);
   }
}
准备好 beanDefinitionReader 后,可以正式加载 BeanDefinition,从 loadBeanDefinitions(beanDefinitionReader) 方法看,有点眼熟,确实,之前 XmlBeanFactory 加载 BeanDefinition 时,也是相同的方法名。
/**
 * 利用XmlBeanDefinitionReader的loadBeanDefinitions方法读取XML配置文件
 * Load the bean definitions with the given XmlBeanDefinitionReader.
 * <p>The lifecycle of the bean factory is handled by the {@link #refreshBeanFactory}
 * method; hence this method is just supposed to load and/or register bean definitions.
 * @param reader the XmlBeanDefinitionReader to use
 * @throws BeansException in case of bean registration errors
 * @throws IOException if the required XML document isn't found
 * @see #refreshBeanFactory
 * @see #getConfigLocations
 * @see #getResources
 * @see #getResourcePatternResolver
 */
protected void loadBeanDefinitions(XmlBeanDefinitionReader reader) throws BeansException, IOException {
   Resource[] configResources = getConfigResources();
   if (configResources != null) {
      reader.loadBeanDefinitions(configResources);
   }
   String[] configLocations = getConfigLocations();
   if (configLocations != null) {
      reader.loadBeanDefinitions(configLocations);
   }
}
果然,其中调用了 XmlBeanDefinitionReader 的 loadBeanDefinitions(configLocations) 方法,关于该方法,其实是 loadBeanDefinitions(Resource resource) 的重载方法,最终仍然会将 String 类型的 configLocations 参数包装成 Resource 类型。这样我们就回到 XmlBeanFactory 加载 BeanDefinitions 的分析步骤了。
public int loadBeanDefinitions(String location, @Nullable Set<Resource> actualResources) throws BeanDefinitionStoreException {
   ResourceLoader resourceLoader = getResourceLoader();
   if (resourceLoader == null) {
      throw new BeanDefinitionStoreException(
            "Cannot import bean definitions from location [" + location + "]: no ResourceLoader available");
   }

   if (resourceLoader instanceof ResourcePatternResolver) {
      // Resource pattern matching available.
      try {
         Resource[] resources = ((ResourcePatternResolver) resourceLoader).getResources(location);
         // 回到XmlBeanFactory加载BeanDefinitions的分析步骤了
         int loadCount = loadBeanDefinitions(resources);
         if (actualResources != null) {
            for (Resource resource : resources) {
               actualResources.add(resource);
            }
         }
         if (logger.isDebugEnabled()) {
            logger.debug("Loaded " + loadCount + " bean definitions from location pattern [" + location + "]");
         }
         return loadCount;
      }
      catch (IOException ex) {
         throw new BeanDefinitionStoreException(
               "Could not resolve bean definition resource pattern [" + location + "]", ex);
      }
   }
   else {
      // Can only load single resources by absolute URL.
      Resource resource = resourceLoader.getResource(location);
      int loadCount = loadBeanDefinitions(resource);
      if (actualResources != null) {
         actualResources.add(resource);
      }
      if (logger.isDebugEnabled()) {
         logger.debug("Loaded " + loadCount + " bean definitions from location [" + location + "]");
      }
      return loadCount;
   }
}
VI. beanFactory功能扩展
进入 prepareBeanFactory(beanFactory) 方法前,Spring已经完成了配置文件的解析,包括默认标签和自定义标签的解析,这些都是靠之前的 DefaultListableBeanFactory 完成的。而 ApplicationContext 在这之上的扩展由此展开。
/**
 * Configure the factory's standard context characteristics,
 * such as the context's ClassLoader and post-processors.
 * @param beanFactory the BeanFactory to configure
 */
protected void prepareBeanFactory(ConfigurableListableBeanFactory beanFactory) {
   // Tell the internal bean factory to use the context's class loader etc.
   // 设置beanFactory的classLoader为当前context的classLoader
   beanFactory.setBeanClassLoader(getClassLoader());

   // 设置beanFactory的表达式语言处理器,Spring3增加了SPEL表达式语言的支持
   // 默认可以使用#{bean.xxx}的形式来调用相关属性值
   beanFactory.setBeanExpressionResolver(new StandardBeanExpressionResolver(beanFactory.getBeanClassLoader()));

   // 为beanFactory增加一个默认的propertyEditor,主要是对bean的属性等设置管理的一个工具(属性编辑器的支持)
   beanFactory.addPropertyEditorRegistrar(new ResourceEditorRegistrar(this, getEnvironment()));

   // 添加BeanPostProcessor
   beanFactory.addBeanPostProcessor(new ApplicationContextAwareProcessor(this));

   // 设置几个忽略自动装配的接口
   beanFactory.ignoreDependencyInterface(EnvironmentAware.class);
   beanFactory.ignoreDependencyInterface(EmbeddedValueResolverAware.class);
   beanFactory.ignoreDependencyInterface(ResourceLoaderAware.class);
   beanFactory.ignoreDependencyInterface(ApplicationEventPublisherAware.class);
   beanFactory.ignoreDependencyInterface(MessageSourceAware.class);
   beanFactory.ignoreDependencyInterface(ApplicationContextAware.class);

   // BeanFactory interface not registered as resolvable type in a plain factory.
   // MessageSource registered (and found for autowiring) as a bean.
   // 设置几个自动装配的特殊规则
   beanFactory.registerResolvableDependency(BeanFactory.class, beanFactory);
   beanFactory.registerResolvableDependency(ResourceLoader.class, this);
   beanFactory.registerResolvableDependency(ApplicationEventPublisher.class, this);
   beanFactory.registerResolvableDependency(ApplicationContext.class, this);

   // Register early post-processor for detecting inner beans as ApplicationListeners.
   // 添加BeanPostProcessor实现:ApplicationListenerDetector,它是用来将实现了ApplicationListener接口的Bean添加到容器的监听器列表
   beanFactory.addBeanPostProcessor(new ApplicationListenerDetector(this));

   // Detect a LoadTimeWeaver and prepare for weaving, if found.
   // 增加对AspectJ的支持
   if (beanFactory.containsBean(LOAD_TIME_WEAVER_BEAN_NAME)) {
      beanFactory.addBeanPostProcessor(new LoadTimeWeaverAwareProcessor(beanFactory));
      // Set a temporary ClassLoader for type matching.
      beanFactory.setTempClassLoader(new ContextTypeMatchClassLoader(beanFactory.getBeanClassLoader()));
   }

   // 以单例模式注册默认的系统环境bean
   if (!beanFactory.containsLocalBean(ENVIRONMENT_BEAN_NAME)) {
      beanFactory.registerSingleton(ENVIRONMENT_BEAN_NAME, getEnvironment());
   }
   if (!beanFactory.containsLocalBean(SYSTEM_PROPERTIES_BEAN_NAME)) {
      beanFactory.registerSingleton(SYSTEM_PROPERTIES_BEAN_NAME, getEnvironment().getSystemProperties());
   }
   if (!beanFactory.containsLocalBean(SYSTEM_ENVIRONMENT_BEAN_NAME)) {
      beanFactory.registerSingleton(SYSTEM_ENVIRONMENT_BEAN_NAME, getEnvironment().getSystemEnvironment());
   }
}
上面的函数对已有的 beanFactory 作了如下扩展:
- 设置 beanFactory 的 classLoader
- 增加对 SPEL 语言的支持
- 增加对属性编辑器的支持
- 增加对一些内置类的信息注入,如 EnvironmentAware、MessageSourceAware
- 设置了依赖功能可忽略的接口
- 设置几个自动装配的特殊规则
- 增加 AspectJ 的支持(后面AOP单独研究)
- 将相关环境变量及属性注册以单例模式注册
设置classLoader
设置 beanFactory 的 classLoader 为当前 Context 的 classLoader。
@Override
public void setBeanClassLoader(@Nullable ClassLoader beanClassLoader) {
   this.beanClassLoader = (beanClassLoader != null ? beanClassLoader : ClassUtils.getDefaultClassLoader());
}
增加SPEL语言的支持
Spring表达式语言全称为“Spring Expression Language”,缩写为“SpEL” 。SpEL是单独模块,只依赖于core模块,不依赖于其他模块,可以单独使用。
关于SpEL具体使用,移步参考阅读。SpEL使用 #{···} 作为界定符,所有在大括号内的字符串被认为是SpEL。SpEL的解析正是通过 setBeanExpressionResolver(BeanExpressionResolver resolver) 注册的语言解析器进行的。
// 设置beanFactory的表达式语言处理器,Spring3增加了SPEL表达式语言的支持
// 默认可以使用#{bean.xxx}的形式来调用相关属性值
beanFactory.setBeanExpressionResolver(new StandardBeanExpressionResolver(beanFactory.getBeanClassLoader()));
其中,参数为新建的 StandardBeanExpressionResolver 实例对象,该对象借助 spring-expression 模块进行解析。
/**
 * Standard implementation of the
 * {@link org.springframework.beans.factory.config.BeanExpressionResolver}
 * interface, parsing and evaluating Spring EL using Spring's expression module.
 */
public class StandardBeanExpressionResolver implements BeanExpressionResolver {

   /** Default expression prefix: "#{". */
   public static final String DEFAULT_EXPRESSION_PREFIX = "#{";

   /** Default expression suffix: "}". */
   public static final String DEFAULT_EXPRESSION_SUFFIX = "}";

	····

   private ExpressionParser expressionParser;

	····

   /** 构造函数,创建SpelExpressionParser实例借其进行SpEL解析 */
   public StandardBeanExpressionResolver() {
      this.expressionParser = new SpelExpressionParser();
   }

   public StandardBeanExpressionResolver(@Nullable ClassLoader beanClassLoader) {
      this.expressionParser = new SpelExpressionParser(new SpelParserConfiguration(null, beanClassLoader));
   }

   /** 实现BeanExpressionResolver接口方法 */
   @Override
   @Nullable
   public Object evaluate(@Nullable String value, BeanExpressionContext evalContext) throws BeansException {
      if (!StringUtils.hasLength(value)) {
         return value;
      }
      try {
         Expression expr = this.expressionCache.get(value);
         if (expr == null) {
            expr = this.expressionParser.parseExpression(value, this.beanExpressionParserContext);
            this.expressionCache.put(value, expr);
         }
         ·····
         return expr.getValue(sec);
      }
      catch (Throwable ex) {
         throw new BeanExpressionException("Expression parsing failed", ex);
      }
   }
   ·····
}
注册了SpEL解析器后,便可以进行解析,但Spring又在何时调用这个解析器进行解析的呢?
之前在上一篇文章bean的加载中,创建 bean 时后面会利用 populateBean(beanName, mbd, instanceWrapper) 进行 bean 属性的填充,其中最后一步为将所有 ProtertyValues 中的属性填充至 BeanWrapper 中,调用的是 applyPropertyValues(beanName, mbd, bw, pvs) 方法:
/**
 * 将所有ProtertyValues中的属性填充至BeanWrapper中
 */
protected void applyPropertyValues(String beanName, BeanDefinition mbd, BeanWrapper bw, PropertyValues pvs) {

    ·····

   // 获取对应的解析器
   BeanDefinitionValueResolver valueResolver = new BeanDefinitionValueResolver(this, beanName, mbd, converter);

   // 遍历属性,将属性转换为对应类的对应属性的类型
   for (PropertyValue pv : original) {
      if (pv.isConverted()) {
         deepCopy.add(pv);
      }
      else {
         String propertyName = pv.getName();
         Object originalValue = pv.getValue();
         Object resolvedValue = valueResolver.resolveValueIfNecessary(pv, originalValue);
         ·····
}
其中,创建了 BeanDefinitionValueResolver 对象并调用了 resolveValueIfNecessary 方法:
@Nullable
public Object resolveValueIfNecessary(Object argName, @Nullable Object value) {
   // We must check each value to see whether it requires a runtime reference
   // to another bean to be resolved.
   if (value instanceof RuntimeBeanReference) {
      RuntimeBeanReference ref = (RuntimeBeanReference) value;
      return resolveReference(argName, ref);
   }
   else if (value instanceof RuntimeBeanNameReference) {
      String refName = ((RuntimeBeanNameReference) value).getBeanName();
      refName = String.valueOf(doEvaluate(refName));
      ·····
   }
   ·····
}
其中对 value 调用了 doEvaluate(refName) 方法,该方法实际调用的是 AbstractBeanFactory 的 evaluateBeanDefinitionString 方法,而这个方法才是调用我们注册的SpEL解析器的地方。
@Nullable
private Object doEvaluate(@Nullable String value) {
   return this.beanFactory.evaluateBeanDefinitionString(value, this.beanDefinition);
}
除此以外,还在 bean 创建的准备时期进行解析获取 bean 的 class 时也调用过 evaluateBeanDefinitionString 方法,以及在 bean 创建完进行属性注入根据注入类型提取依赖的 bean 过程(autowireByType)中也调用了该方法。读者可以在上一篇文章中进行搜索该方法出现位置。
我们具体查看 AbstractBeanFactory 的 evaluateBeanDefinitionString 方法:
/**
 * 调用注册的SpEL解析器
 * Evaluate the given String as contained in a bean definition,
 * potentially resolving it as an expression.
 * @param value the value to check
 * @param beanDefinition the bean definition that the value comes from
 * @return the resolved value
 * @see #setBeanExpressionResolver
 */
@Nullable
protected Object evaluateBeanDefinitionString(@Nullable String value, @Nullable BeanDefinition beanDefinition) {
   if (this.beanExpressionResolver == null) {
      return value;
   }

   Scope scope = null;
   if (beanDefinition != null) {
      String scopeName = beanDefinition.getScope();
      if (scopeName != null) {
         scope = getRegisteredScope(scopeName);
      }
   }
   return this.beanExpressionResolver.evaluate(value, new BeanExpressionContext(this, scope));
}
如果 AbstractBeanFactory 的成员变量 this.beanExpressionResolver 不为空的话,调用 evaluate 进行解析。而我们之前正是通过 setBeanExpressionResolver(BeanExpressionResolver resolver) 注册语言解析器,使得成员变量 this.beanExpressionResolver 不为空。
@Override
public void setBeanExpressionResolver(@Nullable BeanExpressionResolver resolver) {
   this.beanExpressionResolver = resolver;
}
增加属性注册编辑器
在Spring的依赖注入的时候可以把普通属性注入进来,但是其他类型无法直接从String类型进行转换直接注入的,所以一种解决方式是添加属性注册编辑器,我们先来复现一下没有属性注册编辑器转换的场景。
自定义 User 类,包含String类型和Date类型的属性。
public class User {

   private String userName;
   private Date date;

   /** setter and getter and toString */
}
编写XML配置文件:
<?xml version='1.0' encoding='UTF-8' ?>
<beans xmlns="http://www.springframework.org/schema/beans"
      xmlns:xsi="http://www.w3.org/2001/XMLSchema-instance"
      xsi:schemaLocation="http://www.springframework.org/schema/beans    http://www.springframework.org/schema/beans/spring-beans.xsd">

   <bean id="user" class="guo.ping.ioc.propertieseditor.User">
      <property name="userName" value="wgp" />
      <property name="date" value="2018-10-01" />
   </bean>

</beans>
测试:
public class PropertyEditorTest {

   @Test
   public void testPropertyEditorRegister() {
      ApplicationContext context = new ClassPathXmlApplicationContext("propertyEditorTest.xml");
      User user = (User) context.getBean("user");
      System.out.println(user);
   }
}
测试结果:
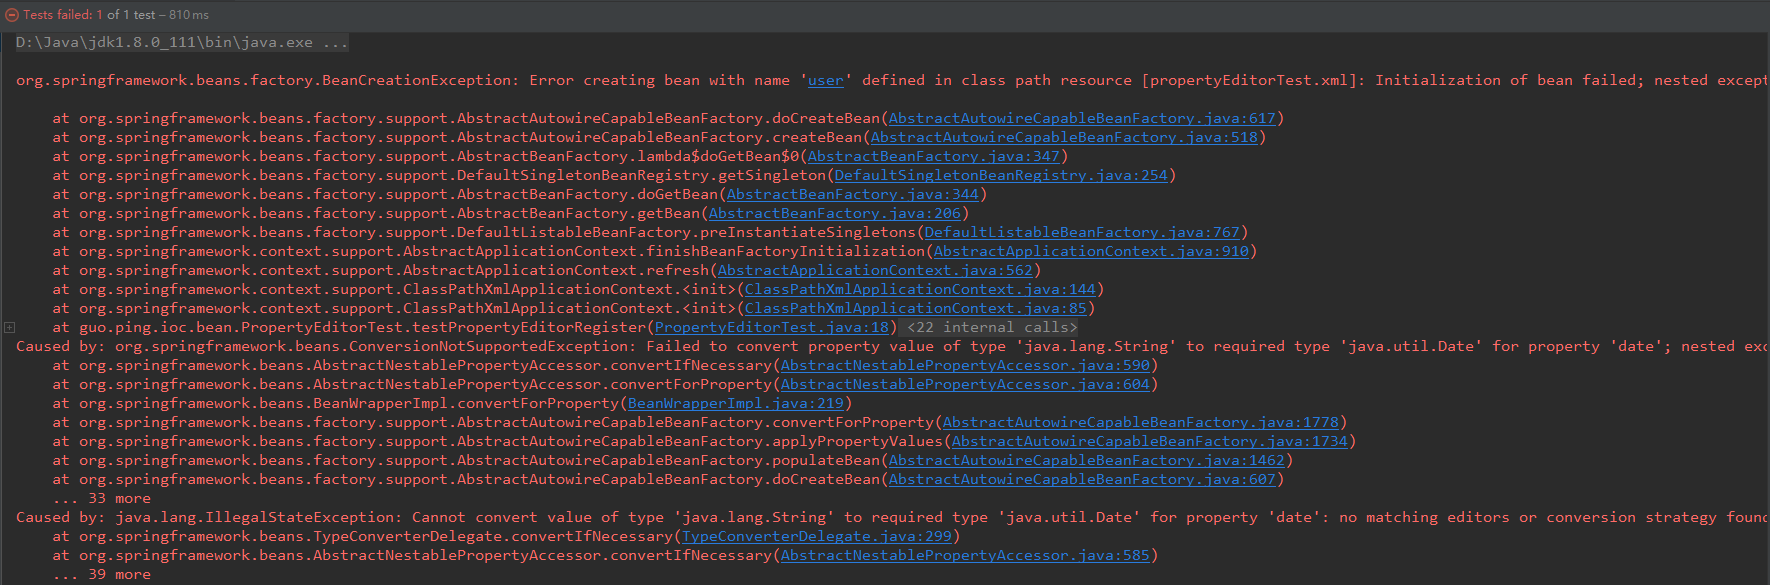
报出的异常便是没有用于将配置文件中String类型的日期转换为Date类型的 editors 或者是 conversion strategy,后者解决方法我们将在后面提及。
Spring利用属性编辑器的解决方案包含两种方式:
- 使用自定义属性编辑器
- 注册Spring自带的属性编辑器
① 使用自定义属性编辑器
编写自定义属性编辑器时,需要继承 PropertyEditorSupport 类,重写其中的 setAsText 方法,在其中实现将字符串类型转换为日期类型的逻辑。实际上就是 setAsText 方法的参数(配置文件中的字符值)经过自定义转换规则转为目标类型并保存至 this.value 中。
/**
 * @description: 自定义日期的属性编辑器
 * @author: guoping wang
 * @date: 2018/10/4 10:25
 * @project: spring
 */
public class DatePropertyEditor extends PropertyEditorSupport {

   private String format = "yyyy-MM-dd";

   public void setFormat(String format) {
      this.format = format;
   }

   @Override
   public void setAsText(String text) throws IllegalArgumentException {
      System.out.println("text: " + text);
      SimpleDateFormat sdf = new SimpleDateFormat(format);

      try {
         Date d = sdf.parse(text);
         this.setValue(d);
      } catch (ParseException e) {
         e.printStackTrace();
      }
   }
}
将我们创建的自定义属性编辑器注入到Spring容器中。注意的是,书上针对的是Spring3版本的配置,Spring4版本之上 CustomEditorConfigurer 的属性 customEditors 设置参数类型已经变化,全都传入 Class 类型,即类名。
<!--自定义属性编辑器-->
<bean class="org.springframework.beans.factory.config.CustomEditorConfigurer">
   <property name="customEditors">
      <map>
         <entry key="java.util.Date" value="guo.ping.ioc.propertieseditor.DatePropertyEditor" />
      </map>
   </property>
</bean>
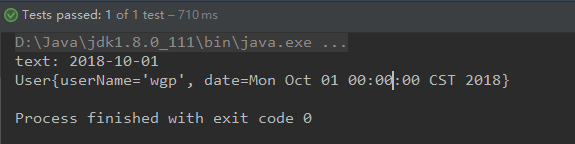
再次运行测试,发现这一次成功解析转换日期类型。
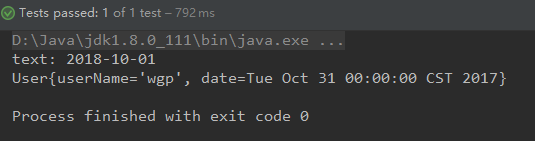
那么,与旧版本相比,我们不经提出疑问,自定义的 DatePropertyEditor 类中成员变量 format 格式是写死的,能否在Spring中配置呢?
我们修改 format=”yyyyMMdd“ 格式,发现程序测试没有报错,但是转换结果已经错误。
好了,有挖了个坑,以后懂了来填….
② 注册Spring自带的属性编辑器
当然,Spring也为我们提供了一些自带的属性编辑器,其中就包含了日期转换相关的 CustomDateEditor 。首先,我们先定义属性编辑器:
/**
 * @description: 注册Spring自带日期的属性编辑器
 * @author: guoping wang
 * @date: 2018/10/4 11:16
 * @project: spring
 */
public class DatePropertyEditorRegistrar implements PropertyEditorRegistrar {

   @Override
   public void registerCustomEditors(PropertyEditorRegistry registry) {
      registry.registerCustomEditor(Date.class, new CustomDateEditor(new SimpleDateFormat("yyyy-MM-dd"), true));
   }
}
然后注册到Spring中:
<bean class="org.springframework.beans.factory.config.CustomEditorConfigurer">
   <property name="propertyEditorRegistrars">
      <list>
         <bean class="guo.ping.ioc.propertieseditor.DatePropertyEditorRegistrar" />
      </list>
   </property>
</bean>
通过在配置文件中将自定义的 DataPropertyEditorRegistrar 注册到 CustomEditorConfigurer 的 propertyEditorRegistrars 属性中,可以与 方式1 有相同的效果。可以理解,两种方式注入的是 CustomEditorConfigurer 不同的属性,但是最终都是依赖 CustomEditorConfigurer 去完成解析转换。
上面已经讲完属性编辑器的使用,但是这跟我们要分析的核心代码 beanFactory.addPropertyEditorRegistrar(new ResourceEditorRegistrar(this, getEnvironment())) 好像并无关联,因为在自定义属性编辑器注册时用的是 PropertyEditorRegistrar 的 registerCustomEditor 方法,而这里用到的是 ConfigurableListableBeanFactory 的 addPropertyEditorRegistrar 方法,为了弄清楚具体逻辑,我们就深入的来看下究竟什么关系。
方法中传入的参数为新 new 的 ResourceEditorRegistrar 对象,我们先研究一下这个类:
public class ResourceEditorRegistrar implements PropertyEditorRegistrar {

   private final PropertyResolver propertyResolver;

   private final ResourceLoader resourceLoader;

   /**
    * Create a new ResourceEditorRegistrar for the given {@link ResourceLoader}
    * and {@link PropertyResolver}.
    * @param resourceLoader the ResourceLoader (or ResourcePatternResolver)
    * to create editors for (usually an ApplicationContext)
    * @param propertyResolver the PropertyResolver (usually an Environment)
    * @see org.springframework.core.env.Environment
    * @see org.springframework.core.io.support.ResourcePatternResolver
    * @see org.springframework.context.ApplicationContext
    */
   public ResourceEditorRegistrar(ResourceLoader resourceLoader, PropertyResolver propertyResolver) {
      this.resourceLoader = resourceLoader;
      this.propertyResolver = propertyResolver;
   }

   /**
    * 注册一系列常用类型的属性编辑器
    * Populate the given {@code registry} with the following resource editors:
    * ResourceEditor, InputStreamEditor, InputSourceEditor, FileEditor, URLEditor,
    * URIEditor, ClassEditor, ClassArrayEditor.
    * <p>If this registrar has been configured with a {@link ResourcePatternResolver},
    * a ResourceArrayPropertyEditor will be registered as well.
    * @see org.springframework.core.io.ResourceEditor
    * @see org.springframework.beans.propertyeditors.InputStreamEditor
    * @see org.springframework.beans.propertyeditors.InputSourceEditor
    * @see org.springframework.beans.propertyeditors.FileEditor
    * @see org.springframework.beans.propertyeditors.URLEditor
    * @see org.springframework.beans.propertyeditors.URIEditor
    * @see org.springframework.beans.propertyeditors.ClassEditor
    * @see org.springframework.beans.propertyeditors.ClassArrayEditor
    * @see org.springframework.core.io.support.ResourceArrayPropertyEditor
    */
   @Override
   public void registerCustomEditors(PropertyEditorRegistry registry) {
      ResourceEditor baseEditor = new ResourceEditor(this.resourceLoader, this.propertyResolver);
      doRegisterEditor(registry, Resource.class, baseEditor);
      doRegisterEditor(registry, ContextResource.class, baseEditor);
      doRegisterEditor(registry, InputStream.class, new InputStreamEditor(baseEditor));
      doRegisterEditor(registry, InputSource.class, new InputSourceEditor(baseEditor));
      doRegisterEditor(registry, File.class, new FileEditor(baseEditor));
      doRegisterEditor(registry, Path.class, new PathEditor(baseEditor));
      doRegisterEditor(registry, Reader.class, new ReaderEditor(baseEditor));
      doRegisterEditor(registry, URL.class, new URLEditor(baseEditor));

      ClassLoader classLoader = this.resourceLoader.getClassLoader();
      doRegisterEditor(registry, URI.class, new URIEditor(classLoader));
      doRegisterEditor(registry, Class.class, new ClassEditor(classLoader));
      doRegisterEditor(registry, Class[].class, new ClassArrayEditor(classLoader));

      if (this.resourceLoader instanceof ResourcePatternResolver) {
         doRegisterEditor(registry, Resource[].class,
               new ResourceArrayPropertyEditor((ResourcePatternResolver) this.resourceLoader, this.propertyResolver));
      }
   }

   /**
    * Override default editor, if possible (since that's what we really mean to do here);
    * otherwise register as a custom editor.
    */
   private void doRegisterEditor(PropertyEditorRegistry registry, Class<?> requiredType, PropertyEditor editor) {
      if (registry instanceof PropertyEditorRegistrySupport) {
         ((PropertyEditorRegistrySupport) registry).overrideDefaultEditor(requiredType, editor);
      }
      else {
         registry.registerCustomEditor(requiredType, editor);
      }
   }
}
参考我们在第二种方法的实现过程,发现 ResourceEditorRegistrar 和我们的 DatePropertyEditorRegistrar 类一样都继承自 PropertyEditorRegistrar。而 ResourceEditorRegistrar 重写的 registerCustomEditors 方法核心主要是注册一系列常用类型的属性编辑器,例如 Resource、ContextResource、InputStream ·····。如果遇到这些属性类型的注入,Spring能够直接进行转换。
然而,beanFactory.addPropertyEditorRegistrar(new ResourceEditorRegistrar(this, getEnvironment())) 仅仅创建了 ResourceEditorRegistrar 对象,并没有调用 registerCustomEditors 方法,也就无谈属性编辑器备注册,那么又是什么时候调用的呢?查看该方法的调用者:
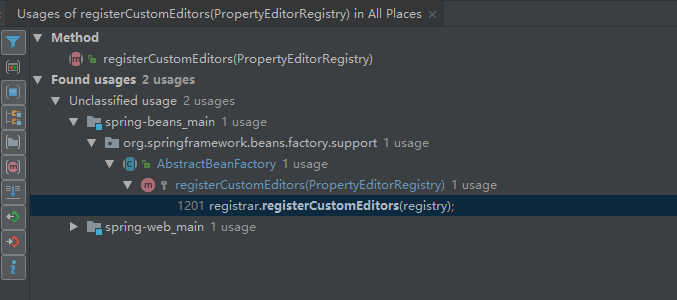
可以看出是 AbstractBeanFactory 中的 registerCustomEditors 方法。继续查看该方法的调用者:
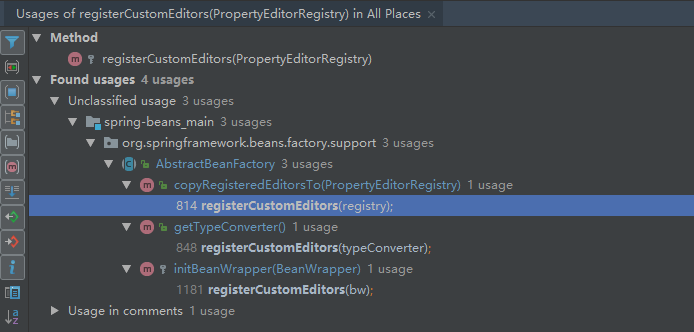
其中 initBeanWrapper(BeanWrapper) 方法是之前研究 bean 初始化的过程中的一个方法,主要是将 BeanDefinition 转换为 BeanWrapper 后用于对属性的填充,主要在有参或者无参的构造函数中执行了该方法。
看到这里后逻辑就非常的清晰了,在 bean 初始化后会调用 ResourceEditorRegistrar 的 registerCustomEditors 进行属性编辑器的批量注册,注册后在属性填充环节就可以让Spring使用这些编辑器对属性进行编辑了。
上面我们提到了 BeanWrapper,在Spring中用于封装 bean 的就是 BeanWrapper 类型,而 BeanWrapper 类型继承了 PropertyEditorRegistry 类型,也就是我们之前反复看到的方法参数 PropertyEditorRegistry registry,其实大部分情况下都是 BeanWrapper,而 BeanWrapper 在Spring中的默认实现是 BeanWrapperImpl。也就是说,这里的 BeanWrapperImpl 实例可以充当 registry 参数。而 BeanWrapperImpl 除了实现了 BeanWrapper 外还继承了 PropertyEditorRegistrySupport,在 PropertyEditorRegistrySupport 中有这样一个方法:
/**
* Actually register the default editors for this registry instance.
*/
private void createDefaultEditors() {
   this.defaultEditors = new HashMap<>(64);

   // Simple editors, without parameterization capabilities.
   // The JDK does not contain a default editor for any of these target types.
   this.defaultEditors.put(Charset.class, new CharsetEditor());
   this.defaultEditors.put(Class.class, new ClassEditor());
   this.defaultEditors.put(Class[].class, new ClassArrayEditor());
   this.defaultEditors.put(Currency.class, new CurrencyEditor());
   this.defaultEditors.put(File.class, new FileEditor());
   this.defaultEditors.put(InputStream.class, new InputStreamEditor());
   this.defaultEditors.put(InputSource.class, new InputSourceEditor());
   this.defaultEditors.put(Locale.class, new LocaleEditor());
   this.defaultEditors.put(Path.class, new PathEditor());
   this.defaultEditors.put(Pattern.class, new PatternEditor());
   this.defaultEditors.put(Properties.class, new PropertiesEditor());
   this.defaultEditors.put(Reader.class, new ReaderEditor());
   this.defaultEditors.put(Resource[].class, new ResourceArrayPropertyEditor());
   this.defaultEditors.put(TimeZone.class, new TimeZoneEditor());
   this.defaultEditors.put(URI.class, new URIEditor());
   this.defaultEditors.put(URL.class, new URLEditor());
   this.defaultEditors.put(UUID.class, new UUIDEditor());
   this.defaultEditors.put(ZoneId.class, new ZoneIdEditor());

   // Default instances of collection editors.
   // Can be overridden by registering custom instances of those as custom editors.
   this.defaultEditors.put(Collection.class, new CustomCollectionEditor(Collection.class));
   this.defaultEditors.put(Set.class, new CustomCollectionEditor(Set.class));
   this.defaultEditors.put(SortedSet.class, new CustomCollectionEditor(SortedSet.class));
   this.defaultEditors.put(List.class, new CustomCollectionEditor(List.class));
   this.defaultEditors.put(SortedMap.class, new CustomMapEditor(SortedMap.class));

   // Default editors for primitive arrays.
   this.defaultEditors.put(byte[].class, new ByteArrayPropertyEditor());
   this.defaultEditors.put(char[].class, new CharArrayPropertyEditor());

   // The JDK does not contain a default editor for char!
   this.defaultEditors.put(char.class, new CharacterEditor(false));
   this.defaultEditors.put(Character.class, new CharacterEditor(true));

   // Spring's CustomBooleanEditor accepts more flag values than the JDK's default editor.
   this.defaultEditors.put(boolean.class, new CustomBooleanEditor(false));
   this.defaultEditors.put(Boolean.class, new CustomBooleanEditor(true));

   // The JDK does not contain default editors for number wrapper types!
   // Override JDK primitive number editors with our own CustomNumberEditor.
   this.defaultEditors.put(byte.class, new CustomNumberEditor(Byte.class, false));
   this.defaultEditors.put(Byte.class, new CustomNumberEditor(Byte.class, true));
   this.defaultEditors.put(short.class, new CustomNumberEditor(Short.class, false));
   this.defaultEditors.put(Short.class, new CustomNumberEditor(Short.class, true));
   this.defaultEditors.put(int.class, new CustomNumberEditor(Integer.class, false));
   this.defaultEditors.put(Integer.class, new CustomNumberEditor(Integer.class, true));
   this.defaultEditors.put(long.class, new CustomNumberEditor(Long.class, false));
   this.defaultEditors.put(Long.class, new CustomNumberEditor(Long.class, true));
   this.defaultEditors.put(float.class, new CustomNumberEditor(Float.class, false));
   this.defaultEditors.put(Float.class, new CustomNumberEditor(Float.class, true));
   this.defaultEditors.put(double.class, new CustomNumberEditor(Double.class, false));
   this.defaultEditors.put(Double.class, new CustomNumberEditor(Double.class, true));
   this.defaultEditors.put(BigDecimal.class, new CustomNumberEditor(BigDecimal.class, true));
   this.defaultEditors.put(BigInteger.class, new CustomNumberEditor(BigInteger.class, true));

   // Only register config value editors if explicitly requested.
   if (this.configValueEditorsActive) {
       StringArrayPropertyEditor sae = new StringArrayPropertyEditor();
       this.defaultEditors.put(String[].class, sae);
       this.defaultEditors.put(short[].class, sae);
       this.defaultEditors.put(int[].class, sae);
       this.defaultEditors.put(long[].class, sae);
   }
}
我们查看一下该方法的调用者:
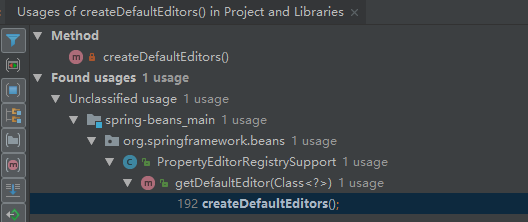
继续查看 PropertyEditorRegistrySupport 中 getDefaultEditor 方法调用者:
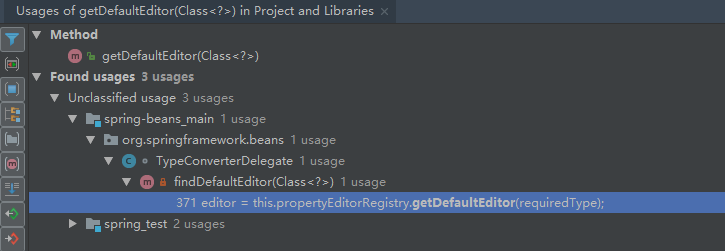
该方法最终在 TypeConvertDelegate 委托类中的 findDefaultEditor 中调用。
/**
 * Find a default editor for the given type.
 * @param requiredType the type to find an editor for
 * @return the corresponding editor, or {@code null} if none
 */
@Nullable
private PropertyEditor findDefaultEditor(@Nullable Class<?> requiredType) {
   PropertyEditor editor = null;
   if (requiredType != null) {
      // No custom editor -> check BeanWrapperImpl's default editors.
      editor = this.propertyEditorRegistry.getDefaultEditor(requiredType);
      if (editor == null && String.class != requiredType) {
         // No BeanWrapper default editor -> check standard JavaBean editor.
         editor = BeanUtils.findEditorByConvention(requiredType);
      }
   }
   return editor;
}
通过上面,我们已经知道在Spring中定义了一系列常用的属性编辑器能够让我们方便地进行配置,如果定义的某个 bean 中的某个属性的类型不在上面的常用配置的话,才需要我们进行个性化属性编辑器的注册。
添加ApplicationContextAwareProcessor
我们接着这一部分(beanFactory功能扩展)的源码继续分析:
// 添加BeanPostProcessor
beanFactory.addBeanPostProcessor(new ApplicationContextAwareProcessor(this));
我们先看外层 addBeanPostProcessor 的逻辑:
/**
 * 注册BeanPostProcessor
 * @param beanPostProcessor the post-processor to register
 */
@Override
public void addBeanPostProcessor(BeanPostProcessor beanPostProcessor) {
   Assert.notNull(beanPostProcessor, "BeanPostProcessor must not be null");
   this.beanPostProcessors.remove(beanPostProcessor);
   this.beanPostProcessors.add(beanPostProcessor);
   if (beanPostProcessor instanceof InstantiationAwareBeanPostProcessor) {
      this.hasInstantiationAwareBeanPostProcessors = true;
   }
   if (beanPostProcessor instanceof DestructionAwareBeanPostProcessor) {
      this.hasDestructionAwareBeanPostProcessors = true;
   }
}
其主要目的就是给 BeanFactory 注册个 BeanPostProcessor,BeanPostProcessor 意为 bean 的后处理器,用于扩展 bean。而真正的逻辑含义我们还是要仔细研究一下参数 ApplicationContextAwareProcessor 类。
ApplicationContextAwareProcessor 类实现了 BeanPostProcessor 接口,之前在 bean 加载的时候已经接触过这个接口,这次我们先来好好研究。
public interface BeanPostProcessor {

   /**
    * Apply this BeanPostProcessor to the given new bean instance <i>before</i> any bean
    * initialization callbacks (like InitializingBean's {@code afterPropertiesSet}
    * or a custom init-method). The bean will already be populated with property values.
    * The returned bean instance may be a wrapper around the original.
    */
   @Nullable
   default Object postProcessBeforeInitialization(Object bean, String beanName) throws BeansException {
      return bean;
   }

   /**
    * Apply this BeanPostProcessor to the given new bean instance <i>after</i> any bean
    * initialization callbacks (like InitializingBean's {@code afterPropertiesSet}
    * or a custom init-method). The bean will already be populated with property values.
    * The returned bean instance may be a wrapper around the original.
    */
   @Nullable
   default Object postProcessAfterInitialization(Object bean, String beanName) throws BeansException {
      return bean;
   }
}
在 bean 实例化的时候,也就是Spring激活 bean 的 init-method 的前后,会调用 BeanPostProcessor 接口的两个接口方法。同样,对于其实现类 ApplicationContextAwareProcessor 我们也将注意力放置在这两个方法之上。
/**
 * 初始化前调用的后期处理
 * @param bean the new bean instance
 * @param beanName the name of the bean
 * @return
 * @throws BeansException
 */
@Override
@Nullable
public Object postProcessBeforeInitialization(final Object bean, String beanName) throws BeansException {
   AccessControlContext acc = null;

   if (System.getSecurityManager() != null &&
         (bean instanceof EnvironmentAware || bean instanceof EmbeddedValueResolverAware ||
               bean instanceof ResourceLoaderAware || bean instanceof ApplicationEventPublisherAware ||
               bean instanceof MessageSourceAware || bean instanceof ApplicationContextAware)) {
      acc = this.applicationContext.getBeanFactory().getAccessControlContext();
   }

   if (acc != null) {
      AccessController.doPrivileged((PrivilegedAction<Object>) () -> {
         invokeAwareInterfaces(bean);
         return null;
      }, acc);
   }
   else {
      invokeAwareInterfaces(bean);
   }

   return bean;
}

/**
 * 初始化后调用的后期处理
 * @param bean the new bean instance
 * @param beanName the name of the bean
 * @return
 */
@Override
public Object postProcessAfterInitialization(Object bean, String beanName) {
   return bean;
}
可以看到,初始化后的后处理方法没有做额外的处理,直接返回 bean。我们重点看看 postProcessBeforeInitialization 方法。仔细看其逻辑,可以看到主要执行了 invokeAwareInterfaces(bean) 方法,我们进入看看该方法对 bean 进行何种后处理操作。
/**
 * 实现了Aware接口的bean可以在被初始化之后,取得一些对应的资源
 * @param bean
 */
private void invokeAwareInterfaces(Object bean) {
   if (bean instanceof Aware) {
      if (bean instanceof EnvironmentAware) {
         ((EnvironmentAware) bean).setEnvironment(this.applicationContext.getEnvironment());
      }
      if (bean instanceof EmbeddedValueResolverAware) {
         ((EmbeddedValueResolverAware) bean).setEmbeddedValueResolver(this.embeddedValueResolver);
      }
      if (bean instanceof ResourceLoaderAware) {
         ((ResourceLoaderAware) bean).setResourceLoader(this.applicationContext);
      }
      if (bean instanceof ApplicationEventPublisherAware) {
         ((ApplicationEventPublisherAware) bean).setApplicationEventPublisher(this.applicationContext);
      }
      if (bean instanceof MessageSourceAware) {
         ((MessageSourceAware) bean).setMessageSource(this.applicationContext);
      }
      if (bean instanceof ApplicationContextAware) {
         ((ApplicationContextAware) bean).setApplicationContext(this.applicationContext);
      }
   }
}
我们从 invokeAwareInterfaces 方法中,我们可以看出来,实现这些 Aware 接口的 bean 在被初始化之后,可以取得一些对应的资源,也就是我们在之前的文章中说的,这些 bean 能够感知一些额外的信息。
设置忽略依赖
刚刚添加了一个 bean 的后处理器 ApplicationContextAwareProcessor,后面还会添加其他的后处理器。 ApplicationContextAwareProcessor 主要是给一些实现了 Aware 接口的特殊 bean 添加一些额外的信息,那么这些 bean 在Spring进行依赖注入时就需要忽略了,这和我们在第一篇文章忽略 BeanNameAware、BeanFactoryAware 和 BeanClassLoaderAware 是一致的。
// 设置几个忽略自动装配的接口
beanFactory.ignoreDependencyInterface(EnvironmentAware.class);
beanFactory.ignoreDependencyInterface(EmbeddedValueResolverAware.class);
beanFactory.ignoreDependencyInterface(ResourceLoaderAware.class);
beanFactory.ignoreDependencyInterface(ApplicationEventPublisherAware.class);
beanFactory.ignoreDependencyInterface(MessageSourceAware.class);
beanFactory.ignoreDependencyInterface(ApplicationContextAware.class);
忽略的接口类型正好是上一步中对应的几个,需要忽略的类型全部被添加到 BeanFactory 中的 this.ignoredDependencyInterfaces 这个 set 属性中。
/**
 * 忽略给定接口的自动装配功能
 * Ignore the given dependency interface for autowiring.
 * <p>This will typically be used by application contexts to register
 * dependencies that are resolved in other ways, like BeanFactory through
 * BeanFactoryAware or ApplicationContext through ApplicationContextAware.
 * <p>By default, only the BeanFactoryAware interface is ignored.
 * For further types to ignore, invoke this method for each type.
 * @see org.springframework.beans.factory.BeanFactoryAware
 * @see org.springframework.context.ApplicationContextAware
 */
public void ignoreDependencyInterface(Class<?> ifc) {
   this.ignoredDependencyInterfaces.add(ifc);
}
设置自动装配的特殊规则
Spring中有忽略某些依赖的功能,自然可以主动注册添加一些依赖功能。
// 设置几个自动装配的特殊规则
beanFactory.registerResolvableDependency(BeanFactory.class, beanFactory);
beanFactory.registerResolvableDependency(ResourceLoader.class, this);
beanFactory.registerResolvableDependency(ApplicationEventPublisher.class, this);
beanFactory.registerResolvableDependency(ApplicationContext.class, this);
ApplicationContext 对这四个类型的属性注入规定了特殊的规则,比如需要对某个 bean 进行属性注入时,其中有属性的类型为 BeanFactory.class,便会立刻将 beanFactory 的实例注入进去。我们查看 DefaultListableBeanFactory 类的 registerResolvableDependency 方法:
@Override
public void registerResolvableDependency(Class<?> dependencyType, @Nullable Object autowiredValue) {
   Assert.notNull(dependencyType, "Dependency type must not be null");
   if (autowiredValue != null) {
      if (!(autowiredValue instanceof ObjectFactory || dependencyType.isInstance(autowiredValue))) {
         throw new IllegalArgumentException("Value [" + autowiredValue +
               "] does not implement specified dependency type [" + dependencyType.getName() + "]");
      }
      this.resolvableDependencies.put(dependencyType, autowiredValue);
   }
}
最终 beanFactory 或者 this (applicationContext) 会被保存至 BeanFactory 的 this.resolvableDependencies 属性中。
将相关环境变量及属性注册以单例模式注册
关于增加对 AspectJ 的支持,在下一篇文章会介绍。在 beanFactory 功能扩展过程,最后一步便是以单例模式注册一些默认的和系统环境相关的 bean,名称分别是 environment、systemProperties 和 systemEnvironment。
// 以单例模式注册默认的系统环境bean
if (!beanFactory.containsLocalBean(ENVIRONMENT_BEAN_NAME)) {
   beanFactory.registerSingleton(ENVIRONMENT_BEAN_NAME, getEnvironment());
}
if (!beanFactory.containsLocalBean(SYSTEM_PROPERTIES_BEAN_NAME)) {
   beanFactory.registerSingleton(SYSTEM_PROPERTIES_BEAN_NAME, getEnvironment().getSystemProperties());
}
if (!beanFactory.containsLocalBean(SYSTEM_ENVIRONMENT_BEAN_NAME)) {
   beanFactory.registerSingleton(SYSTEM_ENVIRONMENT_BEAN_NAME, getEnvironment().getSystemEnvironment());
}
仔细研究 registerSingleton 方法,两个参数分别为 beanName 和 单例对象。
/**
 * 注册单例对象进入容器
 * @param beanName the name of the bean
 * @param singletonObject the existing singleton object
 * @throws IllegalStateException
 */
@Override
public void registerSingleton(String beanName, Object singletonObject) throws IllegalStateException {
   super.registerSingleton(beanName, singletonObject);

   if (hasBeanCreationStarted()) {
      // Cannot modify startup-time collection elements anymore (for stable iteration)
      synchronized (this.beanDefinitionMap) {
         if (!this.beanDefinitionMap.containsKey(beanName)) {
            Set<String> updatedSingletons = new LinkedHashSet<>(this.manualSingletonNames.size() + 1);
            updatedSingletons.addAll(this.manualSingletonNames);
            updatedSingletons.add(beanName);
            this.manualSingletonNames = updatedSingletons;
         }
      }
   }
   else {
      // Still in startup registration phase
      if (!this.beanDefinitionMap.containsKey(beanName)) {
         this.manualSingletonNames.add(beanName);
      }
   }

   clearByTypeCache();
}
其中调用了父类的 registerSingleton(beanName, singletonObject) 方法:
@Override
public void registerSingleton(String beanName, Object singletonObject) throws IllegalStateException {
   Assert.notNull(beanName, "Bean name must not be null");
   Assert.notNull(singletonObject, "Singleton object must not be null");
   synchronized (this.singletonObjects) {
      Object oldObject = this.singletonObjects.get(beanName);
      if (oldObject != null) {
         throw new IllegalStateException("Could not register object [" + singletonObject +
               "] under bean name '" + beanName + "': there is already object [" + oldObject + "] bound");
      }
      addSingleton(beanName, singletonObject);
   }
}
可以看到核心就是 addSingleton(beanName, singletonObject),没错,这个方法之前 bean 加载时也见过,就是加入容器缓存。
/**
 * 添加缓存并移除辅助变量
 * Add the given singleton object to the singleton cache of this factory.
 * <p>To be called for eager registration of singletons.
 * @param beanName the name of the bean
 * @param singletonObject the singleton object
 */
protected void addSingleton(String beanName, Object singletonObject) {
   synchronized (this.singletonObjects) {
      // 加入缓存
      this.singletonObjects.put(beanName, singletonObject);
      this.singletonFactories.remove(beanName);
      this.earlySingletonObjects.remove(beanName);
      this.registeredSingletons.add(beanName);
   }
}
VII. BeanFactory的后处理
BeanFactory 作为Spring中容器功能的基础,用于存放所有已经加载的 bean,为了保证程序上的高可扩展性,Spring针对 BeanFactory 做了大量的扩展,比如我们熟悉的后置处理器 PostProcessor 就是在这里实现的。
bean 的后处理器是 BeanPostProcessor,beanFactory 也有后处理器时 BeanFactoryPostProcessor,关于二者的区别,可以参考文末阅读部分文章,这对下面研究部分的理解有所帮助。
Spring容器初始化 bean 大致过程是: 定义 bean 标签 ==> 将 bean 标签解析成 BeanDefinition ==> 调用构造方法实例化 ==> 属性值的依赖注入 。两种处理器的作用时期,BeanFactoryPostProcessor 作用于第二步和第三步之间,而 BeanPostProcessor 作用于第三步之后的初始化的前后。
接下来我们就深入分析下 BeanFactory 相关的后处理。
激活注册的BeanFactoryPostProcessor
正式开始前,先了解下 BeanFactoryPostProcessor 的用法。
BeanFactoryPostProcessor 接口跟 BeanPostProcessor 类似,都可以对 bean 的定义(配置元数据)进行处理,也就是说Spring IoC容器允许 BeanFactoryPostProcessor 在容器实际实例化任何其他的 bean 之前读取配置元数据,并可能修改它。也可以配置多个 BeanFactoryPostProcessor,可以通过 order 属性来控制 BeanFactoryPostProcessor 的执行顺序(此属性必须当 BeanFactoryPostProcessor 实现了 Ordered 的接口时才可以设置此属性,因此在实现 BeanFactoryPostProcessor 时应该考虑实现 Ordered 接口)。
如果想改变实际的 bean 实例(例如从配置元数据创建的对象),那最好使用 BeanPostProcessor。同样的 BeanFactoryPostProcessor 的作用域范围是容器级别的, 它只是和你所使用的容器有关。如果你在容器中定义了一个 BeanFactoryPostProcessor,它仅仅对此容器中的 bean 进行后置处理。BeanFactoryPostProcessor 不会对定义在另一个容器中的 bean 进行后置处理,即使这两个容器都在同一层次上。在Spring中存在对于 BeanFactoryPostProcessor 的典型应用,如 PropertyPlaceholderConfigurer。
① PropertyPlaceholderConfigurer
在Spring的XML配置文件中可以利用 ${····} 来引用其他配置文件中配置的值,类似 placeHolder 功能,例如:
<bean id="helloMessage" class="guo.ping.ioc.propertyplaceholder.HelloMessage">
   <property name="message" value="${helloMessage.message}" />
   <property name="time" value="${helloMessage.time}" />
</bean>
这在项目中经常Spring配置JDBC连接信息的时候使用,我们看一下 HelloMessage 内容:
public class HelloMessage {

   private String message;
   private String time;

   /** setter and getter and toString() */
}
关于 ${helloMessage.message} 内容在 bean.property 文件中定义:
helloMessage.message=hello, this is PropertyPlaceholderConfigure demo!
helloMessage.time=util tomorrow!
测试代码:
public class PropertyPlacehloderTest {

   @Test
   public void testValidateProperties() {
      ApplicationContext context = new ClassPathXmlApplicationContext("propertyPlaceholder-Test.xml");
      HelloMessage helloMessage = (HelloMessage) context.getBean("helloMessage");
      System.out.println(helloMessage);
   }
}
测试结果:
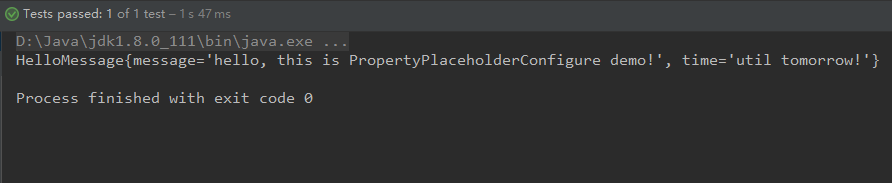
Spring框架是怎么知道存在这样的配置文件里面同时定义了想要的 key-value 呢?其实这就是 PropertyPlaceholderConfigurer,我们在配置文件中还额外配置了一个 bean:
<bean id="mesHandler" class="org.springframework.beans.factory.config.PropertyPlaceholderConfigurer" >
   <property name="locations">
      <list>
         <value>bean.properties</value>
      </list>
   </property>
</bean>
在这个 bean 中指定了 .properties 文件的地址。其实还是有个问题,这个 mesHandler 只不过是Spring框架管理的一个 bean,并没有被别的 bean 或者对象引用,Spring的 beanFactory 是怎么知道这个需要从这个 bean 中获取配置信息呢?我们看下 PropertyPlaceholderConfigurer 这个类的层次结构。
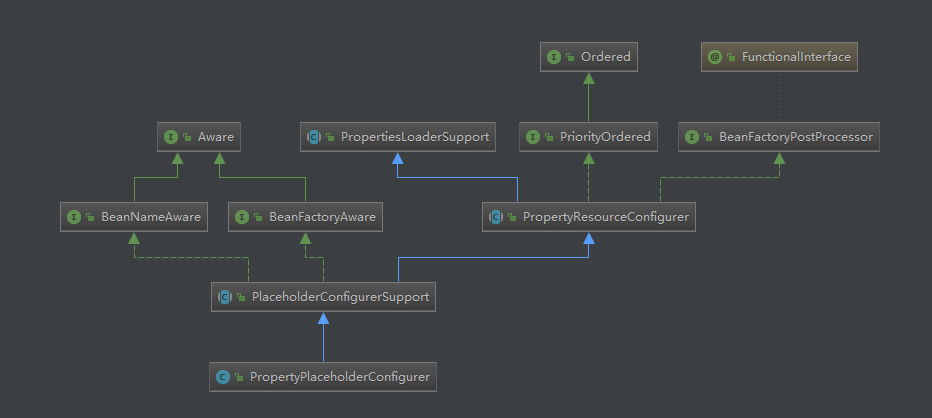
从上图中我们可以看到 PropertyPlaceholderConfigurer 间接的继承了 BeanFactoryPostProcessor 接口。这是一个很特别的接口,当Spring加载任何实现了这个接口的 bean 的配置时,都会在 bean工厂载入所有 bean 的配置之后执行 postProcessBeanFactory 方法。关于 postProcessBeanFactory 方法是在 PropertyResourceConfigurer 类中实现的,实现的方法中先后调用了 mergeProperties()、convertProperties()、processProperties() 这三个方法,分别得到配置,将得到的配置转换为合适的类型,最后将配置内容告知 BeanFactory。
/**
 * {@linkplain #mergeProperties Merge}, {@linkplain #convertProperties convert} and
 * {@linkplain #processProperties process} properties against the given bean factory.
 * @throws BeanInitializationException if any properties cannot be loaded
 */
@Override
public void postProcessBeanFactory(ConfigurableListableBeanFactory beanFactory) throws BeansException {
   try {
      Properties mergedProps = mergeProperties();

      // Convert the merged properties, if necessary.
      convertProperties(mergedProps);

      // Let the subclass process the properties.
      processProperties(beanFactory, mergedProps);
   }
   catch (IOException ex) {
      throw new BeanInitializationException("Could not load properties", ex);
   }
}
正是通过实现 BeanFactoryPostProcessor 接口,BeanFactory 会在实例化任何 bean 之前获得配置信息,从而能够正确的解析 bean 描述文件中的变量引用。
② 自定义BeanFactoryPostProcessor
我们自定义一个 BeanFactoryPostProcessor,实现过滤一些敏感文字信息的功能,借此展示 BeanFactoryPostProcessor 的创建和使用。比如替换下面XML配置文件中的 bollocks 这样的敏感字眼为 ******。
<?xml version='1.0' encoding='UTF-8' ?>
<beans xmlns="http://www.springframework.org/schema/beans"
      xmlns:xsi="http://www.w3.org/2001/XMLSchema-instance"
      xsi:schemaLocation="http://www.springframework.org/schema/beans    http://www.springframework.org/schema/beans/spring-beans.xsd">
   <bean id="myBeanFactoryPostProcessor" class="guo.ping.ioc.selfbeanfactorypostprocessor.MyBeanFactoryPostProcessor">
      <property name="filterStrings">
         <set>
            <value>hello</value>
            <value>world</value>
         </set>
      </property>
   </bean>

   <bean id="user" class="guo.ping.ioc.selfbeanfactorypostprocessor.User">
      <property name="username" value="wgp" />
      <property name="password" value="world" />
      <property name="message" value="hello" />
   </bean>
</beans>
自定义的 BeanFactoryPostProcessor 如下:
public class MyBeanFactoryPostProcessor implements BeanFactoryPostProcessor {

   private Set<String> filterStrings;

   public MyBeanFactoryPostProcessor() {
      filterStrings = new HashSet<>();
   }

   public Set<String> getFilterStrings() {
      return filterStrings;
   }

   public void setFilterStrings(Set<String> filterStrings) {
      this.filterStrings.clear();
      for (String filterString : filterStrings) {
         this.filterStrings.add(filterString);
      }
   }

   @Override
   public void postProcessBeanFactory(ConfigurableListableBeanFactory beanFactory) throws BeansException {
      String[] beanDefinitionNames = beanFactory.getBeanDefinitionNames();
      for (String beanDefinitionName : beanDefinitionNames) {
         BeanDefinition beanDefinition = beanFactory.getBeanDefinition(beanDefinitionName);
         StringValueResolver stringValueResolver = new StringValueResolver() {
            @Override
            public String resolveStringValue(String strVal) {
               if (isFilter(strVal)) {
                  return "******";
               }
               return strVal;
            }
         };
         BeanDefinitionVisitor visitor = new BeanDefinitionVisitor(stringValueResolver);
         visitor.visitBeanDefinition(beanDefinition);
      }
      System.out.println("自定义后处理器执行...");
   }

   private boolean isFilter(Object strVal) {
      String s = strVal.toString();
      return this.filterStrings.contains(s);
   }
}
以及 User 用户信息类:
public class User {

   private String username;
   private String password;
   private String message;

   /** setter and getter and toString() */
}
测试类可以使用 BeanFactory,需要我们手动调用 BeanFactoryPostProcessor 后处理方法:
public class MyBeanFactoryPostProcessorTest {

   @Test
   public void testMyBeanFactoryPostProcessor() {
      ConfigurableListableBeanFactory bf = new XmlBeanFactory(new ClassPathResource("selfBeanFactoryPostProcessor-Test.xml"));
      BeanFactoryPostProcessor bfpp = (BeanFactoryPostProcessor) bf.getBean("myBeanFactoryPostProcessor");
      bfpp.postProcessBeanFactory(bf);
      User user = (User) bf.getBean("user");
      System.out.println(user);
   }
}
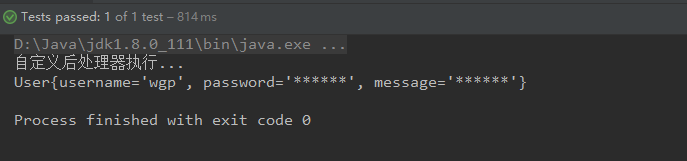
或者直接使用 ApplicationContext,将会自动调用后处理方法:
public class MyBeanFactoryPostProcessorTest {
   @Test
   public void testMyBeanFactoryPostProcessor() {
      ApplicationContext bf = new ClassPathXmlApplicationContext("selfBeanFactoryPostProcessor-Test.xml");
      User user = (User) bf.getBean("user");
      System.out.println(user);
   }
}
测试结果:
③ 激活BeanFactoryPostProcessor
了解了 BeanFactoryPostProcessor 的用法后来深入研究一下它的调用过程,ApplicationContext 如何能够自动激活各种 BeanFactoryPostProcessor 。
/**
 * 激活各种BeanFactoryPostProcessor
 * Instantiate and invoke all registered BeanFactoryPostProcessor beans,
 * respecting explicit order if given.
 * <p>Must be called before singleton instantiation.
 */
protected void invokeBeanFactoryPostProcessors(ConfigurableListableBeanFactory beanFactory) {
   PostProcessorRegistrationDelegate.invokeBeanFactoryPostProcessors(beanFactory, getBeanFactoryPostProcessors());

   // Detect a LoadTimeWeaver and prepare for weaving, if found in the meantime
   // (e.g. through an @Bean method registered by ConfigurationClassPostProcessor)
   if (beanFactory.getTempClassLoader() == null && beanFactory.containsBean(LOAD_TIME_WEAVER_BEAN_NAME)) {
      beanFactory.addBeanPostProcessor(new LoadTimeWeaverAwareProcessor(beanFactory));
      beanFactory.setTempClassLoader(new ContextTypeMatchClassLoader(beanFactory.getBeanClassLoader()));
   }
}
其中委托了 PostProcessorRegistrationDelegate 后处理器注册代理类调用 BeanFactoryPostProcessor 的后处理方法。
/**
 * 调用BeanFactoryPostProcessors后处理方法
 * @param beanFactory
 * @param beanFactoryPostProcessors
 */
public static void invokeBeanFactoryPostProcessors(
      ConfigurableListableBeanFactory beanFactory, List<BeanFactoryPostProcessor> beanFactoryPostProcessors) {

   // ==============1. 先区分beanFactory是否实现了BeanDefinitionRegistry接口================
   // ==============1.1 如果实现了,那么要对硬编码和配置的BeanFactoryPostProcessor进行特殊处理================
   // ==============1.1.1 先对硬编码的进行处理,来源于参数beanFactoryPostProcessors,遍历它区分出其中实现BeanDefinitionRegistryPostProcessor的
   // ==============      用两个list集合分别保存实现的与正常的,对于实现的先调用postProcessBeanDefinitionRegistry方法=============
   // ==============1.1.2 再对于配置文件中配置的BeanDefinitionRegistryPostProcessors的处理,由于后处理器的优先级,可能实现了
   // ==============      优先级类PriorityOrdered和Ordered,剩下的应该是没有优先级的。所以要对配置文件中配的BeanDefinitionRegistryPostProcessors
   // ==============      进行排序,依次调用它们的postProcessBeanDefinitionRegistry方法=============
   // ==============1.1.3 最后,再调用这些BeanDefinitionRegistryPostProcessors本身从BeanFactoryPostProcessor继承而来的postProcessBeanFactory方法
   // ==============      到这里,硬编码的BeanFactoryPostProcessor就处理完了,他们的两种方法都被激活了,而配置文件的只是处理了
   // ==============      BeanDefinitionRegistryPostProcessor类型的,也只激活了postProcessBeanDefinitionRegistry方法===============
   // ==============1.2 当然,如果beanFactory没有实现BeanDefinitionRegistry接口,那么直接对硬编码的所有BeanFactoryPostProcessor进行激活,配置文件的还没搞========
   // ==============2. BeanDefinitionRegistryPostProcessors无论硬编码还是配置的两个方法在第一步已经都激活完成,硬编码的BeanFactoryPostProcessor也全部激活完成
   // ==============   剩下的就是配置文件部分的BeanFactoryPostProcessor,同样为了处理优先级,也不得不新建一些list集合,然后依次分别激活。这样,就全部完工了。========

   // Invoke BeanDefinitionRegistryPostProcessors first, if any.

   // 记录已经处理的bean的hashset
   Set<String> processedBeans = new HashSet<>();

   // 对BeanDefinitionRegistry类型的beanFactory处理
   if (beanFactory instanceof BeanDefinitionRegistry) {
      BeanDefinitionRegistry registry = (BeanDefinitionRegistry) beanFactory;

      // ==============1.1.1开始之处==============

      // 容纳beanFactoryPostProcessors中的常规的BeanFactoryPostProcessors
      List<BeanFactoryPostProcessor> regularPostProcessors = new ArrayList<>();
      // 容纳beanFactoryPostProcessors中的BeanDefinitionRegistryPostProcessor
      List<BeanDefinitionRegistryPostProcessor> registryProcessors = new ArrayList<>();

      // 先处理硬编码注册的后处理器
      for (BeanFactoryPostProcessor postProcessor : beanFactoryPostProcessors) {
         if (postProcessor instanceof BeanDefinitionRegistryPostProcessor) {
            BeanDefinitionRegistryPostProcessor registryProcessor =
                  (BeanDefinitionRegistryPostProcessor) postProcessor;
            // 对于BeanDefinitionRegistryPostProcessor类型,在BeanFactoryPostProcessor的基础上还有自己定义的方法,
            // 需要先调用registryProcessor.postProcessBeanDefinitionRegistry(registry)方法
            registryProcessor.postProcessBeanDefinitionRegistry(registry);
            registryProcessors.add(registryProcessor);
         }
         else {
            // 记录常规BeanFactoryPostProcessor
            regularPostProcessors.add(postProcessor);
         }
      }

      // ==============1.1.1结束之处==============

      // ==============1.1.2开始之处==============

      // Do not initialize FactoryBeans here: We need to leave all regular beans
      // uninitialized to let the bean factory post-processors apply to them!
      // Separate between BeanDefinitionRegistryPostProcessors that implement
      // PriorityOrdered, Ordered, and the rest.
      List<BeanDefinitionRegistryPostProcessor> currentRegistryProcessors = new ArrayList<>();

      // First, invoke the BeanDefinitionRegistryPostProcessors that implement PriorityOrdered.
      // 再对于配置文件中配置的BeanDefinitionRegistryPostProcessors的处理
      String[] postProcessorNames =
            beanFactory.getBeanNamesForType(BeanDefinitionRegistryPostProcessor.class, true, false);
      for (String ppName : postProcessorNames) {
         if (beanFactory.isTypeMatch(ppName, PriorityOrdered.class)) {
            currentRegistryProcessors.add(beanFactory.getBean(ppName, BeanDefinitionRegistryPostProcessor.class));
            processedBeans.add(ppName);
         }
      }
      // 按照优先级进行排序
      sortPostProcessors(currentRegistryProcessors, beanFactory);
      registryProcessors.addAll(currentRegistryProcessors);
      invokeBeanDefinitionRegistryPostProcessors(currentRegistryProcessors, registry);
      currentRegistryProcessors.clear();

      // Next, invoke the BeanDefinitionRegistryPostProcessors that implement Ordered.
      postProcessorNames = beanFactory.getBeanNamesForType(BeanDefinitionRegistryPostProcessor.class, true, false);
      for (String ppName : postProcessorNames) {
         if (!processedBeans.contains(ppName) && beanFactory.isTypeMatch(ppName, Ordered.class)) {
            currentRegistryProcessors.add(beanFactory.getBean(ppName, BeanDefinitionRegistryPostProcessor.class));
            processedBeans.add(ppName);
         }
      }
      sortPostProcessors(currentRegistryProcessors, beanFactory);
      registryProcessors.addAll(currentRegistryProcessors);
      invokeBeanDefinitionRegistryPostProcessors(currentRegistryProcessors, registry);
      currentRegistryProcessors.clear();

      // Finally, invoke all other BeanDefinitionRegistryPostProcessors until no further ones appear.
      boolean reiterate = true;
      while (reiterate) {
         reiterate = false;
         postProcessorNames = beanFactory.getBeanNamesForType(BeanDefinitionRegistryPostProcessor.class, true, false);
         for (String ppName : postProcessorNames) {
            // 处理剩下的
            if (!processedBeans.contains(ppName)) {
               currentRegistryProcessors.add(beanFactory.getBean(ppName, BeanDefinitionRegistryPostProcessor.class));
               processedBeans.add(ppName);
               reiterate = true;
            }
         }
         sortPostProcessors(currentRegistryProcessors, beanFactory);
         registryProcessors.addAll(currentRegistryProcessors);
         invokeBeanDefinitionRegistryPostProcessors(currentRegistryProcessors, registry);
         currentRegistryProcessors.clear();
      }

      // ==============1.1.2结束之处==============

      // ==============1.1.3开始之处==============

      // Now, invoke the postProcessBeanFactory callback of all processors handled so far.
      // 激活postProcessBeanFactory方法,之前激活的是postProcessBeanDefinitionRegistry
      // 激活硬编码设置的BeanDefinitionRegistryPostProcessor的postProcessBeanFactory
      invokeBeanFactoryPostProcessors(registryProcessors, beanFactory);
      // 激活常规的BeanFactoryPostProcessor的postProcessBeanFactory
      invokeBeanFactoryPostProcessors(regularPostProcessors, beanFactory);

      // ==============1.1.3结束之处==============
   }

   else {
      // Invoke factory processors registered with the context instance.
      // 对于硬编码的beanFactoryPostProcessors中的postProcessBeanFactory调用
      invokeBeanFactoryPostProcessors(beanFactoryPostProcessors, beanFactory);
   }

   // Do not initialize FactoryBeans here: We need to leave all regular beans
   // uninitialized to let the bean factory post-processors apply to them!
   // 对于配置中读取的BeanFactoryPostProcessor的处理
   String[] postProcessorNames =
         beanFactory.getBeanNamesForType(BeanFactoryPostProcessor.class, true, false);

   // Separate between BeanFactoryPostProcessors that implement PriorityOrdered,
   // Ordered, and the rest.
   List<BeanFactoryPostProcessor> priorityOrderedPostProcessors = new ArrayList<>();
   List<String> orderedPostProcessorNames = new ArrayList<>();
   List<String> nonOrderedPostProcessorNames = new ArrayList<>();

   // 对后处理进行分类
   for (String ppName : postProcessorNames) {
      if (processedBeans.contains(ppName)) {
         // skip - already processed in first phase above
         // 已经处理过
      }
      else if (beanFactory.isTypeMatch(ppName, PriorityOrdered.class)) {
         priorityOrderedPostProcessors.add(beanFactory.getBean(ppName, BeanFactoryPostProcessor.class));
      }
      else if (beanFactory.isTypeMatch(ppName, Ordered.class)) {
         orderedPostProcessorNames.add(ppName);
      }
      else {
         nonOrderedPostProcessorNames.add(ppName);
      }
   }

   // First, invoke the BeanFactoryPostProcessors that implement PriorityOrdered.
   // 按照优先级进行排序
   sortPostProcessors(priorityOrderedPostProcessors, beanFactory);
   invokeBeanFactoryPostProcessors(priorityOrderedPostProcessors, beanFactory);

   // Next, invoke the BeanFactoryPostProcessors that implement Ordered.
   List<BeanFactoryPostProcessor> orderedPostProcessors = new ArrayList<>();
   for (String postProcessorName : orderedPostProcessorNames) {
      orderedPostProcessors.add(beanFactory.getBean(postProcessorName, BeanFactoryPostProcessor.class));
   }
   // 按照order排序
   sortPostProcessors(orderedPostProcessors, beanFactory);
   invokeBeanFactoryPostProcessors(orderedPostProcessors, beanFactory);

   // Finally, invoke all other BeanFactoryPostProcessors.
   // 无序,直接调用
   List<BeanFactoryPostProcessor> nonOrderedPostProcessors = new ArrayList<>();
   for (String postProcessorName : nonOrderedPostProcessorNames) {
      nonOrderedPostProcessors.add(beanFactory.getBean(postProcessorName, BeanFactoryPostProcessor.class));
   }
   invokeBeanFactoryPostProcessors(nonOrderedPostProcessors, beanFactory);

   // Clear cached merged bean definitions since the post-processors might have
   // modified the original metadata, e.g. replacing placeholders in values...
   beanFactory.clearMetadataCache();
}
这一段的逻辑需要仔细梳理,首先我们得搞清楚方法传进的两个参数分别是什么:
- beanFactory:就是之前步骤初始化出的 beanFactory,
AbstractApplicationContext中的成员变量; - beanFactoryPostProcessors:由
getBeanFactoryPostProcessors()方法获得,也就是AbstractApplicationContext中的成员变量this.beanFactoryPostProcessors,是一个ArrayList。这个 list 用于添加BeanFactoryPostProcessor,利用addBeanFactoryPostProcessor()方法。
@Override
public void addBeanFactoryPostProcessor(BeanFactoryPostProcessor postProcessor) {
   Assert.notNull(postProcessor, "BeanFactoryPostProcessor must not be null");
   this.beanFactoryPostProcessors.add(postProcessor);
}


/**
 * Return the list of BeanFactoryPostProcessors that will get applied
 * to the internal BeanFactory.
 */
public List<BeanFactoryPostProcessor> getBeanFactoryPostProcessors() {
   return this.beanFactoryPostProcessors;
}
所以,由对处理的参数来区分,invokeBeanFactoryPostProcessors 方法内部对 BeanFactoryPostProcessor 的处理主要分两种情况,一种是硬编码情况注册的后处理器,另一种则是靠配置XML配置文件注册的后处理,两者分别通过两个参数可以直接或间接获得。此外,因为 beanFactory 可能是 BeanDefinitionRegistry 实例,也可能不是,如果是 BeanDefinitionRegistry 实例,硬编码注册的 BeanFactoryPostProcessor 可能是 BeanDefinitionRegistryPostProcessor 类型,如果是则要先调用其特有的 registryProcessor.postProcessBeanDefinitionRegistry(registry) 方法,所以方法在逻辑上对 BeanFactoryPostProcessor 的处理又分对 BeanDefinitionRegistry 类的特殊处理,另一种是普通的 BeanFactoryPostProcessor 进行处理。这四种情况的处理导致了非常复杂的逻辑,我将其代码中的流程注释进行截图,便于更加细致的理解。
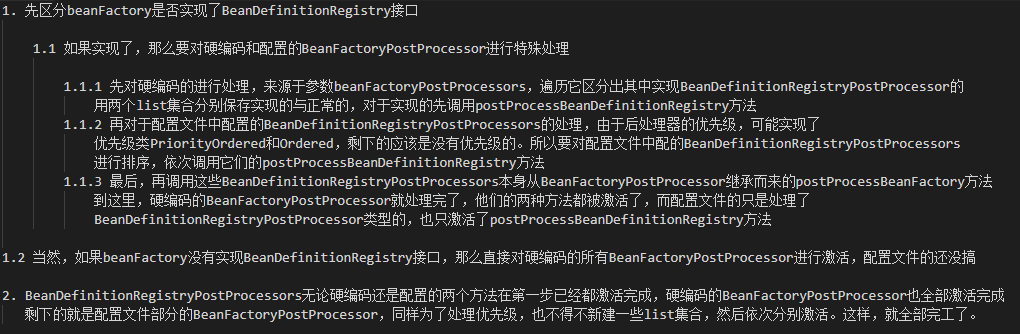
需要提到的是,对于硬编码方式手动添加的后处理器是不需要作任何排序的,但在配置文件中读取的处理器,Spring不保证读取的顺序。所以,为了保证有序的要求,Spring对于后处理器的调用支持按照 PriorityOrdered 和 Ordered 的顺序调用。
注册BeanPostProcessor
上文提到了 BeanFactoryPostProcessor 的调用,是已经注册好的,接下来我们就探索下 BeanPostProcessor。但这里并不是调用,而是注册,真正的调用其实是在 bean 的实例化阶段进行的。在上一部分 beanFactory 功能扩展的添加 ApplicationContextAwareProcessor 中已经涉及到 bean 后处理器的注册内容。
注册 BeanPostProcessor 这是一个很重要的步骤,也是很多功能 BeanFactory 不支持的重要原因。Spring中大部分功能都是通过后处理器的方式进行扩展的,这是Spring框架的一个特写,但是在 BeanFactory 中其实并没有实现后处理器的自动注册,所以在调用的时候如果没有进行手动注册其实是不能使用的。但是 ApplicationContext 中却添加了自动注册功能。
先来演示自定义的 BeanPostProcessor 的使用。自定义一个后处理器,默认 BeanPostProcessor 是对所有 bean 进行处理,通过第二个参数,我们可以达到对单个实例细粒度的控制。
public class MyBeanPostProcessor implements InstantiationAwareBeanPostProcessor {

   @Override
   public Object postProcessBeforeInitialization(Object bean, String beanName) throws BeansException {
      if (beanName.equals("user")) {
         System.out.println("初始化前:指定对user bean进行处理");
      }
      return null;
   }

   @Override
   public Object postProcessAfterInitialization(Object bean, String beanName) throws BeansException {
      if (beanName.equals("user")) {
         System.out.println("初始化后:处理完毕");
      }
      return null;
   }
}
bean 的定义:
public class User {

   private String username;

   /** setter and getter and toString() */
}
配置文件:
<?xml version='1.0' encoding='UTF-8' ?>
<beans xmlns="http://www.springframework.org/schema/beans"
      xmlns:xsi="http://www.w3.org/2001/XMLSchema-instance"
      xsi:schemaLocation="http://www.springframework.org/schema/beans    http://www.springframework.org/schema/beans/spring-beans.xsd">

   <bean id="user" class="guo.ping.ioc.selfbeanpostprocessor.User">
      <property name="username" value="haha" />
   </bean>

   <bean id="user2" class="guo.ping.ioc.selfbeanpostprocessor.User">
      <property name="username" value="xixi" />
   </bean>

   <bean class="guo.ping.ioc.selfbeanpostprocessor.MyBeanPostProcessor" />
</beans>
测试类:
public class SelfBeanPostProcessorTest {

   @Test
   public void testSelfBeanPostProcessor() {
      ApplicationContext context = new ClassPathXmlApplicationContext("selfBeanPostProcessor-Test.xml");
   }
}
测试结果:
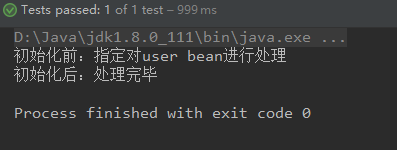
使用 BeanFactory 的方式进行加载的 bean 在加载时不会打印上面的语句,而在使用 ApplicationContext 方式获取的 bean 时就会打印,而这个特性就是在 registryBeanPostProcessor(beanFactory) 方法中完成的。
/**
 * 注册 拦截Bean创建的 Bean处理器,这里只是注册,真正的调用是在getBean时候
 * Instantiate and invoke all registered BeanPostProcessor beans,
 * respecting explicit order if given.
 * <p>Must be called before any instantiation of application beans.
 */
protected void registerBeanPostProcessors(ConfigurableListableBeanFactory beanFactory) {
   PostProcessorRegistrationDelegate.registerBeanPostProcessors(beanFactory, this);
}
见怪不怪,继续深入:
/**
 * 注册 拦截Bean创建的 Bean处理器,这里只是注册,真正的调用是在getBean时候
 * @param beanFactory
 * @param applicationContext
 */
public static void registerBeanPostProcessors(
      ConfigurableListableBeanFactory beanFactory, AbstractApplicationContext applicationContext) {

   String[] postProcessorNames = beanFactory.getBeanNamesForType(BeanPostProcessor.class, true, false);

   // Register BeanPostProcessorChecker that logs an info message when
   // a bean is created during BeanPostProcessor instantiation, i.e. when
   // a bean is not eligible for getting processed by all BeanPostProcessors.
   // BeanPostProcessorChecker是一个普通的信息打印,可能会有些情况,当Spring的配置中的后处理器还没有被注册就已经开始了bean的初始化时
   // 便打印出BeanPostProcessorChecker中设定的信息
   // 1就是指下面要加的BeanPostProcessorChecker
   int beanProcessorTargetCount = beanFactory.getBeanPostProcessorCount() + 1 + postProcessorNames.length;
   beanFactory.addBeanPostProcessor(new BeanPostProcessorChecker(beanFactory, beanProcessorTargetCount));

   // Separate between BeanPostProcessors that implement PriorityOrdered, Ordered, and the rest.
   // 使用PriorityOrdered保证顺序,存的是对象
   List<BeanPostProcessor> priorityOrderedPostProcessors = new ArrayList<>();
   // MergedBeanDefinitionPostProcessor,存的是对象
   List<BeanPostProcessor> internalPostProcessors = new ArrayList<>();
   // 使用Order保证顺序,存的只是beanName
   List<String> orderedPostProcessorNames = new ArrayList<>();
   // 无序BeanPostProcessor,存的只是beanName
   List<String> nonOrderedPostProcessorNames = new ArrayList<>();

   for (String ppName : postProcessorNames) {
      if (beanFactory.isTypeMatch(ppName, PriorityOrdered.class)) {
         BeanPostProcessor pp = beanFactory.getBean(ppName, BeanPostProcessor.class);
         priorityOrderedPostProcessors.add(pp);
         if (pp instanceof MergedBeanDefinitionPostProcessor) {
            internalPostProcessors.add(pp);
         }
      }
      else if (beanFactory.isTypeMatch(ppName, Ordered.class)) {
         orderedPostProcessorNames.add(ppName);
      }
      else {
         nonOrderedPostProcessorNames.add(ppName);
      }
   }

   // First, register the BeanPostProcessors that implement PriorityOrdered.
   // 第一步,注册所有实现PriorityOrdered的BeanPostProcessor
   sortPostProcessors(priorityOrderedPostProcessors, beanFactory);
   registerBeanPostProcessors(beanFactory, priorityOrderedPostProcessors);

   // Next, register the BeanPostProcessors that implement Ordered.
   // 第二步,注册所有实现Ordered的BeanPostProcessor
   List<BeanPostProcessor> orderedPostProcessors = new ArrayList<>();
   for (String ppName : orderedPostProcessorNames) {
      BeanPostProcessor pp = beanFactory.getBean(ppName, BeanPostProcessor.class);
      orderedPostProcessors.add(pp);
      if (pp instanceof MergedBeanDefinitionPostProcessor) {
         internalPostProcessors.add(pp);
      }
   }
   sortPostProcessors(orderedPostProcessors, beanFactory);
   registerBeanPostProcessors(beanFactory, orderedPostProcessors);

   // Now, register all regular BeanPostProcessors.
   // 第三步,注册所有无序的BeanPostProcessor
   List<BeanPostProcessor> nonOrderedPostProcessors = new ArrayList<>();
   for (String ppName : nonOrderedPostProcessorNames) {
      BeanPostProcessor pp = beanFactory.getBean(ppName, BeanPostProcessor.class);
      nonOrderedPostProcessors.add(pp);
      if (pp instanceof MergedBeanDefinitionPostProcessor) {
         internalPostProcessors.add(pp);
      }
   }
   registerBeanPostProcessors(beanFactory, nonOrderedPostProcessors);

   // Finally, re-register all internal BeanPostProcessors.
   // 第四步,注册所有MergedBeanDefinitionPostProcessor类型的BeanPostProcessor,并非重复注册,在beanFactory中会先移除已经存在的BeanPostProcessor
   sortPostProcessors(internalPostProcessors, beanFactory);
   registerBeanPostProcessors(beanFactory, internalPostProcessors);

   // Re-register post-processor for detecting inner beans as ApplicationListeners,
   // moving it to the end of the processor chain (for picking up proxies etc).
   // 最后添加了ApplicationListener探测器的后处理器
   beanFactory.addBeanPostProcessor(new ApplicationListenerDetector(applicationContext));
}
对于 BeanPostProcessor 的处理是只需要注册不需要激活调用的,所以不用考虑什么配置文件硬编码,只需要一股脑注册进行即可,但是 this.beanPostProcessors 是一个 ArrayList,所以要保证调用时有序,注册时就应该有序。这一点与 BeanFactoryPostProcessor 一致,继承 PriorityOrdered 和 Ordered 即可。
光看这一段代码,会认为 internalPostProcessors 中似乎被重复注册了,但是 addBeanPostProcessor 的实现方式保证了注册的唯一性,先尝试 remove 再 add。
/**
 * 注册BeanPostProcessor
 * @param beanPostProcessor the post-processor to register
 */
@Override
public void addBeanPostProcessor(BeanPostProcessor beanPostProcessor) {
   ·······
   this.beanPostProcessors.remove(beanPostProcessor);
   this.beanPostProcessors.add(beanPostProcessor);
   ·······
}
在最后,还添加了 ApplicationListenerDetector 后处理器,用来将实现了 ApplicationListener 接口的 Bean 添加到容器的监听器列表。
初始化消息资源
该函数主要是为Spring的国际化进行服务。
// 为上下文初始化Message消息资源,即不同语言的消息体,国际化处理
initMessageSource();
我们先来回顾Spring国际化的使用方法。 假设我们正在开发一个支持多国语言的web应用程序,要求系统能够根据客户端的系统的语言类型返回对应的界面:英文的操作系统返回英文界面,而中文的操作系统则返回中文界面——这便是典型的i18n国际化问题。对于有国际化要求的应用系统,我们不能简单地采用硬编码的方式编写用户界面信息、报错信息等内容,而必须为这些需要国际化的信息进行特殊处理。简单来说,就是为每种语言提供一套相应的资源文件,并以规范化命名的方式保存在特定的目录中,由系统自动根据客户端语言选择适合的资源文件。
“国际化信息”也称为“本地化信息”,一般需要两个条件才可以确定一个特定类型的本地化信息,它们分别是“语言类型”和“国家地区的类型”。如中文本地化信息既有中国大陆地区的中文,又有中国台湾地区、中国香港地区的中文,还有新加坡地区的中文。Java通过 java.util.Locale 类表示一个本地化对象,它允许通过语言参数和国家/地区参数创建一个确定的本地化对象。
java.util.Locale 是表示语言和国家/地区信息的本地化类,它是创建国际化应用的基础,接下来我们就给出几个创建本地化对象的实例,如下代码:
// 1 带有语言和国家/地区信息的本地化对象
Locale locale1 = new Locale("zh","CN");
// 2 只有语言信息的本地化对象
Locale locale2 = new Locale("zh");
// 等同于1,Locale("zh","CN")
Locale locale3 = Locale.CHINA;
// 等同于2,Locale("zh")
Locale locale4 = Locale.CHINESE;
// 获取系统默认的本地化对象
Locale locale5 = Locale.getDefault();
JDK的 java.util 包中提供了几个支持本地化的格式化操作工具类:NumberFormat、DateFormat、MessageFormat,而在Spring中的国际化资源操作也无非是对于这几个类的封装操作,我们就以 MessageFormat 的用法来简单的回顾下,如下代码:
public class LocaleTest {

   @Test
   public void testLocale() {
      // 信息格式化串
      String pattern1 = "{0}, 你好!你于 {1} 在工商银行存入 {2} 元。";
      String pattern2 = "At {1, time, short} On {1, date, long}, {0} paid {2, number, currency}.";

      // 用于动态替换占位符的参数
      Object[] params = {"WGP", new GregorianCalendar().getTime(), 1.0E3};

      // 使用默认本地化对象格式化信息
      String msg1 = MessageFormat.format(pattern1, params);

      // 使用指定的本地化对象格式化信息
      MessageFormat mf = new MessageFormat(pattern2, Locale.US);
      String msg2 = mf.format(params);

      System.out.println(msg1);
      System.out.println(msg2);
   }
}
Spring定义了访问国际化信息的 MessageSource 接口,并提供了几个易用的实现类。MessageSource 分别被 HierarchicalMessageSource 和 ApplicationContext 接口扩展,这里我们主要看下 HierarchicalMessageSource 接口的几个实现类,如下图所示:
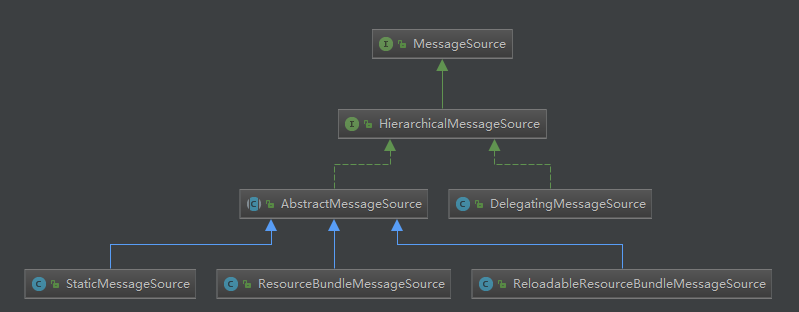
HierarchicalMessageSource 接口最重要的两个实现类是 ResourceBundleMessageSource 和 ReloadableResourceBundleMessageSource。它是基于 Java 的 ResourceBundle 基础类实现的,允许通过资源名加载国际化资源。ReloadableResourceBundleMessageSource 提供了定时刷新功能,允许在不重启系统的情况下更新资源信息。StaticMessageSource 主要用于程序测试,他允许通过编程的方式提供国际化信息,而 DelegatingMessageSource 是为方便操作父 MessageSource 而提供的代理类。
举例 ResourceBundleMessageSource 的实现方式。先定义资源文件:
- messages.properties:test=test
- message_zh_CN.properties:test=测试
- messages_en_US.properties:test=test
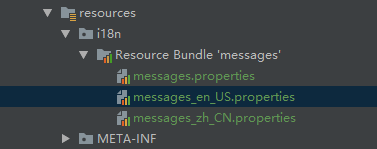
定义配置文件,bean 的 id 必须为 messageSource。
<?xml version='1.0' encoding='UTF-8' ?>
<beans xmlns="http://www.springframework.org/schema/beans"
      xmlns:xsi="http://www.w3.org/2001/XMLSchema-instance"
      xsi:schemaLocation="http://www.springframework.org/schema/beans    http://www.springframework.org/schema/beans/spring-beans.xsd">

   <bean id="messageSource" class="org.springframework.context.support.ResourceBundleMessageSource">
      <property name="basenames">
         <list>
            <!--资源文件地址-->
            <value>i18n.messages</value>
         </list>
      </property>
   </bean>
</beans>
测试类:
public class MessageSourceTest {

   @Test
   public void testMessageSource() {
      ApplicationContext context = new ClassPathXmlApplicationContext("messageSource-Test.xml");
      Object[] params = {"Wgp", new GregorianCalendar().getTime()};

      String str1 = context.getMessage("test", params, Locale.US);
      String str2 = context.getMessage("test", params, Locale.CHINA);

      System.out.println(str1);
      System.out.println(str2);
   }
}
测试结果:
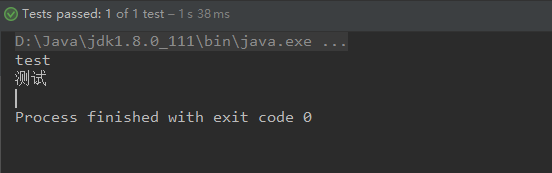
了解了Spring国际化的使用便可以进入源码分析了。我们查看 initMessageSource() 方法:
/**
 * 初始化消息资源,关于Spring的国际化
 * Initialize the MessageSource.
 * Use parent's if none defined in this context.
 */
protected void initMessageSource() {
   ConfigurableListableBeanFactory beanFactory = getBeanFactory();
   // 如果配置文件中定义了messageSource这个bean,那么将其提取并记录在ApplicationContext(this.messageSource)中
   if (beanFactory.containsLocalBean(MESSAGE_SOURCE_BEAN_NAME)) {
      // 获取名为messageSource这个bean
      this.messageSource = beanFactory.getBean(MESSAGE_SOURCE_BEAN_NAME, MessageSource.class);
      // Make MessageSource aware of parent MessageSource.
      if (this.parent != null && this.messageSource instanceof HierarchicalMessageSource) {
         HierarchicalMessageSource hms = (HierarchicalMessageSource) this.messageSource;
         if (hms.getParentMessageSource() == null) {
            // Only set parent context as parent MessageSource if no parent MessageSource
            // registered already.
            hms.setParentMessageSource(getInternalParentMessageSource());
         }
      }
      if (logger.isTraceEnabled()) {
         logger.trace("Using MessageSource [" + this.messageSource + "]");
      }
   }
   // 如果没有定义,Spring提供了默认的配置DelegatingMessageSource以便于作为 调用getMessage方法 的返回
   else {
      // Use empty MessageSource to be able to accept getMessage calls.
      DelegatingMessageSource dms = new DelegatingMessageSource();
      dms.setParentMessageSource(getInternalParentMessageSource());
      this.messageSource = dms;
      beanFactory.registerSingleton(MESSAGE_SOURCE_BEAN_NAME, this.messageSource);
      if (logger.isTraceEnabled()) {
         logger.trace("Unable to locate MessageSource with name '" + MESSAGE_SOURCE_BEAN_NAME +
               "': using default [" + this.messageSource + "]");
      }
   }
}
方法的主要功能就是提取 messageSource 这个 bean,并将其记录在Spring的容器中,也就是 AbstractApplicationContext 中。当然,如果用户未设置资源文件的话,Spring中也提供了默认的配置 DelegatingMessageSource。继续分析方法代码,其中获取自定义资源文件的方式为: beanFactory.getBean(MESSAGE_SOURCE_BEAN_NAME, MessageSource.class),这里使用了硬编码的方式硬性规定了 beanName 必须为 messageSource,否则便会获取不到自定义资源配置,这也是为什么之前提到了 Bean 的 id 必须定义为 messageSource。
通过读取并将自定义资源文件配置记录在容器中,那么就可以在获取资源文件的时候直接使用了,例如,在 AbstractApplicationContext 中的获取资源文件属性的方法:
//---------------------------------------------------------------------
// Implementation of MessageSource interface
//---------------------------------------------------------------------

@Override
public String getMessage(String code, @Nullable Object[] args, @Nullable String defaultMessage, Locale locale) {
   return getMessageSource().getMessage(code, args, defaultMessage, locale);
}

@Override
public String getMessage(String code, @Nullable Object[] args, Locale locale) throws NoSuchMessageException {
   return getMessageSource().getMessage(code, args, locale);
}

@Override
public String getMessage(MessageSourceResolvable resolvable, Locale locale) throws NoSuchMessageException {
   return getMessageSource().getMessage(resolvable, locale);
}

/**
 * Return the internal MessageSource used by the context.
 * @return the internal MessageSource (never {@code null})
 * @throws IllegalStateException if the context has not been initialized yet
 */
private MessageSource getMessageSource() throws IllegalStateException {
   if (this.messageSource == null) {
      throw new IllegalStateException("MessageSource not initialized - " +
            "call 'refresh' before accessing messages via the context: " + this);
   }
   return this.messageSource;
}
其中的 getMessage(code, args, locale) 就是获取之前定义的资源文件 this.messageSource。
初始化ApplicationEventMulticaster
这部分主要与Spring的事件监听传播有关,先来看一下Spring的事件监听的简单用法。
首先,先自定义一个监听事件,实现 ApplicationEvent:
public class TestEvent extends ApplicationEvent {

   public String msg;

   /**
    * Create a new ApplicationEvent.
    *
    * @param source the object on which the event initially occurred (never {@code null})
    */
   public TestEvent(Object source) {
      super(source);
   }

   public TestEvent(Object source, String msg) {
      super(source);
      this.msg = msg;
   }

   public void print() {
      System.out.println(msg);
   }
}
其次,定义一个监听器:
public class TestListener implements ApplicationListener {
   @Override
   public void onApplicationEvent(ApplicationEvent event) {
      if (event instanceof TestEvent) {
         ((TestEvent) event).print();
      }
   }
}
添加配置文件:
<?xml version='1.0' encoding='UTF-8' ?>
<beans xmlns="http://www.springframework.org/schema/beans"
      xmlns:xsi="http://www.w3.org/2001/XMLSchema-instance"
      xsi:schemaLocation="http://www.springframework.org/schema/beans    http://www.springframework.org/schema/beans/spring-beans.xsd">

   <bean id="testListener" class="guo.ping.ioc.eventlistener.TestListener" />
</beans>
测试文件:
public class EventListenerTest {

   @Test
   public void testEventListener() {
      ApplicationContext context = new ClassPathXmlApplicationContext("eventListener-Test.xml");
      TestEvent event = new TestEvent("hello", "msg");
      context.publishEvent(event);
   }
}
测试结果:
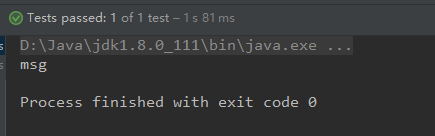
当程序运行时,Spring会将发出的 TestEvent 事件转给我们自定义的 TestListener 监听器进行进一步处理,这是典型的观察者模式,可以在比较关心的事件结束后及时处理。
来看看 ApplicationEventMulticaster 如何被初始化的。
/**
 * 初始化应用消息广播器,并放入"applicationEventMulticaster"bean中,与Spring的事件监听有关
 * Initialize the ApplicationEventMulticaster.
 * Uses SimpleApplicationEventMulticaster if none defined in the context.
 * @see org.springframework.context.event.SimpleApplicationEventMulticaster
 */
protected void initApplicationEventMulticaster() {
   ConfigurableListableBeanFactory beanFactory = getBeanFactory();
   if (beanFactory.containsLocalBean(APPLICATION_EVENT_MULTICASTER_BEAN_NAME)) {
      this.applicationEventMulticaster =
            beanFactory.getBean(APPLICATION_EVENT_MULTICASTER_BEAN_NAME, ApplicationEventMulticaster.class);
      if (logger.isTraceEnabled()) {
         logger.trace("Using ApplicationEventMulticaster [" + this.applicationEventMulticaster + "]");
      }
   }
   else {
      this.applicationEventMulticaster = new SimpleApplicationEventMulticaster(beanFactory);
      beanFactory.registerSingleton(APPLICATION_EVENT_MULTICASTER_BEAN_NAME, this.applicationEventMulticaster);
      if (logger.isTraceEnabled()) {
         logger.trace("Unable to locate ApplicationEventMulticaster with name '" +
               APPLICATION_EVENT_MULTICASTER_BEAN_NAME +
               "': using default [" + this.applicationEventMulticaster + "]");
      }
   }
}
initApplicationEventMulticaster 的逻辑很简单,就是查看配置文件是否含有 applicationEventMulticaster 名称的 bean,如果有则使用用户自定义的事件广播器;如果没有,使用默认的 SimpleApplicationEventMulticaster 事件广播器。按照之前的示例,我们可以猜测,广播器适用于存放监听器,并在合适的时候(事件发生的时候)调用监听器。我们不妨研究一下默认的广播器 SimpleApplicationEventMulticaster:
public class SimpleApplicationEventMulticaster extends AbstractApplicationEventMulticaster {

   @Nullable
   private Executor taskExecutor;
   @Nullable
   private ErrorHandler errorHandler;

   /**
    * Create a new SimpleApplicationEventMulticaster.
    */
   public SimpleApplicationEventMulticaster() {
   }
   /**
    * Create a new SimpleApplicationEventMulticaster for the given BeanFactory.
    */
   public SimpleApplicationEventMulticaster(BeanFactory beanFactory) {
      setBeanFactory(beanFactory);
   }

   ········

   @Override
   public void multicastEvent(ApplicationEvent event) {
      multicastEvent(event, resolveDefaultEventType(event));
   }

   /**
    * 当Spring产生事件时,会默认使用该方法来广播事件,调用监听器的onApplicationEvent方法
    * @param event the event to multicast
    * @param eventType the type of event (can be null)
    */
   @Override
   public void multicastEvent(final ApplicationEvent event, @Nullable ResolvableType eventType) {
      ResolvableType type = (eventType != null ? eventType : resolveDefaultEventType(event));
      for (final ApplicationListener<?> listener : getApplicationListeners(event, type)) {
         Executor executor = getTaskExecutor();
         if (executor != null) {
            executor.execute(() -> invokeListener(listener, event));
         }
         else {
            invokeListener(listener, event);
         }
      }
   }

   private ResolvableType resolveDefaultEventType(ApplicationEvent event) {
      return ResolvableType.forInstance(event);
   }

   /**
    * Invoke the given listener with the given event.
    * @param listener the ApplicationListener to invoke
    * @param event the current event to propagate
    * @since 4.1
    */
   protected void invokeListener(ApplicationListener<?> listener, ApplicationEvent event) {
      ErrorHandler errorHandler = getErrorHandler();
      if (errorHandler != null) {
         try {
            doInvokeListener(listener, event);
         }
         catch (Throwable err) {
            errorHandler.handleError(err);
         }
      }
      else {
         doInvokeListener(listener, event);
      }
   }

   @SuppressWarnings({"unchecked", "rawtypes"})
   private void doInvokeListener(ApplicationListener listener, ApplicationEvent event) {
      try {
         listener.onApplicationEvent(event);
      }
      catch (ClassCastException ex) {
         String msg = ex.getMessage();
         if (msg == null || matchesClassCastMessage(msg, event.getClass().getName())) {
            // Possibly a lambda-defined listener which we could not resolve the generic event type for
            // -> let's suppress the exception and just log a debug message.
            Log logger = LogFactory.getLog(getClass());
            if (logger.isDebugEnabled()) {
               logger.debug("Non-matching event type for listener: " + listener, ex);
            }
         }
         else {
            throw ex;
         }
      }
   }

   private boolean matchesClassCastMessage(String classCastMessage, String eventClassName) {
      // On Java 8, the message simply starts with the class name: "java.lang.String cannot be cast..."
      if (classCastMessage.startsWith(eventClassName)) {
         return true;
      }
      // On Java 9, the message contains the module name: "java.base/java.lang.String cannot be cast..."
      int moduleSeparatorIndex = classCastMessage.indexOf('/');
      if (moduleSeparatorIndex != -1 && classCastMessage.startsWith(eventClassName, moduleSeparatorIndex + 1)) {
         return true;
      }
      // Assuming an unrelated class cast failure...
      return false;
   }
}
仔细分析代码,可以推断出当Spring产生事件时,会默认使用 multicastEvent() 来广播事件,调用所有监听器的 onApplicationEvent 方法进行监听器的处理。而对于每个监听器而言,处理与否则完全由自己决定。
注意,我们这一步只是初始化广播器,还没有开始广播,因为毕竟连监听器都没有注册。
注册监听器
上面已经说到了广播器,研究 multicastEvent() 代码时可以看到,广播器通知了所有从 getApplicationListeners(event, type) 获得到的监听器并进行通知,那么所有的监听器是什么时候注册的呢?我们先来看看 getApplicationListeners(event, type) 方法:
/**
 * 获得与对应事件类型匹配的监听器
 * Return a Collection of ApplicationListeners matching the given
 * event type. Non-matching listeners get excluded early.
 * @param event the event to be propagated. Allows for excluding
 * non-matching listeners early, based on cached matching information.
 * @param eventType the event type
 * @return a Collection of ApplicationListeners
 * @see org.springframework.context.ApplicationListener
 */
protected Collection<ApplicationListener<?>> getApplicationListeners(
      ApplicationEvent event, ResolvableType eventType) {

   Object source = event.getSource();
   Class<?> sourceType = (source != null ? source.getClass() : null);
   ListenerCacheKey cacheKey = new ListenerCacheKey(eventType, sourceType);

   // Quick check for existing entry on ConcurrentHashMap...
   ListenerRetriever retriever = this.retrieverCache.get(cacheKey);
   if (retriever != null) {
      return retriever.getApplicationListeners();
   }

   if (this.beanClassLoader == null ||
         (ClassUtils.isCacheSafe(event.getClass(), this.beanClassLoader) &&
               (sourceType == null || ClassUtils.isCacheSafe(sourceType, this.beanClassLoader)))) {
      // Fully synchronized building and caching of a ListenerRetriever
      synchronized (this.retrievalMutex) {
         retriever = this.retrieverCache.get(cacheKey);
         if (retriever != null) {
            return retriever.getApplicationListeners();
         }
         retriever = new ListenerRetriever(true);
         Collection<ApplicationListener<?>> listeners =
               retrieveApplicationListeners(eventType, sourceType, retriever);
         this.retrieverCache.put(cacheKey, retriever);
         return listeners;
      }
   }
   else {
      // No ListenerRetriever caching -> no synchronization necessary
      return retrieveApplicationListeners(eventType, sourceType, null);
   }
}
可以看到,监听器全部保存在 ListenerRetriever 的 applicationListeners 属性中,获取也是从中获取,那么有理由推测,注册时保存也是保存在此处。我们具体查看:
/**
 * 在所有注册的bean中查找Listener bean,注册到消息广播器中
 * Add beans that implement ApplicationListener as listeners.
 * Doesn't affect other listeners, which can be added without being beans.
 */
protected void registerListeners() {
   // Register statically specified listeners first.
   // 硬编码方式注册的监听器处理
   for (ApplicationListener<?> listener : getApplicationListeners()) {
      getApplicationEventMulticaster().addApplicationListener(listener);
   }

   // Do not initialize FactoryBeans here: We need to leave all regular beans
   // uninitialized to let post-processors apply to them!
   // 配置文件注册的监听器处理
   String[] listenerBeanNames = getBeanNamesForType(ApplicationListener.class, true, false);
   for (String listenerBeanName : listenerBeanNames) {
      getApplicationEventMulticaster().addApplicationListenerBean(listenerBeanName);
   }

   // Publish early application events now that we finally have a multicaster...
   // 广播已有的事件this.earlyApplicationEvents
   Set<ApplicationEvent> earlyEventsToProcess = this.earlyApplicationEvents;
   this.earlyApplicationEvents = null;
   if (earlyEventsToProcess != null) {
      for (ApplicationEvent earlyEvent : earlyEventsToProcess) {
         // 调用广播器的multicastEvent方法
         getApplicationEventMulticaster().multicastEvent(earlyEvent);
      }
   }
}
注册时调用的是广播器的 addApplicationListener(listener) 方法:
@Override
public void addApplicationListenerBean(String listenerBeanName) {
   synchronized (this.retrievalMutex) {
      this.defaultRetriever.applicationListenerBeans.add(listenerBeanName);
      this.retrieverCache.clear();
   }
}
完全验证了我们的猜测!当注册完所有的监听器后便能够广播事件了,这里广播了已有的事件都保存在 this.earlyApplicationEvents,this.earlyApplicationEvents 是在环境准备的最后进行初始化的 HashSet。
VIII. 初始化非延迟加载单例
finishBeanFactoryInitialization(beanFactory) 这一步就完成了关于 beanFactory 的所有工作,包括 ConversionService 的设置、配置冻结以及加载所有的非延迟加载单例 bean。
/**
 * 完成beanFactory的初始化工作,其中包括ConversionService的设置、配置冻结以及非延迟加载的bean的初始化工作
 * Finish the initialization of this context's bean factory,
 * initializing all remaining singleton beans.
 */
protected void finishBeanFactoryInitialization(ConfigurableListableBeanFactory beanFactory) {
   // Initialize conversion service for this context.
   // 为context初始化 转换服务conversionService
   if (beanFactory.containsBean(CONVERSION_SERVICE_BEAN_NAME) &&
         beanFactory.isTypeMatch(CONVERSION_SERVICE_BEAN_NAME, ConversionService.class)) {
      beanFactory.setConversionService(
            beanFactory.getBean(CONVERSION_SERVICE_BEAN_NAME, ConversionService.class));
   }

   // Register a default embedded value resolver if no bean post-processor
   // (such as a PropertyPlaceholderConfigurer bean) registered any before:
   // at this point, primarily for resolution in annotation attribute values.
   if (!beanFactory.hasEmbeddedValueResolver()) {
      beanFactory.addEmbeddedValueResolver(strVal -> getEnvironment().resolvePlaceholders(strVal));
   }

   // Initialize LoadTimeWeaverAware beans early to allow for registering their transformers early.
   String[] weaverAwareNames = beanFactory.getBeanNamesForType(LoadTimeWeaverAware.class, false, false);
   for (String weaverAwareName : weaverAwareNames) {
      getBean(weaverAwareName);
   }

   // Stop using the temporary ClassLoader for type matching.
   beanFactory.setTempClassLoader(null);

   // Allow for caching all bean definition metadata, not expecting further changes.
   // 冻结所有的bean定义,说明注册的bean定义将不被修改或任何进一步的处理
   beanFactory.freezeConfiguration();

   // Instantiate all remaining (non-lazy-init) singletons.
   // 初始化剩下的单实例(非惰性的)
   beanFactory.preInstantiateSingletons();
}
代码逻辑还是较为清楚的,下面着重就三个主要流程进行研究。
ConversionService的设置
之前我们在提及自定义属性编辑器时,讲到一种方式将 String 转换为 Date 类型就是属性编辑器,那么另一种方式就是使用Converter。同样,举个例子演示一下。
首先,先定义转换器实现 Converter 接口:
public class MyConverter implements Converter<String, Date> {

   @Override
   public Date convert(String source) {
      Date date = null;
      try {
         SimpleDateFormat simpleDateFormat = new SimpleDateFormat("yyyy-MM-dd");
         date = simpleDateFormat.parse(source);
      } catch (ParseException e) {
         e.printStackTrace();
      }
      return date;
   }
}
注册配置:
<?xml version='1.0' encoding='UTF-8' ?>
<beans xmlns="http://www.springframework.org/schema/beans"
      xmlns:xsi="http://www.w3.org/2001/XMLSchema-instance"
      xsi:schemaLocation="http://www.springframework.org/schema/beans    http://www.springframework.org/schema/beans/spring-beans.xsd">

   <bean id="conversionService" class="org.springframework.context.support.ConversionServiceFactoryBean">
      <property name="converters">
         <list>
            <bean class="guo.ping.ioc.converter.MyConverter" />
         </list>
      </property>
   </bean>

   <bean id="user" class="guo.ping.ioc.propertieseditor.User">
      <property name="userName" value="wgp" />
      <property name="date" value="2018-10-01" />
   </bean>

</beans>
测试:
public class ConverterTest {

   @Test
   public void testConverter() {
      ApplicationContext context = new ClassPathXmlApplicationContext("converter-Test.xml");
      User user = (User) context.getBean("user");
      System.out.println(user);
   }
}
测试结果:
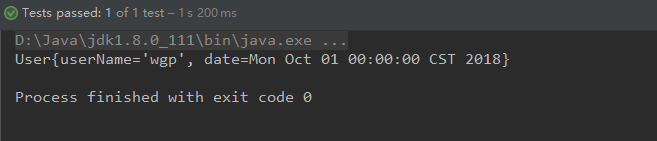
通过以上功能可以看到 Converter 以及 ConversionService 提供的便利功能,其中XML中关于 conversionService 就是在这一步骤中被初始化的。
通过配置文件创建的 conversionService 名称的 bean 中含有 Converters 类型的成员变量, Converters 中包含了一个 HashMap,专门用于放置默认与自定义的 Converter。

冻结配置
冻结所有 bean 的定义,说明注册的 bean 定义将不被修改或进行任何进一步的处理。
@Override
public void freezeConfiguration() {
   this.configurationFrozen = true;
   this.frozenBeanDefinitionNames = StringUtils.toStringArray(this.beanDefinitionNames);
}
上面两个都用了 volatile 关键字进行修饰,支持并发。
初始化非延迟加载bean
ApplicationContext 实现的默认行为就是在启动时将所有的单例非惰性的 bean 提前进行实例化放入容器中。ApplicationContext 会提前创建所有单例 bean,这样在配置文件中有任何错误就会立刻被发现,而这个实例化过程就是在 finishBeanFactoryInitialization 中的 beanFactory.preInstantiateSingletons() 完成的。
/**
 * ApplicationContext实现的默认行为一启动就将所有的单例bean提前进行实例化
 * @throws BeansException
 */
@Override
public void preInstantiateSingletons() throws BeansException {
   if (logger.isDebugEnabled()) {
      logger.debug("Pre-instantiating singletons in " + this);
   }

   // Iterate over a copy to allow for init methods which in turn register new bean definitions.
   // While this may not be part of the regular factory bootstrap, it does otherwise work fine.
   List<String> beanNames = new ArrayList<>(this.beanDefinitionNames);

   // Trigger initialization of all non-lazy singleton beans...
   for (String beanName : beanNames) {
      RootBeanDefinition bd = getMergedLocalBeanDefinition(beanName);
      // bean非抽象且单例非惰性的全部预先加载
      if (!bd.isAbstract() && bd.isSingleton() && !bd.isLazyInit()) {
         if (isFactoryBean(beanName)) {
            Object bean = getBean(FACTORY_BEAN_PREFIX + beanName);
            if (bean instanceof FactoryBean) {
               final FactoryBean<?> factory = (FactoryBean<?>) bean;
               boolean isEagerInit;
               if (System.getSecurityManager() != null && factory instanceof SmartFactoryBean) {
                  isEagerInit = AccessController.doPrivileged((PrivilegedAction<Boolean>)
                              ((SmartFactoryBean<?>) factory)::isEagerInit,
                        getAccessControlContext());
               }
               else {
                  isEagerInit = (factory instanceof SmartFactoryBean &&
                        ((SmartFactoryBean<?>) factory).isEagerInit());
               }
               if (isEagerInit) {
                  getBean(beanName);
               }
            }
         }
         else {
            getBean(beanName);
         }
      }
   }

   // Trigger post-initialization callback for all applicable beans...
   for (String beanName : beanNames) {
      Object singletonInstance = getSingleton(beanName);
      if (singletonInstance instanceof SmartInitializingSingleton) {
         final SmartInitializingSingleton smartSingleton = (SmartInitializingSingleton) singletonInstance;
         if (System.getSecurityManager() != null) {
            AccessController.doPrivileged((PrivilegedAction<Object>) () -> {
               smartSingleton.afterSingletonsInstantiated();
               return null;
            }, getAccessControlContext());
         }
         else {
            smartSingleton.afterSingletonsInstantiated();
         }
      }
   }
}
这里要额外提及的是,this.beanDefinitionNames 是一个 ArrayList,意为这有序。而 this.beanDefinitionNames 的添加过程是按照XML配置文件的顺序读取添加的,所以配置顺序决定了 ApplicationContext 加载顺序。这其实和构造、Setter混合循环依赖那里的配置顺序也就有讲究了。
IX. finishRefresh
在Spring中还提供了 LifeCycle 接口,LifeCycle 接口中包含了 start/stop 方法,实现此接口后Spring会保证在启动的时候调用其 start 方法开始其生命周期,并在Spring关闭的时候调用 stop 方法来结束生命周期。
public interface Lifecycle {
   /**
    * Start this component.
    * <p>Should not throw an exception if the component is already running.
    * <p>In the case of a container, this will propagate the start signal to all
    * components that apply.
    * @see SmartLifecycle#isAutoStartup()
    */
   void start();

   /**
    * Stop this component, typically in a synchronous fashion, such that the component is
    * fully stopped upon return of this method. Consider implementing {@link SmartLifecycle}
    * and its {@code stop(Runnable)} variant when asynchronous stop behavior is necessary.
    * <p>Note that this stop notification is not guaranteed to come before destruction: On
    * regular shutdown, {@code Lifecycle} beans will first receive a stop notification before
    * the general destruction callbacks are being propagated; however, on hot refresh during a
    * context's lifetime or on aborted refresh attempts, only destroy methods will be called.
    * <p>Should not throw an exception if the component isn't started yet.
    * <p>In the case of a container, this will propagate the stop signal to all components
    * that apply.
    * @see SmartLifecycle#stop(Runnable)
    * @see org.springframework.beans.factory.DisposableBean#destroy()
    */
   void stop();

   /**
    * Check whether this component is currently running.
    * <p>In the case of a container, this will return {@code true} only if <i>all</i>
    * components that apply are currently running.
    * @return whether the component is currently running
    */
   boolean isRunning();

}
通常用于配置一些后台程序,再启动后一直运行,如对MQ进行轮询等。而 ApplicationContext 的初始化最后一步就是保证了这一功能的实现。
/**
 * 完成刷新过程,通知生命周期处理器 lifecycleProcessor 刷新过程,同时发出 ContextRefreshEvent 通知别人
 * Finish the refresh of this context, invoking the LifecycleProcessor's
 * onRefresh() method and publishing the
 * {@link org.springframework.context.event.ContextRefreshedEvent}.
 */
protected void finishRefresh() {
   // Clear context-level resource caches (such as ASM metadata from scanning).
   clearResourceCaches();

   // Initialize lifecycle processor for this context.
   // 当ApplicationContext启动或者停止的时候,它会通过LifecycleProcessor来与所有声明的bean的周期做状态更新,而在使用前先初始化
   initLifecycleProcessor();

   // Propagate refresh to lifecycle processor first.
   // 启动所有实现了Lifecycle接口的bean
   getLifecycleProcessor().onRefresh();

   // Publish the final event.
   // 当完成ApplicationContext初始化时,要通过Spring中的事件发布机制来发出ContextRefreshedEvent事件,让监听器进一步处理
   publishEvent(new ContextRefreshedEvent(this));

   // Participate in LiveBeansView MBean, if active.
   LiveBeansView.registerApplicationContext(this);
}
initLifecycleProcessor
当 ApplicationContext 启动或者停止的时候,它会通过 LifecycleProcessor 来与所有声明的 bean 的周期做状态更新,而在使用前先需要进行初始化。
/**
 * 初始化LifecycleProcessor
 * Initialize the LifecycleProcessor.
 * Uses DefaultLifecycleProcessor if none defined in the context.
 * @see org.springframework.context.support.DefaultLifecycleProcessor
 */
protected void initLifecycleProcessor() {
   ConfigurableListableBeanFactory beanFactory = getBeanFactory();
   if (beanFactory.containsLocalBean(LIFECYCLE_PROCESSOR_BEAN_NAME)) {
      this.lifecycleProcessor =
            beanFactory.getBean(LIFECYCLE_PROCESSOR_BEAN_NAME, LifecycleProcessor.class);
      if (logger.isTraceEnabled()) {
         logger.trace("Using LifecycleProcessor [" + this.lifecycleProcessor + "]");
      }
   }
   else {
      DefaultLifecycleProcessor defaultProcessor = new DefaultLifecycleProcessor();
      defaultProcessor.setBeanFactory(beanFactory);
      this.lifecycleProcessor = defaultProcessor;
      beanFactory.registerSingleton(LIFECYCLE_PROCESSOR_BEAN_NAME, this.lifecycleProcessor);
      if (logger.isTraceEnabled()) {
         logger.trace("Unable to locate LifecycleProcessor with name '" +
               LIFECYCLE_PROCESSOR_BEAN_NAME +
               "': using default [" + this.lifecycleProcessor + "]");
      }
   }
}
逻辑已经很简单了,如果配置了就用配置的,没有配置就创建默认的 DefaultLifecycleProcessor。
onRefresh
启动所有实现 Lifecycle 接口的 bean。我们查看 DefaultLifecycleProcessor 中的 onRefresh() 方法。
@Override
public void onRefresh() {
   startBeans(true);
   this.running = true;
}

private void startBeans(boolean autoStartupOnly) {
    Map<String, Lifecycle> lifecycleBeans = getLifecycleBeans();
    Map<Integer, LifecycleGroup> phases = new HashMap<>();
    lifecycleBeans.forEach((beanName, bean) -> {
        if (!autoStartupOnly || (bean instanceof SmartLifecycle && ((SmartLifecycle) bean).isAutoStartup())) {
            int phase = getPhase(bean);
            LifecycleGroup group = phases.get(phase);
            if (group == null) {
                group = new LifecycleGroup(phase, this.timeoutPerShutdownPhase, lifecycleBeans, autoStartupOnly);
                phases.put(phase, group);
            }
            group.add(beanName, bean);
        }
    });
    if (!phases.isEmpty()) {
        List<Integer> keys = new ArrayList<>(phases.keySet());
        Collections.sort(keys);
        for (Integer key : keys) {
            phases.get(key).start();
        }
    }
}
publishEvent
当完成 ApplicationContext 初始化工作时,要通过Spring中的事件发布机制来发出 ContextRefreshedEvent 事件,好让相关监听器做进一步处理。
@Override
public void publishEvent(ApplicationEvent event) {
   publishEvent(event, null);
}

@Override
public void publishEvent(Object event) {
   publishEvent(event, null);
}


protected void publishEvent(Object event, @Nullable ResolvableType eventType) {
   Assert.notNull(event, "Event must not be null");

   // Decorate event as an ApplicationEvent if necessary
   ApplicationEvent applicationEvent;
   if (event instanceof ApplicationEvent) {
      applicationEvent = (ApplicationEvent) event;
   }
   else {
      applicationEvent = new PayloadApplicationEvent<>(this, event);
      if (eventType == null) {
         eventType = ((PayloadApplicationEvent) applicationEvent).getResolvableType();
      }
   }

   // Multicast right now if possible - or lazily once the multicaster is initialized
   if (this.earlyApplicationEvents != null) {
      this.earlyApplicationEvents.add(applicationEvent);
   }
   else {
      getApplicationEventMulticaster().multicastEvent(applicationEvent, eventType);
   }

   // Publish event via parent context as well...
   if (this.parent != null) {
      if (this.parent instanceof AbstractApplicationContext) {
         ((AbstractApplicationContext) this.parent).publishEvent(event, eventType);
      }
      else {
         this.parent.publishEvent(event);
      }
   }
}
X. 总结
关于Spring的 IOC、DI 已经差不多梳理结束,其中不解之处还是有很多,有机会回顾的时候再进行补充。
Spring源码博大精深,想要成为不搬砖,还是得踏踏实实写代码…