springboot没有自己的文件上传技术,是依赖于springMVC的文件上传技术。本文,我们将介绍下springMVC中文件上传技术,并通过示例展示下该技术在springboot项目中的应用。
上传文件,必须将表单method设置为post,并将enctype设置为 multipart/form-data。只有这样,浏览器才会把用户所选文件的二进制数据发送给服务器。这个知识点以前在servlet3.0文件上传中介绍过一次,不熟悉的大家可以翻过去看看。springMVC在文件上传时,会将上传的文件映射为MultipartFile对象,并对MultipartFile对象进行文件的解析和保存。
先看下MultipartFile接口的几个方法
- byte[ ] getBytes( ):获取文件数据
- String getContentType( ):获取文件MIME类型,如application/pdf、image/pdf等
- InputStream getInputStream( ):获取文件流
- String getOriginalFileName( ):获取上传文件的原名称
- long getSize( ):获取文件的字节大小,单位为byte
- boolean isEmpty( ):是否有上传的文件
- void transferTo(File dest):将上传的文件保存到一个目标文件中。
接下来我们创建一个项目,分别演示下单文件和多文件上传功能。
创建一个maven项目,命令为fileupload。在pom.xml中添加依赖,项目需要用到thymeleaf技术,添加spring-boot-starter-thymeleaf依赖;为了修改后方便测试,项目添加spring-boot-devtools依赖。
	<dependencies>
		<dependency>
			<groupId>org.springframework.boot</groupId>
			<artifactId>spring-boot-starter-web</artifactId>
		</dependency>
		<dependency>
			<groupId>org.springframework.boot</groupId>
			<artifactId>spring-boot-devtools</artifactId>
			<scope>runtime</scope>
		</dependency>
		<dependency>
			<groupId>org.springframework.boot</groupId>
			<artifactId>spring-boot-starter-thymeleaf</artifactId>
		</dependency>
	</dependencies>
前台上传页面index.html,这里我们贴关键代码,文件描述信息和文件上传组件代码
<form class="form-horizontal" action="upload" enctype="multipart/form-data" method="post">
<div class="form-group">
<div class="input-group col-md-4">
<span class="input-group-addon"><i class="glyphicon glyphicon-pencil"></i></span>
<input class="form-control" placeholder="文件描述" type="text" name="description" />
</div>
</div>
<div class="form-group">
<div class="input-group col-md-4">
<span class="input-group-addon"><i class="glyphicon glyphicon-search"></i></span>
<input class="form-control" placeholder="请选择文件" type="file" name="file"/>
</div>
</div>
<div class="form-group">
<div class="col-md-4">
<div class="btn-group btn-group-justified" >
<div class="btn-group" >
<button type="submit" class="btn btn-success" id="submitbtn">
<span class="glyphicon glyphicon-share"></span> 文件上传</button>
</div>
</div>
</div>
</div>
</form>后台文件上传控制器类,FileUploadController.java
package com.example.fileupload.controller;
import java.io.File;
import java.io.IOException;
import javax.servlet.http.HttpServletRequest;
import org.springframework.stereotype.Controller;
import org.springframework.web.bind.annotation.PostMapping;
import org.springframework.web.bind.annotation.RequestMapping;
import org.springframework.web.bind.annotation.RequestParam;
import org.springframework.web.multipart.MultipartFile;
/**
* 文件上传控制类
* @author Administrator
*/
@Controller
public class FileUploadController {
@RequestMapping("/")
public String index(){
return "index";
}
/**
* 文件上传类
* 文件会自动绑定到MultipartFile中
* @param request 获取请求信息
* @param description 文件描述
* @param file 上传的文件
* @return 上传成功或失败结果
* @throws IOException
* @throws IllegalStateException
*/
@PostMapping("/upload")
public String upload(HttpServletRequest request,
@RequestParam("description") String description,
@RequestParam("file") MultipartFile file) throws IllegalStateException, IOException {
// 获取文件描述参数 description,纯粹测试使用
System.out.println("description = " + description);
// 测试MultipartFile接口的各个方法
System.out.println("文件类型ContentType=" + file.getContentType());
System.out.println("文件组件名称Name=" + file.getName());
System.out.println("文件原名称OriginalFileName=" + file.getOriginalFilename());
System.out.println("文件大小Size=" + file.getSize()/1024 + "KB");
// 如果文件不为空,写入上传路径,进行文件上传
if (!file.isEmpty()) {
// 构建上传文件的存放路径
String path = request.getServletContext().getRealPath("/upload/");
System.out.println("path = " + path);
// 获取上传的文件名称,并结合存放路径,构建新的文件名称
String filename = file.getOriginalFilename();
File filepath = new File(path, filename);
// 判断路径是否存在,不存在则新创建一个
if (!filepath.getParentFile().exists()) {
filepath.getParentFile().mkdirs();
}
// 将上传文件保存到目标文件目录
file.transferTo(new File(path + File.separator + filename));
return "success";
} else {
return "error";
}
}
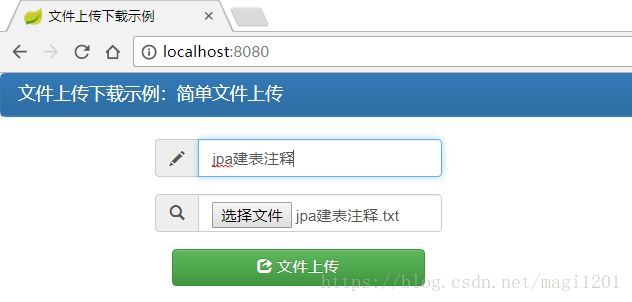
}运行App类的main方法。springboot项目启动后,在浏览器中输入 http://localhost:8080/ 来进行测试

在文件描述中输入描述信息“webservice简介”,点击“选择文件”按钮选择需要上传的文件
页面会跳转到成功页面,查看后台打印信息

可以看到,该文件类型是text/plain 普通文本文件,文件名称是“jpa建表注释”,文件大小是385字节,因为不到1KB,四舍五入后,为0KB。由于springboot自带Tomcat容器,所以,根据打印的上传目的地路径path,打开后,可以找到上传的文件。
我们再上传一个图片,会上传失败,错误信息如下:
org.apache.tomcat.util.http.fileupload.FileUploadBase$FileSizeLimitExceededException: The field file exceeds its maximum permitted size of 1048576 bytes.
这个错误是由于springboot默认的文件大小是1MB造成的,当上传文件超过1MB时就会报错。解决这个报错可以在application.properties中设置上传参数,参数项是默认的,我们设置最大上传文件大小不超过10MB,再次上传会成功。
spring.http.multipart.max-file-size=10MB
spring.http.multipart.max-request-size=10MB
总结下文件上传的要点:
1、表单method设置为post,并将enctype设置为 multipart/form-data
2、文件映射为MultipartFile对象进行解析
3、上传文件大小 spring.http.multipart.max-file-size 限制
附带源码下载:springboot单文件和多文件上传