网上的大多攻略都比较老了,自己记录下来以备后查
先下载一些需要用到的软件安装包或源码(可自行到官网下载最新版)
apache 下载地址http://mirror.bit.edu.cn/apache/httpd/httpd-2.4.29.tar.gz
php下载地址http://cl1.php.net/get/php-7.1.10.tar.gz/from/this/mirror
apr http://mirrors.noc.im/apache//apr/apr-1.5.2.tar.bz2
apr-util http://mirrors.noc.im/apache//apr/apr-util-1.5.4.tar.bz2
pcre http://iweb.dl.sourceforge.net/project/pcre/pcre/8.38/pcre-8.38.zip
安装前先将以前安装的环境卸载干净,这一步很重要
#rpm -qa|grep httpd
将列出的相关包都删除,如下图
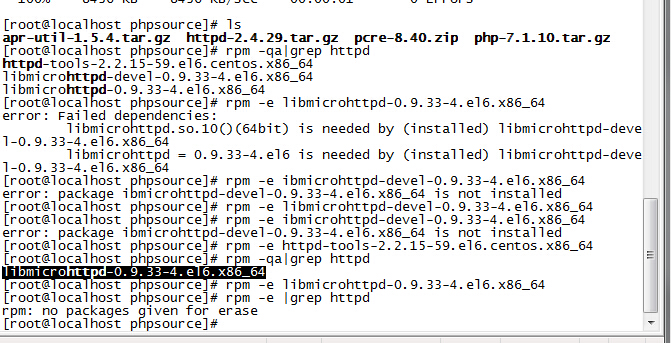
删除与httpd有关的文件

php相关文件也用相同的方法删除

将安装包放到/home/phpsource 目录可以自己随便创建
#cd /home/phpsource
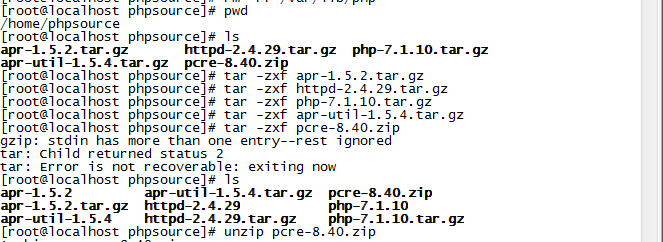
先安装apache
安装apr
#cd apr-1.5.2
#./configure --prefix=/usr/local/apr
#Make && make install
安装apr-util
#cd ../apr-util-1.5.4
#./configure --prefix=/usr/local/apr-util --with-apr=/usr/local/apr
#Make && make install
pcre的安装
#cd ../pcre-8.40
#./configure --prefix=/usr/local/pcre
#make && make install
有时候可能会出错,如configure: error: You need a C++ compiler for C++support,
缺少C++组件 可以通过执行#yum install -y gcc gcc-c++
安装apache
#cd ../httpd-2.4.29指定安装路径,指定3个依赖包安装目录,让apache核心装载DSO,启用重写功能
#./configure --prefix=/usr/local/apache2 --with-apr=/usr/local/apr --with-apr-util=/usr/local/apr-util --with-pcre=/usr/local/pcre --enable-so --enable-rewrite
#make
#make install
将httpd(Apache)设置为启动服务
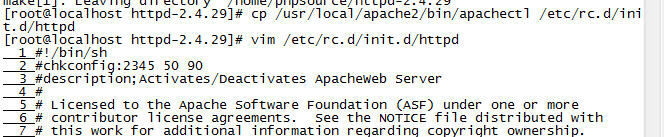
# cp /usr/local/apache2/bin/apachectl /etc/rc.d/init.d/httpd
打开/etc/rc.d/init.d/httpd文件,在# !/bin/sh下面添加
# chkconfig: 2345 50 90
# description: Activates/Deactivates ApacheWeb Server
运行chkconfig把Apache添加到系统的启动服务组里面
# chkconfig --add httpd
# chkconfig httpd on
#mkdir /var/www/html/
修改apache配置
#vim /usr/local/apache2/conf/httpd.conf
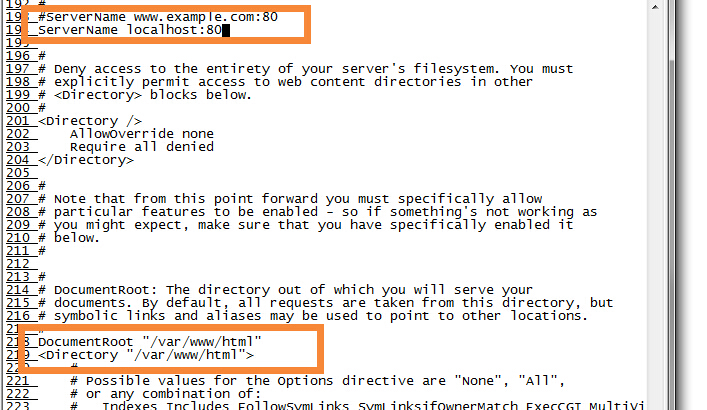
至此apache安装完成
#service httpd start 启动apache
#ps -ef|grep httpd 查看httpd进程
下一步PHP安装
#cd /home/phpsource/php-7.1.10
指定安装目录并开启gd库等扩展
#./configure --prefix=/usr/local/php7 \
--with-apxs2=/usr/local/apache2/bin/apxs \
--with-curl \
--with-freetype-dir \
--with-gd \
--with-gettext \
--with-iconv-dir \
--with-kerberos \
--with-libdir=lib64 \
--with-libxml-dir \
--with-mysqli \
--with-openssl \
--with-pcre-regex \
--with-pdo-mysql \
--with-pdo-sqlite \
--with-pear \
--with-png-dir \
--with-xmlrpc \
--with-xsl \
--with-zlib \
--enable-fpm \
--enable-bcmath \
--enable-libxml \
--enable-inline-optimization \
--enable-gd-native-ttf \
--enable-mbregex \
--enable-mbstring \
--enable-opcache \
--enable-pcntl \
--enable-shmop \
--enable-soap \
--enable-sockets \
--enable-sysvsem \
--enable-xml \
--enable-zip
这一步会遇到一些报错,提示各种依赖缺失,按照提示一个一个用yum安装就行,常见的依赖有以下几种
#yum install libxml2-devel.x86_64
#yum install openssl.x86_64 openssl-devel.x86_64 -y
configure: error: Please reinstall the BZip2 distribution
这是bzip2软件包没有安装,解决办法
#yum install bzip2-devel.x86_64 -y
onfigure: error: Please reinstall the libcurl distribution -
easy.h should be in <curl-dir>/include/curl/
curl和curl库文件没有安装,解决办法
#yum install libcurl.x86_64 libcurl-devel.x86_64 -y
configure: error: jpeglib.h not found
GD库没有安装,解决办法
#yum install libjpeg.x86_64 libpng.x86_64 freetype.x86_64 libjpeg-devel.x86_64 libpng-devel.x86_64 freetype-devel.x86_64 -y
#make
#make install
安装完成后将php.ini-development 复制到/usr/local/php7/lib/php.ini
# cp php.ini-development /usr/local/php7/lib/php.ini
配置apache支持php
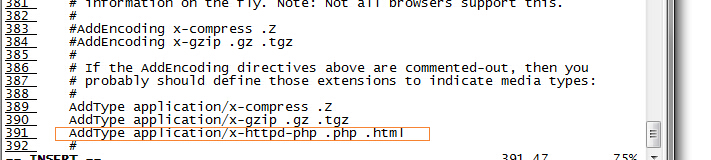
#vim /usr/local/apache2/conf/httpd.conf
添加AddType application/x-httpd-php .php .html,并修改默认起始页面

添加PHP和Apache环境变量
#vim /etc/profile 添加上export PATH=/usr/local/php7/bin:/usr/local/apache2/bin:$PATH
#source /etc/profile修改环境变量后需要运行该指令才会生效
然后执行php -v 和httpd -v 查看安装的版本号

在这里我犯了个错误 DirectoryIndex 后面的index.php和index.html之间是空格,不能加逗号,找了半天才发现原因;index.php和index.html谁放在前面就优先解析谁
安装完成后重启apache
#service httpd restart
在/var/www/html下创建index.php输出phpinfo(),然后访问localhost看看是否能运行php。
至此apache和php基础环境搭建完成。