本系列学习教程来自 创乐博智能学习视频
Arduino 发展
2005年,Massimo Banzi和David Cuartielles、David Mellis设计 Arduino。取该名称的原因是Massimo Banzi喜欢去一家名叫Arduino的酒吧,其名称是1000年前意大利国王Arduino名字命名的。
Arduino 硬件分类
1. Arduino 开发板
开发板由一块AVR单片机、一个晶振和振荡器和一个5V的直流电源。常见的开发板通过一条USB数据线连接计算机。Arduino 有各式各样的开发板,其中最通用的是Arduino UNO。 另外,还有很多小型的、微型的、基于蓝牙和WiFi的变种开发板。
还有一款新增的开发板叫作Arduino Mega2560,提供了更多的I/O引脚和更大的存储空间、启动更迅速。
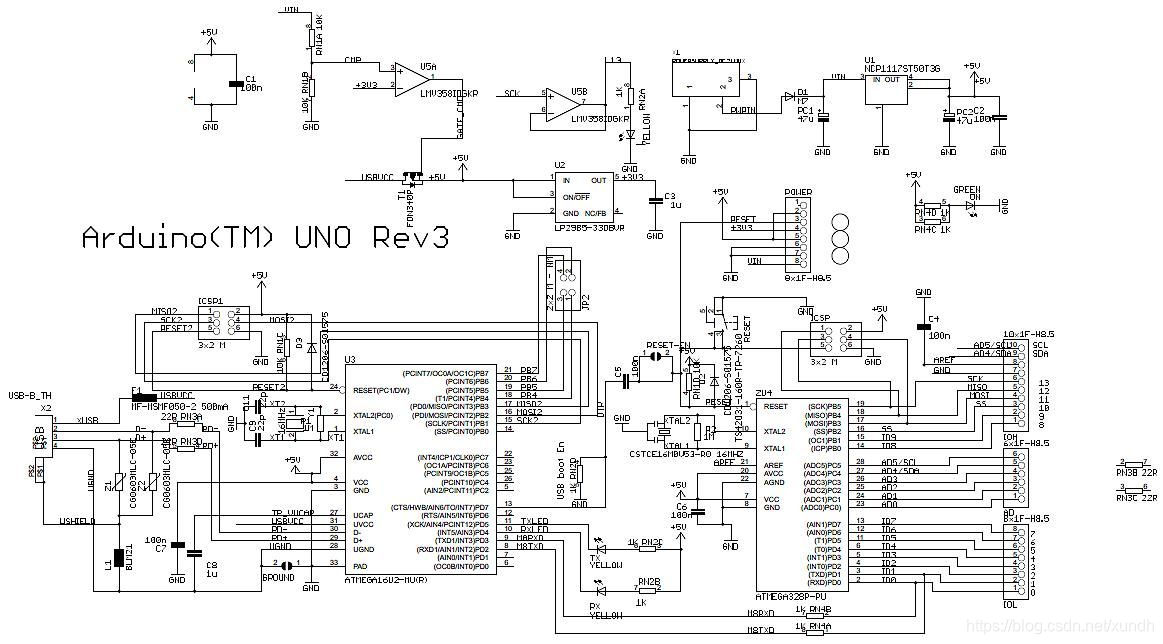
ArduinoUNO的处理器核心是ATmega328,同时具有14路数字输入/输出口(其中6路可作为PWM输出),6路模拟输入,一个16MHz的晶振振荡器,一个USB口、一个电源插座,一个ICSP header和一个复位按钮。
Arduino UNO可以通过三 种方式供电,能自动选择供电方式:外部直流电源通过电源插座供电;电池连接电源连接器的GND和VIN引脚;USB接口供电。电源接口输入的7-12V电源可通过开发板上5V稳压器稳定到5V。
该稳压器是AMST1117,三端5V稳压器。该稳压器输入5V的时候会输出3.3V,输入9V的时候才输出5V。如果使用5V 供电,接外设实验会有些驱动不了。
A0~A5 : 模拟输入的6个接口,可以用来测量连接到引脚上的电压,测量值可以通过串口显示出来。也可以作为数字信号的输入输出。
Arduino 需要串口进行通信,串口工作的时候串口指示灯会闪烁。Arduino通信在编译程序和下载程序时进行,同时还可以与其他设备进行通信。与其它设备通信时需要RX和TX引脚。Atmega328芯片中内置的串口通信硬件是可以通过同步和异步模式工作的。
——摘自《Arduino创客之路》
2. Arduino扩展硬件
3. UNO原理图:
开发环境搭建
-
安装 arduino-1.8.5-windows
-
检查驱动:

-
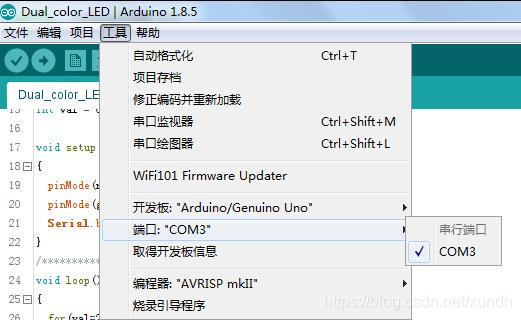
设置arduino-windows端口:
-
上传程序

-
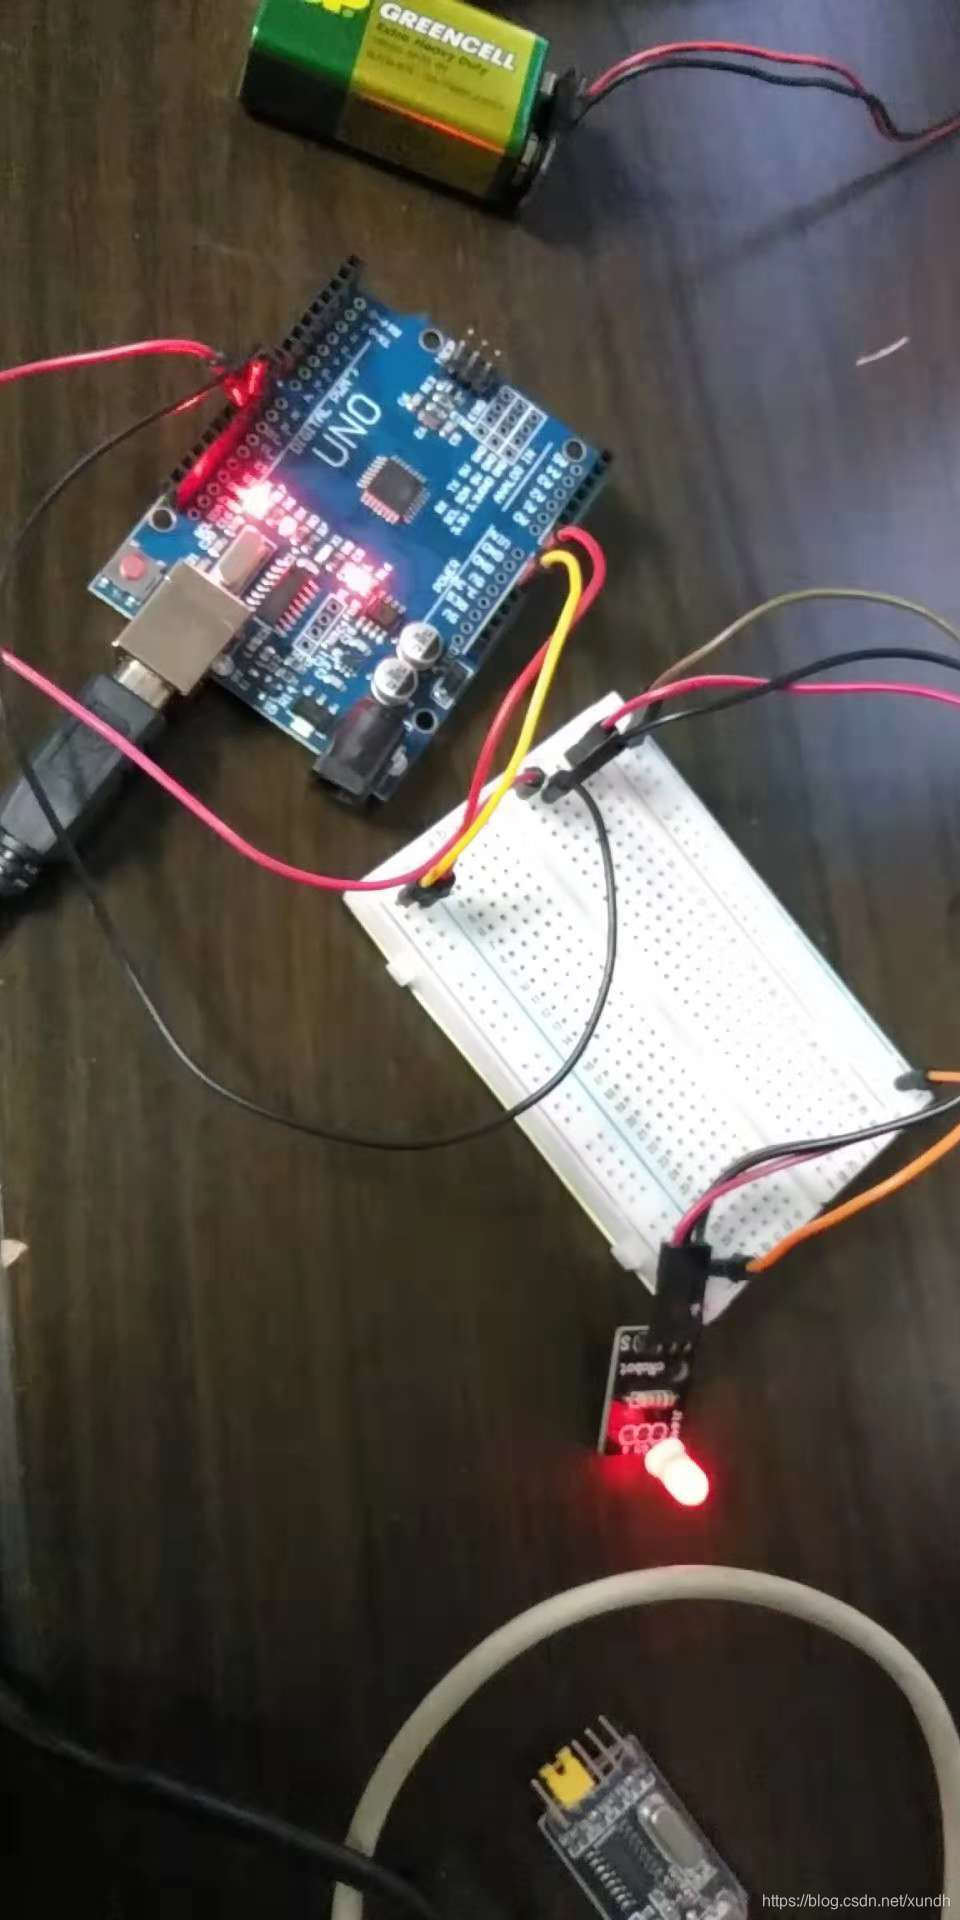
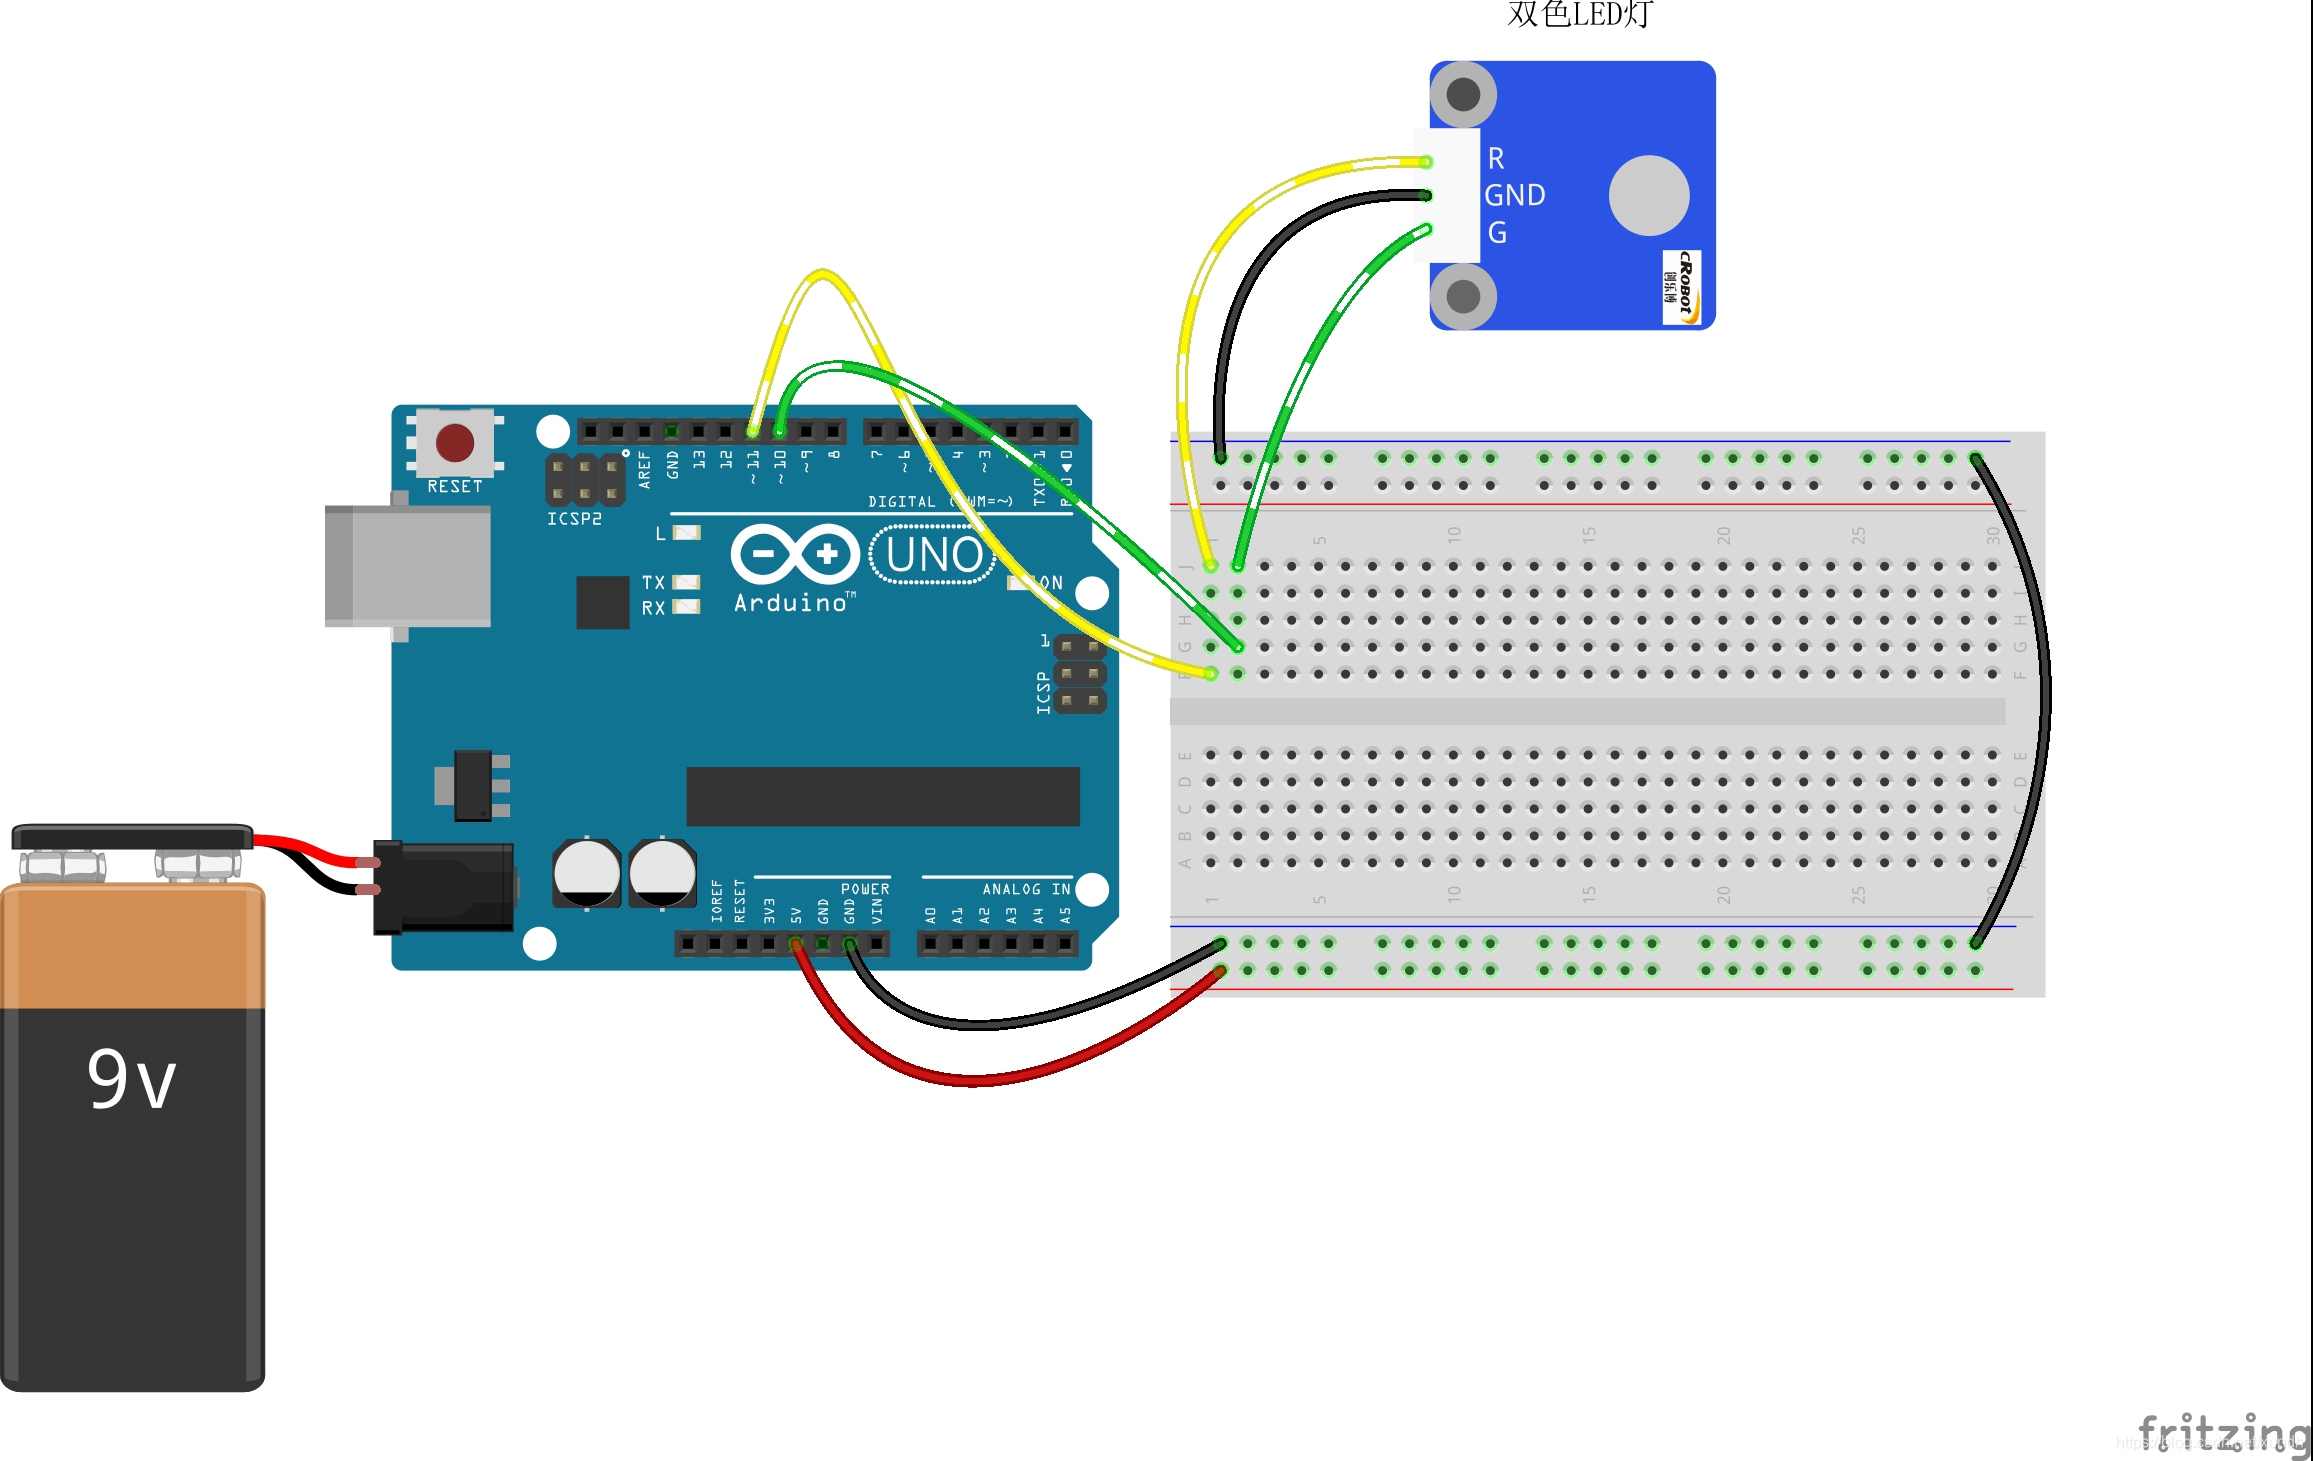
面包板接线
程序代码
/***************************************************
湖南创乐博智能科技有限公司
name:Dual-color LED
function:you can see the dual-color LED changes from red to green alternately,
as well as flashing a mixed color during the alternation.
connection:
Dual-color LED    Arduin Uno R3
R                  11
GND                GND
G                  10
****************************************************/

int redPin = 11;    // select the pin for the red LED
int greenPin = 10;    // select the pin for the blueLED
int val = 0;

void setup()
{
  pinMode(redPin, OUTPUT); //set redPin as OUTPUT
  pinMode(greenPin, OUTPUT);//set greenPin as OUTPUT
  Serial.begin(9600);
}
/******************************************************/
void loop()
{
  for(val=255; val>0; val--) //
  {
   analogWrite(redPin, val); //red value decrease
   analogWrite(greenPin, 255-val);//green value increase
   Serial.println(val, DEC);//print the val on in serial monitor
   delay(30); //delay 30ms
  }
for(val=0; val<255; val++)
  {
   analogWrite(redPin, val); //red value increase
   analogWrite(greenPin, 255-val);//green value decrease
   Serial.println(val, DEC);//print the val on in serial monitor
   delay(30); //delay 30ms
  }
}
/********************************************************/
运行效果