版权声明:本文为博主原创文章,未经博主允许不得转载。 https://blog.csdn.net/qq_25412055/article/details/82422614
Android 换肤
常用方法
1.通过Theme切换主题
通过在setContentView之前设置Theme实现主题切换。
在styles.xml定义一个夜间主题和白天主题:
<style name="LightTheme" parent="Theme.AppCompat.Light.DarkActionBar">
    <item name="colorPrimary">@color/colorPrimary</item>
    <item name="colorPrimaryDark">@color/colorPrimaryDark</item>
    <item name="colorAccent">@color/colorAccent</item>
    <!--主题背景-->
    <item name="backgroundTheme">@color/white</item>
</style>

<style name="BlackTheme" parent="Theme.AppCompat.Light.DarkActionBar">
    <item name="colorPrimary">@color/colorPrimary</item>
    <item name="colorPrimaryDark">@color/colorPrimaryDark</item>
    <item name="colorAccent">@color/colorAccent</item>
    <!--主题背景-->
    <item name="backgroundTheme">@color/dark</item>
</style>
设置主要切换主题View的背景:
<android.support.constraint.ConstraintLayout xmlns:android="http://schemas.android.com/apk/res/android"
    xmlns:app="http://schemas.android.com/apk/res-auto"
    xmlns:tools="http://schemas.android.com/tools"
    android:layout_width="match_parent"
    android:layout_height="match_parent"
    android:background="?attr/backgroundTheme"
    tools:context=".MainActivity">

    <Button
        android:id="@+id/btn"
        android:layout_width="wrap_content"
        android:layout_height="wrap_content"
        android:text="切换主题"
        app:layout_constraintBottom_toBottomOf="parent"
        app:layout_constraintLeft_toLeftOf="parent"
        app:layout_constraintRight_toRightOf="parent"
        app:layout_constraintTop_toTopOf="parent" />

</android.support.constraint.ConstraintLayout>
切换主题:
通过调用setTheme()
@Override
protected void onCreate(Bundle savedInstanceState) {
    super.onCreate(savedInstanceState);
    setTheme(R.style.BlackTheme);
    setContentView(R.layout.activity_main);
}


finish();
Intent intent = getIntent();
intent.setFlags(Intent.FLAG_ACTIVITY_NEW_TASK | Intent.FLAG_ACTIVITY_CLEAR_TASK);
startActivity(intent);
overridePendingTransition(0, 0);
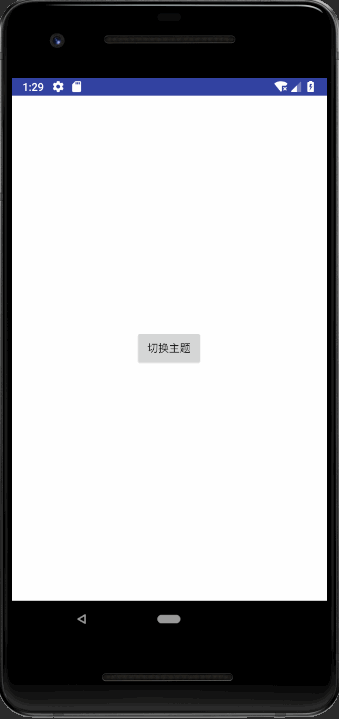
效果如下:
2.通过AssetManager切换主题
下载皮肤包,通过AssetManager加载皮肤包里面的资源文件,实现资源替换。
ClassLoader
Android可以通过classloader获取已安装apk或者未安装apk、dex、jar的context对象,从而通过反射去获取Class、资源文件等。
加载已安装应用的资源
//获取已安装app的context对象
Context context = ctx.getApplicationContext().createPackageContext("com.noob.resourcesapp", Context.CONTEXT_INCLUDE_CODE | Context.CONTEXT_IGNORE_SECURITY);
//获取已安装app的resources对象
Resources resources = context.getResources();
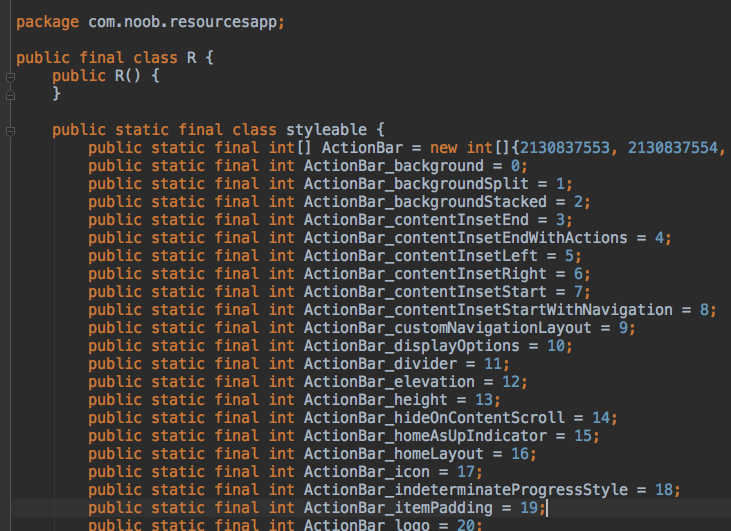
//通过resources获取classloader,反射获取R.class
Class aClass = context.getClassLoader().loadClass("com.noob.resourcesapp.R$drawable");
int resId = (int) aClass.getField("icon_collect").get(null);
imageView.setImageDrawable(resources.getDrawable(id));
加载未安装应用的资源
String apkPath = Environment.getExternalStorageDirectory().getAbsolutePath() + "/test.apk";
//通过反射获取未安装apk的AssetManager
AssetManager assetManager = AssetManager.class.newInstance();
//通过反射增加资源路径
Method method = assetManager.getClass().getMethod("addAssetPath", String.class);
method.invoke(assetManager, apkPath);
File dexDir = ctx.getDir("dex", Context.MODE_PRIVATE);
if (!dexDir.exists()) {
    dexDir.mkdir();
}
//获取未安装apk的Resources
Resources resources = new Resources(assetManager, ctx.getResources().getDisplayMetrics(),
        ctx.getResources().getConfiguration());
//获取未安装apk的ClassLoader
ClassLoader classLoader = new DexClassLoader(apkPath, dexDir.getAbsolutePath(), null, ctx.getClassLoader());
//反射获取class
Class aClass = classLoader.loadClass("com.noob.resourcesapp.R$drawable");
int id = (int) aClass.getField("icon_collect").get(null);
imageView.setImageDrawable(resources.getDrawable(id));
LayoutInflater.Factory
分析setContentView源码
LayoutInflater.Factory是如何被调用的
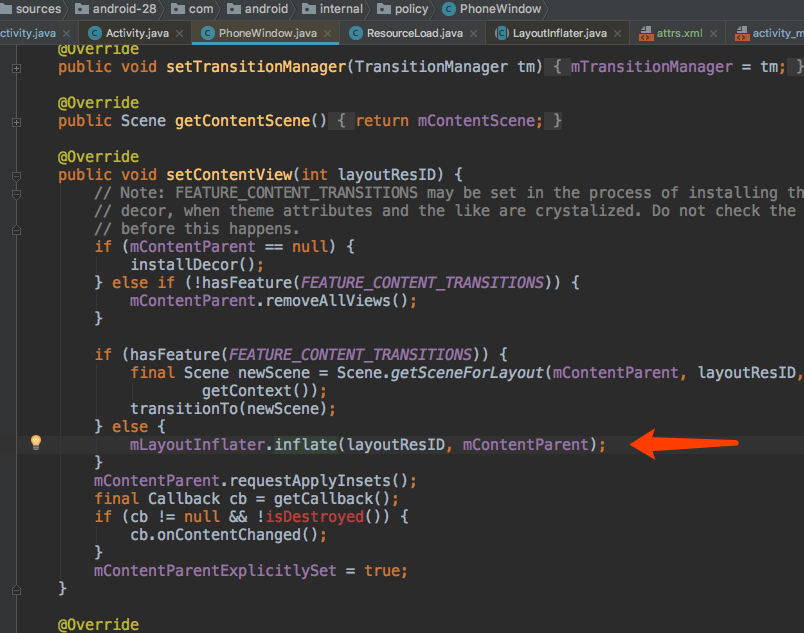
setContentView最终调用了inflate方法,我们来看一下inflate方法的源码
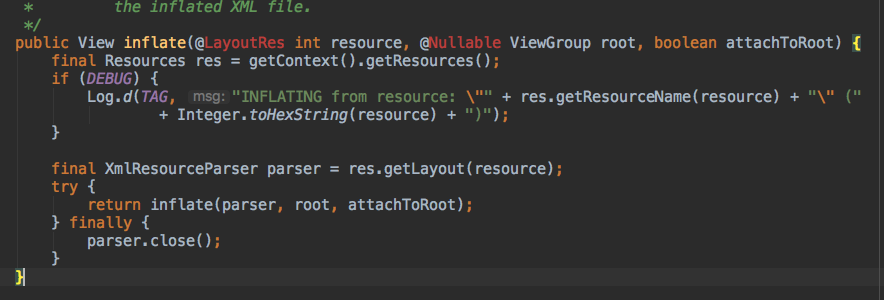
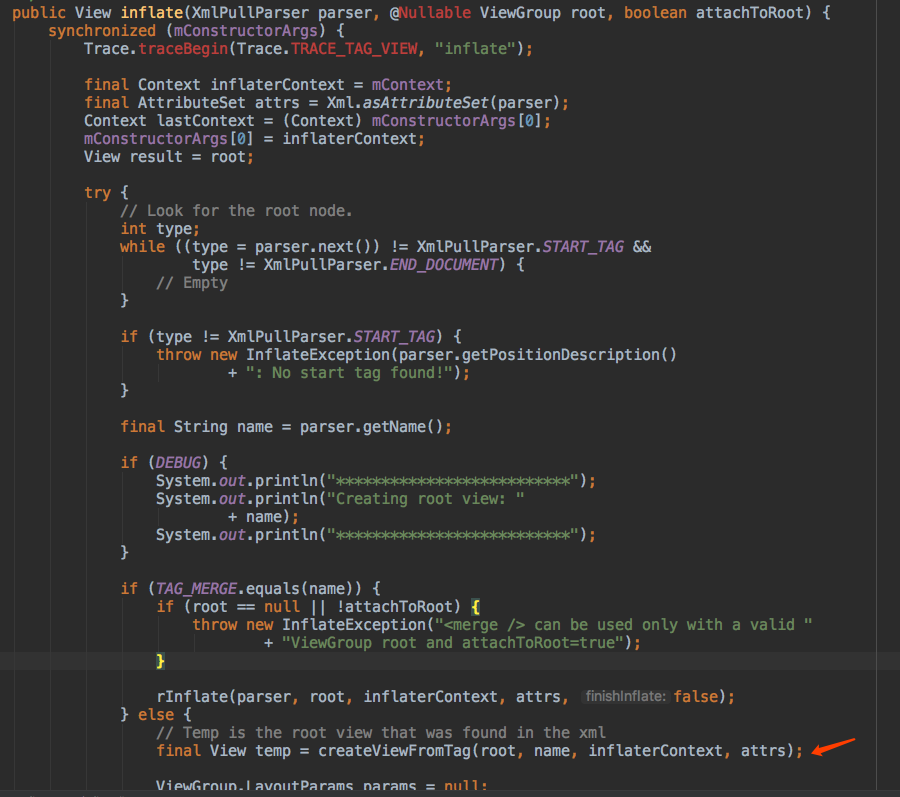
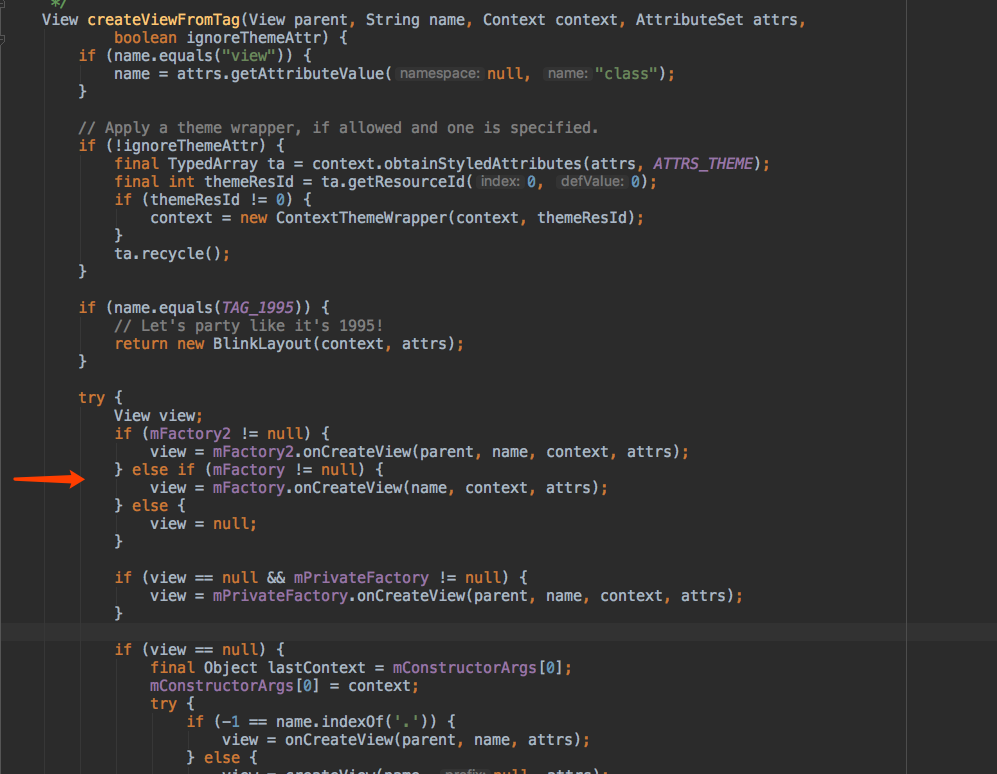
inflate最终调用了createViewFromTag方法来创建View,在这之中用到了factory,如果factory存在就用factory创建对象,如果不存在就由系统自己去创建。
我们在setContentView之前调用测试代码
测试代码:
LayoutInflater.from(this).setFactory(new LayoutInflater.Factory() {
        @Override
        public View onCreateView(String name, Context context, AttributeSet attrs) {
            Log.e("MainActivity", "name :" + name);
            int count = attrs.getAttributeCount();
            for (int i = 0; i < count; i++) {
                Log.e("MainActivity", "AttributeName :" + attrs.getAttributeName(i) + "AttributeValue :"+ attrs.getAttributeValue(i));
            }
            return null;
        }
});
log日志:
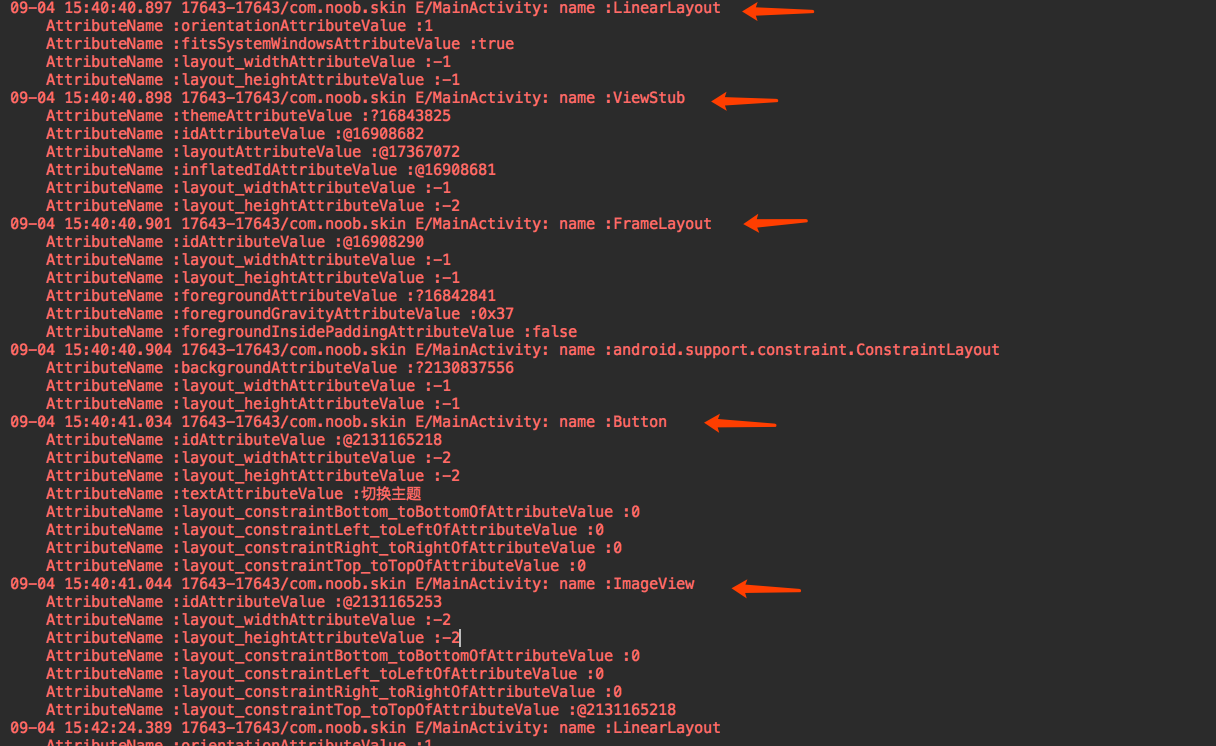
结果发现我们可以获取一个layout的所有View,此时我们就可以对View进行皮肤切换效果。
通过AssetManager切换主题总结
通过AssetManager和LayoutInflater.Factory配合就可以达到调用外部资源获取皮肤的方法。如果想要动态更新,只需要把需要动态更新的View存起来,去遍历设置皮肤,或者用eventBus去通知也可以。
对比
上述两种方法是市面上大多数换肤框架的实现原理。
通过Theme切换主题:
优点:实现简单,配置简单
缺点:需要重启应用;是固定皮肤,不能动态切换
通过AssetManager切换主题:
优点:不需要重启应用;可以动态加载主题,用于盈利
缺点:实现较为复杂;皮肤包比较占资源