版权声明:本文为博主原创文章,未经博主允许不得转载。 https://blog.csdn.net/ErickPang/article/details/79054397
最近学习下关于使用nginx用作服务治理,在此做下记录供以后回顾使用。
一、关联软件和模块
- Nginx1.13.8,下载地址:http://nginx.org/
- LuaJIT-2.0.5,下载地址:http://luajit.org/download.html
- ngx_devel_kit,下载地址: https://github.com/simpl/ngx_devel_kit/releases
- pcre,下载地址:ftp://ftp.csx.cam.ac.uk/pub/software/programming/pcre/
- zlib-1.2.11,下载地址:http://zlib.net/
- lua-resty-redis-0.26,下载地址:https://github.com/openresty/lua-resty-redis/releases
- openssl-1.0.2n,下载地址:https://www.openssl.org/source/
- lua-nginx-module
下载地址:https://github.com/openresty/lua-nginx-module/releases - ngx_dynamic_upstream,
下载地址:https://github.com/cubicdaiya/ngx_dynamic_upstream/releases - lua-cjson ,下载地址:https://github.com/openresty/lua-cjson/releases
二、安装
- 使用tar命令解压所有下载后的tar包
安装LuaJIT(所有安装均修改安装路径,非root用户可进行操作)
1)创建LuaJIT-2.0.5:mkdir LuaJIT-2.0.5
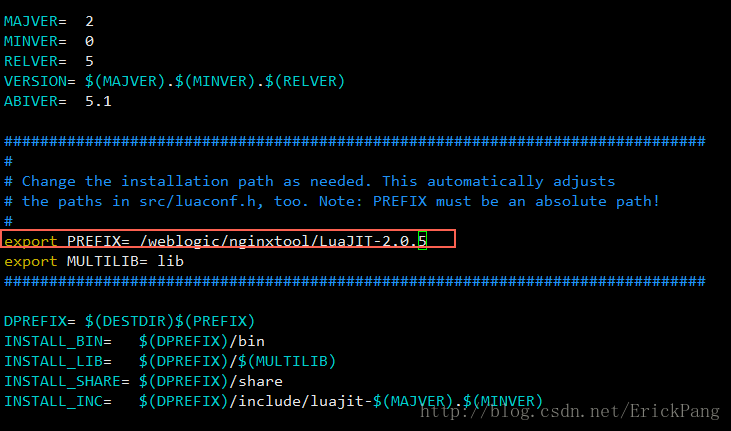
2)修改安装路径:vi Makefile
3)编译 make
4)安装 make install
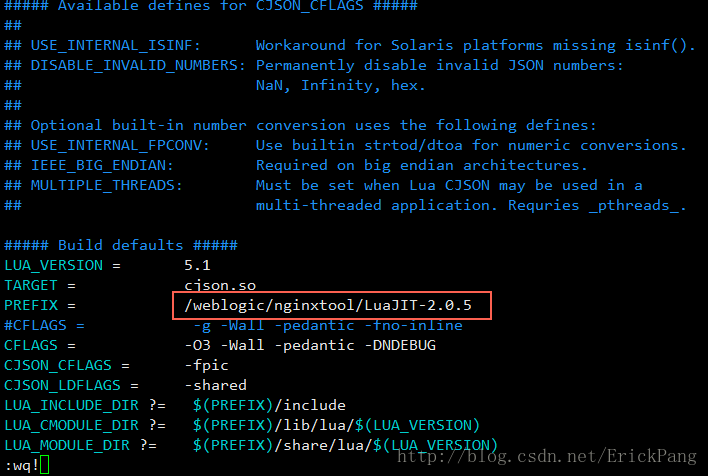
安装lua-cjson
1)修改安装路径(依赖于LuaJIT-2.0.5,故优先安装LuaJIT-2.0.5)
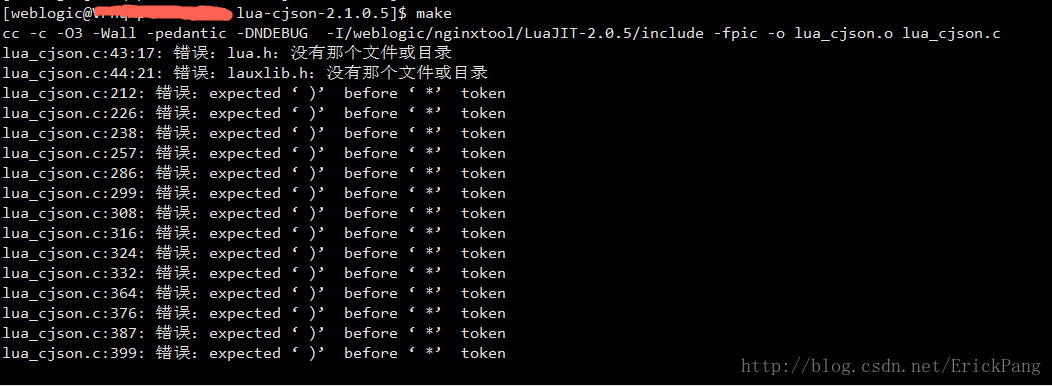
2)编译 make 会报错,见图
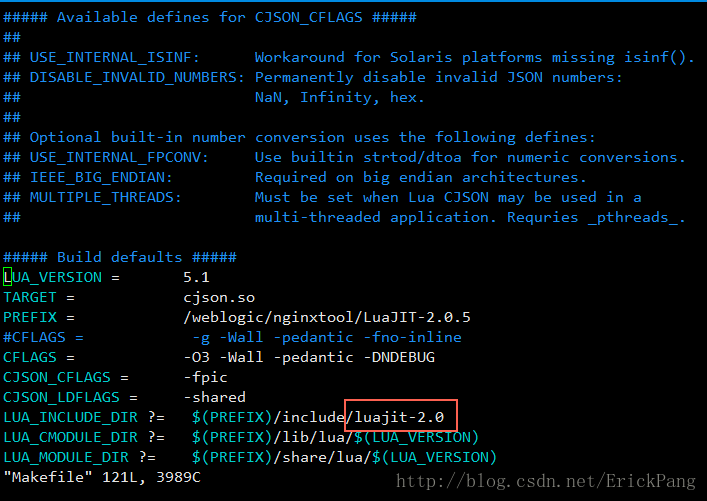
解决方式:修改Makefile,中的include路径(因为在LuaJIT-2.0.5的include中有下一层级luajit-2.0),重新编译(可与上图进行比较)
3)安装 make install,成功- 安装Nginx
1)配置lua环境 在用户跟目录下进行添加

vi .bash_profile
export LUAJIT_LIB=/weblogic/nginxtool/LuaJIT-2.0.5/lib
export LUAJIT_INC=/weblogic/nginxtool/LuaJIT-2.0.5/include/luajit-2.0
2)修改安装路径,并安装关联模块
./configure --prefix=/weblogic/nginxtool/nginx-1.13.8 --sbin-path=/weblogic/nginxtool/nginx-1.13.8/sbin/nginx --conf-path=/weblogic/nginxtool/nginx-1.13.8/conf/nginx.conf --pid-path=/weblogic/nginxtool/nginx-1.13.8/conf/nginx.pid --http-proxy-temp-path=/weblogic/nginxtool/nginx-1.13.8/proxy_temp --http-client-body-temp-path=/weblogic/nginxtool/nginx-1.13.8/client_temp --http-fastcgi-temp-path=/weblogic/nginxtool/nginx-1.13.8/fastcgi_temp --http-uwsgi-temp-path=/weblogic/nginxtool/nginx-1.13.8/uwsgi_temp --http-scgi-temp-path=/weblogic/nginxtool/nginx-1.13.8/scgi_temp --with-http_ssl_module --with-http_gzip_static_module --http-log-path=/weblogic/nginxtool/nginx-1.13.8/logs --with-http_stub_status_module --with-pcre=/weblogic/install_nginx/pcre-8.36 --with-zlib=/weblogic/install_nginx/zlib-1.2.11 --with-openssl=/weblogic/install_nginx/openssl-1.0.2n --with-ld-opt="-Wl,-rpath,/weblogic/nginxtool/LuaJIT-2.0.5/lib" --add-module=/weblogic/install_nginx/ngx_devel_kit-0.3.0 --add-module=/weblogic/install_nginx/lua-nginx-module-0.10.11 --add-module=/weblogic/install_nginx/ngx_dynamic_upstream-0.1.63)编译 make
4)安装 make install,成功

三、Lua demo
- 在nginx.conf中编写代码
location /get {
            default_type 'text/plain';
            content_by_lua_block {
                ngx.say('Hello,world!')
            }
        }
在浏览器中输入http://localhost:7000/get访问
返回结果:Hello,world!