文章目录
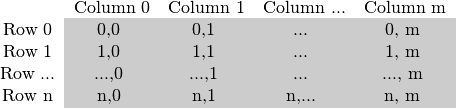
图像的存储结构
- 单通道图像
- 多通道图像(BGR顺序)

用指针扫描(官网:Efficient Way)
- 预备知识:
大部分情况下,一张图像的存储是连续的,这样我们可以得到首地址,然后遍历到尾部。但是有时候你是通过截取已有图像的一部分而创建了一个新的头部信息。那么他的存储就是不连续的,在用指针的时候,需要注意两个row之间的gap。可以用cv::Mat::isContinuous()判断图像存储是否连续。
例子:
Mat& ScanImageAndReduceC(Mat& I, const uchar* const table)
{
    // accept only char type matrices
    CV_Assert(I.depth() == CV_8U);
    int channels = I.channels();
    int nRows = I.rows;
    int nCols = I.cols * channels;
    if (I.isContinuous())  //判断图像存储是否连续
    {
        nCols *= nRows; //如果连续,那么只有一行, col*row 个元素
        nRows = 1;
    }
    int i,j;
    uchar* p;
    for( i = 0; i < nRows; ++i)
    {
        p = I.ptr<uchar>(i);   //如果不连续的存储,每次扫描一整行之后,再重新获取下一行的首地址
        for ( j = 0; j < nCols; ++j)
        {
            p[j] = table[p[j]];    //通过查找表的方式,将元素重新赋值。
        }
    }
    return I;
}
- 或者我们也可以这样使用
data 成员变量返回的是指针,指向第0行、第0列的元素。如果返回是NULL,则Mat对象没有合法的输入图像数据。
uchar* p = I.data; //
for( unsigned int i =0; i < ncol*nrows; ++i)
    *p++ = table[*p];
用迭代器(iterator way : safe)
- 可以使用cv::Mat::begin()和cv::Mat::end()得到图像的迭代器进行遍历,迭代器是自动跳到下一row,所以使用很安全。
- 还需要注意的是:如果使用uchar类型的迭代器去遍历多通道,只能每次访问到B分量。
- 如果对象申明成const型,用cv域下的MatConstIterator_(或者Mat_<Vec3b>::const_iterator)
Mat& ScanImageAndReduceIterator(Mat& I, const uchar* const table)
{
    // accept only char type matrices
    CV_Assert(I.depth() == CV_8U);
    const int channels = I.channels();
    switch(channels)
    {
    case 1:
        {
//          Mat_<uchar>::const_iterator it,end; //也行
            MatIterator_<uchar> it, end; //申明一个 uchar 的开始结束迭代器,
            for( it = I.begin<uchar>(), end = I.end<uchar>(); it != end; ++it)
                *it = table[*it];
            break;
        }
    case 3:
        {
            MatIterator_<Vec3b> it, end;  //申明一个 Vec3b 的开始结束迭代器
            for( it = I.begin<Vec3b>(), end = I.end<Vec3b>(); it != end; ++it)
            {
                (*it)[0] = table[(*it)[0]];
                (*it)[1] = table[(*it)[1]];
                (*it)[2] = table[(*it)[2]];
            }
        }
    }
    return I;
}
On-the-fly RA
- 使用cv::Mat::at() ,它根据你规定type,传入coordinate,即时计算出地址。返回引用。
- 这种方式不建议用在扫描图像上,效率低,用在随机访问/修改某些特定像素。
- 如果扫描彩色图像,输入 type、at 等关键词是比较麻烦的,OpenCV提供了类 Mat_ ,它可以和Mat直接转换。在申明的时候,规定好type,然后可以用()操作符去获取每个像素。注意:这种申明方式的 runtime speed 和 用at 是一样的。只是方便码代码,懒人必备。
Mat& ScanImageAndReduceRandomAccess(Mat& I, const uchar* const table)
{
    // accept only char type matrices
    CV_Assert(I.depth() == CV_8U);
    const int channels = I.channels();
    switch(channels)
    {
    case 1:
        {
            for( int i = 0; i < I.rows; ++i)
                for( int j = 0; j < I.cols; ++j )
                    I.at<uchar>(i,j) = table[I.at<uchar>(i,j)];
            break;
        }
    case 3:
        {
         Mat_<Vec3b> _I = I;    //和下面注释代码 是一样的,定义成Mat_ ,用()操作符去得到元素方便使用
         for( int i = 0; i < I.rows; ++i)
            for( int j = 0; j < I.cols; ++j )
               {
                   _I(i,j)[0] = table[_I(i,j)[0]];
                   _I(i,j)[1] = table[_I(i,j)[1]];
                   _I(i,j)[2] = table[_I(i,j)[2]];
            }
         I = _I;
//         for( int i = 0; i < I.rows; ++i)
//            for( int j = 0; j < I.cols; ++j )
//               {
//					I.at<Vec3b>(i,j)[0]=tablel[I.at<Vec3b>(i,j)[0]];
//					I.at<Vec3b>(i,j)[1]=tablel[I.at<Vec3b>(i,j)[1]];
//					I.at<Vec3b>(i,j)[2]=tablel[I.at<Vec3b>(i,j)[2]];
//               }
         break;
        }
    }
    return I;
}
LUT Core Function
- OpenCV提供 cv::LUT() function of the core module,通过查找表的方式去改变图像的像素值
    Mat lookUpTable(1, 256, CV_8U);
    uchar* p = lookUpTable.ptr();
    for( int i = 0; i < 256; ++i)
        p[i] = i*(i/10);

	Mat J;
    LUT(I, lookUpTable, J); // I 输入, J输出
比较几种扫描方法的效率
- OpenCV提供两个函数: cv::getTickCount() and cv::getTickFrequency() 去测量时间。
- cv::getTickCount() :得到当前的时间戳
- cv::getTickFrequency() :每秒时间戳的个数
可以用下面方式计算耗时:
double t = (double)getTickCount();
// do something ...
t = ((double)getTickCount() - t)/getTickFrequency();
cout << "Times passed in seconds: " << t << endl;
| 方法 | 耗时 |
|---|---|
| 指针 | 0.47ms |
| 迭代器 | 2.1ms |
| On-the-fly RA | 2.3ms |
| LUT Core Function | 0.44ms |