版权声明:本文为博主原创文章,未经博主允许不得转载。 https://blog.csdn.net/xueshanghon_L/article/details/49403509

index.html
<!DOCTYPE html>
<html>
	<head>
		<meta charset="utf-8" />
		<title></title>
	</head>
	<body>
		<input type="text" name="vcode" id="yzm"><a href="javascript:">
<span style="white-space:pre"> </span><img class="vcode" id="yzmimg" src="code.php" width="85" height="35" title="看不清?点击切换">
</body>
</html>
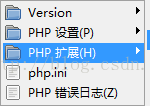
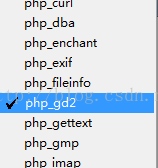
WampServer 里的php_gd2打开
下面是制作验证码
第一步:随机产生4位数
$num = "";
for($i=0;$i<4;$i++){
<span style="white-space:pre">	</span>$num = $num.rand(0,9);
}
$_SESSION["code"]=$num;<span style="white-space:pre">		</span>//保存到session
检测 echo $num;
$img = imagecreate(85,35);第三步:填充背景
$backg = imagecolorallocate($img,rand(1, 255),rand(1, 255),rand(1, 255));<span style="white-space:pre">	</span>//rand(1,255) 在1到255之间数字随机
imagefill($img, 0, 0, $backg);
第四步:边框
$border = imagecolorallocate($img,165,42,42);
imagerectangle($img, 0,0,84,34, $border);
第五步:画字符到图片
$font = "t1.ttf";
$fontc = imagecolorallocate($img,0,0,0);
imagettftext($img, 20, 10, rand(4, 16),rand(30, 33), $fontc, $font, $num);
第六步:画点
$dian = imagecolorallocate($img,0,100,0);
for($i=0;$i<400;$i++){
<span style="white-space:pre">	</span>imagesetpixel($img, rand(1, 84), rand(1, 34), $dian);
}
第七步:画线
$xian = imagecolorallocate($img,124,252,0);
for($i=0;$i<10;$i++){
	imageline($img,rand(1, 84), rand(1, 34),rand(1, 84), rand(1, 34), $xian);
}
第八步:输送到页面
header("Content-type: image/png");			//输出类型
imagejpeg($img);			//输出
第九步:销毁图片
imagedestroy($img);完整代码:
code.php
<?php
//验证码
	session_start();//会话

	//随机产生4位数
	$num = "";
	for($i=0;$i<4;$i++){
		$num = $num.rand(0,9);
	}
	$_SESSION["code"]=$num;


	//创建图片
	$img = imagecreate(85,35);

	//填充背景
	$backg = imagecolorallocate($img,rand(1, 255),rand(1, 255),rand(1, 255));
	imagefill($img, 0, 0, $backg);

	//边框
	$border = imagecolorallocate($img,165,42,42);
	imagerectangle($img, 0,0,84,34, $border);


	//画字符到图片
	$font = "t1.ttf";
	$fontc = imagecolorallocate($img,0,0,0);
	imagettftext($img, 20, 10, rand(4, 16),rand(30, 33), $fontc, $font, $num);

	//画点
	$dian = imagecolorallocate($img,0,100,0);
	for($i=0;$i<400;$i++){
	imagesetpixel($img, rand(1, 84), rand(1, 34), $dian);
	}

	//画线
	$xian = imagecolorallocate($img,124,252,0);
	for($i=0;$i<10;$i++){
		imageline($img,rand(1, 84), rand(1, 34),rand(1, 84), rand(1, 34), $xian);
	}

	//输送到客户端
	header("Content-type: image/png");			//输出类型
	imagejpeg($img);			//输出

	//销毁图片
	imagedestroy($img);
方法二
<pre name="code" class="php"><?php
//验证码
<span style="white-space: pre;"> </span>Header("Content-type: image/PNG"); //创建图片
$img = imagecreate(85,35);
//颜色
$b = imagecolorallocate($img, 0, 0, 0);
$w = imagecolorallocate($img, 255, 255, 255);<span style="white-space:pre"> </span>$s = imagecolorallocate($img, rand(1, 255),rand(1, 255),rand(1, 255));
//填充
imagefill($img, 0, 0, $w);
//矩形轮廓
imagerectangle($img, 0, 0, 84, 34, $b);
//随机数字
$num = rand(1000, 9999);
//放到session中
$_SESSION["num"] = $num;
//输送到图片上
$font = $_SERVER["DOCUMENT_ROOT"]."20151228/common/AngelicWar.ttf";
imagettftext($img, 20, 0, rand(0, 50), rand(0,20), $<span style="font-family: Arial, Helvetica, sans-serif;">s</span><span style="font-family: Arial, Helvetica, sans-serif;">, $font, $num);</span>
<span style="white-space:pre"> </span>//imagestring($img,4,rand(0, 50),rand(0, 20),$num,$b);
//画点
for($i=0;$i<100;$i++){
imagesetpixel($img, rand(0, 84), rand(0, 34), $b);
}
//画线
for($i=0;$i<10;$i++){
imageline($img, rand(0, 84), rand(0, 34),rand(0, 84), rand(0, 34), $b);
}
//以jpeg格式绘制出来
imagejpeg($img);
//销毁图片
imagedestroy($img);最后效果: