之前有一篇博客已经讲解了如何用protobuf+socket完成心跳包的具体过程,见 protobuf+socket实现CS之间的心跳包. 显然之前并没有用到所谓的rpc的调用功能,只是利用protobuf实现序列化的反序列化的功能。
这几天,在学习了brpc开源提供的一些案例的时候,尝试着用brcp去实现cs之间的心跳包,具体的过程如下:
brpc的开源例子见链接:https://github.com/brpc/brpc/tree/master/example/echo_c%2B%2B
1.定制心跳包
由于brpc使用的底层序列化工具是protobuf,所以定制的心跳包也是按照protobuf提供的proto文件来定义,具体定义如下:
syntax="proto2";
package heart;	//定义包名

option cc_generic_services = true;
//定义请求心跳包形式
message HeartRequest{
    required string message = 1;
}
//定义响应心跳包形式
message HeartResponse{
    required string message = 1;
}
//定义心跳服务,主要是接收心跳请求,然后返回当前状态
service HeartService{
    rpc HeartRpc(HeartRequest) returns (HeartResponse);
}
2. 客户端代码
同样是CS架构,首先是客户端代码,客户端向服务端调用心跳请求服务,客户端提供的框架基本如下:
1.通过gflags进行命令行配置的转换,并定义默认项(gflags具体使用方法可以参考博文google gflags 库完全使用)
2.定义一个channel,brpc中没有客户端的概念,客户端可以认为是一个channel,连接到服务端的channel.
3.设置channel的一些参数,比如使用的上层协议,连接方式,超时延时,重试次数等等
4.开启这个channel,利用gflags来配置channel对应的ip地址端口号
5.为protobuf的服务设置一个桩函数stub,通过这个桩函数调用服务(实际通过这个桩函数调用的服务都会由protobuf接管,将参数等数据发送到服务端)
6.填充数据包,set_message()
7.设置controller,这里controller就是brpc提出的控制器,负责在整个rpc调用过程中的性能以及其他参数的控制功能。你可以给这个controller设置携带的附件,设置需要监控的延时选项等等。
8.设置回调函数,注意本案例是同步调用,所以不是异步,不用设置回调函数,如果异步的调用,需要设置对应的回调函数done()
9.打印接收信息
基本是按照上述的9个步骤完成客户端代码的撰写,在整个代码的过程中,你可以发现根本不需要去理会网络协议,socket这些,你只需要专心自己的功能逻辑,需要远程调用的时候去调用即可。
代码如下:
#include <gflags/gflags.h>
#include <butil/logging.h>
#include <butil/time.h>

#include <brpc/channel.h>
#include "heart_package.pb.h"

//using gflags to define line input_iterator_tag
DEFINE_string(attachment,"this is attachment","Carry this along with requests");
DEFINE_string(protocol,"baidu_std","Protocol type.Define in src/brpc/option.proto");
DEFINE_string(connection_type,"","Connection type. Available value:single,polled,short");
DEFINE_string(server,"0.0.0.0:8000","IP Address of service");
DEFINE_string(load_balancer,"","The algorithm for load balancing");
DEFINE_int32(timeout_ms,100,"RPC timeout in milliseconds");
DEFINE_int32(max_retry,3,"Max retries(not including the first rpc)");
DEFINE_int32(interval_ms,1000,"Milliseconds between consecutive requests");


int main(int argc, char* argv[])
{
    //1. prase gflags.
    GFLAGS_NS::ParseCommandLineFlags(&argc,&argv,true);

    //2.define a channel
    brpc::Channel channel;

    //3.set the channel options
    brpc::ChannelOptions options;
    options.protocol = FLAGS_protocol;
    options.connection_type = FLAGS_connection_type;
    options.timeout_ms = FLAGS_timeout_ms;
    options.max_retry = FLAGS_max_retry;

    //4. and initialize the channel
    if(channel.Init(FLAGS_server.c_str(),FLAGS_load_balancer.c_str(),&options) !=0){
        LOG(ERROR) << "Fail to initialize channel";
        return -1;
    }

    //5.creat a service_stub and call a channel by stub
    heart::HeartService_Stub stub(&channel);
    int log_id = 0;
    while(!brpc::IsAskedToQuit()){
        heart::HeartRequest request;
        heart::HeartResponse response;
        brpc::Controller cntl;

        request.set_message("connected......OK");
        cntl.set_log_id(log_id ++);
        cntl.request_attachment().append(FLAGS_attachment);

        //set done is null so, it will wait until the response comes back or error occurs
        stub.Echo(&cntl,&request,&response,NULL);
        if(!cntl.Failed()){
            LOG(INFO) << "Received response about heart_package["
            << cntl->log_id() << "]"
            << " from " << cntl.remote_side()
            << " to" << cntl.local_side()
            << ": " << response.message() << " (attached="
            << cntl.response_attachment() << ")"
            << " latency=" << cntl.latency_us() << "us";
        }else{
            LOG(WARNING) << cntl.ErrorText();
        }

        usleep(FLAGS_interval_ms * 1000);

    }

    LOG(INFO) << "EchoClient is going to quit";
    return 0;
}
3. 服务端代码
服务端代码和客户端代码类似,但是也有不同,服务器顾名思义是开启某一项服务,所以来说首先得自己定义某项服务(本案例里面服务就是发送当前服务的状态是否正常),brpc中服务端按照protubuf提供的服务形式,通过类的继承来完成。具体的实现框架如下:
1.服务类定义,注意某一项服务都是从proto定义的服务中继承而来,所以需要定义继承的子类,对于proto中定义服务函数,还需要以虚函数的形式进行重写,这里重新的函数是HeartRpc()
2.在重写HeartRpc中,首先进行回调函数销毁,这里我也没弄清楚,看brpc案例注释中说明,无论是否有回调done函数,都需要执行done_guard函数进行销毁,猜测应该是某种RAII的机制实现。
3.在重写HeartRpc中,定义本次服务的控制器controller,然后定义服务的具体执行过程,填充服务的返回值等信息
4.在主要的main函数中,和客户端代码类似,首先通过gflags进行命令行参数的配置
5.定义一个服务server,将定义的服务与这个server绑定
6.启动server
注意:服务端代码可以add不同的服务进来,同时服务器开启的服务是以自定义的标识符来标识的,服务开启之后就一直存在,除非进程被强制中断或者退出。
具体的代码如下:
#include <gflags/gflags.h>
#include <butil/logging.h>
#include <brpc/server.h>
#include "heart_package.pb.h"

//using gflags to define line input_iterator_tag
DEFINE_bool(echo_attachment,true,"Echo attachment as well");
DEFINE_int32(port,8000,"TCP Port of this server");
DEFINE_int32(idle_timeout_s,-1,"Connection will be closed if there is no "
                                "read/write operations during the last `idle_timeout_s'");
DEFINE_int32(logoff_ms,2000,"Maximum duration of server's LOGOFF state "
                            "(waiting for client to close connection before server stops)");

// define a implenment of echoservice
// Describable the virtual echo func
// additional information in /status
namespace heart{
class HeartServiceImpl:public HeartService{
public:
    HeartServiceImpl(){}
    virtual ~HeartServiceImpl(){}

    virtual void HeartRpc(::google::protobuf::RpcController* controller,
                       const ::heart::HeartRequest* request,
                       ::heart::HeartResponse* response,
                       ::google::protobuf::Closure* done){

        //1.set done func
        brpc::ClosureGuard done_guard(done);

        //2.register a controller
        brpc::Controller* cntl =
            static_cast<brpc::Controller*>(cntl_base);


        //3.the process of echo func
        LOG(INFO) << "Received response about heart_package["
                  << cntl->log_id() << "]"
                  << " from " << cntl->remote_side()
                  << " to " << cntl->local_side()
                  << " : " << request->message()
                  << " (attached=" << cntl->request_attachment() << ")";

        //4. fill the response
        response->set_message(request->message());

        //5. fill the attachment
        if(FLAGS_echo_attachment)
            cntl->response_attachment().append(cntl->request_attachment());

    }
};
}

int main(int argc, char* argv[]){
    //1. prase gflags.
    GFLAGS_NS::ParseCommandLineFlags(&argc,&argv,true);

    //2.define a server
    brpc::Server server;

    //3.Instance of your service. how the service does
    heart::HeartServiceImpl heart_service_impl;

    //4.Add the service into server.
    if(server.AddService(&heart_service_impl,brpc::SERVER_DOESNT_OWN_SERVICE) != 0){
        LOG(ERROR) << "Fail to add service";
        return -1;
    }

    //5.Start the server.
    brpc::ServerOptions options;
    options.idle_timeout_sec = FLAGS_idle_timeout_s;
    if (server.Start(FLAGS_port, &options) != 0) {
        LOG(ERROR) << "Fail to start EchoServer";
        return -1;
    }

    server.RunUntilAskedToQuit();
    return 0;
}
4. Makefile文件
brpc开源readme中提到了提供了两种编译方法,一种是使用makefile文件,一种是使用cmake工具,这两种都可以支持,这里我直接采用的是example/echo_c++中的makefile文件,连同protobuf一起编译,很方便,makefile如下:
NEED_GPERFTOOLS=0
BRPC_PATH=../..
include $(BRPC_PATH)/config.mk
# Notes on the flags:
# 1. Added -fno-omit-frame-pointer: perf/tcmalloc-profiler use frame pointers by default
# 2. Added -D__const__= : Avoid over-optimizations of TLS variables by GCC>=4.8
CXXFLAGS+=$(CPPFLAGS) -std=c++0x -DNDEBUG -O2 -D__const__= -pipe -W -Wall -Wno-unused-parameter -fPIC -fno-omit-frame-pointer
ifeq ($(NEED_GPERFTOOLS), 1)
	CXXFLAGS+=-DBRPC_ENABLE_CPU_PROFILER
endif
HDRS+=$(BRPC_PATH)/output/include
LIBS+=$(BRPC_PATH)/output/lib

HDRPATHS=$(addprefix -I, $(HDRS))
LIBPATHS=$(addprefix -L, $(LIBS))
COMMA=,
SOPATHS=$(addprefix -Wl$(COMMA)-rpath$(COMMA), $(LIBS))

CLIENT_SOURCES = client.cpp
SERVER_SOURCES = server.cpp
PROTOS = $(wildcard *.proto)

PROTO_OBJS = $(PROTOS:.proto=.pb.o)
PROTO_GENS = $(PROTOS:.proto=.pb.h) $(PROTOS:.proto=.pb.cc)
CLIENT_OBJS = $(addsuffix .o, $(basename $(CLIENT_SOURCES)))
SERVER_OBJS = $(addsuffix .o, $(basename $(SERVER_SOURCES)))

ifeq ($(SYSTEM),Darwin)
 ifneq ("$(LINK_SO)", "")
	STATIC_LINKINGS += -lbrpc
 else
	# *.a must be explicitly specified in clang
	STATIC_LINKINGS += $(BRPC_PATH)/output/lib/libbrpc.a
 endif
	LINK_OPTIONS_SO = $^ $(STATIC_LINKINGS) $(DYNAMIC_LINKINGS)
	LINK_OPTIONS = $^ $(STATIC_LINKINGS) $(DYNAMIC_LINKINGS)
else ifeq ($(SYSTEM),Linux)
	STATIC_LINKINGS += -lbrpc
	LINK_OPTIONS_SO = -Xlinker "-(" $^ -Xlinker "-)" $(STATIC_LINKINGS) $(DYNAMIC_LINKINGS)
	LINK_OPTIONS = -Xlinker "-(" $^ -Wl,-Bstatic $(STATIC_LINKINGS) -Wl,-Bdynamic -Xlinker "-)" $(DYNAMIC_LINKINGS)
endif

.PHONY:all
all: echo_client echo_server

.PHONY:clean
clean:
	@echo "Cleaning"
	@rm -rf echo_client echo_server $(PROTO_GENS) $(PROTO_OBJS) $(CLIENT_OBJS) $(SERVER_OBJS)

echo_client:$(PROTO_OBJS) $(CLIENT_OBJS)
	@echo "Linking $@"
ifneq ("$(LINK_SO)", "")
	@$(CXX) $(LIBPATHS) $(SOPATHS) $(LINK_OPTIONS_SO) -o $@
else
	@$(CXX) $(LIBPATHS) $(LINK_OPTIONS) -o $@
endif

echo_server:$(PROTO_OBJS) $(SERVER_OBJS)
	@echo "Linking $@"
ifneq ("$(LINK_SO)", "")
	@$(CXX) $(LIBPATHS) $(SOPATHS) $(LINK_OPTIONS_SO) -o $@
else
	@$(CXX) $(LIBPATHS) $(LINK_OPTIONS) -o $@
endif

%.pb.cc %.pb.h:%.proto
	@echo "Generating $@"
	@$(PROTOC) --cpp_out=. --proto_path=. $(PROTOC_EXTRA_ARGS) $<

%.o:%.cpp
	@echo "Compiling $@"
	@$(CXX) -c $(HDRPATHS) $(CXXFLAGS) $< -o $@

%.o:%.cc
	@echo "Compiling $@"
	@$(CXX) -c $(HDRPATHS) $(CXXFLAGS) $< -o $@
编译并运行
编译过程很简单,直接执行make即可,会生成如下几个文件:

运行(分别运行服务端,客户端)


运行结果
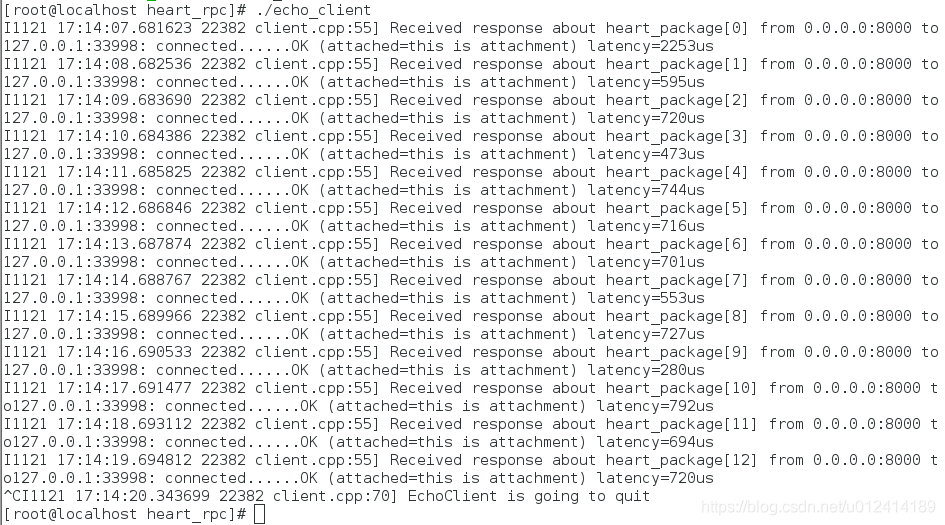
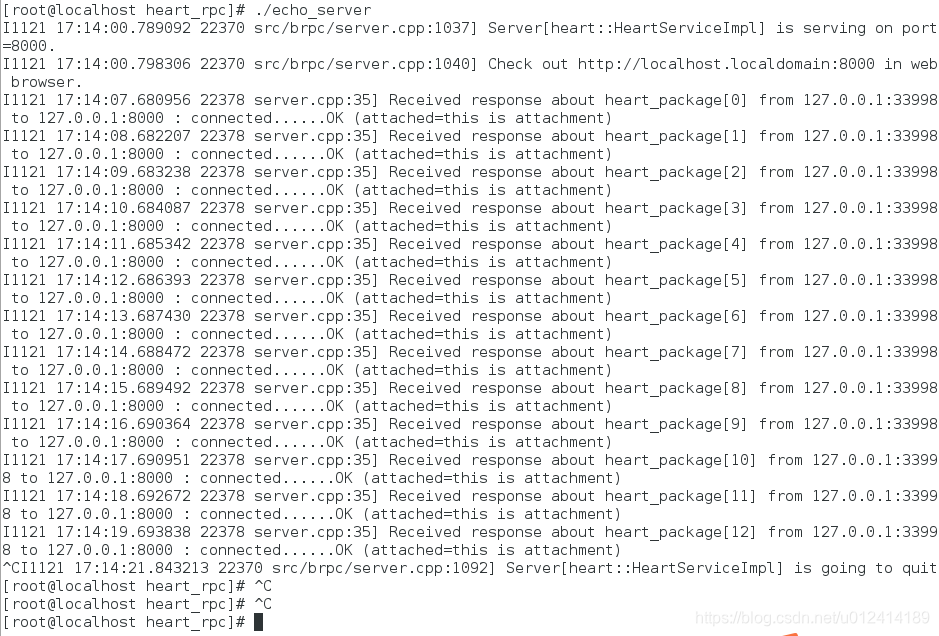
总结
通过这个案例可以运用brcp的远程调用的功能,同时也可以看到整个调用过程中可以不用去考虑网络协议以及数据序列化的功能,更好专注于功能的实现上。目前只是参考的例子进行模仿的写,具体brpc的接口功能可能还需要多看一下brpc的头文件才能弄清楚。