Study From :https://www.kubernetes.org.cn/4948.html
https://www.kubernetes.org.cn/4948.html
感谢原作者提供的资源
1. 安装centos7_1811_7.6
2. 升级kernel 到 4.19
3. 关闭防火墙,关闭selinux
4. 修改sysctl 内容
# 设置网桥包经IPTables,core文件生成路径
echo """
vm.swappiness = 0
net.bridge.bridge-nf-call-ip6tables = 1
net.bridge.bridge-nf-call-iptables = 1
""" > /etc/sysctl.conf
sysctl -p
5. 安装ntpdate
yum install -y ntpdate
ntpdate -u ntp.api.bz
6. 暂时不学习集群 所以 不需要 ipvs了
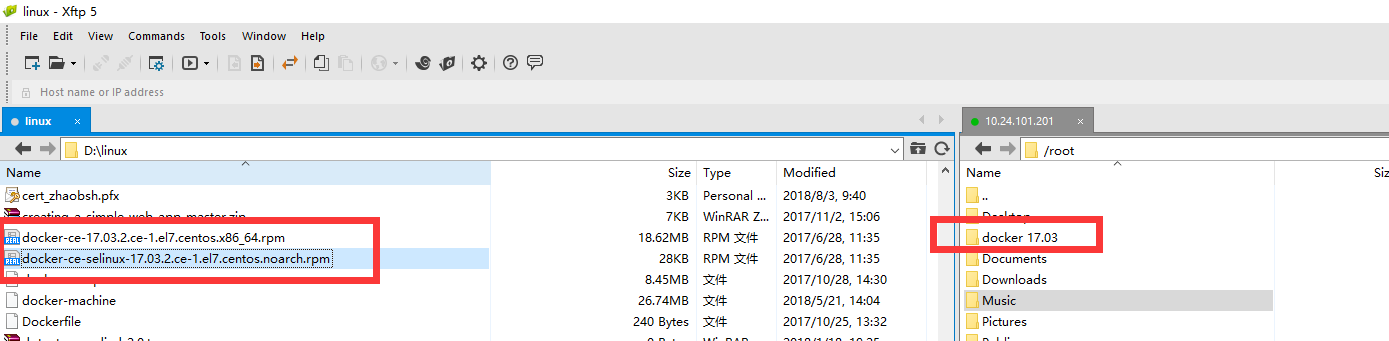
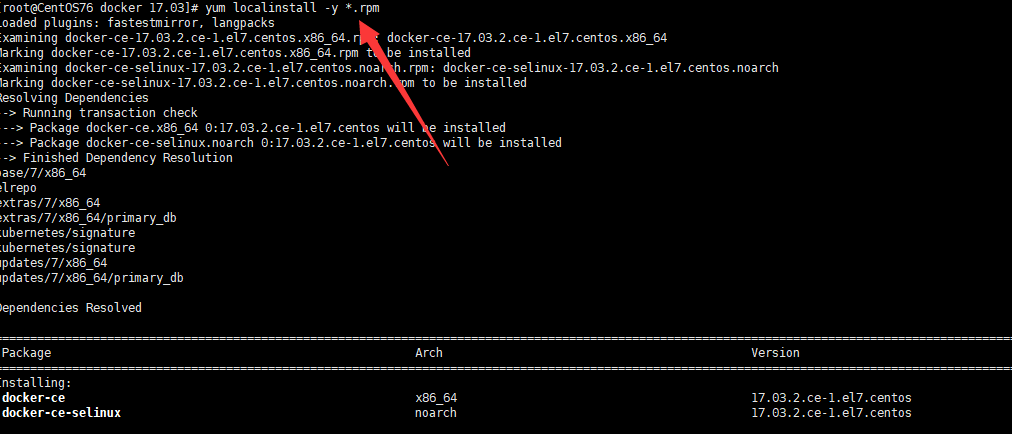
7. 安装docker 17.03
最笨的办法:
然后执行安装
8. 一个虚拟机进行处理 所以不需要harbor了.
9. 将docker设置为开机启动等
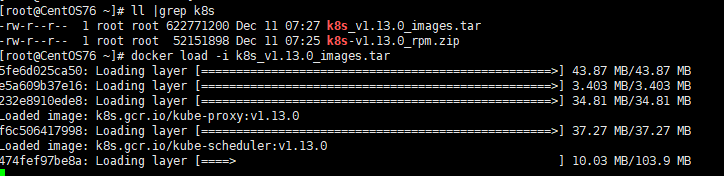
10. docker load 需要的 k8s images
[来源是 原作者blog 导入到 harbor 然后自己摘出来的]
11. 安装 rpm
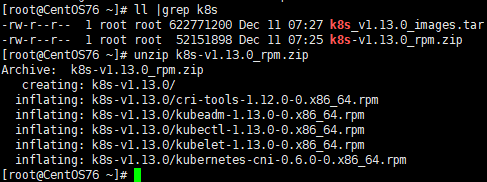
直接进行安装

12. 启动 kubelet

13. 关闭swap
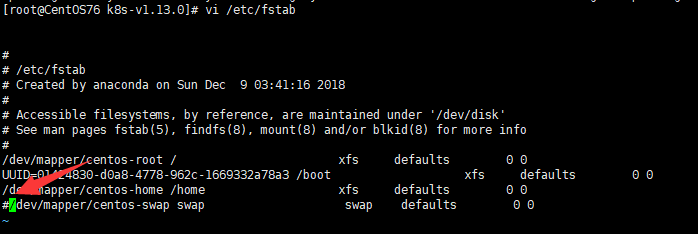
然后 reboot
顺便修改一下 hosts 加上本机
14. 使用kubeadm 进行启动 命令为:
kubeadm init --kubernetes-version=v1.13.0 --pod-network-cidr=10.244.0.0/16 --ignore-preflight-errors=...
15. 命令界面为:
效果
kubeadm init --kubernetes-version=v1.13.0 --pod-network-cidr=10.244.0.0/16 --ignore-preflight-errors=...
[init] Using Kubernetes version: v1.13.0
[preflight] Running pre-flight checks
[preflight] Pulling images required for setting up a Kubernetes cluster
[preflight] This might take a minute or two, depending on the speed of your internet connection
[preflight] You can also perform this action in beforehand using 'kubeadm config images pull'
[kubelet-start] Writing kubelet environment file with flags to file "/var/lib/kubelet/kubeadm-flags.env"
[kubelet-start] Writing kubelet configuration to file "/var/lib/kubelet/config.yaml"
[kubelet-start] Activating the kubelet service
[certs] Using certificateDir folder "/etc/kubernetes/pki"
[certs] Generating "front-proxy-ca" certificate and key
[certs] Generating "front-proxy-client" certificate and key
[certs] Generating "etcd/ca" certificate and key
[certs] Generating "etcd/peer" certificate and key
[certs] etcd/peer serving cert is signed for DNS names [centos76 localhost] and IPs [10.24.101.201 127.0.0.1 ::1]
[certs] Generating "etcd/healthcheck-client" certificate and key
[certs] Generating "apiserver-etcd-client" certificate and key
[certs] Generating "etcd/server" certificate and key
[certs] etcd/server serving cert is signed for DNS names [centos76 localhost] and IPs [10.24.101.201 127.0.0.1 ::1]
[certs] Generating "ca" certificate and key
[certs] Generating "apiserver" certificate and key
[certs] apiserver serving cert is signed for DNS names [centos76 kubernetes kubernetes.default kubernetes.default.svc kubernetes.default.svc.cluster.local] and IPs [10.96.0.1 10.24.101.201]
[certs] Generating "apiserver-kubelet-client" certificate and key
[certs] Generating "sa" key and public key
[kubeconfig] Using kubeconfig folder "/etc/kubernetes"
[kubeconfig] Writing "admin.conf" kubeconfig file
[kubeconfig] Writing "kubelet.conf" kubeconfig file
[kubeconfig] Writing "controller-manager.conf" kubeconfig file
[kubeconfig] Writing "scheduler.conf" kubeconfig file
[control-plane] Using manifest folder "/etc/kubernetes/manifests"
[control-plane] Creating static Pod manifest for "kube-apiserver"
[control-plane] Creating static Pod manifest for "kube-controller-manager"
[control-plane] Creating static Pod manifest for "kube-scheduler"
[etcd] Creating static Pod manifest for local etcd in "/etc/kubernetes/manifests"
[wait-control-plane] Waiting for the kubelet to boot up the control plane as static Pods from directory "/etc/kubernetes/manifests". This can take up to 4m0s
[apiclient] All control plane components are healthy after 25.003224 seconds
[uploadconfig] storing the configuration used in ConfigMap "kubeadm-config" in the "kube-system" Namespace
[kubelet] Creating a ConfigMap "kubelet-config-1.13" in namespace kube-system with the configuration for the kubelets in the cluster
[patchnode] Uploading the CRI Socket information "/var/run/dockershim.sock" to the Node API object "centos76" as an annotation
[mark-control-plane] Marking the node centos76 as control-plane by adding the label "node-role.kubernetes.io/master=''"
[mark-control-plane] Marking the node centos76 as control-plane by adding the taints [node-role.kubernetes.io/master:NoSchedule]
[bootstrap-token] Using token: 9jhx3x.c1a35jp4hq12pk7w
[bootstrap-token] Configuring bootstrap tokens, cluster-info ConfigMap, RBAC Roles
[bootstraptoken] configured RBAC rules to allow Node Bootstrap tokens to post CSRs in order for nodes to get long term certificate credentials
[bootstraptoken] configured RBAC rules to allow the csrapprover controller automatically approve CSRs from a Node Bootstrap Token
[bootstraptoken] configured RBAC rules to allow certificate rotation for all node client certificates in the cluster
[bootstraptoken] creating the "cluster-info" ConfigMap in the "kube-public" namespace
[addons] Applied essential addon: CoreDNS
[addons] Applied essential addon: kube-proxy

Your Kubernetes master has initialized successfully!

To start using your cluster, you need to run the following as a regular user:

  mkdir -p $HOME/.kube
  sudo cp -i /etc/kubernetes/admin.conf $HOME/.kube/config
  sudo chown $(id -u):$(id -g) $HOME/.kube/config

You should now deploy a pod network to the cluster.
Run "kubectl apply -f [podnetwork].yaml" with one of the options listed at:
  https://kubernetes.io/docs/concepts/cluster-administration/addons/

You can now join any number of machines by running the following on each node
as root:

  kubeadm join 10.24.101.201:6443 --token 9jhx3x.c1a35jp4hq12pk7w --discovery-token-ca-cert-hash sha256:5f02ab9b825cf6c21f46a5701c4391e6e1c8c584219a458b3e91f1163bf3a402
效果:

需要安装 flannel 或者是calico 才可以.
这里先不写了....
感谢原作者
kubeadm 跟之前的版本 基本上一致的 简单测试了下.