**
一、虚拟机安装操作系统**
Redhat 6.4
注意:linux下安装oracle 11,如果是redhat系统,选择redhat6版本的,因为redhat7版本里面少一个安装数据库用到的包compat-libstdc+±33,没有这个包,安装之后后面会出错。
1.1 安装系统步骤
选择
1.第一个
2.Tab 键,空格
3.必须选英文
4.basic storage device
5.yes,discard any data
6.Aisa/shanghai 或chongqing
7.设置密码 redhat. —> Use any—>use all space—>write chanes to disk
8.Desktop
9.reboot
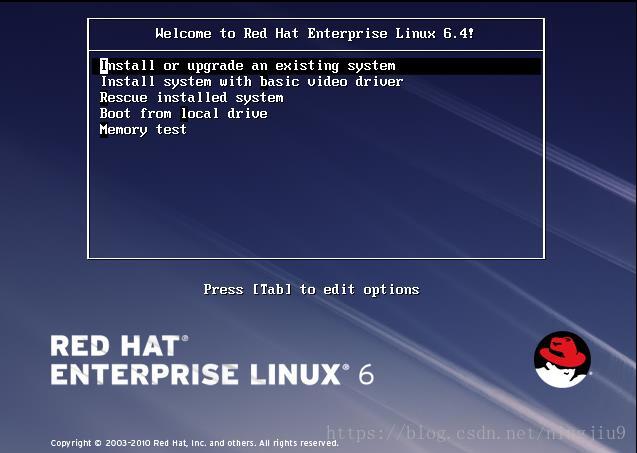
Enter 进入系统
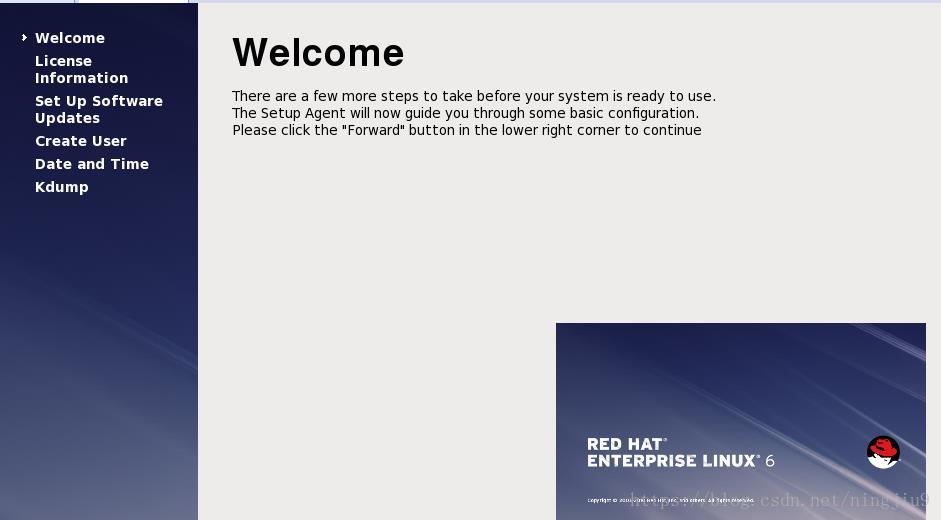
Welcome: 同意
License: 同意
Information: 同意
Set up software: no
Updates: 下一步
Create user: 下一步
Date and time: 下一步
Kdump: 取消勾选 (是一个内核崩溃保护分析机制)
重启
1.1.1首次登陆
勾选do not show me this again
Init 0是关机命令
1.1.2 root 登陆系统后的设置
1)关闭防火墙
Setup命令
Firewalld 用空格取消enabled的*
2)禁用selinux
vim /etc/selinux/config
修改
SELINUX=disabled
3)加载光盘
1.点击左上角虚拟机 选择安装vmwaretools (加载光盘)
查看
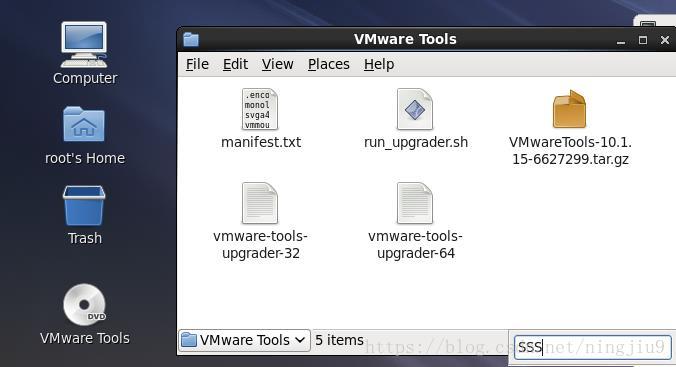
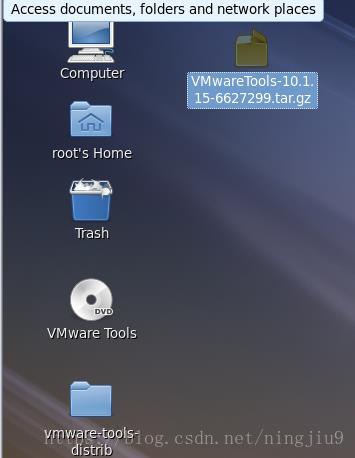
2.点击光盘,拷贝VMwaretools-10.1.15-6627299.tar.gz文件夹到虚拟机桌面],鼠标右键解压缩到此处(Extrace)
3.点击解压出来的文件vmware-tools-distrib 右键open in terminal
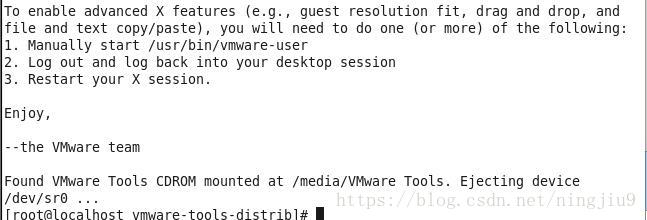
在该终端执行命令:./vmware-install.pl
默认直接回车
4)重启
Init 6
登陆后可以删除有关vmtools的文件
二、安装数据库
2.1上传安装包并解压
将11g安装包1和2复制到虚拟机桌面
Locate + 文件名 查找该文件所在目录

[root@localhost Desktop]# locate p13390677_112040_Linux-x86-64_1of7.zip
[root@localhost Desktop]# locate p13390677_112040_Linux-x86-64_2of7.zip
2.1.1图形化界面打开压终端,先解压安装包1,再解压2
注意:必须是先解压1,再解压2,因为按照这样的顺序解压两个就会组合到一起
[root@localhost Desktop]#unzip p13390677_112040_Linux-x86-64_1of7.zip
[root@localhost Desktop]#unzip p13390677_112040_Linux-x86-64_2of7.zip
查看
删除两个压缩包

[root@localhost Desktop]#rm –rf p*.zip
注意:目录下有一个database目录留下

2.2 建立用户和组
2.2.1 创建目录
[root@localhost Desktop]#mkdir -p /u01/app/oracle
2.2.2 添加组
[root@localhost Desktop]#groupadd oinstall
[root@localhost Desktop]#groupadd dba
2.2.3 为用户指定基本组和附加组
-g 指定组 –G指定附加组
[root@localhost Desktop]#useradd -g oinstall -G dba oracle
2.2.4 为oracle 用户设置密码
[root@localhost Desktop]#passwd oracle
设置密码为redhat
2.2.5 移动目录database到/u01
[root@localhost Desktop]#mv database/ /u01
2.2.6 改权限
改变文件所有者的权限
用法:chown –R 用户名:组名 文件/目录
[root@localhost Desktop]#chown -R oracle:oinstall /u01
改变文件权限
用法:chmod –R xyz权限 文件/目录
r:4,w:2,x:1
[root@localhost Desktop]#chmod -R 775 /u01
2.3 安装所需软件包
2.3.1配置yum源/etc/yum.repo.s/rhel-source.repo
[root@localhost Desktop]#vim /etc/yum.repo.s/rhel-source.repo
1,2行留下
修改
baseurl=file:///mnt/Server
enabled=1
gpgcheck=0
底
下全部删除
2.3.2挂载镜像/dev/cdrom 到/mnt

[root@localhost Desktop]#mount /dev/cdrom /mnt
如果挂载不上,点击右下角连接光盘,
查看
有一个server
[root@localhost Desktop]# cd /mnt
[root@localhost Desktop]# ls
2.4安装数据库所需软件包
查看需要安装哪些软件包(可以不用看)

虚拟机桥接/net模式,
注意:如果将虚拟网络适配器更改为桥接模式,GBE是有线网卡,
   [root@localhost Desktop]# cd /u01/database/doc
    [root@localhost doc ]# firefox index.htm
在该引导界面选择
1)Database Quick Installation Guide(数据库快速安装指南),HTML
在底下查看所需软件包

2.4.1 安装
[root@localhostDesktop]#yum install binutils compat-libstdc++-33 elfutils-libelf elfutils-libelf-devel gcc gcc-c++ glibc glibc-common glibc-devel glibc-headers ksh libaio libaio-devel libgcc libstdc++ libstdc++-devel make sysstat unixODBC unixODBC-devel
2.4.2 修改/etc/sysctl.conf
[root@localhost Desktop]# vi /etc/sysctl.conf
添加
fs.aio-max-nr = 1048567
fs.file-max = 6815744
kernel.shmmni = 4096
kernel.sem = 250 32000 100 128
net.ipv4.ip_local_port_range = 9000 65500
net.core.rmem_default = 262144
net.core.rmem_max = 4194304
net.core.wmem_default = 262144
net.core.wmem_max = 1048586
2.4.3生效
Sysctl –p
2.4.4 修改文件/etc/security/limits.conf
[root@localhost Desktop]# vi /etc/security/limits.conf
oracle              soft    nproc   2047
oracle              hard    nproc   16384
oracle              soft    nofile  1024
oracle              hard    nofile  65536
oracle              soft    stack   S10240
2.4.5 查看/etc/hosts
[root@localhost Desktop]# vim /etc/hosts
[root@localhost Desktop]# hostname
localhost.localdomain
[root@localhost Desktop]# ping localhost.localdomain
PING localhost (127.0.0.1) 56(84) bytes of data.
64 bytes from localhost (127.0.0.1): icmp_seq=1 ttl=64 time=0.045 ms
64 bytes from localhost (127.0.0.1): icmp_seq=2 ttl=64 time=0.042 ms
64 bytes from localhost (127.0.0.1): icmp_seq=3 ttl=64 time=0.042 ms
2.5 创建数据库
2.5.1 root用户运行xhost +
xhost +:控制xserver访问权限,使所有用户都可以访问主机
[root@localhost Desktop]# xhost +
2.5.2 oracle账户登陆在图形化界面创建
[root@localhost Desktop]# su – oracle
查看在/u01/database/目录下有runInstaller
[oracle@localhost ~]$ cd /u01/database/
[oracle@localhost database]$ ls
install  readme.html  response  rpm  runInstaller  sshsetup  stage  welcome.html
运行runInstaller开始安装
[oracle@localhost database]$ ./runInstaller

下一步,yes


下一步

下一步


选择企业版

下一步

下一步
下一步


都可以选择

密码设置为redhat


下一步
点击install


2.5.3运行脚本/u01/app/oraInventory/orainstRoot.sh和脚本/u01/app/oracle/product/11.2.0/dbhome_1/root.sh


[root@localhost Desktop]# /u01/app/oraInventory/orainstRoot.sh
[root@localhostDesktop]#
/u01/app/oracle/product/11.2.0/dbhome_1/root.sh
回车
2.5.4 root 账号登陆xhost +
[root@localhost Desktop]# xhost +
2.5.5 oracle 账号登陆查看
[root@localhost Desktop]# su – oracle
[oracle@localhost ~]$ . oraenv
ORACLE_SID = [oracle] ? orcl
The Oracle base has been set to /u01/app
2.6数据库配置助手dbca介绍
[oracle@localhost ~]$ dbca
如果要创建一个数据库


Ok
2.7 数据库创建好之后oracle账户登陆数据库查看
init 0 关机
oracle 账号登陆
2.7.1登陆数据库
[oracle@localhost Desktop]$ . oraenv
ORACLE_SID = [oracle] ? orcl
The Oracle base has been set to /u01/app/oracle
[oracle@localhost Desktop]$ sqlplus / as sysdba
SQL*Plus: Release 11.2.0.4.0 Production on Tue Aug 28 05:49:19 2018
Copyright © 1982, 2013, Oracle. All rights reserved.
Connected to an idle instance.
2.7.2启动实例
SQL> startup
默认创建hr 用户的departments表

SQL> select * from hr.departments;
27行