原文地址:Seamless Cloning using OpenCV (Python , C++)
无缝合成(Seamless Cloning)是 opencv3 的新特性。
利用这个新特性,我们可以从一个图像复制对象,并将其粘贴到另一个图像中,同时使组合看起来无缝和自然。
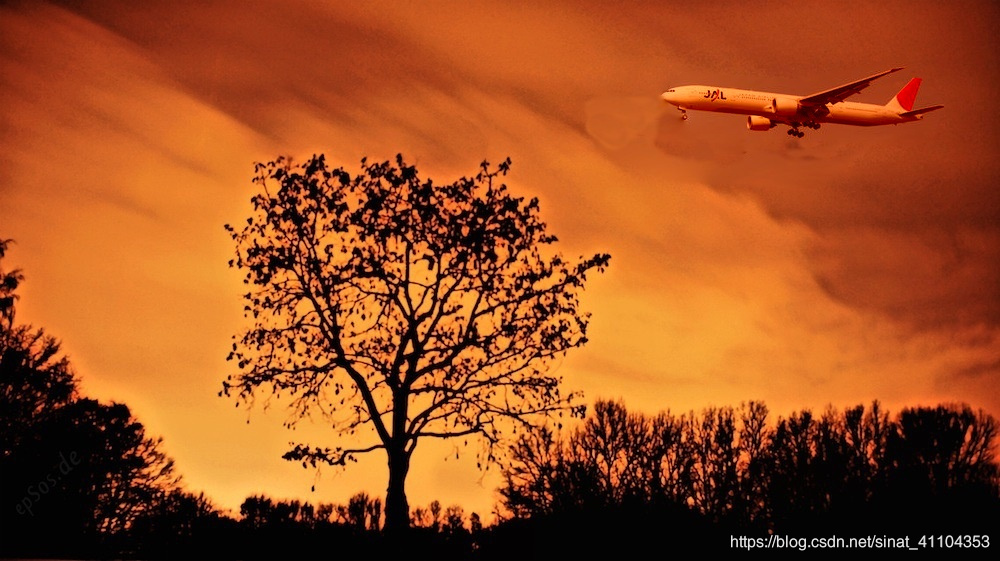
比如说下面这个图就是飞机和天空无缝合成的结果
想要达到上述效果,我们主要的函数就是 cv2.seamlessClone,其定义如下:
output = cv2.seamlessClone(src, dst, mask, center, flags)
| 参数 | 含义 |
|---|---|
| src | Source image that will be cloned into the destination image. In our example it is the airplane. |
| dst | Destination image into which the source image will be cloned. In our example it is the sky image. |
| mask | A rough mask around the object you want to clone. This should be the size of the source image. Set it to an all white image if you are lazy! |
| center | Location of the center of the source image in the destination image. |
| flags | The two flags that currently work are NORMAL_CLONE and MIXED_CLONE. I have included an example to show the difference. |
| output | Output / result image. |
实现上述效果的代码如下:
# Standard imports
import cv2
import numpy as np

# Read images
src = cv2.imread("images/airplane.jpg")
dst = cv2.imread("images/sky.jpg")

# Create a rough mask around the airplane.
src_mask = np.zeros(src.shape, src.dtype)

# 当然我们比较懒得话,就不需要下面两行,只是效果差一点。
# 不使用的话我们得将上面一行改为 mask = 255 * np.ones(obj.shape, obj.dtype) <-- 全白
poly = np.array([ [4,80], [30,54], [151,63], [254,37], [298,90], [272,134], [43,122] ], np.int32)
cv2.fillPoly(src_mask, [poly], (255, 255, 255))

# 这是 飞机 CENTER 所在的地方
center = (800,100)

# Clone seamlessly.
output = cv2.seamlessClone(src, dst, src_mask, center, cv2.NORMAL_CLONE)

# 保存结果
cv2.imwrite("images/opencv-seamless-cloning-example.jpg", output);
飞机和天空的图片可以在下面两个网址找到。
sky
plane
值得一提的是,那个 poly 参数应该是经过仔细计算的。因为一开始我没看到图源,就自己修了下图,结果产生下面的错误:
Traceback (most recent call last):
  File "C:\Users\Administrator\Desktop\test3.py", line 19, in <module>
    output = cv2.seamlessClone(src, dst, src_mask, center, cv2.NORMAL_CLONE)
cv2.error: OpenCV(3.4.3) C:\projects\opencv-python\opencv\modules\core\src\matrix.cpp:465: error: (-215:Assertion failed) 0 <= roi.x && 0 <= roi.width && roi.x + roi.width <= m.cols && 0 <= roi.y && 0 <= roi.height && roi.y + roi.height <= m.rows in function 'cv::Mat::Mat'
更多内容请看原文,我这里只举了其中的一个例子。