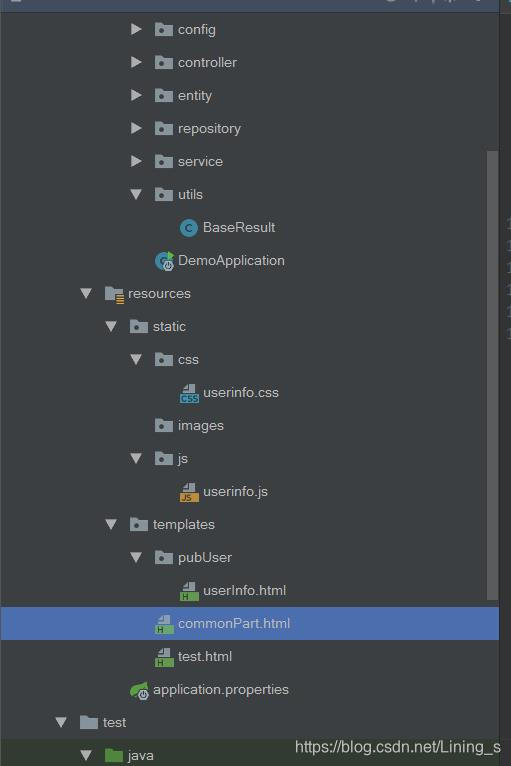
工程目录如下:
1 引入依赖
<!--集成Thymeleaf模版引擎2.1.0-->
		<dependency>
			<groupId>org.springframework.boot</groupId>
			<artifactId>spring-boot-starter-thymeleaf</artifactId>
		</dependency>
2.在application.properties 添加thymeleaf的配置,添加配置如下
### Thymeleaf 模版配置
spring.thymeleaf.mode=HTML5
### 避免缓存,使前端代码及时生效
spring.thymeleaf.cache=false
### 配置编码
spring.thymeleaf.encoding=utf-8
### 配置html文件位置
spring.thymeleaf.prefix=classpath:/templates/
3.在controller包下新增一个返回页面+数据的的类: ModelAndViewController.
@RestController == @ResponseBody (返回数据) + @Controller,由于要返回页面,只需要一个@Controller注解
package com.example.demo.controller;

import com.example.demo.entity.PubUser;
import com.example.demo.service.PubUserService;
import org.springframework.stereotype.Controller;
import org.springframework.ui.Model;
import org.springframework.web.bind.annotation.RequestMapping;
import javax.annotation.Resource;
import java.util.List;


@Controller
@RequestMapping("/test")
public class ModelAndViewController {
    /**
     * 注入服务层
     */
    @Resource
    private PubUserService userService;


    @RequestMapping("userinfo")
    public String userInfo(Model model){
        List<PubUser> list = userService.findAll();
        model.addAttribute("user",list);
        return  "pubUser/userInfo"; //由于templates已经配置,这里是文件的路径
    }
}
3.在templates下新建conmmonPart.html,该页面主要是写一些 公共的css,公共的js,还有一些需要公共头部 或者 底部
<!DOCTYPE html>
<html xmlns="http://www.w3.org/1999/xhtml" xmlns:th="http://www.thymeleaf.org" >
<head th:fragment="common_header(title,links)">
<!-- 网站标题 -->
<title>照着书本撸代码</title>
<meta charset="utf-8">
<meta http-equiv="X-UA-Compatible" content="IE=edge">
<meta name="viewport" content="width=device-width, initial-scale=1.0">
<meta http-equiv="X-UA-Compatible" content="IE=edge,chrome=1">
<!--网站logo-->
<link rel="icon" href="/img/icon.ico" type="image/x-icon" />
<link rel="stylesheet" href="http://cdn.bootcss.com/bootstrap/3.3.0/css/bootstrap.min.css">
<!--添加下面一句话 才能引入特有的css-->
<th:block th:replace="${links}" />
</head>
<div th:fragment="common_js(scripts)">
<script src="http://libs.baidu.com/jquery/2.1.1/jquery.min.js"></script>
<script src="http://libs.baidu.com/bootstrap/3.0.3/js/bootstrap.min.js"></script>
<!--添加下面一句话 才能引入特有的js-->
<th:block th:replace="${scripts}" />
</div>
<div th:fragment="alert">
<div class="modal fade" id="myModal" tabindex="-1" role="dialog" aria-labelledby="myModalLabel" aria-hidden="true">
<div class="modal-dialog">
<div class="modal-content">
<div class="modal-header">
<button type="button" class="close" data-dismiss="modal" aria-hidden="true">
×
</button>
<h4 class="modal-title" id="myModalLabel" style="text-align: center">
系统消息
</h4>
</div>
<div class="modal-body">
<p id="tips">hellokitty</p>
</div>
</div><!-- /.modal-content -->
</div><!-- /.modal -->
</div>
</div>
</html>```
3.在templates/pubUser文件夹下,新建userInfo.html
登录:
邮箱:
$(function () {
    alert("测试");
   $(".btn-success").on("click",function () {
       var tip = $("#info").val();
       $("#tips").text(tip);
       $("#myModal").modal("show");
   })
});
在css文件夹下,新建userinfo.css
.redBorder{
    border: 1px solid red;
    width: 180px;
}
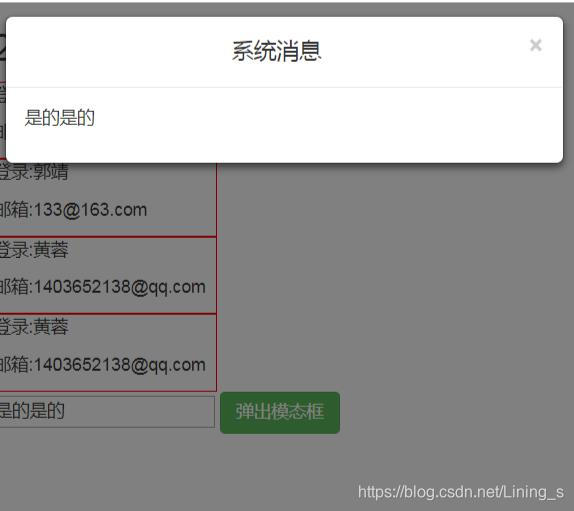
6.集成thymeleaf完成,启动项目,访问http://127.0.0.1:8080/test/userinfo
展示界面如下