AndroidStudio gradle:3.2.0配置NDK开发环境
最近这段时间在学习Android开发人脸识别,踩了很多坑,也学到挺多东西的,第一篇笔记,记录一下NDK环境搭建。
首先打开SDK
然后下载这三个东西,是搭建环境需要的包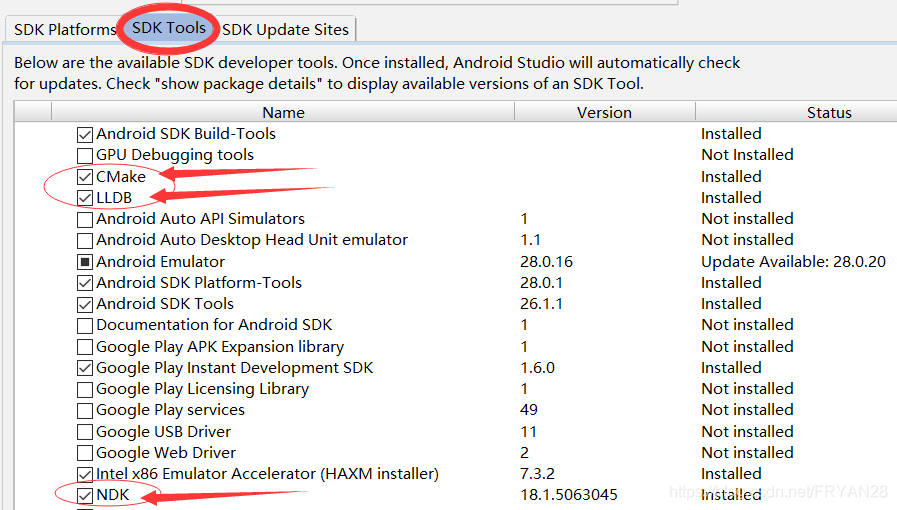 正常情况下这样就可以了,我们打开File–>Setting Structure,设置NDK路径
NDK默认下载到SDK目录之下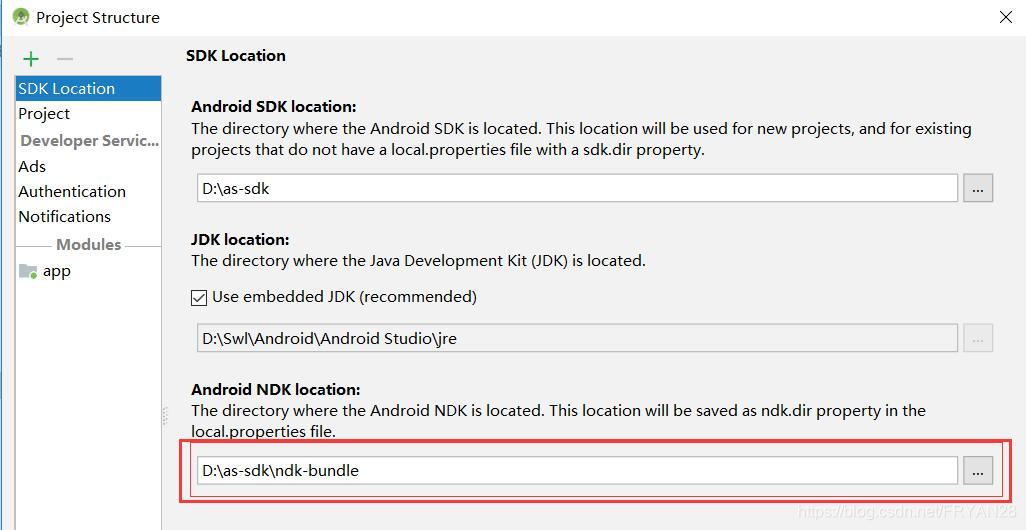
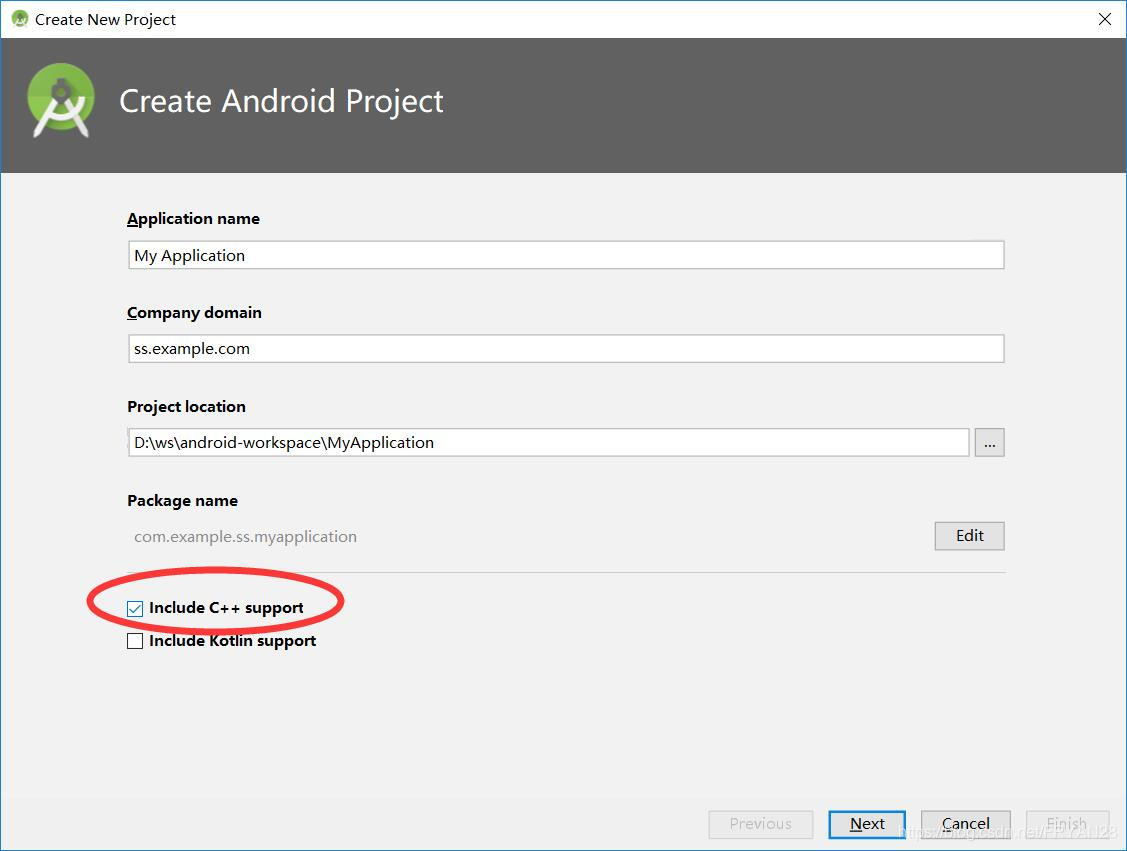
然后新建一个项目,记得把C++打勾
然后Android会自动生成相应的文件,配置如下
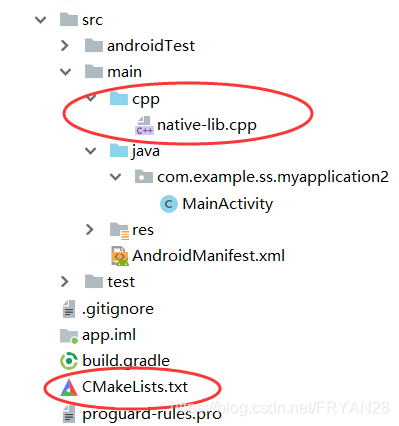
CMake文件内容如下:
 # For more information about using CMake with Android Studio, read the
**# documentation: https://d.android.com/studio/projects/add-native-code.html
# Sets the minimum version of CMake required to build the native library.
cmake_minimum_required(VERSION 3.4.1)
# Creates and names a library, sets it as either STATIC
# or SHARED, and provides the relative paths to its source code.
# You can define multiple libraries, and CMake builds them for you.
# Gradle automatically packages shared libraries with your APK.
add_library( # Sets the name of the library.
        native-lib
        # Sets the library as a shared library.
        SHARED
        # Provides a relative path to your source file(s).
        src/main/cpp/native-lib.cpp)
# Searches for a specified prebuilt library and stores the path as a
# variable. Because CMake includes system libraries in the search path by
# default, you only need to specify the name of the public NDK library
# you want to add. CMake verifies that the library exists before
# completing its build.
find_library( # Sets the name of the path variable.
        log-lib
        # Specifies the name of the NDK library that
        # you want CMake to locate.
        log)
# Specifies libraries CMake should link to your target library. You
# can link multiple libraries, such as libraries you define in this
# build script, prebuilt third-party libraries, or system libraries.
target_link_libraries( # Specifies the target library.
        native-lib
        # Links the target library to the log library
        # included in the NDK.
        ${log-lib})
 一般local.propertoise文件里面的NDK路径
会自动生成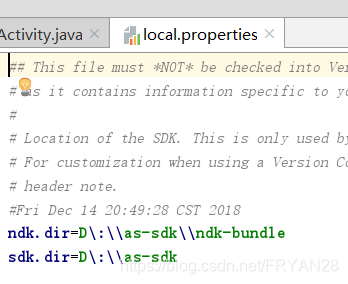
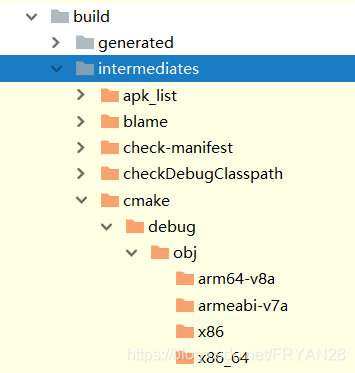
后面编译后的.so文件一般在这里面
APP的buile.gradle可以这样配置,ndk下面写CPU名称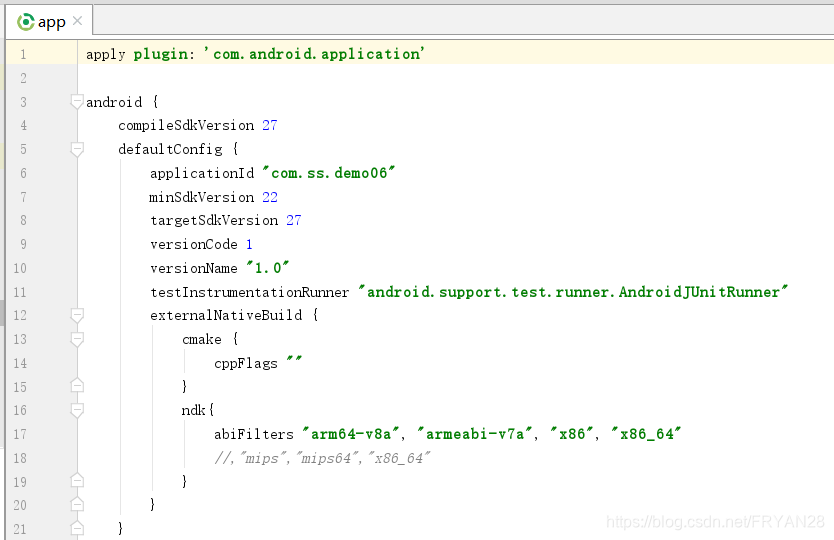
externalNativeBuild {
    cmake {
        cppFlags ""
    }
    ndk{
        abiFilters "arm64-v8a", "armeabi-v7a", "x86", "x86_64"
        //,"mips","mips64","x86_64"
    }
}
然后就可以愉快地调用C++文件啦,在主类里面加载.
.cpp文件
注意C++文件当中的函数名是Java_全类名
最后的类名要和java文件中声明的方法名一样
#include <jni.h>
#include <string>

extern "C" JNIEXPORT jstring JNICALL
Java_com_example_ss_myapplication2_MainActivity_stringFromJNI(
        JNIEnv *env,
        jobject /* this */) {
    std::string hello = "Hello from C++";
    return env->NewStringUTF(hello.c_str());
}
public class Main{

    // Used to load the 'native-lib' library on application startup.
    static {
        System.loadLibrary("native-lib");
    }@Override
protected void onCreate(Bundle savedInstanceState) {
    super.onCreate(savedInstanceState);
    setContentView(R.layout.activity_main);

    // Example of a call to a native method
    TextView tv = (TextView) findViewById(R.id.sample_text);
    tv.setText(stringFromJNI());
}

/**
     * A native method that is implemented by the 'native-lib' native library,
     * which is packaged with this application.
     */
    public native String stringFromJNI();//这里用native声明需要使用C++实现的函数名称
}
3.2的配置过程大概就是这样总体还是比较容易~