Android实现View截图并保存到相册
一、目标
对笔记进行截图,并保存到相册。
1. 效果图
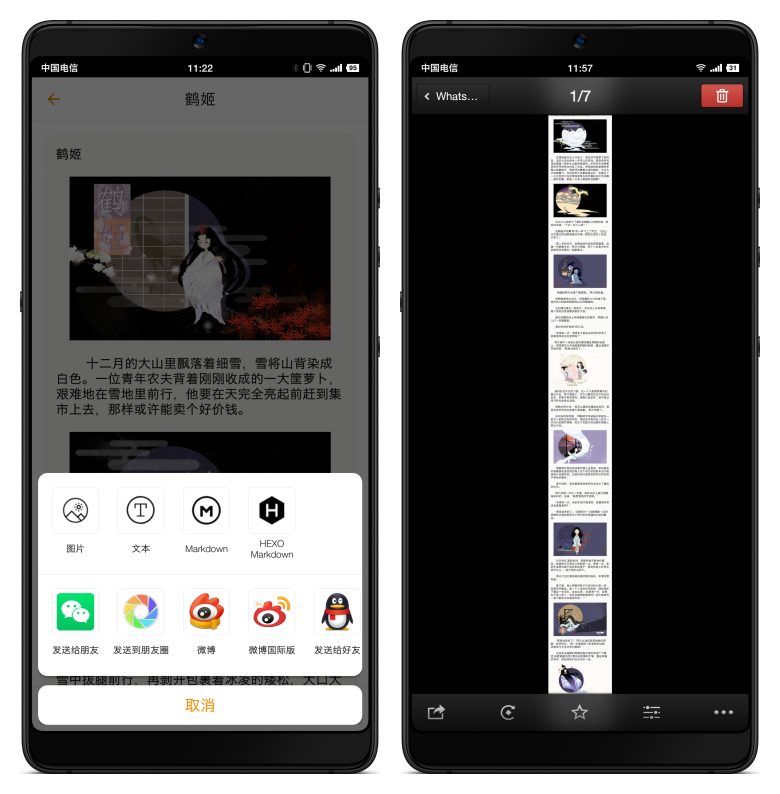
实现第1栏第1个图标”图片“功能,对View进行截图,并保存到图库。
2. 下载地址
神马笔记最新版本:【神马笔记 版本1.2.0.apk】
二、需求设计
图片方式是最能保持原有排版的一种方式,能保证完全一致的阅读体验。并且还具有一定防止修改的能力。
因此,神马笔记非常推荐以图片的方式进行分享。
实现整个功能分成3个步骤:
- 对View进行截图生成Bitmap
- 保存Bitmap图片到文件File
- 更新相册图库
三、准备工作
1. 实现View截图
对View进行截图,有2种方式。
- 通过View#getDrawingCache()获取缓存的Bitmap
- 通过View#draw()将View绘制到离屏的Bitmap
@Deprecated
public void setDrawingCacheEnabled(boolean enabled)

@Deprecated
public Bitmap getDrawingCache()

@Deprecated
public void buildDrawingCache(boolean autoScale)

@Deprecated
public void destroyDrawingCache()

@Deprecated
public void setDrawingCacheQuality(@DrawingCacheQuality int quality)

@Deprecated
public void setDrawingCacheBackgroundColor(@ColorInt int color);
/**
 * @deprecated
 * The view drawing cache was largely made obsolete with the introduction of
 * hardware-accelerated rendering in API 11. With hardware-acceleration, intermediate cache
 * layers are largely unnecessary and can easily result in a net loss in performance due to the
 * cost of creating and updating the layer. In the rare cases where caching layers are useful,
 * such as for alpha animations, {@link #setLayerType(int, Paint)} handles this with hardware rendering.
 */
/**
 * For software-rendered snapshots of a small part of the View hierarchy or
 * individual Views it is recommended to create a {@link Canvas} from either a {@link Bitmap} or
 * {@link android.graphics.Picture} and call {@link #draw(Canvas)} on the View.
 */
/**
 * However these
 * software-rendered usages are discouraged and have compatibility issues with hardware-only
 * rendering features such as {@link android.graphics.Bitmap.Config#HARDWARE Config.HARDWARE}
 * bitmaps, real-time shadows, and outline clipping. For screenshots of the UI for feedback
 * reports or unit testing the {@link PixelCopy} API is recommended.
 */
Android 9.0(API 28)已经将所有操作DrawingCache的方法标识为Deprecated,不推荐使用。
因此,我们采用第二种方式,通过View#draw(Canvas)实现截图。
正如注释中所描述的,采用软件渲染的方式,在处理阴影和裁剪时会遇到问题。
开发过程也确实遇到问题,View#draw(Canvas)会丢失elevation及translationZ方式渲染的阴影。
2. 保存Bitmap到文件
调用Bitmap#compress(CompressFormat format, int quality, OutputStream stream)即可保存到文件。
这里对format及quality两个参数有些取舍。
public enum CompressFormat {
    JPEG    (0),
    PNG     (1),
    WEBP    (2);

    CompressFormat(int nativeInt) {
        this.nativeInt = nativeInt;
    }
    final int nativeInt;
}
/**
 * @param quality  Hint to the compressor, 0-100. 0 meaning compress for
 *                 small size, 100 meaning compress for max quality. Some
 *                 formats, like PNG which is lossless, will ignore the
 *                 quality setting
 */
选择JPEG格式,还是PNG格式呢?
选择JPEG格式,quality在[0, 100]之间设置多大的数值合适呢?
考虑到图片用于分享,因此选择JPEG格式,同时quality设置为50。
3. 更新相册图库
理论上,可以把文件保存到任何一个位置,但是?
在微信发送到朋友圈的时候,遇到找不到图片,无法发送的问题。
把图片保存到系统图库目录,并更新相册图库,问题完美解决。
MediaStore为我们提供了一个很好的示例。
public static final String insertImage(ContentResolver cr, Bitmap source,
                                       String title, String description) {
    ContentValues values = new ContentValues();
    values.put(Images.Media.TITLE, title);
    values.put(Images.Media.DESCRIPTION, description);
    values.put(Images.Media.MIME_TYPE, "image/jpeg");

    Uri url = null;
    String stringUrl = null;    /* value to be returned */

    try {
        url = cr.insert(EXTERNAL_CONTENT_URI, values);

        if (source != null) {
            OutputStream imageOut = cr.openOutputStream(url);
            try {
                source.compress(Bitmap.CompressFormat.JPEG, 50, imageOut);
            } finally {
                imageOut.close();
            }

            long id = ContentUris.parseId(url);
            // Wait until MINI_KIND thumbnail is generated.
            Bitmap miniThumb = Images.Thumbnails.getThumbnail(cr, id,
                                                              Images.Thumbnails.MINI_KIND, null);
            // This is for backward compatibility.
            Bitmap microThumb = StoreThumbnail(cr, miniThumb, id, 50F, 50F,
                                               Images.Thumbnails.MICRO_KIND);
        } else {
            Log.e(TAG, "Failed to create thumbnail, removing original");
            cr.delete(url, null, null);
            url = null;
        }
    } catch (Exception e) {
        Log.e(TAG, "Failed to insert image", e);
        if (url != null) {
            cr.delete(url, null, null);
            url = null;
        }
    }

    if (url != null) {
        stringUrl = url.toString();
    }

    return stringUrl;
}
直接调用insertImage,我们无法控制最终保存位置。需要对这段代码稍作调整。
四、组合起来
1. Snapshot
Snapshot负责实现View截图,并根据内存使用量,自动调整目标Bitmap的尺寸及模式,以保证显示完整内容。
public class Snapshot {

    View view;

    float memoryFactor = 0.5f;

    public Snapshot(View view) {
        this(view, 0.5f);
    }

    public Snapshot(View view, float factor) {
        this.view = view;
        this.memoryFactor = (factor > 0.9f || factor < 0.1f)? 0.5f: factor;
    }

    public Bitmap apply() {
        Mode mode = chooseMode(view);
        if (mode == null) {
            return null;
        }

        Bitmap target = Bitmap.createBitmap(mode.mWidth, mode.mHeight, mode.mConfig);
        Canvas canvas = new Canvas(target);
        if (mode.mWidth != mode.mSourceWidth) {
            float scale = 1.f * mode.mWidth / mode.mSourceWidth;
            canvas.scale(scale, scale);
        }
        view.draw(canvas);

        return target;
    }

    Mode chooseMode(View view) {
        Mode mode = chooseMode(view.getWidth(), view.getHeight());
        return mode;
    }

    Mode chooseMode(int width, int height) {

        Mode mode;

        long max = Runtime.getRuntime().maxMemory();
        long total = Runtime.getRuntime().totalMemory();
        long remain = max - total; // 剩余可用内存
        remain = (long)(memoryFactor * remain);

        int w = width;
        int h = height;
        while (true) {

            // 尝试4个字节
            long memory = 4 * w * h;
            if (memory <= remain) {
                if (memory <= remain / 3) { // 优先保证保存后的图片文件不会过大,有利于分享
                    mode = new Mode(Bitmap.Config.ARGB_8888, w, h, width, height);

                    break;
                }
            }

            // 尝试2个字节
            memory = 2 * w * h;
            if (memory <= remain) {
                mode = new Mode(Bitmap.Config.RGB_565, w, h, width, height);
                break;
            }

            // 判断是否可以继续
            if (w % 3 != 0) {
                h = (int)(remain / 2 / w); // 计算出最大高度
                h = h / 2 * 2; // 喜欢偶数

                mode = new Mode(Bitmap.Config.RGB_565, w, h, width, height);
                break;
            }

            // 缩减到原来的2/3
            w = w * 2 / 3;
            h = h * 2 / 3;
        }

        return mode;
    }

    /**
     *
     */
    public static final class Mode {

        Bitmap.Config mConfig;

        int mWidth;
        int mHeight;

        int mSourceWidth;
        int mSourceHeight;

        Mode(Bitmap.Config config, int width, int height, int srcWidth, int srcHeight) {
            this.mConfig = config;

            this.mWidth = width;
            this.mHeight = height;

            this.mSourceWidth = srcWidth;
            this.mSourceHeight = srcHeight;
        }
    }
}
2. SharePictureAction
实现保存图片,并更新相册图库。分解成3个步骤完成。
- 删除旧文件
- 保存Bitmap到文件(保存在系统Pictures目录下)
- 更新相册图库,同时更新缩略图(参考MediaStore#insertImage实现)。
Uri accept(Bitmap bitmap) {
    Uri url = null;

    if (bitmap == null) {
        return url;
    }

    File file = this.targetDir;
    file = new File(file, entity.getName() + ".jpg");

    // delete previous bitmap
    {
        deleteImage(context, file);
    }

    // save file
    try {
        file.createNewFile();
        FileOutputStream fos = new FileOutputStream(file);
        bitmap.compress(Bitmap.CompressFormat.JPEG, 50, fos);
        fos.close();
    } catch (IOException e) {
        e.printStackTrace();

        file.delete();
        file = null;
    }

    // update media store
    if (file != null && file.exists()) {
        String title = entity.getName();
        String description = "";
        int width = bitmap.getWidth();
        int height = bitmap.getHeight();

        url = insertImage(context, file, title, description, width, height);
    }

    return url;
}
static final int deleteImage(Context context, File file) {

    int count = 0;
    ContentResolver resolver = context.getContentResolver();

    try {

        // 删除旧文件
        count = resolver.delete(MediaStore.Images.Media.EXTERNAL_CONTENT_URI,
                                MediaStore.Images.ImageColumns.DATA + "=?",
                                new String[] { file.getAbsolutePath() });

    } catch (Exception e) {

    }

    return count;
}
static final Uri insertImage(Context context,
                             File file,
                             String title,
                             String description,
                             int width,
                             int height) {
    Uri url;

    ContentValues values = new ContentValues();
    ContentResolver cr = context.getContentResolver();

    // insert to media store
    {
        long time = file.lastModified();

        // media provider uses seconds for DATE_MODIFIED and DATE_ADDED, but milliseconds
        // for DATE_TAKEN
        long dateSeconds = time / 1000;

        // mime-type
        String mimeType = "image/jpeg";

        values.put(MediaStore.Images.ImageColumns.TITLE, title);
        values.put(MediaStore.Images.ImageColumns.DISPLAY_NAME, title);
        values.put(MediaStore.Images.ImageColumns.DESCRIPTION, description);

        values.put(MediaStore.Images.ImageColumns.MIME_TYPE, mimeType);
        values.put(MediaStore.Images.ImageColumns.WIDTH, width);
        values.put(MediaStore.Images.ImageColumns.HEIGHT, height);
        values.put(MediaStore.Images.ImageColumns.SIZE, file.length());
        values.put(MediaStore.Images.ImageColumns.DATA, file.getAbsolutePath());

        values.put(MediaStore.Images.ImageColumns.DATE_TAKEN, time);
        values.put(MediaStore.Images.ImageColumns.DATE_ADDED, dateSeconds);
        values.put(MediaStore.Images.ImageColumns.DATE_MODIFIED, dateSeconds);

        url = cr.insert(MediaStore.Images.Media.EXTERNAL_CONTENT_URI, values);
    }

    // generate thumbnail
    {
        long id = ContentUris.parseId(url);

        // Wait until MINI_KIND thumbnail is generated.
        Bitmap miniThumb = MediaStore.Images.Thumbnails.getThumbnail(cr, id,
                                                                     MediaStore.Images.Thumbnails.MINI_KIND, null);
        if (miniThumb != null) {
            miniThumb.recycle();
        }
    }

    return url;
}
五、Final
整个功能遇到的最大问题是第一步——将View转为Bitmap。
后续两个步骤,MediaStore为我们提供了标准的实现方案。
目前View转为Bitmap最大的问题是会丢失阴影,当我们使用CardView时,问题会非常明显。
坚果Pro2通过截屏的方式,可以完美保持阴影。
坚果Pro2通过长截屏的方式,可以完美对View截图并保持阴影。
~待后续版本进行优化~奈何~奈何~