Spring的传统aop编程
讲解的目的是为了更好的理解aop。
在传统的spring aop开发中它支持增强(advice)有五种:
- 前置通知 目标方法执行前增强 org.springframework.aop.MethodBeforeAdvice
- 后置通知 目标方法执行后增强 org.springframework.aop.AfterReturningAdvice
- 环绕通知 目标方法执行前后进行增强 org.aopalliance.intercept.MethodInterceptor
- 异常抛出通知 目标方法抛出异常后的增强 org.springframework.aop.ThrowsAdvice
- 引介通知 在目标类中添加一些新的方法或属性(不讲解)
org.springframework.aop.IntroductionInterceptor
经典的基于代理的AOP开发(了解)
基本的jar包
6. bean
7. core
8. context
9. expression
10. aop
11. 需要aop联盟的依赖jar包

第一步:编写目标(target)
接口:
package com.itcast.aop;

public interface OrderService {
    public void addOrder();
    public void updateOrder();
}
实现类:
package com.itcast.aop;

public class OrderServiceImpl implements OrderService {
    @Override
    public void addOrder() {
        System.out.println("没有代理的add。。。");
    }

    @Override
    public void updateOrder() {
        System.out.println("没有代理的update。。。");
    }
}
第二步增强(advice) :
package com.itcast.aop;

import org.aopalliance.intercept.MethodInterceptor;
import org.aopalliance.intercept.MethodInvocation;
import org.springframework.aop.AfterReturningAdvice;
import org.springframework.aop.MethodBeforeAdvice;

import java.lang.reflect.Method;

public class OrderServiceAdvice implements MethodBeforeAdvice,AfterReturningAdvice,MethodInterceptor {
    @Override
    public void before(Method method, Object[] objects, Object o) throws Throwable {
        System.out.println("前置通知。。。");
    }

    @Override
    public void afterReturning(Object o, Method method, Object[] objects, Object o1) throws Throwable {
        System.out.println("后置通知");
    }

    @Override
    public Object invoke(MethodInvocation methodInvocation) throws Throwable {
        System.out.println("环绕前通知。。。");
        Object proceed = methodInvocation.proceed();
        System.out.println("环绕后通知。。。");
        return proceed;
    }
}
第三步在applicationContext.xml文件中配置
配置文件applicationContext.xml
<?xml version="1.0" encoding="UTF-8"?>
<beans xmlns="http://www.springframework.org/schema/beans"
       xmlns:xsi="http://www.w3.org/2001/XMLSchema-instance" xmlns:context="http://www.springframework.org/schema/context"
       xsi:schemaLocation="
        http://www.springframework.org/schema/beans http://www.springframework.org/schema/beans/spring-beans.xsd
        http://www.springframework.org/schema/context http://www.springframework.org/schema/context/spring-context.xsd">

    <!--目标target-->
    <bean id="orderService" class="com.itcast.aop.OrderServiceImpl"></bean>

    <!--通知Advice-->
    <bean id="orderServiceAdvice" class="com.itcast.aop.OrderServiceAdvice"></bean>

    <!--切点:通过方法的名字定义切点,但是定义方式偏硬,不建议使用-->
    <!--<bean id="orderServicePointCut1" class="org.springframework.aop.support.NameMatchMethodPointcut">-->
        <!--<property name="mappedNames">-->
            <!--<list>-->
                <!--<value>add</value>-->
                <!--<value>update</value>-->
            <!--</list>-->
        <!--</property>-->
    <!--</bean>-->
    <!--切点:建议使用使用类似正则表达式方式-->
    <bean id="orderServicePointCut" class="org.springframework.aop.support.JdkRegexpMethodPointcut">
        <property name="pattern" value=".*Order"/>
    </bean>

    <!--切面aspect = pointcut+advice-->
    <bean id="orderServiceAspect" class="org.springframework.aop.support.DefaultPointcutAdvisor">
        <property name="advice" ref="orderServiceAdvice"></property><!--增强-->
        <property name="pointcut" ref="orderServicePointCut"></property><!--切点-->
    </bean>

    <!--手动代理-->
    <!--<bean id="orderServiceProxy" class="org.springframework.aop.framework.ProxyFactoryBean">
        <property name="target" ref="orderService"/>
        <property name="interceptorNames" value="orderServiceAspect"/>
        <property name="proxyInterfaces" value="com.itcast.aop.OrderService"/>
    </bean>-->

    <!--自动代理,通过自动代理,可以减化配置,自动代理之后不再使用@Qualifier指定代理对象-->
    <bean class="org.springframework.aop.framework.autoproxy.DefaultAdvisorAutoProxyCreator"></bean>
</beans>
测试:
package com.itcast.aop;

import org.junit.Test;
import org.junit.runner.RunWith;
import org.springframework.beans.factory.annotation.Autowired;
import org.springframework.beans.factory.annotation.Qualifier;
import org.springframework.test.context.ContextConfiguration;
import org.springframework.test.context.junit4.SpringJUnit4ClassRunner;

@RunWith(SpringJUnit4ClassRunner.class)
@ContextConfiguration(locations = "classpath:applicationContext.xml")
public class AopTest {
    @Autowired
    //@Qualifier("orderServiceProxy")//自动代理之后就不需要指定代理对象了
    private OrderService orderService;
    @Test
    public void test1(){
        orderService.addOrder();
    }
}
ps:
spring的配置文件可以拆分,分模块分开配置
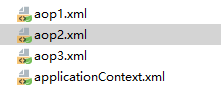
在applicationContext.xml中使用import标签引入
<import resource="aop1.xml"/>
例示:
