版权声明:本文为博主原创文章,未经博主允许不得转载。 https://blog.csdn.net/cdnight/article/details/86478379
前言
网上一般资料都是基于maven来对spring boot程序进行打包的。。
不过本文使用的项目不是maven。
试验以及错误过程略长,可以直接跳过过程看结论。
过程
首先使用gradle进行打包:
apply plugin: 'application'
mainClassName = 'com.xxl.conf.admin.XxlConfAdminApplication'
jar {
    manifest {
        attributes 'Main-Class': 'com.xxl.conf.admin.XxlConfAdminApplication'
    }
    from {
        configurations.compile.collect { it.isDirectory() ? it : zipTree(it) }
    }
}
然后执行build:
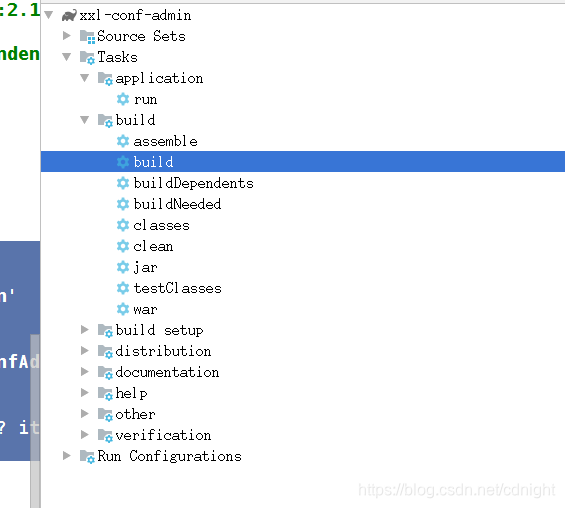

而文件在这:

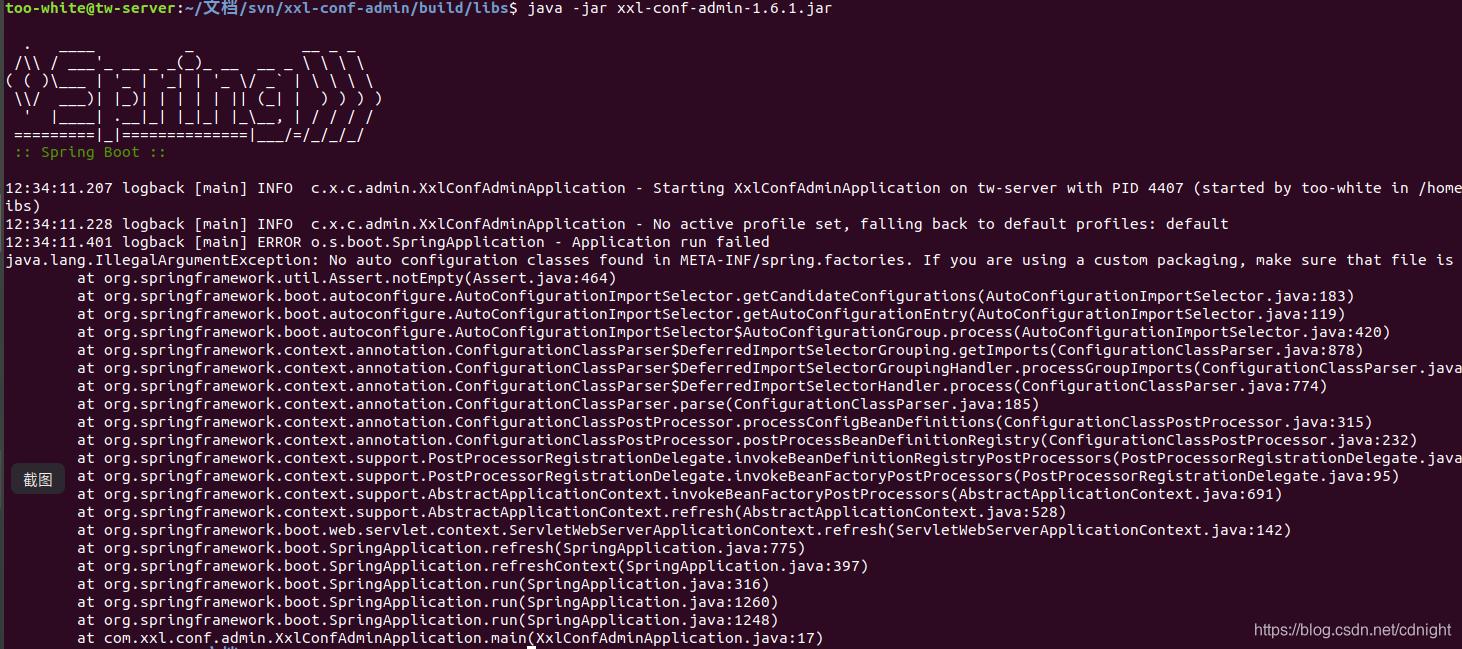
用命令执行:
出现问题,可以参考:
spring boot在idea下启动正常,打成jar包到linux部署启动时报错
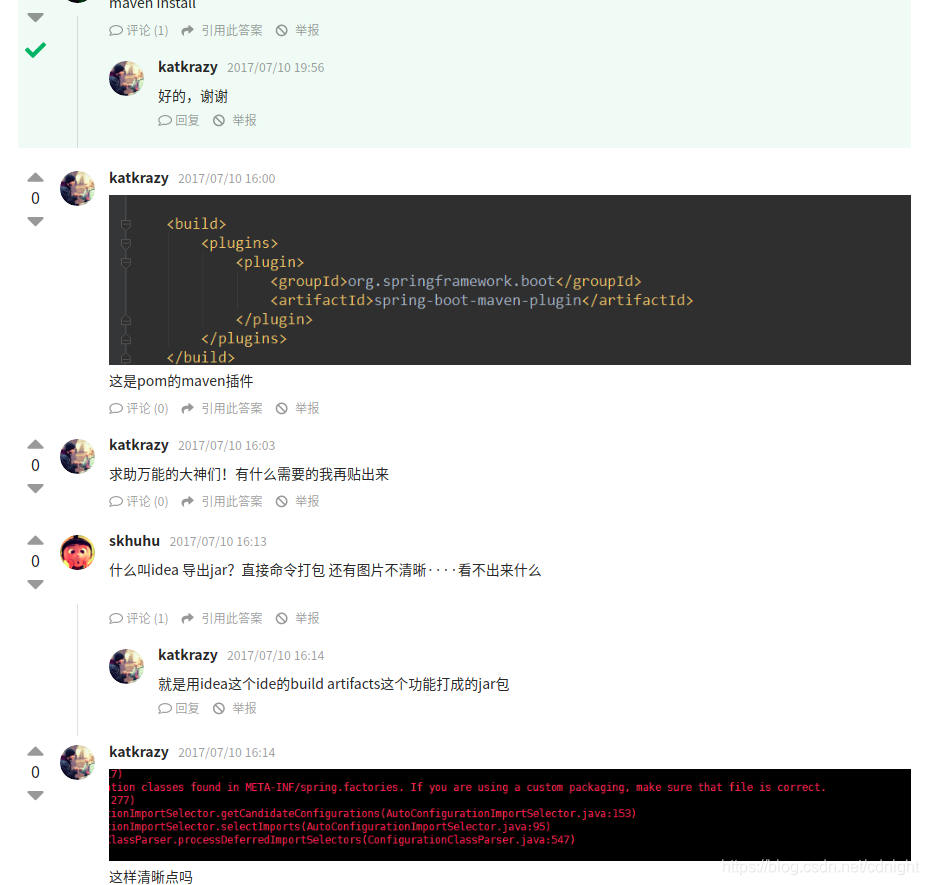
还有:
Spring Boot Gradle Plugin Reference Guide
Gradle build with fatJar plugin and SpringBoot application gives ‘Application startup failed’
经过试验以后:
完整的spring boot+gradle打包程序如下。
注意,用了插件以后就会打包出来war文件,还有在bootScript下面会有一份sh脚本用来执行
buildscript {
ext {
springBootVersion = '2.1.1.RELEASE'
}
repositories {
mavenCentral()
}
dependencies {
classpath("org.springframework.boot:spring-boot-gradle-plugin:${springBootVersion}")
}
}
plugins {
id 'java'
id 'war'
// id 'org.springframework.boot'
id "application"
// id 'org.springframework.boot' version '2.0.0.RELEASE'
// id 'io.spring.dependency-management'
}
group 'com.xuxueli'
version '1.6.1'
sourceCompatibility = 1.8
//repositories {
// mavenCentral()
//}
repositories {
maven{
//更换为阿里的仓库
// url 'http://maven.aliyun.com/nexus/content/groups/public'
url 'http://你的nexusip/repository/maven-public/'
}
//有些jar包在中央仓库是没有的,需要手动添加上去
// flatDir { dirs 'local_jars' }
// mavenCentral()
}
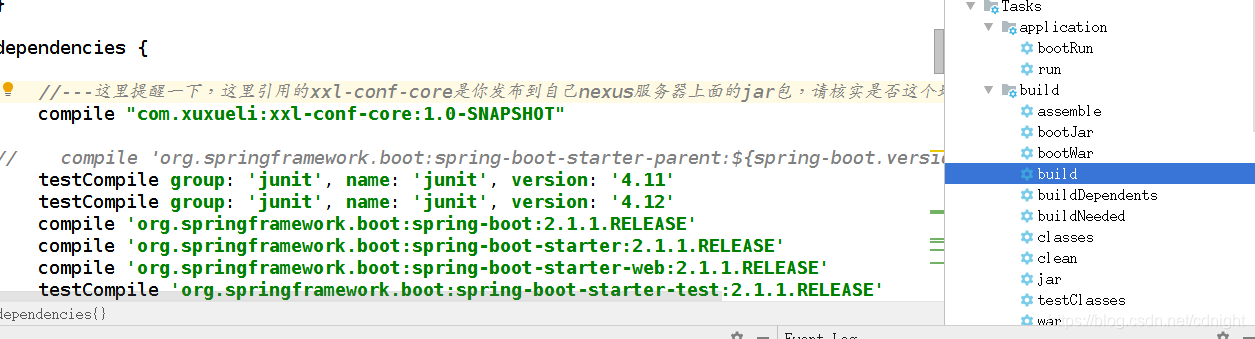
dependencies {
//---这里提醒一下,这里引用的xxl-conf-core是你发布到自己nexus服务器上面的jar包,请核实是否这个地址
compile "com.xuxueli:xxl-conf-core:1.0-SNAPSHOT"
// compile 'org.springframework.boot:spring-boot-starter-parent:${spring-boot.version}'
testCompile group: 'junit', name: 'junit', version: '4.11'
testCompile group: 'junit', name: 'junit', version: '4.12'
compile 'org.springframework.boot:spring-boot:2.1.1.RELEASE'
compile 'org.springframework.boot:spring-boot-starter:2.1.1.RELEASE'
compile 'org.springframework.boot:spring-boot-starter-web:2.1.1.RELEASE'
testCompile 'org.springframework.boot:spring-boot-starter-test:2.1.1.RELEASE'
compile 'org.springframework.boot:spring-boot-starter-freemarker:2.1.1.RELEASE'
// compile 'org.springframework.boot:spring-boot-devtools'
compile 'org.springframework.boot:spring-boot-devtools:2.1.1.RELEASE'
// compile 'org.mybatis.spring.boot:mybatis-spring-boot-starter:${mybatis-spring-boot-starter.version}'
compile 'org.mybatis.spring.boot:mybatis-spring-boot-starter:1.3.2'
// compile 'mysql:mysql-connector-java:${mysql-connector-java.version}'
compile 'mysql:mysql-connector-java:5.1.40'
// compile 'org.apache.commons:commons-lang3:${commons-lang3.version}'
compile 'org.apache.commons:commons-lang3:3.8.1'
compile 'org.postgresql:postgresql:42.2.2'
compileOnly 'org.springframework.boot:spring-boot-dependencies:2.1.1.RELEASE'
// providedRuntime 'org.springframework.boot:spring-boot-starter-tomcat'
}
//
///**
// *
// * 打包为可执行 jar
// *
// * ***/
//
//
//apply plugin: "spring-boot"
apply plugin: 'org.springframework.boot'
apply plugin: 'io.spring.dependency-management'
dependencyManagement {
imports {
mavenBom org.springframework.boot.gradle.plugin.SpringBootPlugin.BOM_COORDINATES
}
}
//
mainClassName = 'com.xxl.conf.admin.XxlConfAdminApplication'
//
configurations {
providedRuntime
}
//
//
//
/****
*
* 注意,引入spring boot以后,默认打包的是war,
* 而且生成的执行脚本也会找到war包进行执行,就是说,
* jar的生成已经没用了,只需要用war即可。
*
* *****/
//jar {
//// baseName = 'conf-admin'
//// version = '1.0.0'
//// destinationDir='lib'
//// destinationDir = file("$buildDir/lib")
// manifest {
// attributes 'Main-Class': 'com.xxl.conf.admin.XxlConfAdminApplication'
// }
// from {
// configurations.compile.collect { it.isDirectory() ? it : zipTree(it) }
// }
//}
///****
// * 注意,application打包的jar以及war都放在build的libs下面,但是bootscript下面的启动脚本是启动的build
// * 下面的lib下面。
// * ***/
//task clearJar(type: Delete) {
// delete 'build/lib'
//}
//
//task copyJar(type: Copy) {
// from configurations.runtime
// into('build/lib')
//}
//
//task release(type: Copy, dependsOn: [build, clearJar, copyJar])
//
//springBoot {
// executable = true
//}
譬如:
执行:
点击build。
然后,可以执行完毕。

产出物:
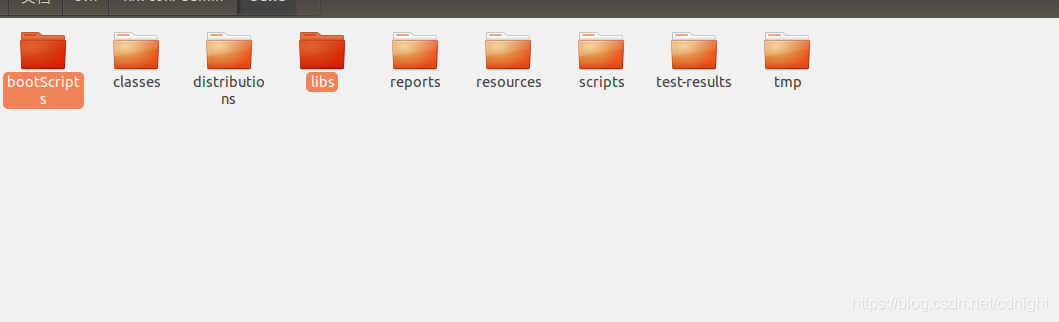
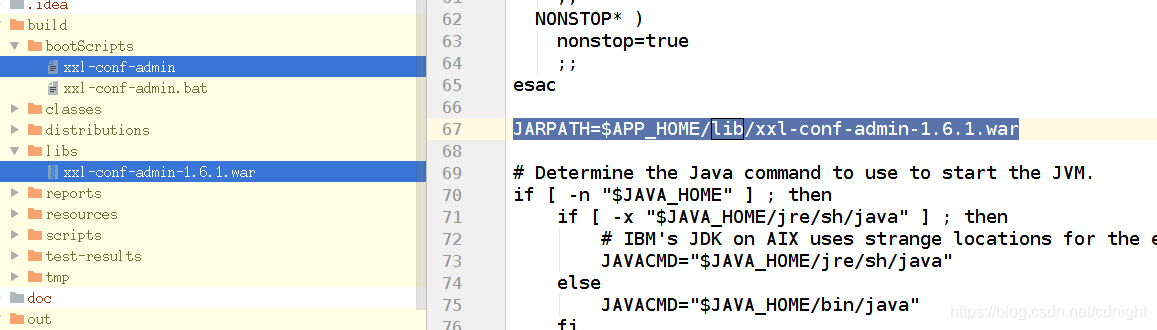
注意的是,产出物中,jarpath就是执行的路径是错的,应该是libs。
执行会有错误:

经过资料查找可以找到解决方案:
于是,war的打包的脚本变更为:
buildscript {
    ext {
        springBootVersion = '2.1.1.RELEASE'
    }
    repositories {
        mavenCentral()
    }

    dependencies {
        classpath("org.springframework.boot:spring-boot-gradle-plugin:${springBootVersion}")


    }
}

plugins {
    id 'java'
    id 'war'
//    id 'org.springframework.boot'
    id "application"
//    id 'org.springframework.boot' version '2.0.0.RELEASE'
//    id 'io.spring.dependency-management'
}

group 'com.xuxueli'
version '1.6.1'

sourceCompatibility = 1.8

//repositories {
//    mavenCentral()
//}

repositories {
    maven{
        //更换为阿里的仓库
//            url  'http://maven.aliyun.com/nexus/content/groups/public'
        url  'http://你的nexus地址repository/maven-public/'
    }

    //有些jar包在中央仓库是没有的,需要手动添加上去
//        flatDir {  dirs 'local_jars' }
//        mavenCentral()
}

dependencies {

    //---这里提醒一下,这里引用的xxl-conf-core是你发布到自己nexus服务器上面的jar包,请核实是否这个地址
    compile "com.xuxueli:xxl-conf-core:1.0-SNAPSHOT"

//    compile 'org.springframework.boot:spring-boot-starter-parent:${spring-boot.version}'
    testCompile group: 'junit', name: 'junit', version: '4.11'
    testCompile group: 'junit', name: 'junit', version: '4.12'
    compile 'org.springframework.boot:spring-boot:2.1.1.RELEASE'
    compile 'org.springframework.boot:spring-boot-starter:2.1.1.RELEASE'
    compile 'org.springframework.boot:spring-boot-starter-web:2.1.1.RELEASE'
    testCompile 'org.springframework.boot:spring-boot-starter-test:2.1.1.RELEASE'
    compile 'org.springframework.boot:spring-boot-starter-freemarker:2.1.1.RELEASE'
    //    compile 'org.springframework.boot:spring-boot-devtools'
    compile 'org.springframework.boot:spring-boot-devtools:2.1.1.RELEASE'

//    compile 'org.mybatis.spring.boot:mybatis-spring-boot-starter:${mybatis-spring-boot-starter.version}'
    compile 'org.mybatis.spring.boot:mybatis-spring-boot-starter:1.3.2'
//    compile 'mysql:mysql-connector-java:${mysql-connector-java.version}'
    compile 'mysql:mysql-connector-java:5.1.40'
//    compile 'org.apache.commons:commons-lang3:${commons-lang3.version}'
    compile 'org.apache.commons:commons-lang3:3.8.1'
    compile 'org.postgresql:postgresql:42.2.2'
    compile("org.springframework:spring-jdbc")

    compileOnly 'org.springframework.boot:spring-boot-dependencies:2.1.1.RELEASE'
//    providedRuntime 'org.springframework.boot:spring-boot-starter-tomcat'
}
//
///**
// *
// * 打包为可执行 jar
// *
// * ***/
//
//
//apply plugin: "spring-boot"
apply plugin: 'org.springframework.boot'
apply plugin: 'io.spring.dependency-management'
dependencyManagement {
    imports {
        mavenBom org.springframework.boot.gradle.plugin.SpringBootPlugin.BOM_COORDINATES
    }
}

//
mainClassName = 'com.xxl.conf.admin.XxlConfAdminApplication'
//
configurations {
    providedRuntime
}
//
//
//
/****
 *
 * 注意,引入spring boot以后,默认打包的是war,
 * 而且生成的执行脚本也会找到war包进行执行,就是说,
 * jar的生成已经没用了,只需要用war即可。
 *
 * *****/
jar {
//    baseName = 'conf-admin'
//    version =  '1.0.0'
//    destinationDir='lib'
//    destinationDir = file("$buildDir/lib")
    manifest {
        attributes 'Main-Class': 'com.xxl.conf.admin.XxlConfAdminApplication'
    }
    from {
        configurations.compile.collect { it.isDirectory() ? it : zipTree(it) }
    }
}

///****
// * 注意,application打包的jar以及war都放在build的libs下面,但是bootscript下面的启动脚本是启动的build
// * 下面的lib下面。所以下面要添加一个文件复制操作
// * ***/

build.doLast {


    copy {

        from file("${rootDir}/build/libs/")
        into("${rootDir}/build/lib/")
        include '**/*.war'
        include '*.war'
    }

    println "build 结束,执行文件复制操作"
}
然后build:
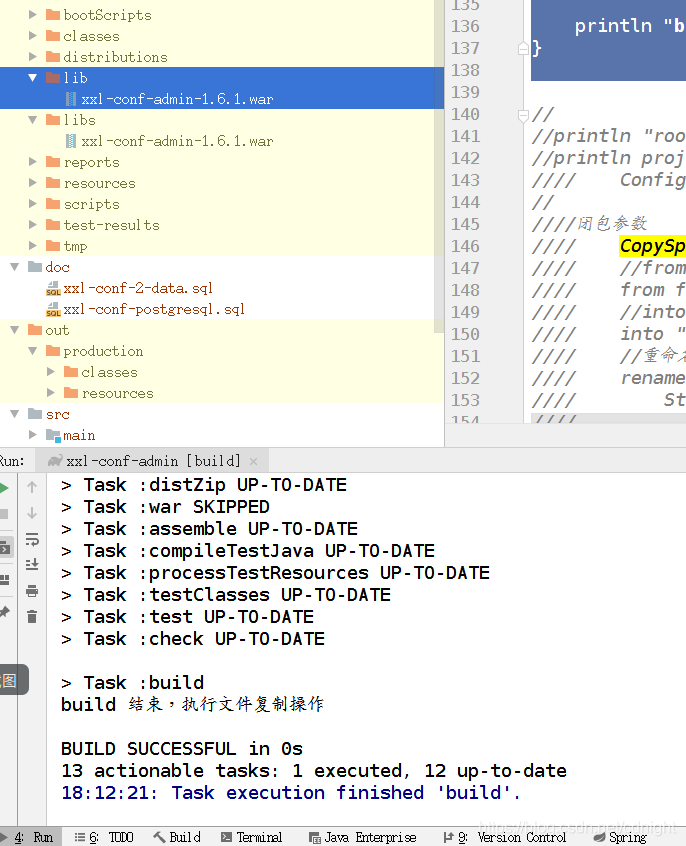
可以看到lib下面已经有war文件了,然后执行:

成功执行。
结论
经过重重磨难,所以最后的结论是:
buildscript {
    ext {
        springBootVersion = '2.1.1.RELEASE'
    }
    repositories {
        mavenCentral()
    }

    dependencies {
        classpath("org.springframework.boot:spring-boot-gradle-plugin:${springBootVersion}")


    }
}

plugins {
    id 'java'
    id 'war'
//    id 'org.springframework.boot'
    id "application"
//    id 'org.springframework.boot' version '2.0.0.RELEASE'
//    id 'io.spring.dependency-management'
}

group 'com.xuxueli'
version '1.6.1'

sourceCompatibility = 1.8

//repositories {
//    mavenCentral()
//}

repositories {
    maven{
        //更换为阿里的仓库
//            url  'http://maven.aliyun.com/nexus/content/groups/public'
        url  'http://你的nexus地址repository/maven-public/'
    }

    //有些jar包在中央仓库是没有的,需要手动添加上去
//        flatDir {  dirs 'local_jars' }
//        mavenCentral()
}

dependencies {

    //---这里提醒一下,这里引用的xxl-conf-core是你发布到自己nexus服务器上面的jar包,请核实是否这个地址
    compile "com.xuxueli:xxl-conf-core:1.0-SNAPSHOT"

//    compile 'org.springframework.boot:spring-boot-starter-parent:${spring-boot.version}'
    testCompile group: 'junit', name: 'junit', version: '4.11'
    testCompile group: 'junit', name: 'junit', version: '4.12'
    compile 'org.springframework.boot:spring-boot:2.1.1.RELEASE'
    compile 'org.springframework.boot:spring-boot-starter:2.1.1.RELEASE'
    compile 'org.springframework.boot:spring-boot-starter-web:2.1.1.RELEASE'
    testCompile 'org.springframework.boot:spring-boot-starter-test:2.1.1.RELEASE'
    compile 'org.springframework.boot:spring-boot-starter-freemarker:2.1.1.RELEASE'
    //    compile 'org.springframework.boot:spring-boot-devtools'
    compile 'org.springframework.boot:spring-boot-devtools:2.1.1.RELEASE'

//    compile 'org.mybatis.spring.boot:mybatis-spring-boot-starter:${mybatis-spring-boot-starter.version}'
    compile 'org.mybatis.spring.boot:mybatis-spring-boot-starter:1.3.2'
//    compile 'mysql:mysql-connector-java:${mysql-connector-java.version}'
    compile 'mysql:mysql-connector-java:5.1.40'
//    compile 'org.apache.commons:commons-lang3:${commons-lang3.version}'
    compile 'org.apache.commons:commons-lang3:3.8.1'
    compile 'org.postgresql:postgresql:42.2.2'
    compile("org.springframework:spring-jdbc")

    compileOnly 'org.springframework.boot:spring-boot-dependencies:2.1.1.RELEASE'
//    providedRuntime 'org.springframework.boot:spring-boot-starter-tomcat'
}
//
///**
// *
// * 打包为可执行 jar
// *
// * ***/
//
//
//apply plugin: "spring-boot"
apply plugin: 'org.springframework.boot'
apply plugin: 'io.spring.dependency-management'
dependencyManagement {
    imports {
        mavenBom org.springframework.boot.gradle.plugin.SpringBootPlugin.BOM_COORDINATES
    }
}

//
mainClassName = 'com.xxl.conf.admin.XxlConfAdminApplication'
//
configurations {
    providedRuntime
}
//
//
//
/****
 *
 * 注意,引入spring boot以后,默认打包的是war,
 * 而且生成的执行脚本也会找到war包进行执行,就是说,
 * jar的生成已经没用了,只需要用war即可。
 *
 * *****/
jar {
//    baseName = 'conf-admin'
//    version =  '1.0.0'
//    destinationDir='lib'
//    destinationDir = file("$buildDir/lib")
    manifest {
        attributes 'Main-Class': 'com.xxl.conf.admin.XxlConfAdminApplication'
    }
    from {
        configurations.compile.collect { it.isDirectory() ? it : zipTree(it) }
    }
}

///****
// * 注意,application打包的jar以及war都放在build的libs下面,但是bootscript下面的启动脚本是启动的build
// * 下面的lib下面。所以下面要添加一个文件复制操作
// * ***/

build.doLast {


    copy {

        from file("${rootDir}/build/libs/")
        into("${rootDir}/build/lib/")
        include '**/*.war'
        include '*.war'
    }

    println "build 结束,执行文件复制操作"
}
然后build:
可以看到lib下面已经有war文件了,然后执行:
成功执行。