前言
xxl-conf是一个配置中心,具体请参考作者的博客:
不过很多地方是需要修改一下,譬如说,配置中心用的是mysql–额,个人不太喜欢mysql,要更换为postgresql。
还有,将项目从maven改为gradle构建。
xxl-conf-core本地部署
在github上面下载项目以后可以看到目录结构如下:
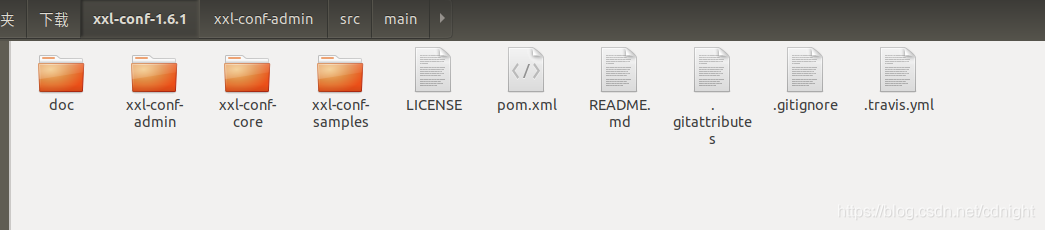
由于xxl-conf-admin项目依赖于xxl-conf-core我们可以先行将xxl-conf-core项目部署到自己的nexus服务器上面。
使用的是intellij idea,注意gradle的build.gradle的依赖以及任务脚本:
plugins {
    id 'java'
}

group 'com.xuxueli'
version '1.0-SNAPSHOT'

sourceCompatibility = 1.8

repositories {
    mavenCentral()
}

dependencies {
    testCompile group: 'junit', name: 'junit', version: '4.12'

//    compile 'org.slf4j:slf4j-api:${slf4j-api.version}'

    compile 'org.slf4j:slf4j-api:1.7.21'

//    testCompile 'org.slf4j:slf4j-log4j12:${slf4j-api.version}'

//    compile 'org.springframework:spring-beans:${spring.version}'
    compile 'org.springframework:spring-beans:5.1.3.RELEASE'
    compile 'org.slf4j:slf4j-log4j12:1.7.25'
    testCompile 'org.slf4j:slf4j-log4j12:1.7.25'


}


//--发布到nexus上面去。


//--添加任务,用于执行打包jar到nexus
apply plugin: "maven-publish" //一定要添加maven 发布插件!
//设置动态属性
ext {
    //发布到仓库用户名
    publishUserName = "admin"
    //发布到仓库地址
    publishUserPassword = "admin123"
    //仓库地址
//    publishURL="http://196.10.149.149:8080/nexus/content/repositories/snapshots/"
    publishURL="http://nexus服务器地址/repository/maven-snapshots/"

    apiBaseJarName = "xxl-conf-core"
    apiBaseJarVersion = '1.0-SNAPSHOT'
    builtBy="gradle 4.3"
}
//jar包名称组成:[baseName]-[appendix]-[version]-[classifier].[extension]
//打包class文件
task apiBaseJar(type:Jar){
    version apiBaseJarVersion
    baseName apiBaseJarName
    from sourceSets.main.output
    destinationDir file("$buildDir/dist")
    includes ['com/xxl/conf/core/**']
    manifest {
        attributes 'packageName': apiBaseJarName, 'Built-By': builtBy,'Built-date': new Date().format('yyyy-MM-dd HH:mm:ss'),'Manifest-Version':version
    }
}
//打包源码
task apiBaseSourceJar(type:Jar){
    version apiBaseJarVersion
    baseName apiBaseJarName
    classifier "sources"
    from sourceSets.main.allSource
    destinationDir file("$buildDir/dist")
    includes ['com/ai/gcf/api/base/**']
    manifest {
        attributes 'packageName': apiBaseJarName+'-sources', 'Built-By': builtBy,'Built-date': new Date().format('yyyy-MM-dd HH:mm:ss'),'Manifest-Version':version
    }
}
//上传jar包
publishing {
    publications {
        publishing.publications.create('xxl-conf-core', MavenPublication) {
            groupId 'com.xuxueli'
            artifactId apiBaseJarName
            version apiBaseJarVersion
            //同时上传class包和源码包
            artifacts = [apiBaseJar,apiBaseSourceJar]
        }
    }
    repositories {
        maven {
            url  publishURL
            credentials {
                username = publishUserName
                password = publishUserPassword
            }
        }
    }
}
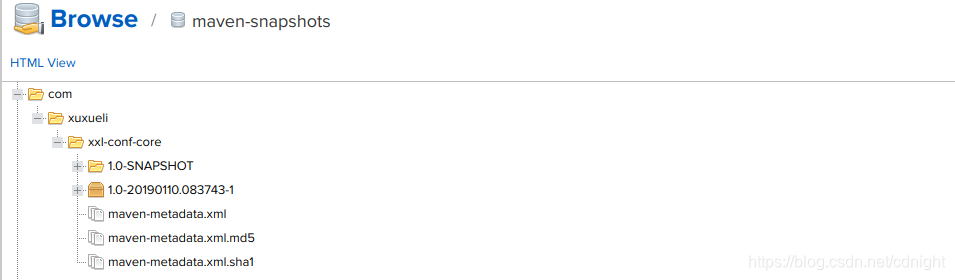
执行发布任务以后,可以看到:
xxl-conf-admin改造及本地部署[linux环境下]
注意,xxl-conf-admin是管理配置中心的web项目,配置中心的标配存储数据库是mysql,不过本人不太喜欢,换成postgresql了—其中需要修改的有配置文件的数据库配置,数据库驱动配置,数据库初始化sql语句,还有mybatis的xml文件中的sql语句都要一一作出修改,具体过程不表,这里提示一下需要注意的地方或者配置的过程。
可以在这里下载admin的源代码:
xxl-conf-admin gradle项目源码+postgresql改造
这里说一下配置的主要点:
数据库初始化
注意,需要先配置数据库,这样做:
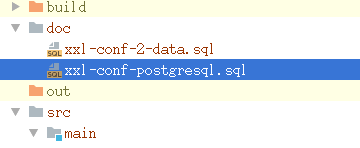
先执行xxl-conf-postgresql.sql的内容,即:
-- CREATE database if NOT EXISTS "xxl-conf" default character set utf8 collate utf8_general_ci;
-- use "xxl-conf";

create or replace function global_temp_update_database()
-- returns integer as
 returns text as
$body$
declare
DECLARE sql_select_max varchar(400);
         starts_with_val int:=1;
         sql_create_sequence varchar(600);
         debug_str varchar(800):='';
         sequence_name varchar(60):='';
         sql_bind_sequence varchar(800):='';
         sp_sequence_name varchar(80):='';


  BEGIN


CREATE TABLE if not EXISTS "xxl_conf_env" (
  "env" varchar(100) NOT NULL primary  key ,--COMMENT 'Env',
  "title" varchar(100) NOT NULL ,-- COMMENT '环境名称',
  "order" smallint NOT NULL DEFAULT '0' -- COMMENT '显示排序',
);


COMMENT ON COLUMN "xxl_conf_env"."env" IS 'Env';
COMMENT ON COLUMN "xxl_conf_env"."title" IS '环境名称';
COMMENT ON COLUMN "xxl_conf_env"."order" IS '显示排序';


CREATE TABLE if not EXISTS "xxl_conf_project" (
  "appname" varchar(100) NOT NULL primary key ,-- COMMENT 'AppName',
  "title" varchar(100) NOT NULL -- COMMENT '项目名称'
);


COMMENT ON COLUMN "xxl_conf_project"."appname" IS 'AppName';
COMMENT ON COLUMN "xxl_conf_project"."title" IS '项目名称';


CREATE TABLE if not exists "xxl_conf_user" (
  "username" varchar(100) NOT NULL  primary key ,--COMMENT '账号',
  "password" varchar(100) NOT NULL ,-- COMMENT '密码',
  "permission" smallint NOT NULL DEFAULT '0' ,--COMMENT '权限:0-普通用户、1-管理员',
  "permission_data" varchar(1000) DEFAULT NULL -- COMMENT '权限配置数据',
) ;


COMMENT ON COLUMN "xxl_conf_user"."username" IS '账号';
COMMENT ON COLUMN "xxl_conf_user"."password" IS '密码';
COMMENT ON COLUMN "xxl_conf_user"."permission" IS '权限:0-普通用户、1-管理员';
COMMENT ON COLUMN "xxl_conf_user"."permission_data" IS '权限配置数据';


CREATE TABLE if not exists "xxl_conf_node" (
  "env" varchar(100) NOT NULL ,-- COMMENT 'Env',
  "key" varchar(200) NOT NULL ,-- COMMENT '配置Key',
  "appname" varchar(100) NOT NULL  ,--COMMENT '所属项目AppName',
  "title" varchar(100) NOT NULL,-- COMMENT '配置描述',
  "value" varchar(2000) DEFAULT NULL  ,-- COMMENT '配置Value',
  PRIMARY KEY ("env","key")
) ;

COMMENT ON COLUMN "xxl_conf_node"."env" IS 'Env';
COMMENT ON COLUMN "xxl_conf_node"."key" IS '配置key';
COMMENT ON COLUMN "xxl_conf_node"."appname" IS '所属AppName';
COMMENT ON COLUMN "xxl_conf_node"."title" IS '配置描述';
COMMENT ON COLUMN "xxl_conf_node"."value" IS '配置value';

CREATE TABLE if not exists "xxl_conf_node_log" (
  "env" varchar(255) NOT NULL ,-- COMMENT 'Env',
  "key" varchar(200) NOT NULL ,-- COMMENT '配置Key',
  "title" varchar(100) NOT NULL,-- COMMENT '配置描述',
  "value" varchar(2000) DEFAULT NULL ,-- COMMENT '配置Value',
  "addtime" timestamp (0) without time zone NOT NULL ,-- COMMENT '操作时间',
  "optuser" varchar(100) NOT NULL -- COMMENT '操作人'
) ;
COMMENT ON COLUMN "xxl_conf_node_log"."env" IS 'Env';
COMMENT ON COLUMN "xxl_conf_node_log"."key" IS '配置key';
COMMENT ON COLUMN "xxl_conf_node_log"."title" IS '配置描述';
COMMENT ON COLUMN "xxl_conf_node_log"."value" IS '配置value';
COMMENT ON COLUMN "xxl_conf_node_log"."addtime" IS '操作时间';
COMMENT ON COLUMN "xxl_conf_node_log"."optuser" IS '操作人';


CREATE TABLE if not exists "xxl_conf_node_msg" (
  "id" serial primary key,
  "addtime" timestamp (0) without time zone NOT NULL,
  "env" varchar(100) NOT NULL,-- COMMENT 'Env',
  "key" varchar(200) NOT NULL ,-- COMMENT '配置Key',
  "value" varchar(2000) DEFAULT NULL -- COMMENT '配置Value'
);
COMMENT ON COLUMN "xxl_conf_node_msg"."env" IS 'Env';
COMMENT ON COLUMN "xxl_conf_node_msg"."key" IS '配置key';
COMMENT ON COLUMN "xxl_conf_node_msg"."value" IS '配置value';
COMMENT ON COLUMN "xxl_conf_node_msg"."addtime" IS '操作时间';


return 'Done';

    end
$body$
language plpgsql;
这段脚本创建或更新了一个叫做:global_temp_update_database 的存储过程,然后,执行存储过程:
select global_temp_update_database();
执行完毕,那么就已经有了基本的数据库结构了,接下来执行
xxl-conf-2-data.sql的内容,初始化数据,即,执行:
-- 注意,执行完xxl-conf-postgresql.sql方法以后,再执行:
-- select global_temp_update_database(); 运行存储过程,生成表结构,然后再执行以下文件进行数据库数据初始化。
INSERT INTO "xxl_conf_env" VALUES ('test', '测试环境', 1), ('ppe', '预发布环境', 2), ('product', '生产环境', 3);
INSERT INTO "xxl_conf_project" VALUES ('default', '示例项目');
INSERT INTO "xxl_conf_user" VALUES ('admin', 'e10adc3949ba59abbe56e057f20f883e', 1, NULL), ('user', 'e10adc3949ba59abbe56e057f20f883e', 0, 'default#test,default#ppe');
INSERT INTO "xxl_conf_node" VALUES ('test', 'default.key01', 'default', '测试配置01', '1'), ('test', 'default.key02', 'default', '测试配置02', '2'), ('test', 'default.key03', 'default', '测试配置03', '3');
配置源代码的数据库信息等
项目里面有两个配置文件需要注意:
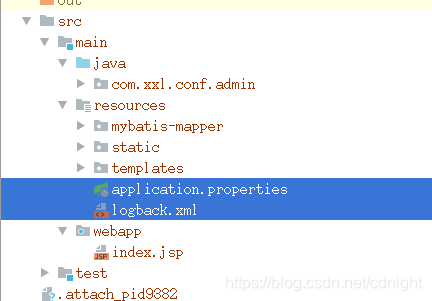
分别是logback.xml以及application.properties.
在logback.xml中需要配置–log.path这个参数:
<?xml version="1.0" encoding="UTF-8"?>
<configuration debug="false" scan="true" scanPeriod="1 seconds">

    <contextName>logback</contextName>

    <!--

    log.path需要设置一下,否则在执行admin项目的时候就会出现找不到文件的错误

    这个路径:/home/too-white/data/applogs/xxl-conf/xxl-conf-admin.log
    中,的结构是 /home/你的账号目录/.......
    个人建议直接在你的账号目录下面新建,这样可以避免access deny 这样的账号权限问题。

    步骤为:
    mkdir -p /home/too-white/data/applogs/xxl-conf/
    cd /home/too-white/data/applogs/xxl-conf/
    touch xxl-conf-admin.log
    -->
    <property name="log.path" value="/home/too-white/data/applogs/xxl-conf/xxl-conf-admin.log"/>

    <appender name="console" class="ch.qos.logback.core.ConsoleAppender">
       <!-- <filter class="ch.qos.logback.classic.filter.ThresholdFilter" >
            <level>WARN</level>
        </filter>-->
        <encoder>
            <pattern>%d{HH:mm:ss.SSS} %contextName [%thread] %-5level %logger{36} - %msg%n</pattern>
        </encoder>
    </appender>

    <appender name="file" class="ch.qos.logback.core.rolling.RollingFileAppender">
        <file>${log.path}</file>
        <rollingPolicy class="ch.qos.logback.core.rolling.TimeBasedRollingPolicy">
            <fileNamePattern>${log.path}.%d{yyyy-MM-dd}.zip</fileNamePattern>
        </rollingPolicy>
        <encoder>
            <pattern>%date %level [%thread] %logger{36} [%file : %line] %msg%n
            </pattern>
        </encoder>
    </appender>

    <root level="info">
        <appender-ref ref="console"/>
        <appender-ref ref="file"/>
    </root>

</configuration>
在application.properties需要配置:
spring.datasource.url=jdbc:postgresql://localhost:5432/xxl_conf
spring.datasource.username=数据库访问账号
spring.datasource.password=数据库访问密码

以及
xxl.conf.confdata.filepath=/home/too-white/data/applogs/xxl-conf/confdata
详细解释见下面:
### web
server.port=8080
server.context-path=/xxl-conf-admin

### resources
spring.mvc.static-path-pattern=/static/**
spring.resources.static-locations=classpath:/static/

### freemarker
spring.freemarker.templateLoaderPath=classpath:/templates/
spring.freemarker.suffix=.ftl
spring.freemarker.charset=UTF-8
spring.freemarker.request-context-attribute=request
spring.freemarker.settings.number_format=0.##########

### mybatis
mybatis.mapper-locations=classpath:/mybatis-mapper/*Mapper.xml

### xxl-conf, datasource
#spring.datasource.url=jdbc:mysql://127.0.0.1:3306/xxl-conf?Unicode=true&characterEncoding=UTF-8
## 注意填写的是你的数据库的链接信息。我这里是postgresql。
spring.datasource.url=jdbc:postgresql://localhost:5432/xxl_conf
spring.datasource.username=数据库访问账号
spring.datasource.password=数据库访问密码
#spring.datasource.driver-class-name=com.mysql.jdbc.Driver
spring.datasource.driver-class-name=org.postgresql.Driver

spring.datasource.type=org.apache.tomcat.jdbc.pool.DataSource
spring.datasource.tomcat.max-wait=10000
spring.datasource.tomcat.max-active=30
spring.datasource.tomcat.test-on-borrow=true

# xxl-conf, confdata
#####注意,建议confdatafilepath放到你的账号的home目录下面。
#####即:/home/账号名称 这样可以避免linux下面的账号权限问题。
#####譬如现在这样设置:
#####mkdir -p /home/too-white/data/applogs/xxl-conf/confdata
#####
xxl.conf.confdata.filepath=/home/too-white/data/applogs/xxl-conf/confdata
xxl.conf.access.token=
build.gradle下面需要配置这两个:

分别是nexus服务器,以及你发布到nexus服务器的xxl-conf-core的依赖。
然后执行之后可以看到结果:
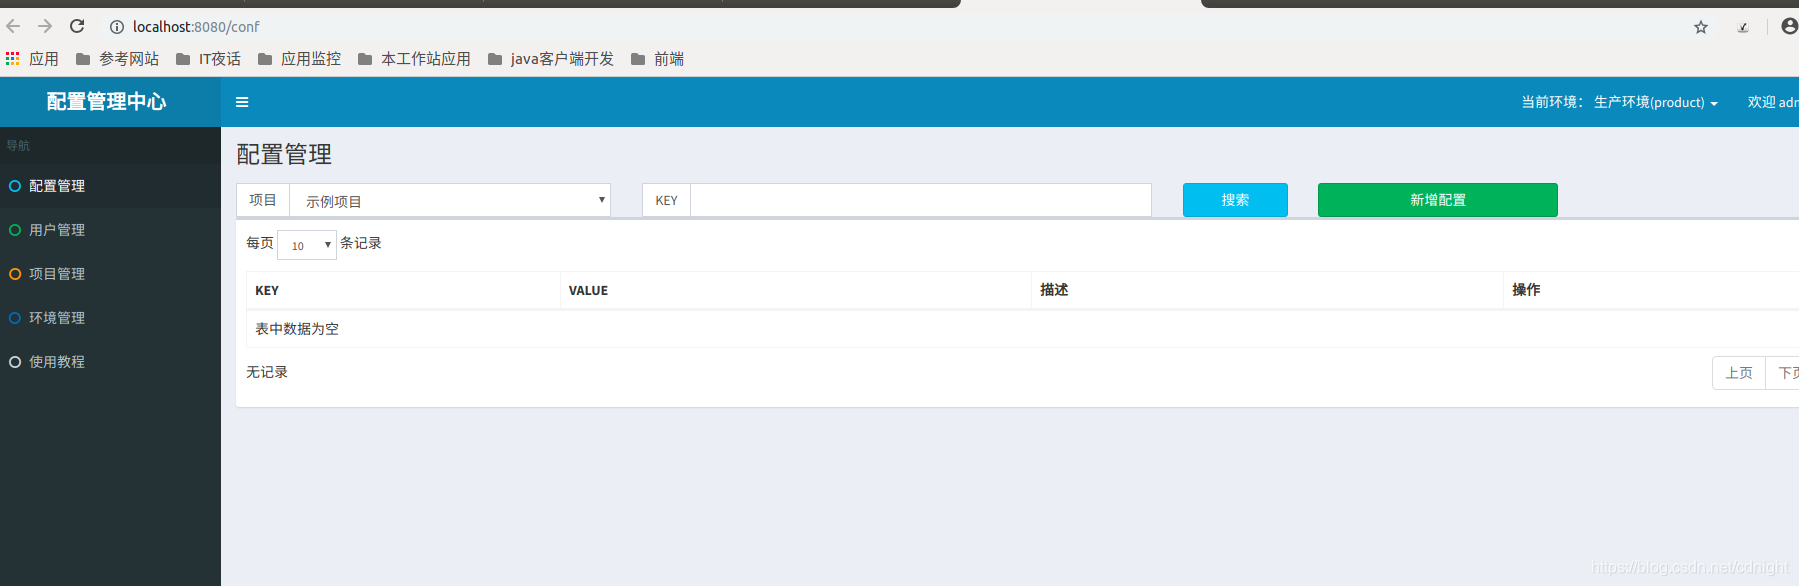
xxl-conf-core以及xxl-conf-admin的发布配置完成。